

Why Is My Black+Decker BCED37 Compact Dryer Not Heating?
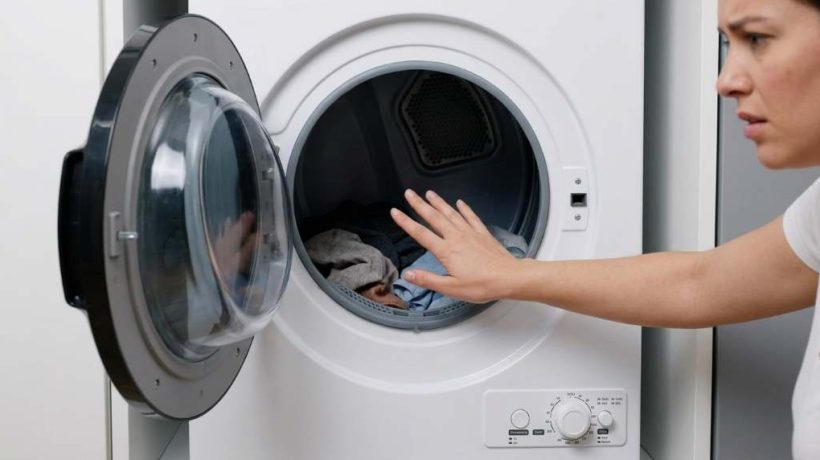
If your Black+Decker BCED37 compact dryer is not heating, first check the heat setting, airflow, lint filters, and load size. If those checks fail, a failed thermal safety component, heating element, thermostat, or electrical part may need service.
The 3.5 cubic foot BCED37 handles loads up to 13.2 pounds and uses a 1,500 watt, 120V electrical system. The Black+Decker BCED37 compact dryer also includes hot, warm, cool, and air dry settings.
Therefore, a no heat problem does not always mean the heating element failed. Start with simple operating checks before opening the cabinet or replacing internal parts.
What Causes a BCED37 Dryer to Stop Heating?
Several conditions can prevent your BCED37 from producing useful heat. Some involve settings or airflow, while others involve internal electrical components.
- Incorrect drying mode or temperature setting
- Clogged lint or exhaust filters
- Restricted or crushed exhaust hose
- Overloaded or tightly packed laundry
- Insufficient airflow around the dryer
- Overheating that activates safety protection
- Failed heating element
- Defective thermostat or thermal fuse
- Damaged wiring or another electrical fault
Importantly, the BCED37 includes overheat protection and a double layer lint filter. Consequently, restricted airflow deserves attention whenever heating suddenly becomes weak.
1. Check the Drying Mode First
The BCED37 provides several operating modes, and not every mode produces high heat. Air Dry intentionally operates without heat, so clothes remain cool during that setting.
Likewise, Cool uses less heat than Warm or Hot. Therefore, move the mode control to Hot when testing whether the dryer can produce normal heat.
Quick Setting Test
- Remove most clothing from the drum.
- Set the mode control to Hot.
- Set the timer for a suitable drying period.
- Close the door firmly.
- Allow the dryer several minutes to operate.
- Check whether the exhaust air becomes noticeably warm.
If Hot produces warm air, the heating system probably works normally. In that situation, the problem may involve the selected mode, load size, moisture level, or airflow.
2. Clean Both Filters Before Testing Again
Lint buildup can restrict airflow and reduce drying performance even when the heating system still works. The manufacturer recommends cleaning the lint filter before or after every load.
However, do not inspect only the primary lint filter. The BCED37 also uses an exhaust filter, which can collect fine lint and dust over time.
How to Clean the Filters
- Turn the dryer off completely.
- Disconnect the power before cleaning internal areas.
- Remove the lint filter carefully.
- Clear visible lint and debris.
- Inspect the exhaust filter for accumulated material.
- Clean the exhaust filter according to the manual.
- Reinstall every filter securely.
Never operate the dryer with a missing or incorrectly installed filter. After cleaning, run a small test load using the Hot setting.
3. Inspect the Exhaust Hose for Restrictions
The BCED37 requires external venting, so airflow directly affects drying performance. A blocked, sharply bent, or crushed hose can trap hot air inside the appliance.
When hot air cannot escape efficiently, the dryer can overheat and activate its safety protection. As a result, the machine may appear to stop heating even though the heating system itself remains functional.
Look for These Vent Problems
- A hose pressed tightly against a wall
- Sharp bends near the exhaust connection
- Lint buildup inside the hose
- Objects blocking the exterior exhaust opening
- Excessively long or complicated routing
- A damaged or collapsed vent hose
Straighten the hose and remove accessible obstructions before testing the dryer again. Keep the exhaust route as short and direct as practical for better airflow.
4. Reduce the Laundry Load
Compact dryers need enough open space for warm air to circulate through clothing. A tightly packed drum can make the dryer seem weak even when everything works correctly.
The BCED37 supports loads up to 13.2 pounds, but maximum capacity does not guarantee ideal drying for every fabric. Heavy towels and dense garments require more airflow and drying time.
Instead, test the dryer with a small load containing several lightweight garments. If that load heats and dries normally, excessive loading likely contributed to the problem.
5. Check Whether the Dryer Recently Overheated
The BCED37 includes overheat protection to help protect the appliance during excessive heat conditions. Restricted airflow, heavy loads, and prolonged operation can contribute to excessive internal temperatures.
If the dryer recently became unusually hot, turn it off and disconnect the power. Allow the appliance to cool completely before checking filters, vents, and surrounding clearance.
Afterward, correct the airflow problem before running another heated cycle. Repeated overheating requires further investigation instead of repeated resets.
6. Make Sure the Dryer Has Proper Ventilation
Proper ventilation around the appliance helps support normal operation and heat management. Avoid placing the dryer tightly against walls, furniture, or other objects.
Also inspect the area around the exhaust connection for restrictions. A compact appliance still needs adequate space for air movement during heated cycles.
If the dryer works temporarily after cooling, ventilation or airflow deserves particular attention. That pattern can indicate a heat related safety response rather than immediate heating element failure.
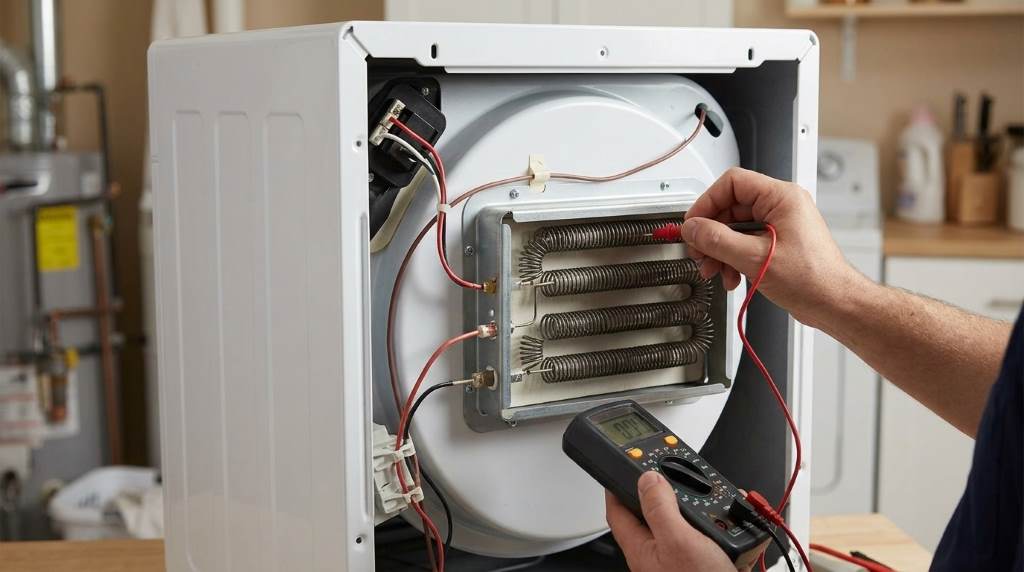
7. Test for a Heating Element Problem
If the dryer runs normally but produces completely cold air, an internal heating component may have failed. The heating element converts electrical energy into the heat required for drying.
A damaged element can develop an open circuit and stop producing heat. However, you should not assume the element failed until basic airflow and setting checks pass.
Signs That Point Toward the Heating Element
- The drum rotates normally.
- The selected setting requires heat.
- Filters remain clean.
- The exhaust path remains clear.
- The dryer still produces no warm air.
- The problem appeared suddenly during normal use.
Internal electrical testing requires appropriate tools and technical knowledge. Disconnect the appliance before any service work, and avoid energized testing unless you understand electrical safety procedures.
8. Consider a Thermal Fuse or Thermostat Fault
Thermal safety components protect dryers from dangerous temperature conditions. A failed thermal fuse or thermostat can interrupt heating even when the dryer motor still operates.
These components can fail after overheating or electrical faults. Importantly, replacing a fuse without correcting the original overheating cause may lead to another failure.
If airflow remains restricted, a replacement fuse may fail again. Therefore, technicians should inspect the surrounding system before replacing safety components.
9. Check the Power Supply Safely
The BCED37 operates from a standard 120V electrical supply. Confirm that the power cord sits securely in the outlet.
Also check your home’s circuit breaker if the dryer suddenly stopped working correctly. Do not repeatedly reset a breaker that trips during dryer operation.
A repeatedly tripping breaker can indicate an electrical problem requiring qualified inspection. Avoid using extension cords or improvised power connections with the appliance.
10. Understand What Sensor Dry Can Change
The BCED37 includes Sensor Dry, which measures moisture and adjusts drying operation automatically. This feature can make a cycle behave differently from a fixed timed drying cycle.
For troubleshooting, use a straightforward timed heated cycle first. This approach removes automatic moisture sensing from the initial diagnosis.
If timed drying produces heat but Sensor Dry behaves unexpectedly, investigate the sensor function separately. That result points away from a completely failed heating system.
A Simple BCED37 No Heat Troubleshooting Sequence
Follow this sequence before considering internal repairs. It helps separate operating problems from genuine component failures.
| Check | What to Do | What the Result Means |
|---|---|---|
| Mode | Set the dryer to Hot | Confirms the selected cycle requests heat |
| Load | Test a small load | Rules out excessive loading |
| Lint filter | Clean the filter | Restores basic airflow |
| Exhaust filter | Remove accumulated lint | Improves exhaust airflow |
| Vent hose | Inspect bends and blockages | Reduces heat buildup |
| Cooling | Let the dryer cool | Helps identify overheating symptoms |
| Power | Check the outlet and breaker | Rules out basic supply problems |
| Internal parts | Arrange qualified diagnosis | Identifies component failures |
When Should You Stop DIY Troubleshooting?
Stop troubleshooting immediately if you notice burning smells, smoke, melted wiring, sparks, or unusual electrical sounds. Those symptoms can indicate a serious electrical or overheating problem.
Also stop if the circuit breaker repeatedly trips after resetting. Do not continue running the dryer simply because the drum still turns.
Internal dryer repairs can expose you to electrical hazards and hot components. If you lack appliance repair experience, contact qualified service personnel for diagnosis.
What Not to Do When Your BCED37 Has No Heat
Some troubleshooting shortcuts can create bigger problems. Avoid bypassing thermal protection or operating the dryer with removed safety components.
- Do not bypass a thermal fuse.
- Do not operate without required filters.
- Do not ignore a blocked exhaust path.
- Do not repeatedly reset a tripping breaker.
- Do not overload the drum during testing.
- Do not continue using the dryer after smoke appears.
- Do not open electrical components without proper knowledge.
Instead, start with airflow, settings, load size, and power checks. These steps provide useful information without unnecessarily disturbing internal components.
How to Prevent Future Heating Problems
Regular maintenance can reduce many drying problems before they become major failures. Clean the lint filter before or after every load to maintain airflow.
Next, inspect the exhaust filter and hose regularly. Keep the exhaust route clear, direct, and free from crushing or severe bends.
Additionally, avoid consistently filling the drum to its maximum capacity. Smaller loads allow better airflow and can reduce drying stress.
Finally, pay attention to changes in drying time, airflow, temperature, and operating sounds. Early changes often provide useful clues before a component fails completely.
Frequently Asked Questions
Why is my BCED37 running but not heating?
The dryer may have an incorrect setting, restricted airflow, overheating protection, or an internal heating component failure.
Does Air Dry produce heat on the BCED37?
No, Air Dry operates without heat, so select Hot when testing the heating function.
Can a clogged filter cause a dryer to stop heating?
Yes, restricted filters can reduce airflow, increase heat buildup, and trigger protective temperature controls.
Why does my BCED37 heat briefly and then stop?
Restricted airflow or an overheating condition can cause the heating system to cycle off for protection.
Should I replace the heating element myself?
Only attempt internal electrical repairs if you have the required appliance repair knowledge and can work safely.
Final Takeaway
A Black+Decker BCED37 that stops heating does not automatically need a new heating element. Start with the Hot setting, small load, clean filters, clear exhaust path, proper ventilation, and safe power checks.
If those steps do not restore heat, an internal component such as the heating element, thermostat, thermal fuse, or wiring may need professional diagnosis. Act promptly when the dryer shows overheating, burning odors, smoke, or repeated electrical problems.
For the safest result, stop using the appliance when serious warning signs appear and arrange qualified service. A careful diagnosis can identify the actual fault without replacing parts unnecessarily.
How to Fix Toshiba EM131A5C-SS Microwave Not Heating
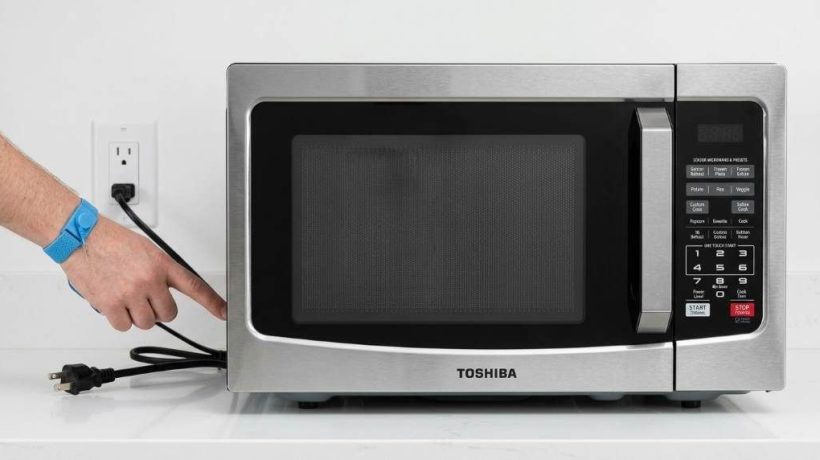
If your Toshiba EM131A5C-SS microwave runs but leaves food cold, start with simple power, setting, door, and airflow checks. The model uses 1,100 watts of microwave output and has 10 selectable power levels, so weak heating needs investigation. A Toshiba EM131A5C-SS countertop microwave should heat normally when its power supply, controls, door system, and heating circuit work correctly.
Fortunately, many apparent heating problems come from incorrect settings or simple operating issues. However, internal microwave components can create dangerous electrical hazards, even after unplugging the appliance.
Start With the Symptoms Before Troubleshooting
First, determine exactly what the microwave does when you press Start. This small step helps separate a heating problem from a power or control problem.
If the display works and the turntable rotates, the microwave receives power. Yet, that does not prove the heating circuit works correctly.
Next, notice whether the oven produces unusual sounds, smells, sparks, or repeated shutdowns. These signs can indicate a component fault that requires professional service.
Common Symptoms and What They Suggest
- Runs but stays cold: Check settings first, then consider a heating circuit problem.
- Does not start: Check the door, controls, outlet, and possible lock function.
- Heats very slowly: Check power level, voltage, load size, and ventilation.
- Stops during cooking: Check overheating, airflow, and repeated heavy use.
- Makes loud buzzing: Stop using it and arrange qualified service.
Check the Microwave Power Supply
Begin with the wall outlet because inconsistent electrical power can affect microwave operation. Plug another suitable appliance into the same outlet to confirm basic power delivery.
Then inspect the Toshiba power cord for visible damage, cuts, scorching, or loose connections. Do not use the microwave if the cord or plug shows damage.
Also check your home’s circuit breaker if the microwave suddenly stopped heating. Resetting a tripped breaker may restore normal operation when the circuit caused the problem.
Avoid Problematic Extension Cord Setups
The EM131A5C-SS manual specifies a grounded electrical connection and provides specific guidance for extension cords. If you use one, its rating must meet or exceed the microwave’s electrical requirements.
For reliable operation, connect the microwave directly to an appropriate grounded household outlet whenever practical. Avoid sharing a heavily loaded circuit with powerful kitchen appliances.
Confirm You Are Actually Using Microwave Cooking
Sometimes the microwave appears operational because the display counts down, yet the selected function does not heat normally. Therefore, test the appliance using a basic Time Cook cycle.
Place a microwave safe cup containing water inside the cavity. Then select Time Cook, set a short heating period, and use the highest power level.
The EM131A5C-SS provides 10 power levels, so accidentally selecting a low setting can make heating seem unusually weak. Check the displayed power level before assuming the appliance has failed.
Use a Simple Water Heating Test
A water test gives you a practical way to compare heating performance without guessing. Use the same cup, water amount, starting temperature, and cooking time during repeat tests.
- Fill a microwave safe cup with water.
- Place the cup near the center of the turntable.
- Select Time Cook at full power.
- Run the microwave for a short, controlled test.
- Carefully check whether the water becomes noticeably hotter.
Do not touch the water immediately if it becomes very hot. Heated liquids can sometimes exceed their visible boiling point and suddenly boil when disturbed.
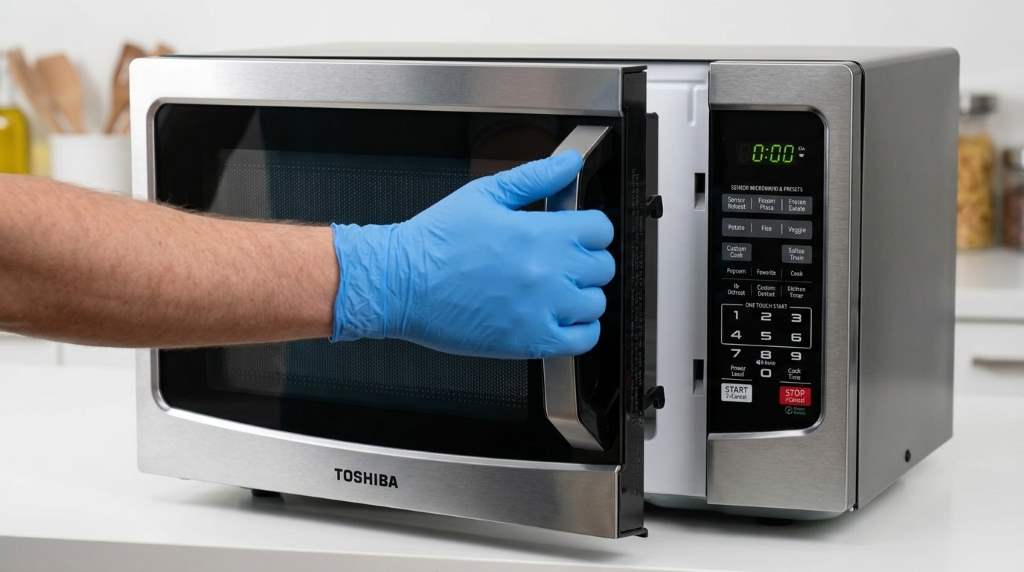
Inspect the Door and Latches
A microwave depends on properly functioning door safety interlocks before it can produce microwave energy. Therefore, a damaged or poorly closing door deserves immediate attention.
Open and close the door normally, then check whether it closes firmly without unusual movement. Look for damaged hinges, broken latches, bent metal, or visible sealing problems.
Clean food residue from the door and sealing surfaces using a soft, damp cloth. The manual specifically warns against operating the oven when the door, hinges, latches, seals, or sealing surfaces have damage.
Never Bypass the Door Safety System
Never tape, hold, disconnect, or modify a microwave door interlock to make the appliance operate. These safety components protect you from exposure to microwave energy.
If the microwave starts behaving strangely when you move or open the door, stop using it immediately. Arrange inspection by qualified service personnel instead of attempting a workaround.
Check the Control Lock and Settings
The EM131A5C-SS includes a lock function that can prevent normal operation. If the controls seem unresponsive, check whether the lock indicator appears on the display.
Follow the model’s control instructions to disable the lock before testing heating again. A locked control panel can look like a mechanical failure when the microwave itself remains functional.
Also verify that you selected Time Cook rather than Kitchen Timer. The kitchen timer counts down without activating the microwave heating system.
Clean the Cavity and Waveguide Area
Food splashes can accumulate inside the microwave and interfere with normal operation. Heavy residue can also contribute to sparking, odors, and uneven cooking.
Clean the cavity with a soft cloth and mild, nonabrasive cleaning solution. Pay particular attention to the interior ceiling, side walls, floor, and door sealing surfaces.
The waveguide area also needs attention when food residue accumulates there. The manual recommends keeping this area clean and removing food splash residue with a soft damp cloth.
Never Scrub the Interior Aggressively
Abrasive cleaners can damage interior surfaces and create additional problems. Instead, soften stubborn food residue before wiping it away gently.
Do not scrape damaged paint or attempt to repair damaged cavity surfaces yourself. Significant interior damage deserves professional evaluation before further operation.
Make Sure the Turntable Works Properly
The turntable does not create microwave energy, but correct installation supports more even cooking. A misplaced tray or ring can also cause unusual operation or noise.
Remove the glass tray and inspect the turntable ring for food debris or obstruction. Clean both pieces before reinstalling them correctly.
The EM131A5C-SS uses a 12.4 inch turntable, and the manual requires the glass tray and turntable ring during cooking.
Check for Obstructions
- Make sure the glass tray sits correctly on its support.
- Confirm the turntable ring moves freely.
- Remove food particles beneath the rotating components.
- Keep oversized containers from blocking rotation.
If the microwave heats but the turntable remains completely stationary, address that issue separately. Heating can still occur, but uneven food temperatures may become more noticeable.
Check Ventilation and Overheating
Microwaves need adequate airflow around their ventilation openings. Blocked openings can increase internal heat and trigger protective shutdown behavior.
Keep the appliance away from other heat producing appliances and avoid covering its ventilation openings. The installation guidance specifically warns against placing the unit over a range or another heat source.
If the microwave stops heating after repeated cooking cycles, allow it to cool completely. Then test it again with a small water heating cycle.
Understand When the Problem Needs Professional Repair
If the Toshiba runs normally but consistently fails the water test, the problem may involve an internal heating component. Common possibilities include the magnetron, high voltage diode, capacitor, transformer, thermal protection, or related circuitry.
These components operate at hazardous voltages and require specialized diagnostic procedures. The EM131A5C-SS manual explicitly states that the appliance should not be disassembled and should receive service from qualified personnel.
Do Not Open the Microwave Cabinet
Unplugging the microwave does not automatically make internal components safe to touch. A high voltage capacitor can retain dangerous electrical energy after power removal.
For that reason, do not remove the outer cabinet, test internal components, discharge capacitors, or replace high voltage parts yourself. Professional microwave technicians have the equipment and procedures needed for safe diagnosis.
When Replacement Makes More Sense
A heating failure does not automatically mean you need another microwave. First, determine whether a qualified technician can diagnose the fault economically.
However, replacement may make more sense when several problems appear together. Consider replacement when the microwave has serious cabinet damage, door damage, repeated electrical faults, or an expensive internal repair.
Also consider the appliance’s overall condition and expected remaining service life. A simple external issue deserves troubleshooting, while major internal failure requires a practical repair versus replacement decision.
A Practical Toshiba Heating Troubleshooting Checklist
Work through these checks in order instead of randomly testing different functions. This approach reduces unnecessary repairs and helps identify the problem faster.
- Confirm the wall outlet provides power.
- Inspect the power cord and plug.
- Check the circuit breaker.
- Confirm the door closes correctly.
- Check the control lock.
- Use Time Cook instead of Kitchen Timer.
- Select the highest power level.
- Run a controlled water heating test.
- Clean the cavity and waveguide area.
- Check the turntable and roller ring.
- Allow the microwave to cool after heavy use.
- Stop using the appliance when unusual noises or damage appear.
Common Mistakes That Can Cause Weak Heating
Users sometimes blame the microwave when the selected cooking method creates the problem. Fortunately, several mistakes take only seconds to correct.
- Running Kitchen Timer instead of Time Cook.
- Accidentally selecting a low power level.
- Using a damaged or poorly closing door.
- Blocking ventilation openings.
- Using unsuitable containers that restrict normal cooking.
- Ignoring heavy food residue inside the cavity.
- Continuing operation after sparks, burning smells, or unusual noises.
Correcting these issues can restore normal performance without opening the appliance. If heating remains absent, stop troubleshooting once internal repair becomes likely.
How to Prevent Future Heating Problems
Good operating habits can reduce unnecessary stress on the microwave and keep cooking performance consistent. Clean spills promptly instead of allowing residue to build up around the cavity.
Use microwave safe cookware and avoid sealed containers unless you follow appropriate preparation instructions. Also, never operate the oven empty unless the manufacturer specifically instructs you to do so.
Keep the door, hinges, and latch clean and free from impacts. Finally, give the appliance adequate ventilation and avoid repeated heavy cooking when it becomes unusually hot.
Frequently Asked Questions
Why does my Toshiba EM131A5C-SS run but not heat?
A faulty setting, door interlock, thermal protection system, or internal heating component can cause this symptom.
How can I test whether my Toshiba microwave heats?
Run a controlled Time Cook test using a microwave safe cup of water at full power.
Can a dirty microwave stop heating?
Heavy food residue can cause arcing and operating problems, so clean the cavity and waveguide area carefully.
Should I replace the magnetron myself?
No, microwave magnetron replacement requires professional service because the internal high voltage system can remain dangerous.
Why does my Toshiba microwave heat slowly?
Check the power level, electrical supply, ventilation, food load, and possible internal heating faults.
Final Takeaway
Fixing a Toshiba EM131A5C-SS that does not heat starts with safe external checks rather than cabinet disassembly. Confirm power, cooking mode, power level, door condition, ventilation, cleanliness, and turntable installation.
If those checks fail to restore heating, stop using the appliance and arrange qualified service. That approach protects you from high voltage hazards while giving the technician useful information about the failure.
Before paying for a major repair, compare the technician’s diagnosis with the microwave’s overall condition. A clear diagnosis lets you make a practical decision between repair and replacement.
How to Refill and Fix a Sputtering Sondiko Butane Torch
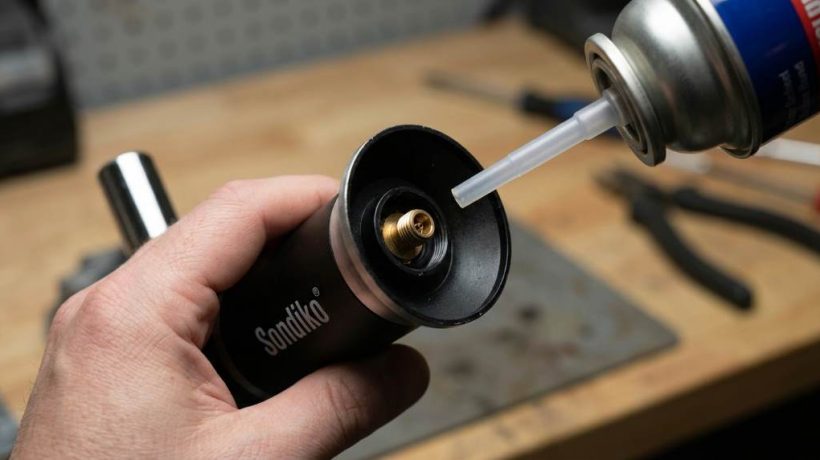
A sputtering torch usually needs proper refilling, air purging, clean fuel, or flame adjustment. A typical refill takes about 10 seconds, while a three minute wait helps fuel stabilize before ignition. A Sondiko butane torch can often recover without replacement when you troubleshoot it carefully. First, extinguish the flame and let the torch cool completely. Then refill it with suitable butane and purge trapped air if needed. Finally, test the flame outdoors or in a properly ventilated area away from ignition hazards.
Why a Sondiko Butane Torch Starts Sputtering
Sputtering usually means the torch receives an inconsistent mixture of butane and air. However, several conditions can create that imbalance during normal use.
Low fuel, trapped air, poor quality butane, clogged openings, and incorrect flame settings remain common causes. Therefore, identify the simplest cause before attempting any deeper troubleshooting.
- Low or depleted butane inside the tank
- Air trapped inside after refilling
- Impure or contaminated butane fuel
- A partially blocked burner opening
- A flame adjustment setting that sits too low
- A cold torch or cold fuel supply
- Damage around the fuel valve or burner assembly
Fortunately, most simple fuel and airflow problems require only basic maintenance. Still, never operate a torch that leaks, smells strongly of gas, or shows physical damage.
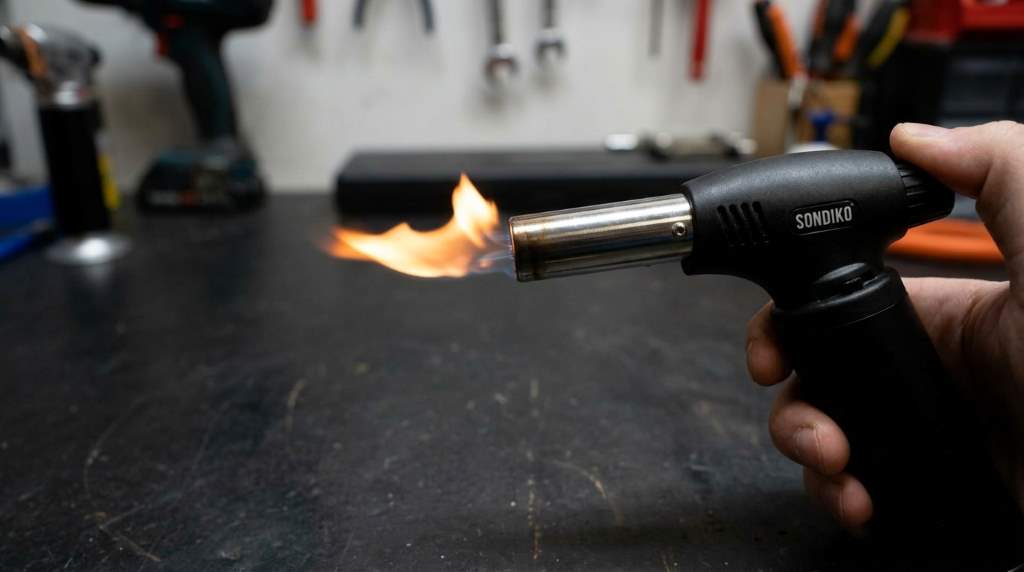
Safety Checks Before Refilling the Torch
Butane remains highly flammable, so refilling requires more care than ordinary lighter maintenance. Always work away from flames, sparks, cigarettes, hot surfaces, and other ignition sources.
Before touching the refill valve, extinguish the torch and allow it to reach room temperature. Also, refill only in a well ventilated location where escaping fuel cannot accumulate.
- Turn the torch completely off.
- Let the torch cool to room temperature.
- Move away from flames and ignition sources.
- Keep children and other people away during refilling.
- Use compatible butane intended for refillable torches.
- Never test suspected leaks with an open flame.
If you notice continuous hissing, visible damage, or a strong gas odor, stop immediately. Do not attempt to repair the fuel system yourself when the torch appears unsafe.
How to Refill a Sondiko Butane Torch
Correct refilling starts with removing the old air and positioning the torch properly. Follow the specific instructions supplied with your Sondiko model whenever they differ from general refill practices.
1. Turn Off and Cool the Torch
First, extinguish the torch completely and place it somewhere stable. Allow enough time for the body, burner, and fuel tank to cool before refilling.
Never refill a warm torch because residual heat can increase the risk from escaping butane. Instead, wait until the entire torch feels cool to the touch.
2. Locate the Refill Valve
Look underneath the torch for the small refill valve designed to accept the butane nozzle. Keep the valve accessible and position the torch securely.
If your model includes a fuel level window, inspect it before adding fuel. Avoid repeatedly forcing fuel into a tank that already appears full.
3. Purge Excess Air When Necessary
Air inside the fuel tank can cause weak ignition, uneven flames, or sputtering after refilling. Therefore, purging can restore a more consistent fuel flow.
Only purge a completely cool torch in a well ventilated area away from every ignition source. Follow your model instructions for the correct purge method and never improvise with tools.
4. Refill With the Torch Inverted
Hold the torch so its refill valve faces upward, unless your model instructions specify another position. Turn the butane container upside down during filling.
Press the refill nozzle firmly against the valve and allow fuel to enter steadily. A typical refill takes roughly 10 seconds, but tank size varies by model.
Stop when the tank reaches its recommended capacity or fuel begins escaping around the valve. Avoid repeatedly topping off a full tank because excess fuel can create handling risks.
5. Let the Fuel Stabilize
After refilling, remove the fuel canister and place the torch somewhere safe. Wait about three minutes before attempting ignition.
This short pause allows pressure and fuel conditions to stabilize inside the tank. Starting immediately can produce inconsistent ignition or an unstable flame.
How to Fix Sputtering After Refilling
If the torch sputters after a correct refill, avoid immediately adding more fuel. Instead, work through the following checks from simplest to more involved.
Check the Flame Adjustment
A flame control set too low can create a weak, unstable flame. Turn the adjustment gradually toward a moderate setting rather than opening it fully.
Then ignite the torch and observe the flame carefully. A steady blue flame generally indicates more consistent combustion than a yellow, flickering flame.
Check for Trapped Air
Repeated sputtering after refilling can indicate air remaining inside the tank. If your model supports purging, follow its instructions before attempting another refill.
After purging, refill the torch correctly and allow the fuel to stabilize. Then test the flame again using the same adjustment setting.
Inspect the Burner Opening
Dust, debris, or residue around the burner can interfere with gas flow and flame stability. Inspect the visible burner area under good lighting before cleaning anything.
Use only the cleaning method recommended for your model. Never insert needles, wires, pins, or other objects into gas passages.
Consider Butane Quality
Fuel quality can affect ignition and flame consistency, especially when contaminated fuel enters a small torch system. Use clean, suitable butane from a reputable manufacturer.
If problems began immediately after using a different fuel, fuel quality deserves attention. Avoid mixing questionable fuel with repeated refills because contamination can remain inside the tank.
Let a Cold Torch Reach Room Temperature
Cold conditions can reduce fuel pressure and make the flame appear weak or inconsistent. Bring the torch indoors and let it naturally reach room temperature.
Do not heat the torch with a heater, flame, hot water, or another artificial heat source. Excessive heat can create dangerous pressure inside the fuel tank.
What Different Flame Problems Can Tell You
The flame itself provides useful clues when diagnosing a sputtering torch. However, treat these signs as troubleshooting clues rather than reasons to dismantle the torch.
| Problem | Likely Cause | First Action |
|---|---|---|
| Weak blue flame | Low fuel or low setting | Check fuel level and adjust gradually |
| Sputtering flame | Air, fuel flow, or contamination | Purge and refill correctly |
| Yellow flame | Dirty burner or poor combustion | Inspect visible burner area |
| Flame will not stay lit | Low fuel or unstable flow | Check refill and adjustment |
| Gas odor without ignition | Possible leak | Stop using the torch immediately |
How to Clean a Sondiko Torch Without Damaging It
Routine cleaning should focus on accessible surfaces rather than internal gas components. Excessive cleaning can damage small parts or disturb factory settings.
First, make sure the torch remains completely cool and empty of active flame. Then inspect the exterior and visible burner area for dust, residue, or debris.
- Use a soft, dry cloth for exterior surfaces.
- Keep the burner opening free from visible debris.
- Follow the model manual for specialized cleaning.
- Never disassemble the fuel valve without manufacturer guidance.
- Never use solvents that the manufacturer does not recommend.
After cleaning, allow the torch to remain completely dry before use. A clean exterior also makes cracks, damage, and unusual residue easier to spot.
When You Should Stop Troubleshooting
Not every sputtering torch deserves another refill or adjustment. Continuing to use a damaged fuel appliance can turn a minor fault into a serious safety problem.
Stop using the torch if you notice a fuel leak, damaged tank, cracked housing, persistent gas odor, or abnormal heating. You should also stop when the torch repeatedly malfunctions after proper refilling and cleaning.
Do not modify internal components or attempt to repair sealed gas mechanisms without qualified technical support. Replacement usually makes more sense than experimenting with a pressurized fuel system.
How to Prevent Future Sputtering
Good storage and consistent fuel handling can prevent many recurring flame problems. Therefore, treat maintenance as part of normal torch use rather than emergency repair.
- Store the torch in a cool, dry, ventilated location.
- Keep the torch away from prolonged sunlight and excessive heat.
- Use compatible, clean butane fuel.
- Allow the torch to cool before every refill.
- Avoid dropping or striking the torch.
- Inspect the torch before each use.
- Keep the burner area visibly clean.
Also, avoid storing the torch near heaters, stoves, radiators, or other heat producing equipment. Proper storage protects both the fuel system and the torch housing.
A Simple Troubleshooting Sequence
When time matters, use a consistent diagnostic sequence instead of changing several variables simultaneously. This approach helps you identify the actual cause faster.
- Extinguish the torch and let it cool completely.
- Inspect the body, refill valve, and burner area.
- Check the fuel level.
- Purge air only when the model supports that procedure.
- Refill with compatible butane.
- Wait about three minutes after refilling.
- Set the flame control to a moderate level.
- Test the flame in a safe, ventilated location.
If the torch still sputters after these steps, stop using it rather than forcing another repair. Persistent problems can indicate a faulty valve, regulator, ignition component, or internal fuel passage.
Common Refill Mistakes to Avoid
Many refill problems happen because users rush the process or treat every torch like the same appliance. A careful refill takes little time but requires consistent technique.
- Refilling while the torch remains warm
- Refilling near an ignition source
- Using an incompatible fuel container
- Overfilling the fuel tank
- Ignoring a persistent gas smell
- Testing leaks with a flame
- Forcing objects into the burner opening
- Adjusting internal factory components
Most importantly, never continue operating a torch simply because it still produces a flame. A flame does not prove that the fuel system operates safely.
Final Takeaway
You can often fix a sputtering Sondiko butane torch by cooling it, purging trapped air, refilling it correctly, and adjusting the flame. Clean fuel and careful burner inspection can also restore stable performance when contamination or debris causes trouble.
Start with the safest, simplest checks before considering any repair. If the torch leaks, remains unstable, or shows physical damage, stop using it and replace or professionally service the unit.
Use this troubleshooting sequence during your next refill, and keep the manufacturer’s instructions nearby for model specific requirements. A careful refill routine can help your torch deliver a steadier flame while reducing unnecessary wear.
Frequently Asked Questions
Why is my Sondiko torch sputtering after refilling?
Trapped air, inconsistent fuel flow, poor fuel quality, or an incorrect flame setting can cause sputtering after refilling.
How long should I wait after refilling a butane torch?
Wait about three minutes after refilling so the fuel and internal pressure can stabilize before ignition.
Can I use any butane fuel in a Sondiko torch?
Use only butane that matches your specific Sondiko model’s fuel requirements and refill valve design.
Why does my torch produce a yellow flame?
A yellow flame can indicate incomplete combustion, contamination, restricted airflow, or another burner related problem.
Should I repair a leaking Sondiko torch?
No, stop using a leaking torch and seek appropriate manufacturer support or replace the damaged unit.
Why Won’t My Propane Torch Burner Stay Lit?
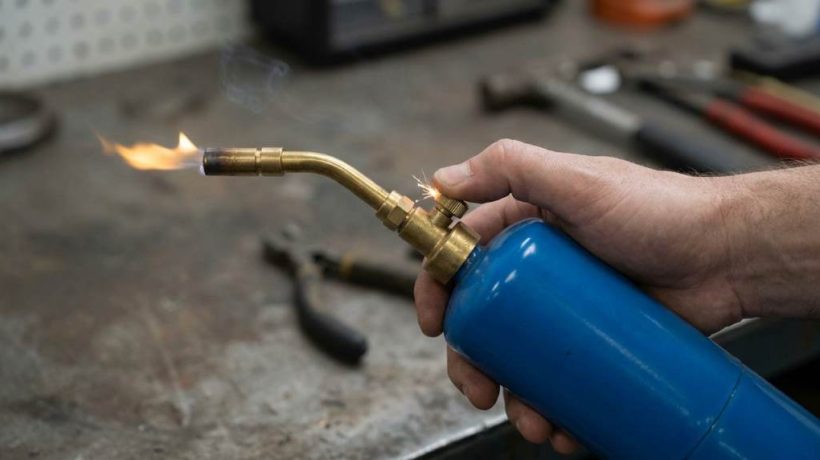
If your propane torch burner keeps going out, start with fuel flow, airflow, connection, and burner condition. A weak cylinder, blocked burner, excessive wind, or faulty safety control can interrupt the flame. Propane torch burners need steady gas flow and proper air mixing to maintain combustion. Propane vapor sits low because it is about 1.5 times heavier than air. In air, propane can ignite across roughly 2.1% to 9.5% concentration.
Why Your Propane Torch Burner Keeps Going Out
A torch needs three things to maintain a flame: fuel, oxygen, and reliable ignition. Therefore, any interruption in one part can make the flame shrink, flicker, or disappear.
Most problems come from simple causes rather than major component failures. However, repeated flame loss can signal a regulator, valve, or safety control problem that needs professional attention.
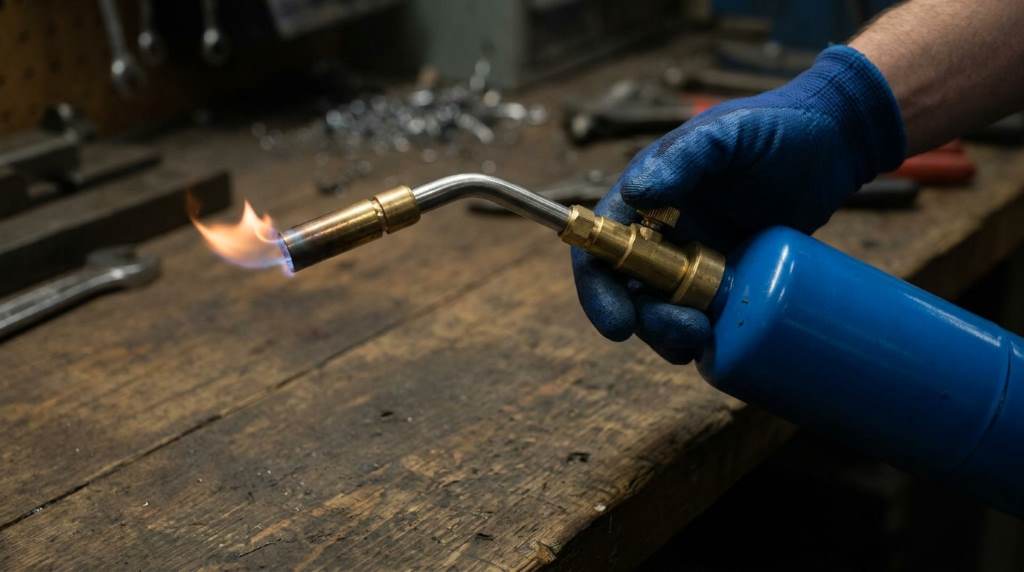
1. The Propane Supply May Be Too Low
A nearly empty cylinder may still produce a flame, but the flame can become weak and unstable. As propane pressure changes, the burner may fail to maintain enough fuel flow for steady combustion.
First, confirm that the cylinder contains propane and remains upright during operation. If another approved cylinder works normally, the original cylinder may have caused the problem.
Cold conditions can also reduce vapor production and make the flame weaker. Therefore, avoid judging cylinder performance solely by how much liquid you think remains inside.
2. The Cylinder Valve May Not Open Properly
Your torch needs consistent propane flow from the cylinder through the connection and control valve. A partially opened valve can sometimes produce a weak flame that quickly disappears.
Follow the torch manufacturer’s lighting procedure exactly. Never force a valve, remove safety components, or alter the gas control system.
3. The Regulator May Restrict Gas Flow
Some propane torches use a regulator to control pressure before gas reaches the burner. A damaged, contaminated, or malfunctioning regulator can reduce flow and cause flame instability.
Look for obvious external damage around the regulator and hose assembly. If the torch repeatedly loses its flame after basic checks, have the gas system inspected professionally.
Do not attempt to adjust internal regulator components yourself. Incorrect pressure can create unsafe combustion, excessive flame size, or gas leakage.
4. The Burner Opening May Have Debris
Dirt, dust, insects, and residue can interfere with the small opening where propane exits. Even minor blockage can disturb the fuel and air mixture needed for stable combustion.
Turn off the propane supply and allow the torch to cool completely before inspecting it. Follow the manufacturer’s cleaning instructions instead of inserting wires or sharp objects.
Never enlarge the burner opening or drill into the nozzle. A modified opening can change gas flow and create a dangerous flame pattern.
5. Strong Wind May Blow Out the Flame
Outdoor torches can struggle when wind repeatedly disrupts the flame. Strong airflow can separate the flame from the burner and prevent stable combustion.
Move the torch to a suitable sheltered location that follows its operating instructions. Keep the burner away from combustible materials, enclosed spaces, and unstable surfaces.
Do not improvise a wind shield around the burner unless the manufacturer specifically permits one. Restricting airflow can create another combustion problem.
6. The Air Mixture May Be Incorrect
Many propane burners mix gas with air before combustion occurs. Too much or too little air can produce a flame that burns poorly or fails to remain established.
A flame that looks unusually yellow, noisy, weak, or irregular deserves attention. Such symptoms can indicate poor combustion, contamination, incorrect adjustment, or another equipment problem.
Use only the adjustments described in the manufacturer’s instructions. Never modify an air shutter or burner setting without clear equipment guidance.
7. The Ignition System May Be Weak
A torch can ignite successfully and still have an ignition system problem. Weak ignition components may fail to maintain reliable operation after the initial flame appears.
If your model uses electronic ignition, inspect the system for obvious damage and follow its troubleshooting instructions. Avoid repeatedly releasing propane while attempting ignition.
When ignition becomes difficult or inconsistent, stop using the torch until you identify the cause. A qualified technician can assess components that require internal service.
8. A Safety Control May Be Shutting Off Gas
Some propane appliances use safety controls that stop gas flow when operating conditions become unsafe. These systems can respond to flame loss, overheating, or other detected problems.
If your torch lights briefly and shuts off consistently, a safety control may be involved. Never bypass, tape down, disable, or remove that safety feature.
Instead, check the owner’s instructions for the specific behavior of your model. If the shutdown continues, professional inspection offers the safest next step.
9. The Hose or Connection May Have a Problem
A damaged hose or loose connection can interrupt fuel delivery and create a serious leak hazard. Therefore, inspect the connection area before attempting repeated ignition.
Look for cracks, visible damage, unusual wear, or a connection that does not seat correctly. Never operate a torch with damaged gas carrying components.
Do not tighten components beyond the manufacturer’s instructions. If you suspect a leak, stop using the torch immediately and follow propane emergency procedures.
What to Check Before Lighting the Torch Again
A short inspection can help separate ordinary operating problems from equipment failures. Work through these checks without disassembling the gas system.
- Confirm that the propane cylinder contains fuel.
- Keep the cylinder upright during operation.
- Check the hose and connections for visible damage.
- Confirm that the valve operates according to instructions.
- Inspect the burner opening for visible debris.
- Check whether wind affects the flame.
- Follow the manufacturer’s lighting sequence.
- Stop immediately if you smell propane.
These checks can identify obvious issues without exposing you to unnecessary risks. However, they cannot replace professional service for internal gas components.
How to Tell What the Flame Is Telling You
The flame itself often provides useful clues about torch performance. Therefore, observe its behavior without placing your hands near the burner.
| Flame behavior | Possible cause | Recommended response |
|---|---|---|
| Flame starts then disappears | Safety control or unstable fuel flow | Follow the manual and seek service if repeated |
| Small weak flame | Low fuel, restricted flow, or regulator issue | Check fuel and visible connections |
| Flame changes with wind | Excessive airflow | Use the torch only in an approved sheltered location |
| Yellow or irregular flame | Poor air mixture or burner contamination | Stop and follow manufacturer maintenance instructions |
| No ignition | Fuel, ignition, or connection problem | Stop repeated ignition attempts and inspect safely |
What to Do If You Smell Propane
Never troubleshoot a torch when you suspect an active propane leak. Propane can collect near the ground because its vapor weighs more than air.
Do not create flames or sparks near suspected leaking propane. Leave the area and contact your propane supplier, emergency responders, or another qualified professional.
If there is no immediate hazard, shut the cylinder valve according to safety instructions. Never use a torch again until a qualified professional determines that the system is safe.
How to Check for a Suspected Connection Leak
A soapy water test can help identify certain leaks around accessible connections. Only perform this test when the equipment manufacturer and propane safety guidance permit it.
Apply an appropriate leak detection solution around the connection area. Slowly open the cylinder valve and watch for growing bubbles.
Growing bubbles indicate escaping gas and require immediate attention. Close the valve when safe, avoid ignition sources, and contact a qualified propane professional.
Never use a flame to search for a propane leak. That method can ignite escaping gas and cause a fire or explosion.
Why You Should Not Keep Relighting a Failing Torch
Repeated ignition attempts can allow unburned propane to accumulate around the burner. That accumulation can create a sudden flare when ignition finally occurs.
Instead, follow the manufacturer’s shutdown and relighting procedure after every failed attempt. Give the equipment enough time to clear according to those instructions.
If the same failure happens repeatedly, stop troubleshooting and arrange professional inspection. Persistent flame loss usually deserves more attention than another ignition attempt.
Common Mistakes That Make the Problem Worse
Many torch problems become more difficult because users change several things at once. Consequently, identifying the original fault becomes harder.
- Do not bypass a flame safety device.
- Do not drill or enlarge a burner opening.
- Do not use damaged hoses or connectors.
- Do not test leaks with an open flame.
- Do not operate a leaking cylinder or torch.
- Do not store propane cylinders in enclosed areas.
- Do not modify regulator pressure without authorization.
- Do not ignore repeated flame failure.
Safe troubleshooting focuses on observation rather than modification. When a gas component needs repair, qualified service protects both equipment and people.
When You Should Stop Troubleshooting
Some symptoms clearly indicate that home troubleshooting has reached its limit. Stop using the torch if you smell propane, hear persistent hissing, or see damaged gas components.
Repeated flame loss also deserves professional attention when basic operating checks produce no improvement. Likewise, unusual flame color, soot, or overheating can indicate combustion problems.
A qualified professional can inspect the regulator, valve, burner, hose, and safety controls properly. That approach costs less than risking equipment damage or an uncontrolled gas release.
How to Prevent Future Flame Problems
Good maintenance starts before the torch develops symptoms. Keep the equipment clean, dry, protected from damage, and stored according to manufacturer instructions.
Inspect the cylinder, hose, connections, and burner area before regular use. Replace damaged components with approved parts instead of making temporary repairs.
Also, keep combustible materials away from the operating area. Use the torch only in locations approved by the manufacturer for adequate ventilation and safe operation.
Build a Simple Pre Use Routine
A consistent inspection takes little time and can prevent many avoidable problems. Before lighting, verify fuel, connections, equipment condition, and operating conditions.
- Check the cylinder condition.
- Confirm proper cylinder position.
- Inspect the hose and fittings.
- Look for visible burner blockage.
- Check the surrounding area.
- Review the manufacturer’s lighting procedure.
- Stop if anything looks damaged or unusual.
This routine helps you spot problems before ignition begins. More importantly, it prevents repeated attempts with equipment that may already need service.
Frequently Asked Questions
Why does my propane torch light but not stay lit?
The most common causes include restricted fuel flow, wind, burner blockage, safety controls, or a faulty regulator.
Can a low propane tank make a torch flame go out?
Yes, a low fuel supply can reduce available gas flow and produce an unstable flame.
Should I clean a clogged propane torch nozzle?
Follow the manufacturer’s cleaning instructions, but never drill, enlarge, or modify the burner opening.
Why does my torch flame turn yellow before going out?
A yellow flame can indicate poor air mixing, contamination, or another combustion problem that needs attention.
Is it safe to keep relighting a propane torch?
No, repeated ignition attempts can allow unburned propane to accumulate and create a dangerous flare.
Final Takeaway
A propane torch burner that will not stay lit usually has a fuel flow, airflow, burner, connection, wind, or safety control issue. Start with safe external checks, follow the manufacturer’s instructions, and avoid modifying gas components.
Most importantly, stop immediately when you smell propane, hear unexpected hissing, or notice damaged equipment. If basic checks do not solve repeated flame failure, contact a qualified professional instead of continuing to relight the torch.
Use this troubleshooting checklist before your next torch session, and treat persistent flame problems as a service issue rather than something to force into working.
How to Troubleshoot a Ninja Kitchen System Not Blending
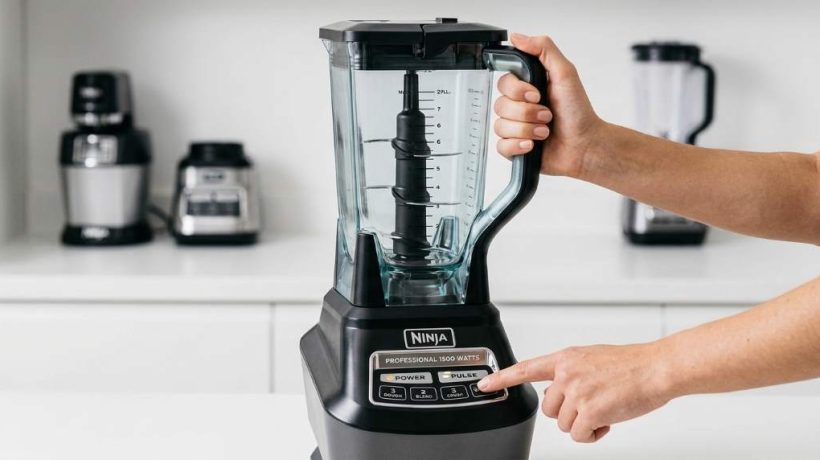
When a Ninja Kitchen System stops blending, check assembly, power, blade movement, ingredient load, and motor temperature first. A 15 minute cooling period can restore operation after an overload, while smaller ingredient loads often improve blending. The Ninja kitchen system combines powerful blending with food preparation functions, so one small setup issue can stop the entire process. Start with the simplest checks before assuming the motor or blade assembly needs replacement. This approach saves time, protects the appliance, and helps you identify the actual cause.
Start With a Quick Ninja Kitchen System Diagnostic
Before taking anything apart, switch the system off and unplug it from the outlet. Then inspect the base, container, lid, blade assembly, and power connection for obvious problems.
A quick diagnostic prevents unnecessary repairs and helps separate setup problems from mechanical problems. Work through each check in order instead of changing several things at once.
- Confirm the power cord sits firmly inside a working outlet.
- Check that the pitcher, bowl, or cup sits correctly on the motor base.
- Make sure the lid locks into its proper position.
- Inspect the blade assembly for stuck food or visible damage.
- Check whether the ingredients exceed the recommended capacity.
- Look for signs of overheating around the motor base.
If the appliance remains completely silent, focus on power and safety interlocks first. If the motor runs but ingredients remain intact, focus on the blade and ingredient load.
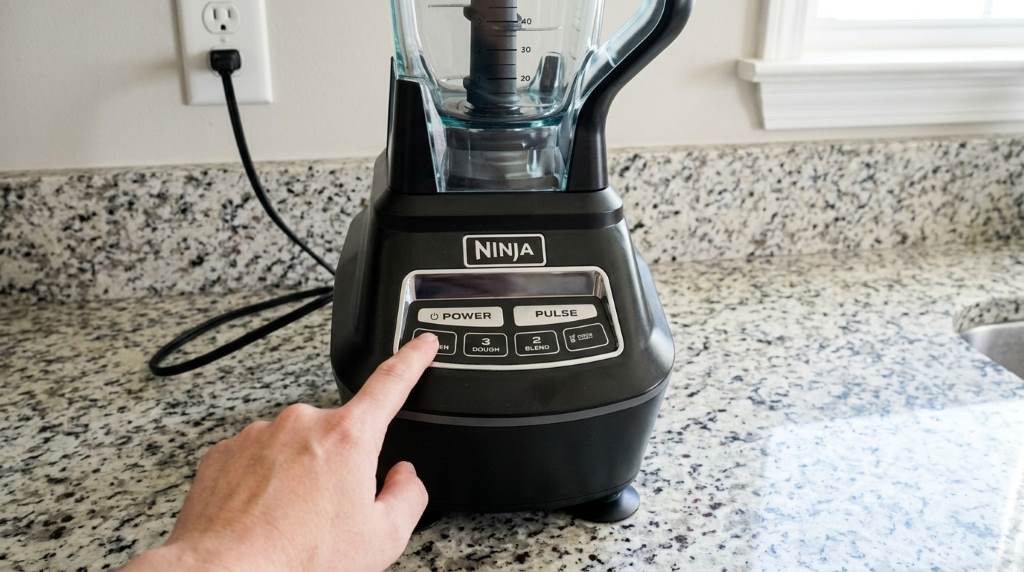
Why Your Ninja Kitchen System May Not Blend
A Ninja Kitchen System can fail to blend for several different reasons. However, most troubleshooting begins with assembly, ingredients, blade movement, or overheating.
Understanding the symptom helps you avoid treating the wrong problem. Therefore, identify what the machine does before attempting a fix.
| Symptom | Likely Cause | First Action |
|---|---|---|
| No motor response | Power or assembly issue | Check outlet and container locking |
| Motor runs but food stays whole | Heavy load or poor liquid balance | Reduce ingredients and add suitable liquid |
| Blades stop suddenly | Overload or blockage | Unplug and inspect the blade area |
| System becomes hot | Extended or overloaded operation | Stop and allow the motor to cool |
| Uneven blending | Large pieces or dull blades | Reduce piece size and inspect blades |
Check the Power Before Anything Else
A powerless blender cannot respond to program buttons, so begin with the electrical connection. Confirm that the plug sits securely in the outlet and inspect the cord for visible damage.
Next, test the outlet with another small appliance if you suspect a power problem. Also check whether a tripped breaker or switched outlet affects the connection.
Never continue using a cord with exposed wires, severe cuts, or obvious heat damage. Instead, stop troubleshooting and arrange qualified service or replacement.
Reseat the Container and Lid Correctly
Many Ninja systems require the container and lid to reach specific locked positions before operation begins. Consequently, a slightly misaligned component can make a working motor appear completely dead.
Remove the container from the base and reinstall it carefully. Align the container with its locking points, then secure it without forcing the mechanism.
Afterward, check the lid and its locking mechanism. Remove food residue from contact areas because debris can interfere with proper seating.
Why Proper Locking Matters
The locking system helps prevent accidental operation while the blades remain accessible. Therefore, never bypass or modify a safety mechanism to make the blender operate.
If the appliance works only when you press or hold a component unusually, stop using it. That behavior can indicate a damaged or misaligned safety mechanism.
Inspect the Blade Assembly Safely
Sharp blades can cause serious cuts, even when they appear stationary. Always unplug the system before touching, removing, cleaning, or inspecting the blade assembly.
Look for fibrous vegetables, frozen chunks, sticky foods, or other material wrapped around the blades. Even a small blockage can prevent smooth blade rotation.
Never reach into the container while the appliance remains connected to power. Instead, remove the container and follow the model specific cleaning procedure.
Look for Blade Damage
After cleaning, inspect the blade assembly for bent, cracked, loose, or visibly damaged components. Damaged blades can create poor results even when the motor operates normally.
Also check whether the blade assembly sits correctly in its container. A loose or incorrectly positioned assembly can affect blending and create unusual movement.
Reduce an Overloaded Ingredient Mixture
Overfilling creates one of the most common blending problems with high powered kitchen systems. Dense ingredients can prevent the blades from moving freely through the mixture.
Remove some ingredients when the container looks crowded. Then restart with a smaller load and observe how the mixture moves around the blades.
Cut large fruits, vegetables, and other solid ingredients into smaller pieces before blending. Smaller pieces give the blades a better chance to break ingredients down evenly.
Use Enough Liquid for Thick Mixtures
Thick mixtures need enough liquid to move through the blade area effectively. Without sufficient liquid, ingredients can form a dense mass that resists circulation.
Add liquid gradually rather than flooding the container immediately. Use the liquid that suits your recipe, such as water, milk, juice, broth, or another suitable ingredient.
For frozen mixtures, allow ingredients to soften slightly when appropriate. Then use shorter blending cycles and inspect the consistency between cycles.
Use the Pulse Function for Difficult Ingredients
Large or dense ingredients can benefit from short pulses before continuous blending. Pulsing helps break stubborn pieces into smaller portions that move more easily.
Start with several controlled pulses instead of running the motor continuously. Then switch to the appropriate blending program once the mixture begins circulating.
However, avoid repeatedly pulsing a severely overloaded container. Remove some ingredients first when the blades struggle to move.
Check Whether the Motor Has Overheated
A motor can become hot when the system processes heavy loads for extended periods. Overload protection may stop operation to protect the motor from excessive heat.
If the motor stops during blending, switch the appliance off and unplug it. Allow the unit to cool for at least 15 minutes before testing it again.
Meanwhile, reduce the ingredient quantity and improve airflow around the motor base. Never cover ventilation areas while the appliance operates.
Recognize Signs of Excessive Heat
A warm motor base does not automatically mean the appliance has failed. However, strong burning smells, smoke, or repeated shutdowns require immediate attention.
Unplug the appliance if you notice smoke or a persistent burning odor. Do not restart it until a qualified technician or appropriate support process clears the problem.
Fix Uneven Blending Without Replacing Parts
Sometimes the Ninja Kitchen System runs normally but leaves chunks behind. This problem usually points toward ingredient size, mixture thickness, loading technique, or blade condition.
First, stop the machine and inspect the mixture safely. Then redistribute large pieces and add a small amount of suitable liquid if necessary.
Next, reduce the overall load and process the ingredients in smaller batches. Smaller batches often produce more consistent circulation around the blades.
Load Ingredients for Better Circulation
Place liquid and softer ingredients where they can help move heavier ingredients toward the blades. Add dense ingredients in manageable quantities rather than creating one solid mass.
For smoothies, combine enough liquid with fruits and vegetables to create movement. For thicker recipes, use short pulses and pause when the mixture needs redistribution.
Clean the System After a Failed Blend
Food residue can interfere with lids, seals, blade assemblies, and container connections. Therefore, cleaning should form part of every serious troubleshooting routine.
Unplug the appliance before removing components for cleaning. Follow the cleaning instructions designed for your specific model and attachment.
Pay particular attention to dried food around the lid and blade assembly. Once everything dries completely, inspect the components again before reassembly.
When a Ninja Kitchen System Needs Professional Attention
Some problems require more than cleaning, reseating, or reducing ingredients. Persistent electrical faults, damaged wiring, smoke, or repeated motor shutdowns deserve professional attention.
Do not disassemble the motor base simply to investigate an internal fault. Opening the housing can create electrical and mechanical hazards while making later service more difficult.
Professional evaluation makes more sense when basic troubleshooting produces no improvement. Keep the model number available because different Ninja systems use different containers, blades, and controls.
A Five Minute Troubleshooting Sequence
When you need a practical process, follow the same sequence every time. This method reduces guesswork and helps identify the failure point quickly.
- Unplug the system: Make the appliance safe before touching any removable components.
- Check the outlet: Confirm that the electrical connection works properly.
- Reseat everything: Secure the container, blade assembly, and lid correctly.
- Inspect the blades: Remove visible food blockages using safe handling practices.
- Reduce the load: Remove excess ingredients and cut large pieces smaller.
- Add suitable liquid: Improve circulation when the mixture appears excessively thick.
- Cool the motor: Wait at least 15 minutes after an overload shutdown.
- Test a small batch: Use a simple mixture to separate recipe problems from appliance problems.
Testing a small batch provides a useful baseline after troubleshooting. If the system works normally afterward, the original recipe or loading method likely caused the problem.
How to Prevent Future Blending Problems
Good operating habits can prevent many blending failures before they start. Keep loads within the recommended capacity and avoid forcing dense mixtures through an overloaded container.
Cut large ingredients into smaller pieces and provide enough liquid for recipes that need circulation. Also, give the motor adequate cooling time between demanding blending tasks.
Clean the blade assembly and container after use to prevent dried residue from interfering with future operation. Finally, inspect removable components regularly for cracks, damage, or unusual wear.
When Replacement Makes More Sense Than Repair
A replacement attachment may make sense when the blade assembly has visible damage or severe wear. However, replacing parts should follow the exact model compatibility requirements.
If the motor base repeatedly fails after correct assembly and normal loading, continued troubleshooting may not solve the underlying problem. At that stage, professional service can determine whether repair or replacement makes practical sense.
Do not purchase a random replacement container or blade because Ninja systems can use model specific components. Match every replacement part with the exact model number before ordering.
Frequently Asked Questions
Why is my Ninja Kitchen System not blending?
Check the power connection, container locking, blade blockage, ingredient load, liquid level, and motor temperature first.
Why does my Ninja blender turn on but not blend?
Reduce the ingredient load, add suitable liquid, inspect the blades, and use pulses for dense ingredients.
How long should I let an overheated Ninja blender cool?
Allow the motor to cool for at least 15 minutes before testing the appliance again.
Can a jammed blade stop my Ninja Kitchen System?
Yes, food lodged around the blades can restrict rotation and prevent effective blending.
When should I stop troubleshooting my Ninja Kitchen System?
Stop troubleshooting when you notice smoke, persistent burning odors, damaged wiring, or repeated unexplained shutdowns.
Final Thoughts
A Ninja Kitchen System that stops blending does not automatically need replacement. Start with power, assembly, blade movement, ingredient quantity, liquid balance, and motor temperature.
Most basic problems respond to careful setup and safer loading habits. However, persistent electrical faults or signs of motor damage require professional attention.
Use the troubleshooting sequence above the next time your system refuses to blend. By testing one cause at a time, you can find the problem faster and protect your appliance from unnecessary damage.
Why Is My Ninja Air Fryer Smoking and How to Fix It
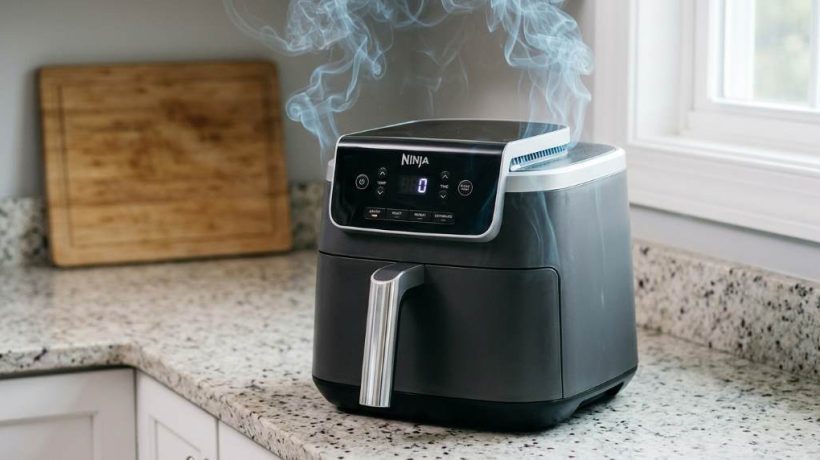
A smoking Ninja air fryer usually needs cleaning, less oil, or better food placement. White smoke often comes from hot grease, while persistent dark smoke or electrical smells require immediate shutdown.
Cooking remains a major source of household fires, so unusual smoke deserves attention. NFPA data recorded about 158,373 reported home cooking fires annually from 2017 through 2021. Those fires also caused about 26.2 injuries per 1,000 reported fires.
For everyday cooking, a clean Ninja air fryer should produce little visible smoke. Therefore, sudden smoke usually points toward food residue, excess grease, blocked airflow, or an overheating component.
Why Is My Ninja Air Fryer Smoking?
Your Ninja air fryer may smoke because grease, crumbs, or food residue reaches the hot heating area. Likewise, fatty foods can release enough oil to create visible smoke during high temperature cooking.
Sometimes, food itself causes the problem rather than the appliance. Bacon, sausage, chicken skin, burgers, and other fatty foods can release substantial grease while cooking.
In other cases, the smoke signals poor airflow or accumulated residue. Therefore, identifying the smoke type can help you find the cause faster.
White Smoke Usually Means Hot Grease
White smoke often appears when rendered fat becomes extremely hot inside the cooking chamber. The smoke may look dramatic, but grease does not always mean an electrical problem.
However, you should still stop and inspect the fryer when smoke becomes heavy. Excess grease can continue heating and create a genuine fire risk.
Dark Smoke Needs Immediate Attention
Dark gray or black smoke usually deserves more concern than light white smoke. It can indicate burning food, excessive residue, damaged components, or overheating.
Turn the appliance off immediately if dark smoke continues after removing obvious food residue. Also unplug it when you can do so safely without touching hot or damaged parts.
A Plastic Smell Can Have Different Causes
A mild new appliance smell can sometimes occur during initial use. However, a strong burning plastic odor should never become normal through repeated cooking.
Stop using the appliance if the smell remains strong after several clean cooking cycles. Inspect the cord, plug, basket, housing, and surrounding countertop for signs of heat damage.
Common Reasons a Ninja Air Fryer Produces Smoke
Several simple problems can create smoke without indicating a permanent appliance failure. Start with the cooking chamber before assuming the heating system has failed.
| Possible cause | What you may notice | What to do |
|---|---|---|
| Excess grease | White smoke and greasy residue | Reduce fatty foods and clean the chamber |
| Old food residue | Burnt smell and repeated smoke | Clean the basket and interior carefully |
| Loose crumbs | Smoke during high heat cooking | Remove crumbs before the next cycle |
| Overfilled basket | Uneven cooking and poor airflow | Reduce the food load |
| Wet food | Steam mixed with light smoke | Pat food dry before cooking |
| Heating area residue | Smoke from above the food | Clean accessible surfaces after cooling |
| Electrical damage | Burning smell, sparks, or dark smoke | Stop using the appliance immediately |
How to Fix a Smoking Ninja Air Fryer
The safest approach starts with stopping the cooking cycle and allowing the appliance to cool. Never begin cleaning while the basket, heating area, or internal surfaces remain dangerously hot.
1. Stop Cooking and Check the Smoke
First, cancel the cooking program and observe the smoke carefully. If flames appear, treat the situation as an appliance fire rather than a cleaning problem.
Keep the cooking compartment closed when possible during a small internal flare up. Do not pour water into an air fryer containing hot grease or flames.
If you cannot control the situation safely, leave the area and contact emergency services. Never risk burns while trying to save an appliance.
2. Let the Air Fryer Cool Completely
Allow the appliance to cool before removing the basket or inspecting internal surfaces. Hot grease can remain dangerous even after the cooking cycle ends.
Place the appliance on a stable, heat resistant surface while it cools. Keep children and pets away from the cooking area during this process.
3. Clean the Basket and Crisper Plate
Remove the basket and crisper plate once they become safe to handle. Wash removable parts according to the instructions for your specific Ninja model.
Pay particular attention to sticky grease around corners, edges, and perforations. Even a thin layer of old grease can smoke during another high temperature cycle.
Rinse away cleaning residue and allow every washable component to dry completely. Water left around electrical areas can create another safety problem.
4. Clean Accessible Interior Surfaces
Grease can travel upward during cooking and collect around the upper cooking chamber. That residue may smoke when the heating element becomes hot.
After cooling, wipe accessible interior surfaces with an appropriate damp cloth. Avoid flooding the appliance or allowing liquid to reach electrical components.
Also inspect the area around the heating element for loose crumbs or burnt food. Remove only residue that you can safely reach without forcing or bending components.
5. Reduce Excess Oil
Air fryers need little oil because circulating hot air handles much of the cooking process. Adding too much oil can create unnecessary smoke and greasy buildup.
Use a light coating when your recipe requires oil. Avoid pouring pools of oil directly into the cooking basket unless your model specifically supports that method.
For fatty foods, reduce added oil even further. The food may release enough natural fat during cooking.
6. Dry Wet Ingredients Before Cooking
Wet ingredients can create heavy steam that sometimes looks like smoke. Excess moisture also affects browning and can make cooking less consistent.
Pat vegetables, meat, and other ingredients dry before placing them inside the basket. This simple step improves browning while reducing unnecessary moisture.
7. Avoid Overfilling the Basket
An overcrowded basket restricts airflow and prevents hot air from moving around the food properly. Consequently, food may cook unevenly and release more moisture.
Leave enough space for air to circulate around the ingredients. Cook smaller batches when the food covers most of the basket surface.
Smaller batches can also produce better browning and crispier results. Although another cycle takes longer, the cooking quality usually improves.
8. Check Food Placement
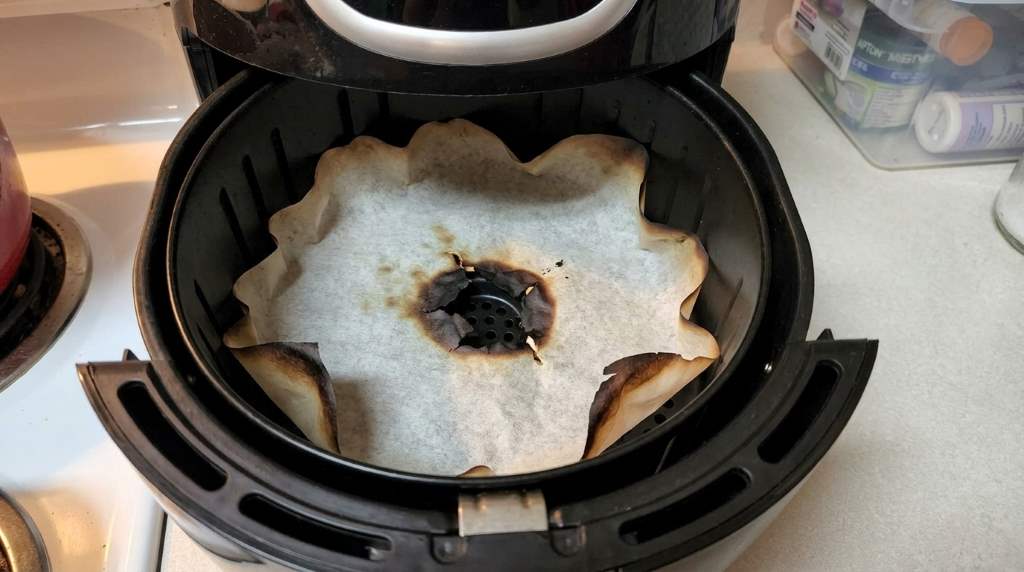
Light foods can sometimes move during powerful air circulation. Thin bread, parchment, and lightweight ingredients can reach the heating area if positioned incorrectly.
Keep food securely placed inside the basket during cooking. Never allow loose materials to sit where the heating element can contact them.
Use only accessories designed for air fryer cooking and compatible with your Ninja model. Always follow the accessory and appliance instructions before use.
How to Tell Whether the Smoke Comes From Food
Food related smoke usually appears during cooking and decreases after removing the offending ingredients. The smell often resembles burnt fat, seasoning, crumbs, or overcooked food.
Electrical smoke behaves differently and deserves more caution. You may notice burning plastic, melting material, sparks, unusual sounds, or smoke from the cord area.
| Smoke pattern | Likely source | Recommended response |
|---|---|---|
| Light white smoke | Hot grease or moisture | Stop cooking and inspect grease buildup |
| Smoke with burnt food smell | Food residue | Cool and clean the appliance |
| Smoke from upper area | Residue near heating components | Cool completely and inspect accessible areas |
| Dark smoke | Severe burning or overheating | Stop using the appliance |
| Electrical burning smell | Cord, plug, or internal fault | Unplug safely and discontinue use |
What to Do If Your Ninja Air Fryer Smokes After Cleaning
Repeated smoke after thorough cleaning suggests that residue may remain near an inaccessible heating component. It can also indicate a mechanical, electrical, or temperature control problem.
Run another cooking cycle only when the appliance looks undamaged and the previous smoke had an obvious food related cause. Otherwise, continued testing can increase the risk.
If smoke returns quickly without greasy food inside, stop using the appliance. Contact Ninja support or a qualified appliance professional for model specific guidance.
Inspect the Power Cord and Plug
Examine the cord and plug after the appliance cools completely. Look for melted plastic, discoloration, cracking, exposed wiring, or unusual heat damage.
Do not continue using an appliance with damaged electrical components. Likewise, never attempt an improvised electrical repair on a countertop cooking appliance.
Check the Countertop and Airflow
Your air fryer needs adequate ventilation around its exterior vents. Blocking those areas can interfere with heat removal and normal operation.
Move nearby objects away from the appliance before cooking again. Keep the unit on a stable surface that can tolerate the appliance’s operating heat.
How to Prevent Your Ninja Air Fryer From Smoking
Regular maintenance prevents most food related smoke problems before they become disruptive. A simple cleaning routine also protects cooking performance over time.
- Clean removable cooking parts after regular use.
- Remove crumbs before cooking another high temperature recipe.
- Reduce added oil when cooking fatty foods.
- Pat wet ingredients dry before air frying.
- Avoid packing the basket too tightly.
- Keep lightweight ingredients away from the heating area.
- Inspect the cord and plug regularly.
- Keep exterior vents clear during operation.
- Never leave the appliance cooking without attention.
- Stop using the appliance after unexplained electrical smoke.
Cleaning frequency should match how often you use the appliance. Frequent cooking with fatty foods requires more frequent cleaning than occasional vegetable cooking.
Also, inspect the cooking chamber whenever you notice new odors or smoke. Early cleaning usually takes less effort than removing heavily baked grease later.
When Should You Stop Using the Air Fryer?
Not every smoke event means your Ninja air fryer needs replacement. However, certain warning signs should end troubleshooting immediately.
- Dark smoke continues after cleaning.
- The appliance produces sparks during operation.
- The plug becomes unusually hot.
- You smell burning plastic or electrical insulation.
- The cord shows visible damage.
- The housing becomes unusually hot or deformed.
- The appliance makes repeated crackling or popping sounds.
- The unit repeatedly smokes without fatty food.
These symptoms can point toward an electrical or internal component problem. In that situation, professional inspection offers a safer solution than repeated home testing.
Can You Still Cook With a Smoking Ninja Air Fryer?
Yes, but only when the smoke clearly came from removable food residue or normal grease. First, stop cooking, cool the appliance, clean it thoroughly, and inspect it.
Afterward, monitor the next cooking cycle closely and use a lower risk food. If smoke returns without an obvious food related reason, discontinue use.
Never assume repeated smoke represents normal air fryer behavior. A clean appliance should not continuously produce heavy smoke during ordinary cooking.
Frequently Asked Questions
Why does my Ninja air fryer smoke when cooking bacon?
Bacon releases substantial fat, which can become hot enough to create visible white smoke.
How do I stop my Ninja air fryer from smoking?
Clean grease and crumbs, reduce added oil, avoid overfilling, and keep the heating area free from residue.
Is white smoke from a Ninja air fryer dangerous?
White smoke often comes from hot grease, but heavy or persistent smoke still requires immediate inspection.
Why does my Ninja air fryer smell like burning plastic?
A strong burning plastic smell can indicate overheating or electrical damage and requires immediate discontinuation.
Should I replace my Ninja air fryer if it keeps smoking?
Replace or professionally inspect it when unexplained smoke continues after cleaning and proper food preparation.
Final Thoughts
A smoking Ninja air fryer often has a simple cause, especially excess grease, crumbs, or poor food placement. Still, dark smoke, sparks, electrical odors, or repeated overheating should never become part of normal operation.
Start by stopping the cycle, cooling the appliance, and cleaning every accessible cooking surface. Then reduce oil, improve airflow, and test carefully with a suitable food.
If the smoke returns without an obvious food related cause, stop using the appliance. Take the safer route by contacting Ninja support or a qualified appliance professional.
Use these checks before your next cooking session, and keep your air fryer clean between uses. That routine can improve cooking results while reducing avoidable smoke and safety risks.
How to Stop Bakers Signature Air Fryer Paper Liners From Burning
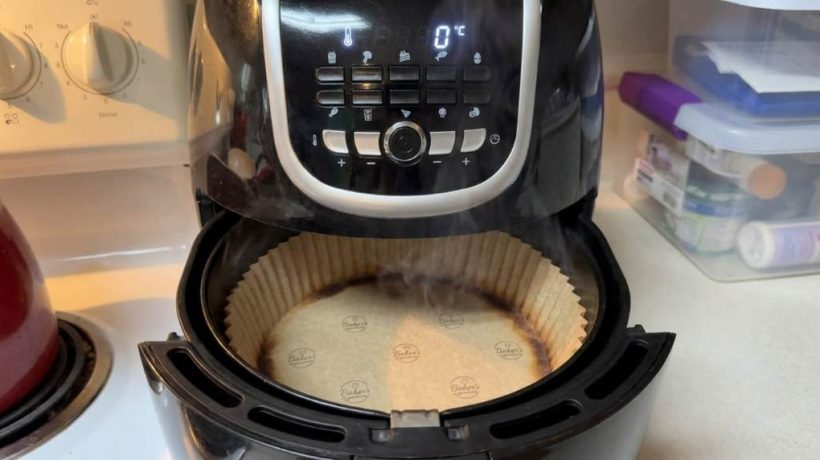
To stop Bakers Signature air fryer paper liners from burning, keep them weighed down and away from the heating element. Also, add the liner only after preheating, then use a temperature within the liner’s rated limit. Bakers Signature air fryer paper liners can make cleanup easier, but correct placement matters. A typical liner may sit in an air fryer operating around 400°F. Even a small exposed edge can scorch when strong airflow lifts it toward the heater.
Why Air Fryer Paper Liners Burn
Paper liners usually burn because hot air moves them into direct contact with the heating element. The problem becomes worse when the basket contains little food to hold the liner down.
Additionally, excessive temperature can darken parchment quickly, especially around exposed edges. Therefore, burning usually signals a placement or temperature problem rather than a simple liner defect.
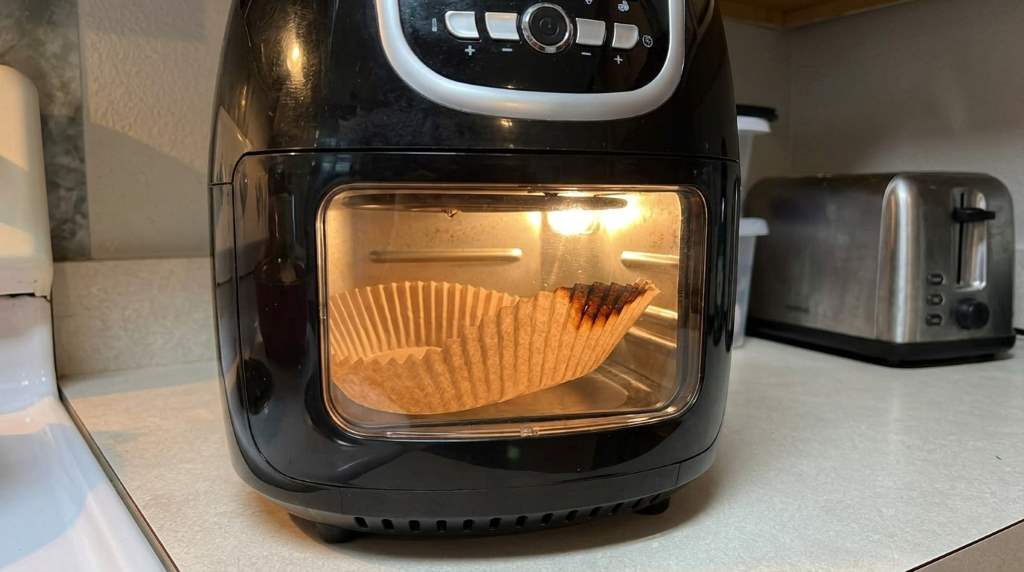
The Main Cause Is Loose Paper
An air fryer creates powerful circulating airflow inside a small cooking chamber. Consequently, a lightweight liner can lift, curl, fold, or shift during cooking.
Once the paper rises toward the heating element, concentrated heat can scorch the exposed section. That situation can happen within minutes when the liner lacks enough food weight.
Preheating Can Create Another Problem
Never place a loose paper liner inside an empty air fryer during preheating. Without food covering it, airflow can lift the liner toward the heating element.
Instead, preheat the appliance first when your recipe requires preheating. Then place the liner inside and immediately cover it with enough food.
How to Prevent Bakers Signature Liners From Burning
The safest approach combines proper timing, correct positioning, suitable temperature, and enough food coverage. Follow these steps before starting your next air fryer cycle.
1. Preheat the Air Fryer First
If your recipe calls for preheating, complete that step before inserting the paper liner. This simple habit prevents an empty liner from circulating inside the hot chamber.
After preheating, carefully place the liner into the basket. Immediately add food so the paper remains firmly against the cooking surface.
2. Keep the Liner Completely Inside the Basket
Check the liner before cooking and make sure no section extends above the basket rim. Exposed paper can catch stronger airflow and move toward the heater.
If the liner looks oversized, use a correctly sized liner for your basket. A close fit reduces loose edges and keeps the paper more stable.
3. Cover the Liner With Enough Food
Food provides the weight that keeps parchment positioned during cooking. Spread food across the liner instead of placing everything in one small area.
For small portions, use a smaller liner that matches the food area. This approach reduces exposed paper and limits unnecessary movement.
4. Avoid Excessive Cooking Temperatures
Always check the temperature guidance provided with your specific liner before cooking. Parchment products can tolerate heat only within their stated operating limits.
Furthermore, avoid raising the temperature simply to shorten cooking time. Higher heat can increase scorching around exposed edges and thin sections.
5. Keep Paper Away From the Heating Element
Look inside the air fryer before starting and identify where the heating element sits. Keep the liner positioned well below that area throughout cooking.
If your appliance design leaves little clearance, paper liners may not suit that cooking setup. In that case, consider an approved reusable silicone accessory instead.
Check the Liner Size Before Cooking
Liner size matters because oversized paper creates unnecessary exposed areas around the food. Those loose sections can fold upward as the fan circulates hot air.
For example, Baker’s Signature offers different liner sizes for different air fryer basket capacities. Therefore, match the liner dimensions with your appliance rather than assuming every sheet fits.
- Measure the basket before buying liners.
- Match round liners with round baskets when appropriate.
- Keep square liners inside square cooking baskets.
- Avoid liners that rise significantly above the basket walls.
- Replace badly folded or damaged liners before cooking.
Use the Right Amount of Food
Food coverage plays an important role because it holds parchment against the basket. However, overloading the basket can create a separate airflow problem.
Instead, spread food in an even layer whenever possible. Leave enough space for hot air to circulate around the food without lifting exposed paper.
Small Portions Need Extra Attention
Small meals often leave large sections of parchment uncovered. Therefore, they can create more opportunities for airflow to move the liner.
Use a smaller liner when appropriate, or reduce exposed paper while keeping the cooking surface properly covered. Never use heavy objects that the appliance manufacturer does not approve.
Check the Liner Before Every Cooking Cycle
A quick inspection can prevent many burning problems before they start. Look for curled corners, torn sections, excessive folds, and paper extending beyond the basket.
Also, check whether previous cooking left grease or food residue on the liner. Replace heavily damaged parchment instead of trying to reuse it.
- Inspect every corner before use.
- Flatten obvious folds when practical.
- Remove torn or badly scorched sheets.
- Confirm that food will hold the liner down.
- Check that paper cannot reach the heating element.
What to Do If the Liner Starts Burning
If you see smoke, scorching, or flames, stop the air fryer immediately. Do not continue cooking while the paper remains near the heating element.
Keep the appliance closed when appropriate so you do not feed additional oxygen into a developing fire. Follow your air fryer’s safety instructions and allow the unit to cool completely.
Do Not Pull Burning Paper Out Immediately
Hot paper can cause burns when you try removing it too quickly. Instead, stop the appliance and wait until handling the basket becomes safe.
After cooling, inspect the basket, heating area, and surrounding surfaces for remaining paper. Remove all residue before using the appliance again.
Why Cutting the Liner Can Help
Sometimes a liner fits the basket poorly because its dimensions exceed the available cooking surface. Reducing unnecessary exposed material can improve stability when the product instructions allow it.
However, do not modify a liner if cutting could compromise its intended design. A properly sized liner usually provides a better solution than excessive trimming.
Should You Use Liners Without Food?
No, you should not run a loose paper liner inside an operating air fryer without food holding it down. Strong airflow can move lightweight parchment toward hot internal components.
This rule becomes especially important during preheating. Always follow your appliance and liner manufacturer’s instructions for safe use.
Temperature, Food, and Airflow Work Together
Burning rarely comes from one factor alone because several conditions can interact. High heat, exposed paper, strong airflow, and insufficient food coverage can create a dangerous combination.
Therefore, fixing only the temperature may not solve the problem. Keep the paper secured while also controlling temperature and placement.
| Problem | Likely Cause | Practical Fix |
|---|---|---|
| Corner burns | Exposed paper lifts | Cover more of the liner with food |
| Whole liner moves | Too little food weight | Add food immediately after placement |
| Paper darkens quickly | Excessive heat | Lower temperature within recipe limits |
| Paper touches heater | Oversized or loose liner | Use the correct liner size |
| Smoke appears | Scorching or food residue | Stop cooking and inspect after cooling |
Common Mistakes That Cause Burning
Many liner problems come from small habits that seem harmless during busy cooking sessions. Fortunately, most of these mistakes have simple solutions.
- Placing parchment inside before preheating.
- Running the liner without food on top.
- Using a liner larger than the basket.
- Cooking at temperatures beyond the product guidance.
- Leaving loose corners exposed to strong airflow.
- Reusing damaged or heavily scorched parchment.
- Ignoring smoke or unusual burning smells.
When You Should Stop Using Paper Liners
Paper liners are optional accessories, not essential air fryer components. If your appliance repeatedly moves or scorches them, stop using them until you identify the cause.
Likewise, stop using a liner if it repeatedly contacts the heating element. A reusable accessory approved for your specific appliance may offer a better fit.
Consider a Silicone Alternative
A properly sized silicone air fryer insert can reduce concerns about loose parchment moving around. However, confirm that the accessory suits your appliance before using it.
Silicone inserts can also affect airflow and cooking performance when they cover too much of the basket. Therefore, proper sizing still matters even after switching materials.
A Simple Pre Cooking Safety Routine
A short inspection routine can make liner use much safer and more predictable. Complete these checks before pressing the start button.
- Confirm the liner matches the basket size.
- Preheat the air fryer without the loose liner.
- Place the liner flat inside the basket.
- Cover the liner promptly with food.
- Check that no paper reaches the heating element.
- Use the recommended cooking temperature.
- Stop immediately if smoke or burning appears.
How to Get Better Results Without Burning
Safe liner use does not require complicated techniques. Instead, focus on keeping the paper stable while preserving enough airflow for proper cooking.
Arrange food evenly across the liner, then check exposed edges before starting. Additionally, avoid covering more of the basket than necessary because excessive coverage can affect circulation.
Final Takeaway
To stop Bakers Signature air fryer paper liners from burning, preheat first, then add the liner and cover it with food. Use the correct size, stay within the recommended temperature range, and keep paper away from the heating element.
Most importantly, never ignore scorching, smoke, or repeated liner movement. Apply these simple checks before your next meal, and your air fryer routine should become safer and easier to manage.
If your liner continues burning despite correct placement and temperature, stop using it and check your appliance instructions. When necessary, switch to an approved reusable accessory that fits your specific basket.
Frequently Asked Questions
Can Bakers Signature air fryer liners catch fire?
Yes, exposed parchment can burn when airflow moves it close to the heating element.
Can I preheat an air fryer with a paper liner inside?
No, avoid leaving a loose liner inside during preheating because airflow can lift it toward the heater.
Why does my air fryer liner keep moving?
The liner usually moves because insufficient food weight allows circulating air to lift the exposed paper.
Should the liner cover the entire basket?
The liner should fit the cooking surface appropriately without creating large loose sections around the basket.
What should I do if my liner starts smoking?
Stop the appliance immediately, allow it to cool safely, and inspect the liner and heating area.
Why Is My Aroma Digital Rice Cooker Burning Rice?
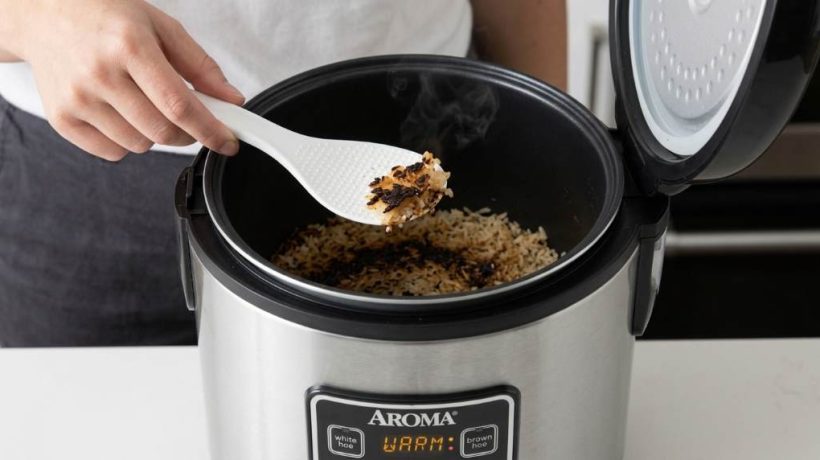
If your Aroma digital rice cooker burns rice, incorrect water levels, residue, or sensor problems usually cause it. A typical rice cooking cycle lasts about 20 to 40 minutes, depending on rice type and quantity.
Even small changes in water, rice volume, or heat sensing can create scorched bottoms. This guide explains the causes, fixes, cleaning steps, and warning signs for your Aroma digital rice cooker.
Why Does an Aroma Digital Rice Cooker Burn Rice?
An Aroma cooker can burn rice when the cooking pot loses enough moisture before cooking finishes. Once the water disappears, the heating plate can continue transferring strong heat.
Normally, the cooker changes temperature after detecting that most water has evaporated. However, incorrect measurements or sensor problems can interrupt that process.
Several issues can create this problem, so inspect the simple causes before assuming the cooker needs replacement.
- Too little water
- Incorrect rice to water ratios
- Excess rice in the cooking pot
- Dirty temperature sensors
- Food residue beneath the inner pot
- A damaged or warped cooking pot
- Uneven contact with the heating plate
- Using the wrong cooking program
- Leaving rice on Keep Warm too long
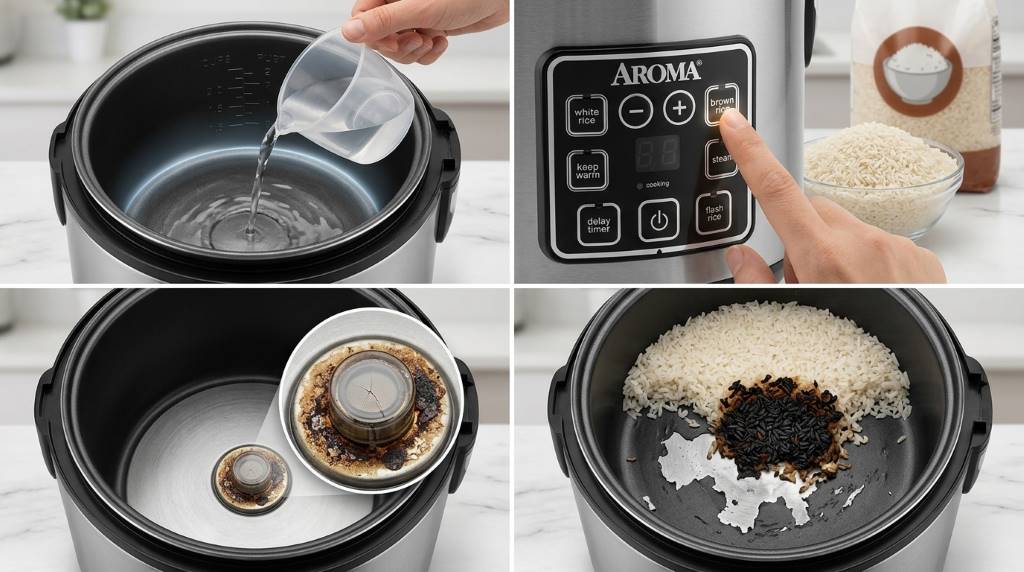
1. Check the Rice to Water Ratio
The most common cause involves insufficient water during the cooking cycle. Rice needs enough moisture to absorb water and soften without exposing its bottom to excessive heat.
Start with the measuring instructions supplied for your specific Aroma model. Different rice varieties and programs can require different water amounts.
Why Water Levels Matter
White rice generally needs less water than brown rice because brown rice retains its outer bran layer. Consequently, using a white rice ratio for brown rice can produce undercooked grains.
However, adding excessive water can also create poor results. Too much water may produce mushy rice, while too little can encourage scorching.
Use the cooker cup supplied with your appliance whenever possible. Also, fill water according to the markings inside the cooking pot.
2. Measure Rice Before Adding Water
Measurement errors can change the cooking balance considerably. Therefore, always measure dry rice before placing it inside the inner pot.
Then rinse the rice when appropriate and drain it consistently. Extra water from inconsistent rinsing can alter the final cooking texture.
For repeatable results, use the same measuring cup and preparation method each time. This approach makes troubleshooting much easier.
3. Clean the Heating Plate and Sensor
A dirty heating area can prevent the inner pot from sitting correctly. As a result, the cooker may transfer heat unevenly across the pot.
Remove the inner pot and inspect the heating plate underneath. Look for dried rice, starch, grease, crumbs, or other residue.
Clean the area after unplugging the appliance and allowing it to cool completely. Use a soft, slightly damp cloth rather than abrasive materials.
Pay Attention to the Temperature Sensor
Many digital rice cookers rely on temperature changes to determine when cooking should transition. A dirty sensor can interfere with that temperature detection.
Inspect the small sensor area in the center of the heating plate. Keep it clean, dry, and free from food particles.
Never pour water directly into the cooker base. Moisture inside the electrical housing can create a serious safety hazard.
4. Make Sure the Inner Pot Sits Correctly
The inner pot should sit flat against the heating surface. Even a small obstruction underneath can create uneven heating.
Before starting a cycle, rotate the pot gently into position. Check that it does not wobble, tilt, or sit unusually high.
Also inspect the bottom of the pot for dents or warping. A damaged base can prevent proper contact with the heating plate.
5. Avoid Overloading the Cooker
Adding too much rice can interfere with proper water distribution. Moreover, overloaded pots may cook unevenly from the center toward the edges.
Check your model’s maximum capacity before preparing large batches. Remember that cooked rice expands considerably during cooking.
For consistent results, stay comfortably below the maximum capacity when troubleshooting burning. Smaller batches can also help identify whether capacity causes the problem.
6. Use the Correct Cooking Setting
Aroma digital cookers can offer several programs for different foods and rice varieties. Each program controls cooking conditions differently.
Using a specialized setting for the wrong food can therefore produce poor texture. For example, brown rice generally benefits from its designated cooking program.
Check the control panel before starting the cycle. Select the setting that matches the rice variety and preparation method.
7. Consider the Type of Rice
Different rice varieties absorb water at different rates. Therefore, one measurement method cannot always deliver identical results.
Brown rice, jasmine rice, basmati rice, sushi rice, and wild rice can behave differently. Adjust preparation according to the cooker instructions for each variety.
Additionally, older rice can sometimes require slightly different preparation than freshly packaged rice. Keep your method consistent while testing adjustments.
8. Rinse Rice Properly
Rinsing removes excess surface starch from many rice varieties. Excess starch can create a sticky layer that settles against the cooking surface.
Place the rice in a separate bowl or suitable strainer before rinsing. Continue until the water becomes noticeably clearer.
Afterward, drain the rice consistently before adding it to the cooking pot. Avoid leaving large amounts of rinse water behind.
9. Check Whether Keep Warm Is Causing the Burning
Sometimes the cooker does not burn rice during cooking itself. Instead, extended Keep Warm operation can dry the bottom and create browning.
Keep Warm maintains heat after the cooking cycle ends. Over time, moisture gradually leaves the rice, especially from the bottom layer.
If fresh rice tastes fine initially but develops a hard, brown base later, Keep Warm may cause the issue. Serve the rice sooner or transfer it into another container.
Signs Keep Warm Causes the Problem
- The rice looks normal immediately after cooking.
- The bottom becomes dry after extended holding.
- The upper rice remains soft while the bottom hardens.
- Burning appears mainly after the cooking cycle ends.
10. Inspect the Cooking Pot for Damage
The inner pot directly affects how heat reaches the rice. Scratches, dents, warping, or damaged surfaces can affect cooking performance.
Remove the pot and place it on a flat surface. If it rocks or fails to sit evenly, inspect it closely for deformation.
Do not continue using a severely damaged pot. Replacing the compatible inner pot can solve problems caused by poor heating contact.
11. Reset Your Aroma Rice Cooker
A basic reset can help after unusual cooking behavior or control issues. First, stop the cooking cycle and unplug the appliance.
Allow the cooker to cool before reconnecting it. Then prepare a small batch using the correct rice and water measurements.
If the cooker repeatedly burns properly measured rice after cleaning, resetting probably will not solve the underlying problem. At that point, inspect the appliance more carefully.
12. Run a Simple Troubleshooting Test
A controlled test can help identify whether the problem involves ingredients or the appliance. Use a small, familiar batch of white rice for this test.
Follow these steps carefully:
- Unplug and clean the cooker base.
- Clean the heating plate and temperature sensor.
- Inspect the inner pot for dents or warping.
- Measure the rice using the supplied cup.
- Use the recommended water level.
- Place the pot firmly into position.
- Select the appropriate rice setting.
- Observe the rice immediately after cooking.
If the rice cooks normally, your earlier preparation method likely caused the burning. If scorching continues, investigate the appliance itself.
What If My Aroma Rice Cooker Still Burns Rice?
Persistent burning can indicate a temperature sensing or heating problem. The cooker may fail to reduce heating when the cooking cycle reaches its transition point.
At that stage, stop repeatedly testing the appliance with large batches. Repeated scorching wastes food and can worsen damage to the cooking pot.
Check the model specific instructions for troubleshooting procedures. If the cooker still behaves abnormally, contact the manufacturer or a qualified appliance technician.
When Should You Replace the Rice Cooker?
You may need replacement when the appliance repeatedly overheats despite correct preparation. Physical damage, electrical faults, or unreliable temperature control can make continued use impractical.
However, replacement should not become the first solution. Cleaning, correct measurements, proper placement, and suitable settings solve many burning problems.
Consider replacement when several controlled tests produce the same scorching result. Also stop using the cooker if you notice smoke, damaged wiring, unusual electrical smells, or other unsafe behavior.
How to Prevent Burned Rice in the Future
Prevention becomes easier once you establish a consistent cooking routine. Small habits can keep the rice cooker performing more predictably.
- Use the supplied measuring cup.
- Follow the correct water markings.
- Match the cooking program to your rice.
- Rinse rice consistently when appropriate.
- Clean the heating plate regularly.
- Keep the temperature sensor free from residue.
- Check the inner pot for damage.
- Avoid exceeding the recommended capacity.
- Do not leave cooked rice warm for excessive periods.
- Inspect unusual cooking behavior early.
A Practical Cleaning Routine
Regular cleaning protects both cooking performance and food quality. Always unplug the appliance before cleaning the cooker base.
Wash the removable inner pot according to its care instructions. Wipe the heating plate carefully and keep the electrical base dry.
Also clean removable steam components when your model includes them. Finally, allow washable components to dry fully before reassembly.
Quick Diagnosis: What the Burn Pattern Tells You
| Burning Pattern | Likely Cause | First Action |
|---|---|---|
| Thin brown layer | Low water or extended warming | Check water and serving time |
| Heavy bottom scorching | Sensor or heating issue | Clean and inspect the sensor |
| Uneven burning | Poor pot contact | Check the inner pot base |
| Burning after Keep Warm | Extended warming | Transfer rice sooner |
| Burning every cycle | Possible appliance fault | Stop testing and inspect further |
Frequently Asked Questions
Why does my Aroma rice cooker burn rice on the bottom?
Low water, residue, poor pot contact, or excessive heating can cause rice to burn underneath.
How much water should I add to my Aroma rice cooker?
Use the water markings and rice specific instructions provided for your particular Aroma model.
Can a dirty sensor make a rice cooker burn rice?
Yes, residue around the temperature sensor can interfere with heat detection and cause improper cooking.
Why does rice burn only during Keep Warm?
Extended warming gradually removes moisture, which can dry and brown the rice touching the bottom.
Should I replace my Aroma rice cooker if it keeps burning rice?
Consider replacement after cleaning and correct measurements fail to solve repeated scorching.
Conclusion
An Aroma digital rice cooker usually burns rice because of water, measurement, cleaning, contact, or temperature issues. Start with simple fixes before assuming the appliance has failed.
Clean the heating area, verify measurements, inspect the pot, and test a small batch. If burning continues despite correct preparation, stop using the appliance and seek qualified support.
Take a few minutes to inspect your cooker before your next batch. A consistent preparation routine can restore better rice and prevent unnecessary scorching.
How to Fix an Amazon Basics 2-Slice Toaster
If your Amazon Basics 2-slice toaster will not pop up, first unplug it and let it cool completely. Then check for trapped bread, excess crumbs, or a lever that fails to lock and release properly. The Amazon Basics 2-slice toaster normally uses a mechanical lever and timed heating cycle. Many models also include two slots and several browning settings. Toaster, toaster oven, and countertop broiler equipment accounts for about 1,428 home structure fires annually. Those incidents also cause an estimated 43 civilian injuries each year, so a stuck mechanism deserves attention.
Why an Amazon Basics Toaster May Not Pop Up
A toaster that stays down usually has a mechanical, electrical, or obstruction related problem. Fortunately, you can safely check several simple causes before considering professional service.
First, determine whether the bread remains trapped or the lever itself stays down. That distinction helps you avoid unnecessary troubleshooting and prevents unsafe handling.
The toaster relies on the lever moving freely throughout its operating cycle. Crumbs, food debris, damaged bread, or internal mechanical wear can interfere with that movement.
Common Causes of a Stuck Toasting Lever
- Bread has become lodged inside the slot.
- Crumbs have accumulated around the internal mechanism.
- The lever does not travel fully downward.
- The lever moves down but fails to release.
- An internal mechanical component has worn out.
- The toaster has developed an electrical or control fault.
Start with the simplest possibility before assuming the toaster needs replacement. A careful inspection often identifies an obstruction without opening the appliance.
Step 1: Unplug the Toaster and Let It Cool
Safety comes before every troubleshooting step because the heating elements can remain extremely hot. Press the cancel button if it responds, then disconnect the power plug.
Place the toaster on a stable, heat resistant surface and allow it to cool completely. Never reach inside a warm toaster because hidden heating elements can cause serious burns.
Also, never try to remove trapped bread while the toaster remains connected to power. Disconnecting the appliance eliminates the immediate electrical supply while you inspect the problem.
Step 2: Check Whether Bread Is Blocking the Mechanism
Look into both slots after the toaster has cooled completely. Check whether bread has expanded, folded, or shifted against the internal guides.
Thick bread can sometimes create enough resistance to prevent smooth movement. Raisins, seeds, crust fragments, and other food pieces can also interfere with normal operation.
If you see trapped bread, gently remove it without forcing the lever or touching the heating elements. Never use a metal fork, knife, or other conductive object.
What to Do When Bread Remains Stuck
- Unplug the toaster from the wall outlet.
- Wait until every hot surface cools completely.
- Lift the lever gently if it still moves.
- Remove accessible bread without touching heating elements.
- Stop if the bread resists removal.
Do not force a lodged item because excessive pressure can damage internal components. If you cannot remove the bread safely, stop troubleshooting and seek qualified service.
Step 3: Clean the Crumb Tray
Crumbs naturally collect during regular toaster use, especially when you toast frequently. Over time, accumulated debris can affect cleaning and create unwanted heat or smoke risks.
Unplug the appliance before removing its crumb tray. Pull the tray out carefully, empty the contents, and wipe it clean.
Allow the tray to dry completely before returning it to the toaster. Make sure it sits correctly before you operate the appliance again.
Why Crumb Cleaning Matters
Crumb buildup does not always directly cause a stuck lever, but it can contribute to poor appliance condition. Regular cleaning also makes it easier to identify food debris that may have entered unwanted areas.
Do not pour water into the toaster or immerse any part containing electrical components. Instead, use a dry or slightly damp cloth for appropriate exterior cleaning.
Step 4: Test the Toasting Lever Without Bread
After cleaning and cooling, inspect the lever movement without inserting bread. The lever should move smoothly and lock into its operating position when power reaches the appliance.
If the lever feels unusually stiff, loose, or unstable, avoid repeatedly forcing it. Mechanical resistance can indicate an internal problem that cleaning cannot correct.
If the lever moves normally but refuses to stay down, the issue may involve the locking mechanism. That condition generally requires service rather than additional household cleaning.
Step 5: Check the Electrical Outlet
Sometimes the toaster appears faulty because the electrical supply has a problem. Test the wall outlet with another suitable appliance that you know works correctly.
If the other appliance also fails, inspect the circuit breaker or outlet. Restore power only when the electrical system appears safe and functional.
However, do not keep testing a toaster that produces sparks, unusual heat, burning smells, or damaged cord insulation. Those symptoms require immediate disconnection and professional assessment.
Step 6: Use the Cancel Function
Many Amazon Basics toaster models include a cancel control that stops the current cycle. Pressing cancel should interrupt the cycle and release the toast mechanism.
If cancel works but automatic popping does not, the problem may involve the timing or control system. If neither function works, the mechanism may have a more serious fault.
Do not repeatedly cycle a malfunctioning toaster to see whether it eventually works. Repeated operation can increase heat exposure and worsen an existing electrical or mechanical problem.
Step 7: Check the Browning Setting
A high browning setting increases the length of the heating cycle. Therefore, darker settings can make the toast remain down longer than expected.
This behavior does not necessarily indicate a malfunction. However, the lever should still release automatically when the programmed cycle finishes.
Try a moderate browning setting after completing the earlier safety checks. Observe the cycle without leaving the toaster unattended.
Step 8: Test With Different Bread
Bread thickness and moisture can affect how smoothly slices move inside toaster slots. Very thick slices can create additional resistance around the lifting mechanism.
Test the toaster with a standard slice that fits comfortably. Avoid forcing oversized bread into the slots because the toaster needs enough clearance for normal movement.
If normal bread works correctly, the problem may involve the original bread rather than the toaster. If every slice causes the same problem, investigate the appliance further.
What If the Lever Stays Down After Cleaning?
A lever that remains stuck after cleaning may indicate internal mechanical damage. At that point, further household troubleshooting provides limited value.
Internal toaster components can include springs, latches, switches, and thermal controls. Opening the housing can expose you to electrical hazards and may damage safety components.
For that reason, do not disassemble the toaster unless you have appropriate electrical repair training. Instead, contact the manufacturer or a qualified appliance technician.
When You Should Stop Using the Toaster
A toaster that fails to pop up deserves extra caution when other warning signs appear. Certain symptoms indicate a potential electrical or fire hazard rather than a simple mechanical obstruction.
- Burning plastic or electrical odors appear.
- The power cord becomes unusually hot.
- You notice sparks or visible electrical arcing.
- The housing becomes abnormally hot.
- The toaster activates unpredictably.
- The lever remains down after the cycle ends.
- The toaster produces smoke during normal operation.
- The appliance has visible physical damage.
Immediately unplug the appliance when you notice these symptoms, provided you can do so safely. Do not continue testing it simply because the toaster still produces heat.
Simple Maintenance to Prevent Future Problems
Regular maintenance can reduce debris related problems and help you notice mechanical changes earlier. A toaster does not need complicated maintenance to remain in good working condition.
Follow a Simple Cleaning Routine
- Empty the crumb tray regularly.
- Clean the exterior with a suitable cloth.
- Keep the slots free from visible food debris.
- Never insert metal objects into the slots.
- Keep the toaster away from splashing water.
- Allow the appliance to cool before cleaning.
Also, avoid shaking the toaster aggressively to remove crumbs. Strong impacts can damage internal components and create new mechanical problems.
Use Suitable Bread Sizes
Choose bread that fits comfortably inside the toaster slots. Thick or oversized slices can become trapped and place unnecessary pressure on the lifting system.
Remove loose toppings before toasting whenever practical. Small food particles can fall into the appliance and accumulate around internal components.
Should You Repair or Replace the Toaster?
The right decision depends on the exact failure and the appliance’s condition. Simple cleaning or safe removal of trapped bread may restore normal operation.
However, internal mechanical or electrical failures deserve professional attention. If repair costs approach the value of a replacement toaster, replacement may make more practical sense.
Before making that decision, check the model number and purchase documentation. Different Amazon Basics toaster models can have different controls, specifications, and troubleshooting procedures.
A Practical Troubleshooting Checklist
| Problem | First Action | Next Step |
|---|---|---|
| Bread remains stuck | Unplug and cool | Remove bread carefully |
| Lever feels stiff | Stop forcing it | Inspect for obstruction |
| Lever will not lock | Check power supply | Seek service if unchanged |
| Toast stays down | Press cancel | Stop using if it remains stuck |
| Smoke appears | Cancel and unplug | Clean only after cooling |
| Burning smell appears | Disconnect power | Do not continue testing |
This checklist helps separate simple user maintenance from faults that require professional attention. Most importantly, never sacrifice electrical safety to save a small appliance.
How to Safely Test the Toaster After Cleaning
Only test the toaster after removing obstructions and confirming that it looks undamaged. Place it on a clear, stable surface away from curtains and other combustible materials.
Insert a normal slice of bread and select a moderate browning setting. Stay nearby and watch whether the lever locks, the cycle completes, and the toast releases normally.
After the first successful cycle, perform another test only if everything appears normal. Stop immediately if the lever sticks again or unusual smells develop.
When Professional Help Makes Sense
Professional service makes sense when the toaster repeatedly fails despite cleaning and safe basic checks. It also makes sense when you notice damaged wiring, electrical odors, or abnormal heating.
A qualified technician can inspect internal switches, mechanical components, wiring, and thermal controls. That approach provides a safer solution than attempting an unfamiliar electrical repair yourself.
For a low cost countertop appliance, replacement can also provide better value. However, make that decision only after confirming the actual problem and checking available support options.
Frequently Asked Questions
Why won’t my Amazon Basics toaster pop up?
A trapped slice, obstructed mechanism, lever problem, or internal fault can prevent the toast from popping up.
Can crumbs make a toaster lever stick?
Yes, accumulated crumbs can interfere with normal operation and can contribute to poor appliance performance.
Can I use a fork to remove stuck toast?
No, never use a metal utensil because it can contact electrical components or heating elements.
Should I keep using a toaster that smells burnt?
No, unplug the toaster and stop using it when an unusual burning smell persists.
Is a stuck toaster lever repairable?
Some mechanical problems can receive professional repair, but replacement may provide better value for inexpensive appliances.
Final Takeaway
When an Amazon Basics 2 slice toaster will not pop up, start with safety, cooling, and obstruction checks. Then clean the crumb tray, inspect lever movement, verify the outlet, and test carefully.
If the mechanism still fails, do not force the lever or open the housing without proper electrical training. Instead, contact qualified service or consider replacement when internal failure makes repair impractical.
Use the troubleshooting checklist above before buying another toaster. Most importantly, stop using the appliance whenever smoke, sparks, burning odors, damaged wiring, or abnormal heat appear.
Amazon Basics 20x20x1 Air Filter Whistling: Causes and Fixes
Your Amazon Basics 20x20x1 air filter may whistle because air squeezes through restricted or poorly sealed areas. A clogged filter, incorrect installation, excessive airflow, or duct leakage commonly creates this sound. The Amazon Basics 20x20x1 air filter should allow steady airflow without producing a sharp whistle. Even a small airflow restriction can create noticeable pressure changes inside your HVAC system. Manufacturers commonly recommend checking filters around every 30 to 90 days, depending on household conditions.
What Causes an Air Filter to Whistle?
A whistling filter usually signals an airflow problem rather than a defective filter. Air accelerates when it passes through a narrow opening, which can create a high pitched sound.
Therefore, the filter itself may work correctly while another component creates the noise. The most useful approach involves checking the filter, housing, airflow, and surrounding ductwork.
Restricted Airflow
A dirty filter forces your HVAC system to pull air through a smaller usable surface area. Consequently, the system creates stronger suction around the filter.
That stronger suction can make air squeeze through tiny gaps around the filter frame. The resulting turbulence often produces a noticeable whistle during heating or cooling cycles.
Improper Filter Installation
Your filter must sit squarely inside its designated slot. If the frame sits crooked, air can pass around its edges.
That bypass airflow can create turbulence between the filter and housing. Additionally, a loose fit can produce vibrations that make the whistle sound louder.
Incorrect Filter Size
A 20x20x1 filter should match the HVAC system’s specified dimensions. However, nominal filter sizes can differ slightly from their actual measurements.
A filter that fits loosely can allow air around the frame. Meanwhile, an oversized filter can restrict airflow or prevent proper seating.
Excessive HVAC Airflow
Your blower fan may move more air than the filter system can handle quietly. High blower settings can increase pressure across the filter.
As a result, even a clean filter may whistle under certain operating conditions. A technician can measure system airflow and static pressure when needed.
How to Stop the Whistling Noise
Start with simple checks before investigating deeper HVAC problems. Most filter related whistles require only a few careful adjustments.
1. Turn Off the HVAC System
Switch off your heating or cooling system before removing the filter. This prevents moving air from complicating your inspection.
Next, wait briefly until the blower stops completely. Then remove the filter carefully without bending its frame.
2. Inspect the Filter Condition
Hold the filter under good lighting and inspect its entire surface. Look for heavy dust, pet hair, and visible debris.
If the filter looks heavily loaded, replace it with the correct replacement. Never wash a disposable filter unless its packaging specifically permits cleaning.
3. Check the Airflow Direction
Most pleated filters include an arrow showing the correct airflow direction. The arrow should point toward the blower or air handling equipment.
Installing the filter backward can increase airflow resistance. Therefore, always follow the directional marking before restarting your HVAC system.
4. Confirm the Filter Fits Properly
Slide the filter completely into its slot without forcing the frame. Check whether the filter sits evenly against the surrounding housing.
Small gaps deserve attention because bypass airflow can produce sharp sounds. However, do not permanently seal removable filter access panels.
5. Inspect the Filter Door
A loose filter door can vibrate when the blower operates. It can also create an opening that pulls air through a narrow gap.
Close the panel securely after installing the filter. Then listen for changes during the next heating or cooling cycle.
Why a Clean Filter Can Still Whistle
A clean filter does not automatically rule out airflow problems. Your HVAC system can create excessive pressure even with a new filter.
For example, restrictive ductwork can force air through smaller passages. Likewise, closed supply registers can increase pressure throughout parts of the system.
Blocked Return Air
Your HVAC system needs unrestricted return air to operate efficiently. Furniture, curtains, rugs, or household items can obstruct return grilles.
When return airflow drops, the blower may pull harder through the available opening. Consequently, the filter can whistle even when it looks perfectly clean.
Closed Supply Registers
Closing several supply registers can change the system’s airflow balance. The blower still attempts to move air through fewer open outlets.
This imbalance can increase pressure and create unexpected sounds. Open the registers fully and observe whether the whistle changes.
Dirty Evaporator Coil
A dirty evaporator coil can restrict airflow after air passes through the filter. Dust buildup can gradually reduce the available air passage.
In that situation, replacing the filter alone may not solve the noise. A qualified HVAC technician should inspect the coil safely.
Check for Air Leaks Around the Filter
Air leaks can create whistling when air passes through narrow openings. The filter compartment deserves particular attention because pressure changes occur there.
Listen around the filter edges while the HVAC system runs. A whistle that changes when you press the access panel suggests a sealing issue.
However, avoid covering vents or permanently modifying the filter housing yourself. Improper sealing can interfere with maintenance and system airflow.
Could the Filter Be Too Restrictive?
Some high efficiency filters create more resistance than basic filters. Your HVAC system must support the filter’s airflow requirements.
Therefore, avoid selecting a filter solely because it offers a higher filtration rating. Follow the HVAC manufacturer’s recommended filter specifications instead.
Understanding Filter Resistance
Every filter creates some resistance as air passes through its media. Dust buildup increases that resistance over time.
Higher resistance can increase blower workload and change airflow noise. Thus, the correct filter balances filtration performance with the system’s airflow capacity.
What the Whistle Can Tell You
| Whistle Behavior | Likely Cause | Recommended Action |
|---|---|---|
| Starts after filter replacement | Installation or fit issue | Recheck seating and airflow direction |
| Gets louder as filter gets dirty | Restricted filter airflow | Replace the filter |
| Continues with a new filter | System airflow restriction | Inspect return and supply airflow |
| Changes when panel moves | Air leak or vibration | Inspect the filter compartment |
| Occurs only at high fan speed | Excessive airflow or pressure | Check blower settings and static pressure |
When You Should Call an HVAC Professional
A persistent whistle deserves professional attention when basic filter checks produce no improvement. The noise may indicate a deeper airflow or ductwork problem.
Contact an HVAC professional if you notice weak airflow, unusual odors, icing, or repeated system shutdowns. These symptoms can indicate conditions that require proper testing.
A technician can measure static pressure, inspect ductwork, evaluate blower operation, and examine internal components. Those measurements provide better answers than guessing from sound alone.
How to Prevent Future Filter Whistling
Regular filter maintenance can prevent many airflow related noises. However, your replacement schedule should reflect actual household conditions.
- Inspect the filter monthly during heavy HVAC use.
- Replace heavily loaded disposable filters promptly.
- Keep return grilles clear of furniture and household items.
- Keep supply registers open unless your system allows balancing adjustments.
- Install the filter according to the airflow arrow.
- Confirm the replacement filter matches the specified size.
- Listen for new sounds after every filter replacement.
- Schedule professional inspection when noise persists.
Common Mistakes That Make Whistling Worse
Many homeowners respond to filter noise by installing an increasingly restrictive filter. That approach can increase airflow resistance instead of solving the underlying problem.
Another mistake involves ignoring the filter compartment itself. A loose panel, damaged frame, or poorly fitted filter can create surprisingly loud airflow noise.
Some homeowners also close several registers to redirect conditioned air. However, this can disrupt airflow balance and increase system pressure.
Is a Whistling Filter Dangerous?
A brief whistle does not automatically indicate an emergency. Still, persistent airflow noise deserves attention because restricted airflow can strain HVAC components.
Watch for worsening symptoms instead of ignoring the sound indefinitely. Reduced comfort, unusual cycling, icing, or weak airflow should prompt professional inspection.
Frequently Asked Questions
Why does my Amazon Basics 20x20x1 air filter whistle?
It usually whistles because restricted airflow or an imperfect filter seal creates turbulent air movement.
Can a dirty air filter cause whistling?
Yes, a loaded filter can increase airflow resistance and create stronger suction around the filter.
Should I replace a whistling air filter?
Replace it if dust buildup appears heavy or the filter has reached its normal replacement interval.
Can the wrong filter size cause whistling?
Yes, an incorrect size can create gaps or excessive restriction that produces noticeable airflow noise.
When should I call an HVAC technician?
Call a technician when whistling continues after filter checks or appears with weak airflow and other system symptoms.
Final Takeaway
Your Amazon Basics 20x20x1 air filter probably whistles because air faces restriction or escapes around the filter. Start by checking its condition, orientation, fit, filter door, and surrounding airflow.
If those checks fail, investigate return airflow, supply registers, duct restrictions, and blower settings. Do not keep replacing filters without finding the reason behind persistent noise.
Take action when the whistle first appears, and your HVAC system can often avoid unnecessary airflow stress. If the sound continues, schedule an HVAC inspection for accurate pressure and airflow testing.