How to Fix an Amazon Basics 2-Slice Toaster

Amazon Basics 20x20x1 Air Filter Whistling: Causes and Fixes
August 11, 2026
Why Is My Aroma Digital Rice Cooker Burning Rice?
August 11, 2026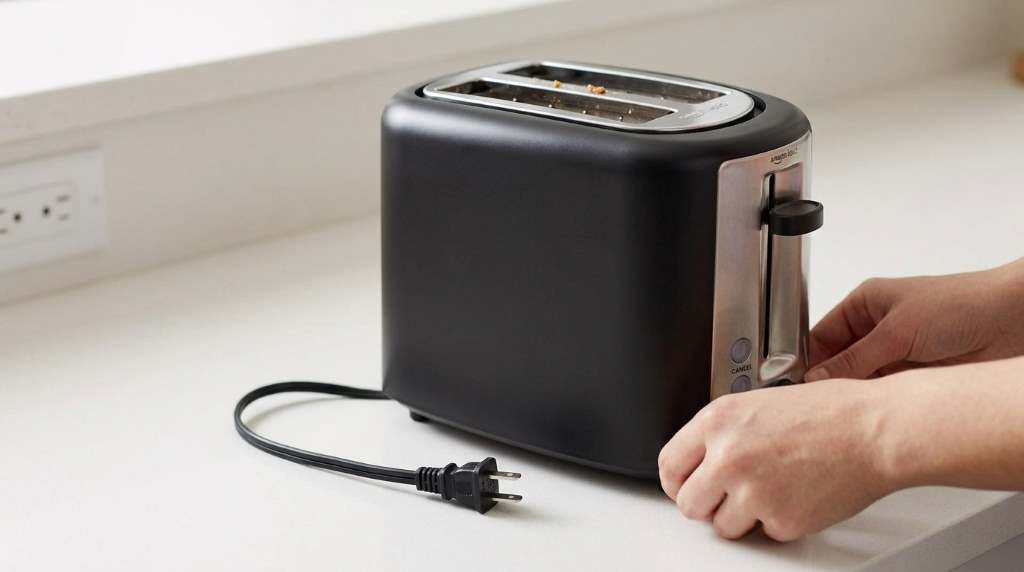
If your Amazon Basics 2-slice toaster will not pop up, first unplug it and let it cool completely. Then check for trapped bread, excess crumbs, or a lever that fails to lock and release properly. The Amazon Basics 2-slice toaster normally uses a mechanical lever and timed heating cycle. Many models also include two slots and several browning settings. Toaster, toaster oven, and countertop broiler equipment accounts for about 1,428 home structure fires annually. Those incidents also cause an estimated 43 civilian injuries each year, so a stuck mechanism deserves attention.
Why an Amazon Basics Toaster May Not Pop Up
A toaster that stays down usually has a mechanical, electrical, or obstruction related problem. Fortunately, you can safely check several simple causes before considering professional service.
First, determine whether the bread remains trapped or the lever itself stays down. That distinction helps you avoid unnecessary troubleshooting and prevents unsafe handling.
The toaster relies on the lever moving freely throughout its operating cycle. Crumbs, food debris, damaged bread, or internal mechanical wear can interfere with that movement.
Common Causes of a Stuck Toasting Lever
- Bread has become lodged inside the slot.
- Crumbs have accumulated around the internal mechanism.
- The lever does not travel fully downward.
- The lever moves down but fails to release.
- An internal mechanical component has worn out.
- The toaster has developed an electrical or control fault.
Start with the simplest possibility before assuming the toaster needs replacement. A careful inspection often identifies an obstruction without opening the appliance.
Step 1: Unplug the Toaster and Let It Cool
Safety comes before every troubleshooting step because the heating elements can remain extremely hot. Press the cancel button if it responds, then disconnect the power plug.
Place the toaster on a stable, heat resistant surface and allow it to cool completely. Never reach inside a warm toaster because hidden heating elements can cause serious burns.
Also, never try to remove trapped bread while the toaster remains connected to power. Disconnecting the appliance eliminates the immediate electrical supply while you inspect the problem.
Step 2: Check Whether Bread Is Blocking the Mechanism
Look into both slots after the toaster has cooled completely. Check whether bread has expanded, folded, or shifted against the internal guides.
Thick bread can sometimes create enough resistance to prevent smooth movement. Raisins, seeds, crust fragments, and other food pieces can also interfere with normal operation.
If you see trapped bread, gently remove it without forcing the lever or touching the heating elements. Never use a metal fork, knife, or other conductive object.
What to Do When Bread Remains Stuck
- Unplug the toaster from the wall outlet.
- Wait until every hot surface cools completely.
- Lift the lever gently if it still moves.
- Remove accessible bread without touching heating elements.
- Stop if the bread resists removal.
Do not force a lodged item because excessive pressure can damage internal components. If you cannot remove the bread safely, stop troubleshooting and seek qualified service.
Step 3: Clean the Crumb Tray
Crumbs naturally collect during regular toaster use, especially when you toast frequently. Over time, accumulated debris can affect cleaning and create unwanted heat or smoke risks.
Unplug the appliance before removing its crumb tray. Pull the tray out carefully, empty the contents, and wipe it clean.
Allow the tray to dry completely before returning it to the toaster. Make sure it sits correctly before you operate the appliance again.
Why Crumb Cleaning Matters
Crumb buildup does not always directly cause a stuck lever, but it can contribute to poor appliance condition. Regular cleaning also makes it easier to identify food debris that may have entered unwanted areas.
Do not pour water into the toaster or immerse any part containing electrical components. Instead, use a dry or slightly damp cloth for appropriate exterior cleaning.
Step 4: Test the Toasting Lever Without Bread
After cleaning and cooling, inspect the lever movement without inserting bread. The lever should move smoothly and lock into its operating position when power reaches the appliance.
If the lever feels unusually stiff, loose, or unstable, avoid repeatedly forcing it. Mechanical resistance can indicate an internal problem that cleaning cannot correct.
If the lever moves normally but refuses to stay down, the issue may involve the locking mechanism. That condition generally requires service rather than additional household cleaning.
Step 5: Check the Electrical Outlet
Sometimes the toaster appears faulty because the electrical supply has a problem. Test the wall outlet with another suitable appliance that you know works correctly.
If the other appliance also fails, inspect the circuit breaker or outlet. Restore power only when the electrical system appears safe and functional.
However, do not keep testing a toaster that produces sparks, unusual heat, burning smells, or damaged cord insulation. Those symptoms require immediate disconnection and professional assessment.
Step 6: Use the Cancel Function
Many Amazon Basics toaster models include a cancel control that stops the current cycle. Pressing cancel should interrupt the cycle and release the toast mechanism.
If cancel works but automatic popping does not, the problem may involve the timing or control system. If neither function works, the mechanism may have a more serious fault.
Do not repeatedly cycle a malfunctioning toaster to see whether it eventually works. Repeated operation can increase heat exposure and worsen an existing electrical or mechanical problem.
Step 7: Check the Browning Setting
A high browning setting increases the length of the heating cycle. Therefore, darker settings can make the toast remain down longer than expected.
This behavior does not necessarily indicate a malfunction. However, the lever should still release automatically when the programmed cycle finishes.
Try a moderate browning setting after completing the earlier safety checks. Observe the cycle without leaving the toaster unattended.
Step 8: Test With Different Bread
Bread thickness and moisture can affect how smoothly slices move inside toaster slots. Very thick slices can create additional resistance around the lifting mechanism.
Test the toaster with a standard slice that fits comfortably. Avoid forcing oversized bread into the slots because the toaster needs enough clearance for normal movement.
If normal bread works correctly, the problem may involve the original bread rather than the toaster. If every slice causes the same problem, investigate the appliance further.
What If the Lever Stays Down After Cleaning?
A lever that remains stuck after cleaning may indicate internal mechanical damage. At that point, further household troubleshooting provides limited value.
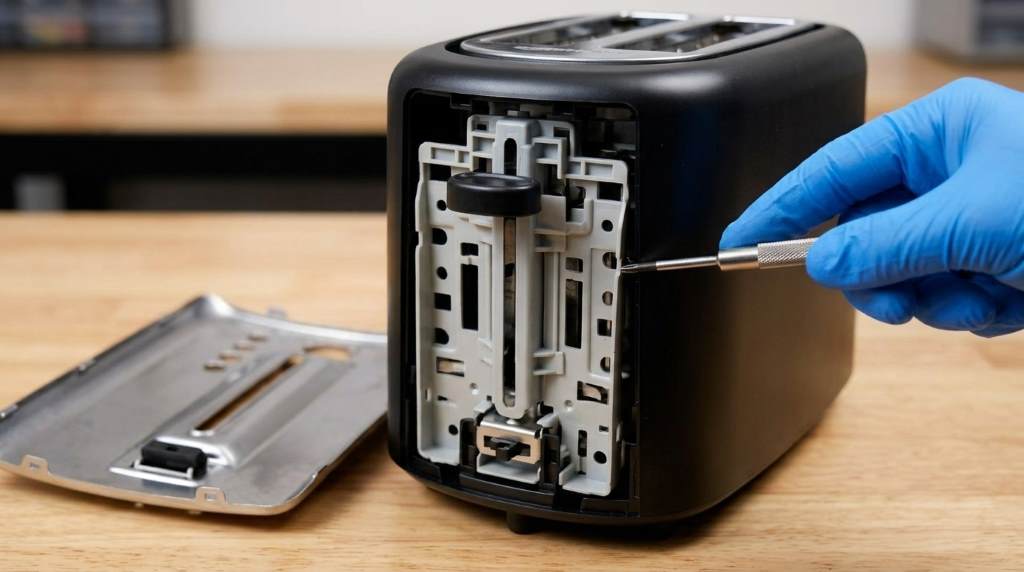
Internal toaster components can include springs, latches, switches, and thermal controls. Opening the housing can expose you to electrical hazards and may damage safety components.
For that reason, do not disassemble the toaster unless you have appropriate electrical repair training. Instead, contact the manufacturer or a qualified appliance technician.
When You Should Stop Using the Toaster
A toaster that fails to pop up deserves extra caution when other warning signs appear. Certain symptoms indicate a potential electrical or fire hazard rather than a simple mechanical obstruction.
- Burning plastic or electrical odors appear.
- The power cord becomes unusually hot.
- You notice sparks or visible electrical arcing.
- The housing becomes abnormally hot.
- The toaster activates unpredictably.
- The lever remains down after the cycle ends.
- The toaster produces smoke during normal operation.
- The appliance has visible physical damage.
Immediately unplug the appliance when you notice these symptoms, provided you can do so safely. Do not continue testing it simply because the toaster still produces heat.
Simple Maintenance to Prevent Future Problems
Regular maintenance can reduce debris related problems and help you notice mechanical changes earlier. A toaster does not need complicated maintenance to remain in good working condition.
Follow a Simple Cleaning Routine
- Empty the crumb tray regularly.
- Clean the exterior with a suitable cloth.
- Keep the slots free from visible food debris.
- Never insert metal objects into the slots.
- Keep the toaster away from splashing water.
- Allow the appliance to cool before cleaning.
Also, avoid shaking the toaster aggressively to remove crumbs. Strong impacts can damage internal components and create new mechanical problems.
Use Suitable Bread Sizes
Choose bread that fits comfortably inside the toaster slots. Thick or oversized slices can become trapped and place unnecessary pressure on the lifting system.
Remove loose toppings before toasting whenever practical. Small food particles can fall into the appliance and accumulate around internal components.
Should You Repair or Replace the Toaster?
The right decision depends on the exact failure and the appliance’s condition. Simple cleaning or safe removal of trapped bread may restore normal operation.
However, internal mechanical or electrical failures deserve professional attention. If repair costs approach the value of a replacement toaster, replacement may make more practical sense.
Before making that decision, check the model number and purchase documentation. Different Amazon Basics toaster models can have different controls, specifications, and troubleshooting procedures.
A Practical Troubleshooting Checklist
| Problem | First Action | Next Step |
|---|---|---|
| Bread remains stuck | Unplug and cool | Remove bread carefully |
| Lever feels stiff | Stop forcing it | Inspect for obstruction |
| Lever will not lock | Check power supply | Seek service if unchanged |
| Toast stays down | Press cancel | Stop using if it remains stuck |
| Smoke appears | Cancel and unplug | Clean only after cooling |
| Burning smell appears | Disconnect power | Do not continue testing |
This checklist helps separate simple user maintenance from faults that require professional attention. Most importantly, never sacrifice electrical safety to save a small appliance.
How to Safely Test the Toaster After Cleaning
Only test the toaster after removing obstructions and confirming that it looks undamaged. Place it on a clear, stable surface away from curtains and other combustible materials.
Insert a normal slice of bread and select a moderate browning setting. Stay nearby and watch whether the lever locks, the cycle completes, and the toast releases normally.
After the first successful cycle, perform another test only if everything appears normal. Stop immediately if the lever sticks again or unusual smells develop.
When Professional Help Makes Sense
Professional service makes sense when the toaster repeatedly fails despite cleaning and safe basic checks. It also makes sense when you notice damaged wiring, electrical odors, or abnormal heating.
A qualified technician can inspect internal switches, mechanical components, wiring, and thermal controls. That approach provides a safer solution than attempting an unfamiliar electrical repair yourself.
For a low cost countertop appliance, replacement can also provide better value. However, make that decision only after confirming the actual problem and checking available support options.
Frequently Asked Questions
Why won’t my Amazon Basics toaster pop up?
A trapped slice, obstructed mechanism, lever problem, or internal fault can prevent the toast from popping up.
Can crumbs make a toaster lever stick?
Yes, accumulated crumbs can interfere with normal operation and can contribute to poor appliance performance.
Can I use a fork to remove stuck toast?
No, never use a metal utensil because it can contact electrical components or heating elements.
Should I keep using a toaster that smells burnt?
No, unplug the toaster and stop using it when an unusual burning smell persists.
Is a stuck toaster lever repairable?
Some mechanical problems can receive professional repair, but replacement may provide better value for inexpensive appliances.
Final Takeaway
When an Amazon Basics 2 slice toaster will not pop up, start with safety, cooling, and obstruction checks. Then clean the crumb tray, inspect lever movement, verify the outlet, and test carefully.
If the mechanism still fails, do not force the lever or open the housing without proper electrical training. Instead, contact qualified service or consider replacement when internal failure makes repair impractical.
Use the troubleshooting checklist above before buying another toaster. Most importantly, stop using the appliance whenever smoke, sparks, burning odors, damaged wiring, or abnormal heat appear.