

How to Fix a Noisy Firegas 30-Inch Under Cabinet Range Hood
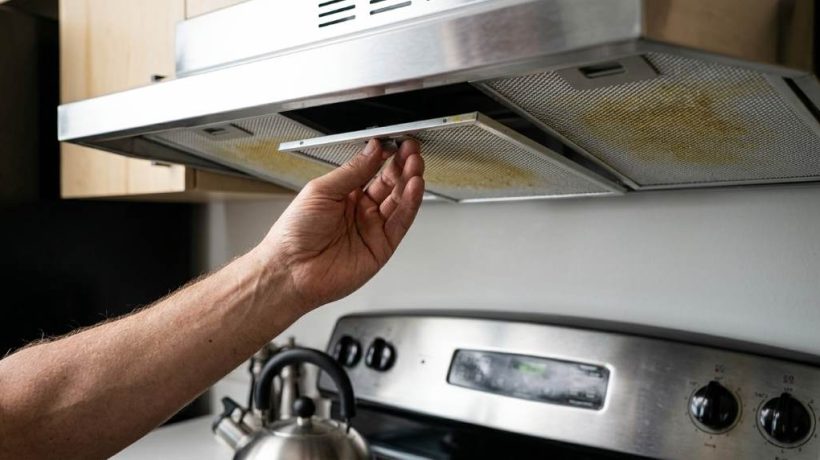
A noisy range hood usually points to loose mounting, dirty filters, airflow resistance, or a fan problem. Start by switching off power, then inspect the filter, fan area, duct path, and mounting screws carefully. The Firegas 30-inch under cabinet range hood can produce less than 57 dB at high speed. Its listed airflow reaches 300 CFM, so unusual rattling deserves attention.
Fortunately, many range hood noises come from simple problems rather than major component failures. Therefore, you can often identify the cause through a careful inspection and a few basic adjustments. This guide explains what to check, what each sound usually means, and when professional service makes sense.
Start by Identifying the Type of Noise
Before touching the hood, listen closely while the fan runs at each available speed. Different sounds often point toward different mechanical or airflow problems.
A steady rushing sound usually comes from normal air movement through the fan and ductwork. However, rattling, scraping, buzzing, clicking, or vibrating sounds deserve further inspection.
- Rattling: Often indicates a loose filter, screw, damper, or mounting component.
- Scraping: Usually suggests fan blade contact or a damaged internal component.
- Buzzing: May indicate electrical vibration, motor problems, or loose wiring components.
- Clicking: Can come from a damper, loose fan component, or foreign object.
- Strong vibration: Often points toward loose mounting or an unbalanced fan.
- Air roar: Can indicate restricted ductwork or excessive airflow resistance.
Next, run the hood briefly on low speed and then high speed. If the noise changes sharply between speeds, focus attention on the fan, airflow, and mounting system.
Safety First Before Troubleshooting
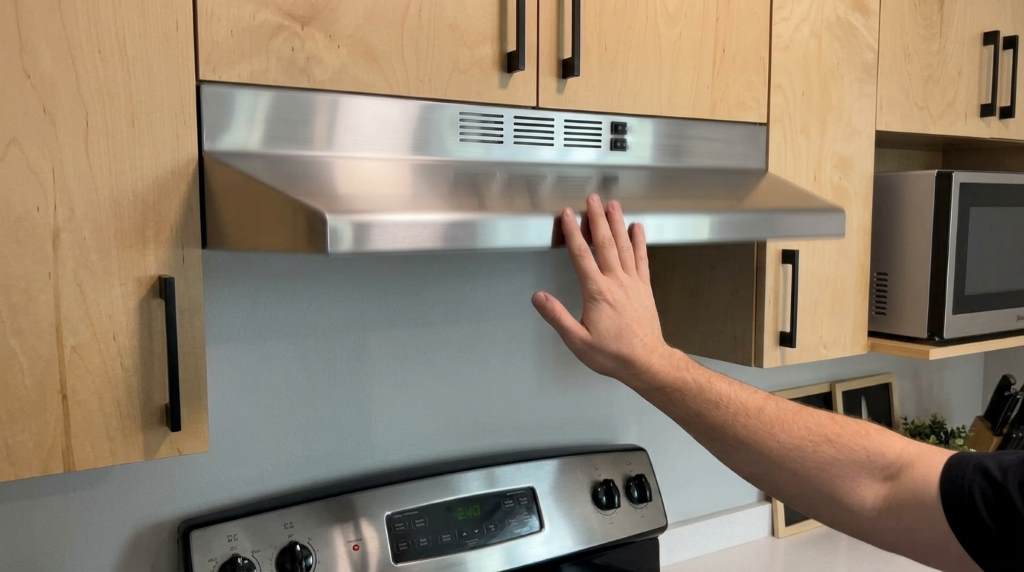
Always disconnect electrical power before cleaning, inspecting, or servicing the range hood. The manufacturer instructions also call for power disconnection before maintenance work.
If your unit uses hard wiring, switch off the appropriate circuit breaker before opening electrical areas. Never work around exposed wiring while the appliance remains energized.
Also, avoid reaching into the fan housing while the blades can move. Allow the fan to stop completely before removing filters or inspecting internal parts.
Clean the Grease Filters Thoroughly
Grease buildup can restrict airflow and create additional turbulence around the fan. Over time, that restriction can make normal operation sound noticeably louder.
First, remove the aluminum filter according to the appliance instructions. Then wash away accumulated grease using warm water and a suitable degreasing cleaner.
Rinse the filter thoroughly and let it dry completely before reinstalling it. Never reinstall a wet filter because moisture can affect nearby electrical components.
Check the Filter Fit
A clean filter can still create noise if it sits incorrectly inside the hood. Therefore, inspect its edges and confirm that every retaining point sits securely.
Move the installed filter gently with your hand while the power remains off. If it shifts easily, reinstall it until it sits firmly without excessive movement.
Tighten the Range Hood Mounting Screws
Loose mounting hardware ranks among the simplest causes of range hood vibration. A small amount of movement can become much louder when the fan reaches higher speed.
Inspect the screws connecting the hood to the cabinet or mounting surface. Tighten loose hardware carefully, but avoid overtightening and damaging the cabinet material.
After tightening everything, test the hood again at both speeds. If the vibration disappears, the mounting connection likely caused the original noise.
Inspect the Cabinet Around the Hood
Sometimes the hood works correctly, but the cabinet amplifies its vibration. Thin panels can behave like soundboards and make ordinary fan movement seem much louder.
Place your hand lightly against nearby cabinet surfaces while the fan operates. If the vibration changes when you touch a panel, inspect that panel and its connections.
Secure loose cabinet hardware where appropriate. Avoid adding materials inside the hood unless the manufacturer specifically approves them.
Inspect the Fan for Obstructions
A foreign object inside the fan area can produce clicking, scraping, or intermittent rattling. Grease residue can also collect around moving components and affect smooth operation.
Disconnect power before inspecting the fan area. Look for loose debris, damaged pieces, or anything that could contact the fan during operation.
Do not force the fan or bend its blades during inspection. A distorted blade can create imbalance and produce stronger vibration when the motor runs.
Look for Fan Blade Contact
Fan blades should rotate without rubbing against nearby housing components. Any contact can create a sharp scraping sound that changes with fan speed.
If you notice visible damage or blade contact, stop using the hood until the problem receives proper attention. Continuing operation can worsen motor or fan damage.
Check the Damper and Vent Outlet
A ducted range hood relies on a clear exhaust path for efficient airflow. The FIREGAS design supports ducted or ductless configurations on several 30 inch models.
For ducted installations, inspect the accessible damper and exhaust connection for movement or obstruction. A loose damper can rattle whenever air passes through the outlet.
Also check whether the exterior vent flap moves freely. Debris, grease, nesting material, or other restrictions can increase airflow noise.
Why Duct Restrictions Create More Noise
Air needs a reasonably clear path when the fan operates. Sharp restrictions can increase turbulence, pressure, and audible airflow noise.
Inspect accessible duct sections for crushed areas or obvious blockages. However, avoid dismantling hidden ductwork unless you have the required skills and equipment.
Professional inspection makes more sense when the duct runs through walls, ceilings, or difficult cabinet spaces. This approach reduces the chance of damaging concealed structures.
Check Whether the Hood Uses Ducted or Ductless Venting
Your troubleshooting approach depends partly on the ventilation configuration. Ducted systems move air outdoors, while ductless systems return filtered air into the kitchen.
Ductless operation requires the appropriate charcoal filtration system for compatible models. A saturated filter can restrict airflow and increase operating noise.
If the hood suddenly became louder after months of use, inspect the filtration system first. Replacing an exhausted charcoal filter may restore smoother airflow.
Inspect the Motor and Fan Assembly
If cleaning and tightening do not solve the noise, the motor deserves closer attention. Motor wear can produce humming, grinding, squealing, or increasingly loud operation.
Listen for sounds that remain present even after the filters and mounting hardware receive attention. A persistent mechanical sound can indicate bearing wear or another motor related problem.
Do not attempt internal motor repairs unless you have suitable electrical and appliance repair experience. A qualified technician can inspect the assembly without creating additional safety risks.
Signs That Point Toward Motor Trouble
- The hood becomes louder gradually over several weeks.
- The fan produces grinding or squealing sounds.
- The motor struggles to start or changes speed unexpectedly.
- The noise continues after cleaning and tightening.
- The hood produces unusual electrical smells or excessive heat.
When these symptoms appear together, continued operation may not make sense. Switch off the appliance and arrange professional inspection.
Check for Electrical Buzzing
A buzzing sound requires more caution because electrical components may cause it. Loose electrical connections can also create heat and increase fire risk.
Turn off the circuit breaker before inspecting any accessible electrical connections. Never tighten or modify energized wiring inside the hood.
If you see damaged insulation, scorched components, loose wiring, or unusual heat, stop troubleshooting immediately. A licensed electrician or qualified appliance technician should handle the repair.
Use a Simple Noise Troubleshooting Sequence
A structured process helps you avoid replacing parts unnecessarily. Follow the checks from the easiest external causes toward more complex internal faults.
- Turn off electrical power and let the fan stop completely.
- Remove and clean the grease filter thoroughly.
- Check the filter for damage and confirm proper seating.
- Inspect accessible mounting screws and cabinet connections.
- Look for visible debris around the fan area.
- Inspect accessible duct connections and the exterior damper.
- Restore power and test the hood on low speed.
- Test high speed and compare the sound with the earlier result.
- Stop operation if scraping, burning smells, or electrical symptoms appear.
This sequence works because it starts with common, low risk causes. It also helps you identify whether cleaning or mechanical tightening actually changed the noise.
Common Noise Problems and Practical Fixes
| Noise | Likely Cause | First Action |
|---|---|---|
| Rattle | Loose filter or mounting hardware | Secure the filter and screws |
| Vibration | Loose mounting or unbalanced fan | Check mounting stability |
| Scraping | Fan blade contact | Stop and inspect the fan |
| Buzzing | Electrical or motor issue | Disconnect power and inspect safely |
| Air roar | Duct restriction | Inspect accessible ventilation paths |
| Clicking | Damper or loose component | Inspect the damper and housing |
What Not to Do When Fixing the Noise
Do not spray lubricant into the motor or fan assembly without manufacturer approval. The wrong lubricant can damage components or create a fire hazard around cooking grease.
Likewise, never block ventilation openings to reduce noise. That approach can restrict airflow and force the fan to work against greater resistance.
Avoid adding foam, cloth, tape, or other soundproofing materials inside the hood. These materials can interfere with ventilation and create serious heat or fire concerns.
When You Should Stop Troubleshooting
Some problems require professional service rather than another round of household adjustments. Stop troubleshooting when the noise comes with electrical, mechanical, or heat related warning signs.
- Burning smells come from the hood.
- The circuit breaker trips repeatedly.
- The motor becomes unusually hot.
- The fan produces severe grinding or scraping.
- Electrical wires appear damaged.
- The fan blade appears cracked or badly distorted.
- The hood vibrates excessively after mounting checks.
These symptoms can indicate a deeper fault that basic cleaning cannot resolve. Professional service also protects the appliance from damage caused by incorrect disassembly.
How to Prevent Future Range Hood Noise
Regular cleaning provides the simplest long term defense against many airflow problems. Clean grease filters before heavy buildup changes the fan sound or reduces extraction performance.
Also, inspect the hood mounting points whenever you notice new vibration. Catching loose hardware early can prevent repeated movement and cabinet damage.
For ducted installations, keep the exhaust path as clear and direct as practical. Proper ventilation reduces unnecessary turbulence and helps the fan operate more efficiently.
A Simple Maintenance Routine
- Check the filter regularly for visible grease accumulation.
- Clean aluminum filters according to the appliance instructions.
- Inspect visible screws and mounting points periodically.
- Listen for changes in fan sound during normal use.
- Check accessible vent components for obstruction.
- Replace compatible charcoal filters when they become exhausted.
Small maintenance tasks can prevent minor noises from becoming larger mechanical problems. More importantly, they help preserve safe and consistent ventilation performance.
Should You Repair or Replace the Hood?
A repair usually makes sense when cleaning, mounting adjustments, or minor component replacement solves the problem. Replacement becomes more reasonable when major components repeatedly fail.
Consider the hood’s age, condition, performance, and repair requirements before making that decision. A noisy but otherwise functional appliance may need only a simple mechanical correction.
However, persistent motor problems deserve a careful cost comparison. Professional diagnosis can help determine whether repair offers better value than replacing the entire unit.
Final Thoughts
Fixing a noisy Firegas 30 inch under cabinet range hood usually starts with cleaning, tightening, and checking airflow. Those steps address several common causes without unnecessary part replacement.
Start with the filter and mounting hardware, then inspect the fan and accessible ventilation path. If scraping, electrical buzzing, burning smells, or severe vibration continues, stop using the hood.
Take action before a small noise becomes a larger mechanical or electrical problem. If basic troubleshooting does not restore quiet operation, arrange a qualified inspection for a safe, lasting repair.
FAQs
Why is my Firegas range hood rattling?
A loose filter, mounting screw, damper, or internal component commonly causes rattling during fan operation.
Why does my range hood sound louder on high speed?
Higher fan speed increases airflow and vibration, which can expose loose parts or restricted ductwork.
Can a dirty filter make a range hood noisy?
Yes, heavy grease buildup can restrict airflow and increase turbulence around the fan.
Should I lubricate a noisy Firegas range hood motor?
No, avoid motor lubrication unless the manufacturer specifically approves the procedure for your model.
When should I call a professional for range hood noise?
Call a professional when noise continues after basic checks or appears with heat, burning smells, or electrical symptoms.
Why Is Flow Slow After Changing Everydrop EDR4RXD1 Filter?
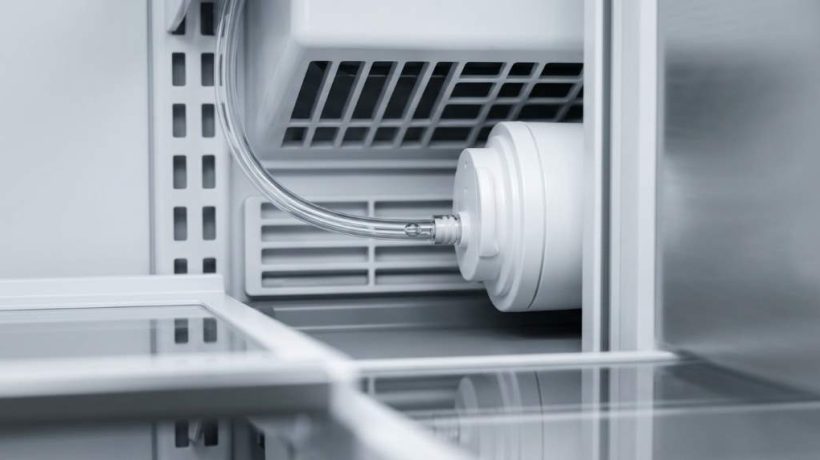
Slow water flow after installing an Everydrop EDR4RXD1 refrigerator filter usually comes from trapped air, improper seating, or an installation issue. In most cases, you can restore normal flow by reseating the filter and purging the water line correctly. The EDR4RXD1 can reduce 32 potentially harmful contaminants, including certain heavy metals and pesticides. It also carries certification for reducing 99% of microplastics under specified testing conditions.
Why Does Water Flow Slow After Filter Replacement?
A new refrigerator filter can temporarily restrict flow while water moves through fresh filtration media. However, noticeably weak flow often points to air, poor installation, or another restriction. The problem rarely means the refrigerator suddenly developed a major fault. Instead, the recent filter change provides an important clue about where to start.
Everydrop recommends purging air after replacing its refrigerator filters. The process helps remove trapped air that can interrupt steady dispenser operation. Therefore, proper flushing should always become the first troubleshooting step after installation.
1. Trapped Air Can Reduce Water Flow
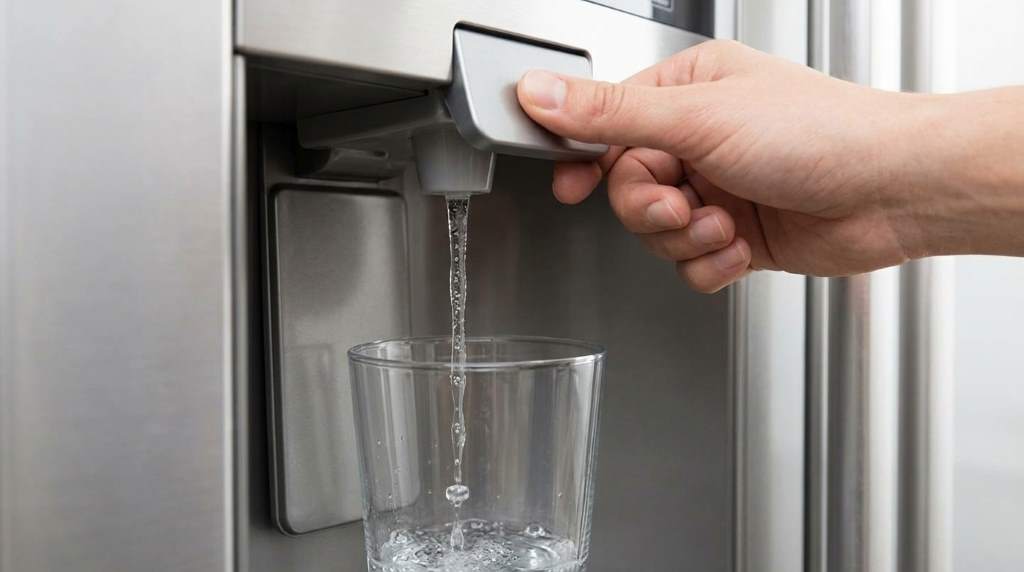
Air can enter the water system when you remove the old filter. That air can remain inside the cartridge, housing, or connected water line. Consequently, the dispenser may sputter, pulse, or produce a weak stream.
This condition often improves after repeated dispensing cycles. Everydrop recommends holding the dispenser for five seconds, then releasing it for five seconds. Continue those cycles until water flows steadily, then continue for about two additional minutes.
How to Purge Air From the System
- Place a large container beneath the refrigerator dispenser.
- Press and hold the dispenser for five seconds.
- Release the dispenser for five seconds.
- Repeat those cycles until the stream becomes steady.
- Continue dispensing for approximately two additional minutes.
- Check the stream again after the system rests briefly.
Do not judge the filter immediately after one short dispensing cycle. A newly installed cartridge may need several cycles before the flow stabilizes. If the stream remains weak, continue with the installation checks below.
2. The Filter May Not Sit Correctly
A filter can appear installed while the cartridge remains slightly misaligned. That small positioning problem can interfere with the refrigerator water path. As a result, the dispenser may deliver less water than expected.
Remove the filter and inspect its connection points carefully. Then reinstall it according to your refrigerator’s specific filter mechanism. Make sure the cartridge reaches its proper locked position without forcing it.
Check the Filter Seating
- Turn off dispensing before removing the cartridge.
- Remove the filter using the refrigerator’s normal release method.
- Inspect the cartridge for visible damage or distortion.
- Check that all packaging and sealing material has been removed.
- Reinstall the filter until the locking mechanism engages properly.
- Gently test the filter for secure seating.
Never force a cartridge into place when the alignment feels wrong. Forced installation can damage the housing or create a poor connection. Instead, remove the filter and repeat the installation with careful alignment.
3. Packaging Material May Still Cover the Filter
New filters often arrive with protective material covering important cartridge surfaces. Leaving that material in place can interfere with water movement. Therefore, inspect the entire filter before installation.
Check for protective caps, sealing labels, or other shipping materials. Remove every piece that the installation instructions identify as removable. Then reinstall the cartridge and purge the water line again.
This simple mistake can create symptoms that look like a defective filter. However, the cartridge may work normally once the protective material disappears. Always inspect the new filter before assuming a refrigerator component failed.
4. The Wrong Filter Can Restrict Flow
Everydrop offers several refrigerator filter models with different shapes and compatibility requirements. A filter that looks similar may not match your refrigerator’s water system. Using the wrong model can create installation and flow problems.
Verify the refrigerator model before replacing the cartridge again. You should also compare the filter number with the previous cartridge. Everydrop provides a filter finder that matches compatible filters with refrigerator models.
Confirm These Details
- Check the refrigerator model number.
- Confirm the installed cartridge says EDR4RXD1.
- Compare the cartridge shape with the previous filter.
- Verify that the filter locks into the housing correctly.
- Check that the refrigerator supports the EDR4RXD1 model.
If the old filter restored normal flow, compare both cartridges carefully. A compatibility mismatch becomes more likely when everything else appears correct. Avoid modifying the cartridge to make it fit the refrigerator.
5. The New Filter Can Have Higher Initial Resistance
Fresh filtration media can create more resistance before water fully saturates the cartridge. That resistance can make the initial stream appear weaker than expected. Usually, proper flushing helps stabilize the flow.
The EDR4RXD1 uses a multi stage filtration design with an activated carbon core. The cartridge filters particles before targeted filtration processes reduce selected contaminants. Therefore, adequate water pressure remains important for consistent dispenser performance.
Do not confuse temporary startup behavior with a permanent restriction. Test the flow again after completing the recommended purge procedure. If performance remains poor, investigate the refrigerator and water supply.
6. Low Household Water Pressure Can Affect Flow
The filter cannot create pressure that the refrigerator does not receive. Low incoming pressure can therefore produce weak dispenser flow after any filter replacement. The new cartridge may simply make an existing pressure problem more noticeable.
Check whether other water fixtures also show reduced pressure. If multiple fixtures perform poorly, the issue may involve the household water supply. However, normal faucet pressure with weak refrigerator flow points toward the refrigerator system.
Simple Pressure Clues
- Check the kitchen faucet before testing the refrigerator.
- Compare cold water flow with refrigerator dispenser flow.
- Ask whether other household fixtures also have weak pressure.
- Check the refrigerator water supply valve if accessible.
- Look for recent plumbing work or supply interruptions.
Do not immediately blame the filter when household pressure also seems weak. A supply problem can affect the refrigerator regardless of cartridge condition. Correcting the upstream issue may restore normal dispenser performance.
7. The Water Supply Valve May Not Open Fully
Many refrigerators connect to a dedicated water supply valve behind or near the appliance. That valve must provide adequate water flow for the dispenser. A partially closed valve can cause slow dispensing after filter replacement.
Check the valve carefully if you can access it safely. Make sure it sits in the fully open operating position. Avoid forcing a stiff valve because damaged plumbing connections can cause leaks.
If the valve looks normal, inspect the connected tubing for obvious kinks. A pinched tube can restrict water before it reaches the filter. Straightening an accessible kink may improve flow immediately.
8. A Kinked Water Line Can Restrict the Dispenser
Refrigerators sometimes sit close enough to walls or cabinets to compress their water tubing. Moving the appliance can also bend the line unexpectedly. Consequently, water may reach the filter with insufficient volume.
Look behind the refrigerator for sharply bent tubing. Check areas where the appliance contacts the wall or cabinet. If the tubing appears compressed, restore a gentle routing path without pulling connections.
After correcting the line, test the dispenser again. Allow several seconds for the system to stabilize. If flow improves substantially, the tubing restriction likely caused the problem.
9. A Clogged Water Line Can Mimic a Bad Filter
Mineral deposits and debris can restrict older refrigerator water lines. Sediment can also affect small passages around valves and connections. A new filter cannot correct a blockage located elsewhere in the system.
This possibility becomes stronger when flow remains weak with more than one filter. It also matters when the refrigerator previously showed declining dispenser performance. In that situation, investigate the water path instead of repeatedly replacing filters.
Never insert sharp objects into refrigerator water connections to remove debris. Such attempts can damage seals and create leaks. Use the refrigerator’s service procedure or qualified appliance assistance when internal blockage seems likely.
10. The Refrigerator Water Inlet Valve May Need Attention
The inlet valve controls water entering the refrigerator. If the valve develops a restriction, the dispenser can receive insufficient water. Filter replacement may expose this issue because the new cartridge changes system resistance.
A failing inlet valve often produces consistently weak flow. Other symptoms can include slow ice production or unusual filling behavior. However, these symptoms can have several causes, so avoid replacing the valve without proper testing.
When to Suspect the Inlet Valve
- The filter fits correctly but flow remains consistently weak.
- Purging air produces little improvement.
- The household water supply has normal pressure.
- The water line shows no obvious kink.
- Ice production also appears unusually slow.
At this stage, professional diagnosis can save time and prevent unnecessary parts replacement. A technician can test pressure and valve operation directly. That approach provides better evidence than replacing several components by trial and error.
11. Compare Flow Before and After the Filter
A useful troubleshooting method involves isolating where the restriction occurs. However, refrigerator water systems vary, so avoid disconnecting pressurized lines without proper instructions.
Instead, compare dispenser behavior before and after each troubleshooting step. Record whether the stream becomes stronger after purging, reseating, or correcting the supply line. This simple process helps identify the most likely cause.
| Symptom | Likely Cause | First Action |
|---|---|---|
| Sputtering water | Trapped air | Purge the water line |
| Weak flow immediately after replacement | Filter seating issue | Remove and reinstall the filter |
| Weak flow with several filters | Supply restriction | Check pressure and tubing |
| Slow water and ice production | Possible valve or supply problem | Inspect the water supply |
| No improvement after purging | Possible blockage or component issue | Arrange further diagnosis |
How Long Should You Flush a New EDR4RXD1 Filter?
The correct flushing process depends on your refrigerator’s instructions and filter system. Everydrop recommends repeated five second dispensing cycles after replacement. Once water flows steadily, continue dispensing for about two additional minutes.
Do not rely only on a fixed number of gallons unless your specific instructions require it. Different refrigerator configurations can use different flushing procedures. Following the refrigerator manufacturer’s instructions provides the safest approach.
What If the EDR4RXD1 Still Has Slow Flow?
Start by removing and reinstalling the cartridge carefully. Then purge trapped air and check the water supply valve and tubing. Afterward, test the dispenser again before investigating internal components.
If the flow remains weak, test another compatible filter when available. A second cartridge can help distinguish installation problems from an individual cartridge issue. Avoid using an incompatible cartridge simply to compare performance.
If multiple compatible filters produce weak flow, focus on the refrigerator system. Water pressure, tubing, inlet valves, and internal restrictions become more likely causes. Professional service becomes sensible when basic checks cannot identify the restriction.
How to Prevent Slow Flow After Future Filter Changes
A consistent replacement routine can prevent most avoidable flow problems. Keep the refrigerator manual nearby and follow the filter installation sequence exactly. Also, avoid rushing the purge process immediately after installing a cartridge.
- Verify the filter model before installation.
- Remove every protective piece from the new cartridge.
- Install the cartridge without forcing the connection.
- Confirm that the filter locks securely.
- Purge air using repeated five second cycles.
- Continue dispensing after steady flow returns.
- Watch for leaks around the filter housing.
- Replace the filter according to the recommended schedule.
Everydrop recommends replacing refrigerator filters about every six months. Usage and water quality can require more frequent replacement. Keeping replacement filters available also reduces the temptation to delay routine maintenance.
When Should You Stop Troubleshooting?
Stop troubleshooting when the filter housing leaks, the water line appears damaged, or internal components seem faulty. Continuing to experiment can turn a minor flow issue into water damage.
Professional help makes sense when several compatible filters show identical poor performance. It also helps when household pressure remains normal but refrigerator flow stays weak. A qualified technician can test the system without unnecessary part replacement.
Final Takeaway
Slow flow after changing an EDR4RXD1 filter usually starts with trapped air or an installation problem. Purge the water line, reseat the filter, confirm compatibility, and inspect the supply path. Then check household pressure, tubing, and refrigerator components if the problem continues.
Do not replace several parts before identifying the restriction. A methodical check can restore normal flow while avoiding unnecessary service costs. If basic troubleshooting fails, contact a qualified appliance professional for a proper diagnosis.
For the best result, treat every filter replacement as a small maintenance procedure rather than a simple cartridge swap. Follow the installation steps carefully, flush the system thoroughly, and monitor dispenser performance. Take action promptly when weak flow continues instead of allowing the restriction to worsen.
Frequently Asked Questions
Why is my water slow after installing an EDR4RXD1?
Trapped air, incorrect seating, or restricted water supply usually causes slow flow after installation.
How do I purge air from my refrigerator water line?
Dispense water for five seconds, release for five seconds, then repeat until steady flow returns.
Can a new EDR4RXD1 filter reduce water pressure?
A new filter can temporarily affect flow, but persistent weakness usually indicates another restriction or installation issue.
How often should I replace an EDR4RXD1 filter?
Everydrop generally recommends replacing refrigerator filters every six months, depending on usage and water quality.
What should I do if a new filter still has weak flow?
Reseat the filter, purge the system, check the supply line, and seek professional diagnosis if weakness continues.
How to Flush an Everydrop EDR2RXD1 Water Filter Properly
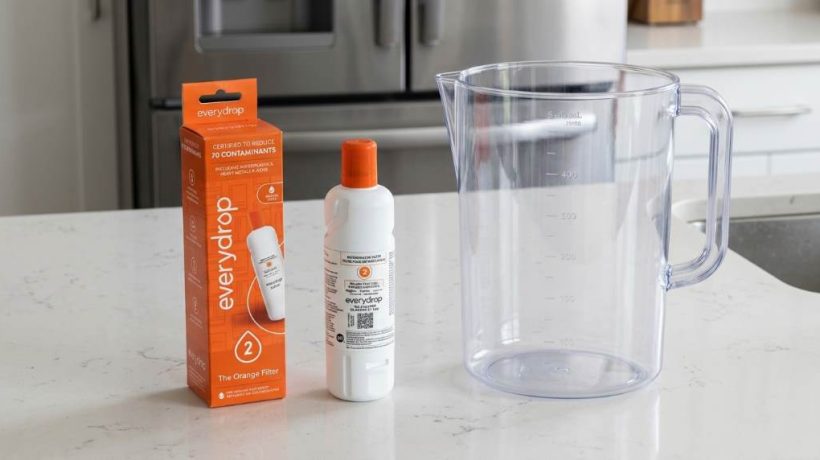
Yes, flush a new Everydrop EDR2RXD1 water filter before drinking the filtered water. The manufacturer specifies 4 gallons of flushing for this filter, while replacement generally occurs every six months. A Everydrop EDR2RXD1 water filter needs proper flushing because activated carbon filters can release harmless carbon fines during initial use. Therefore, flushing clears those particles, purges trapped air, and helps restore normal dispenser flow. The process usually takes several minutes, depending on dispenser flow rate.
Why You Need to Flush the EDR2RXD1 Filter
Flushing prepares the cartridge for normal operation after installation. A fresh carbon filter can contain loose carbon particles from manufacturing and handling.
Consequently, your first glasses may look slightly cloudy or contain tiny black specks. Those particles usually represent carbon fines rather than a damaged filter.
Flushing also removes trapped air inside the cartridge and refrigerator water line. Removing that air helps reduce sputtering, inconsistent flow, and temporary dispenser dripping.
Everydrop recommends flushing the water system after installing a replacement filter. The EDR2RXD1 performance information specifically calls for flushing 4 gallons before use.
What You Need Before Starting
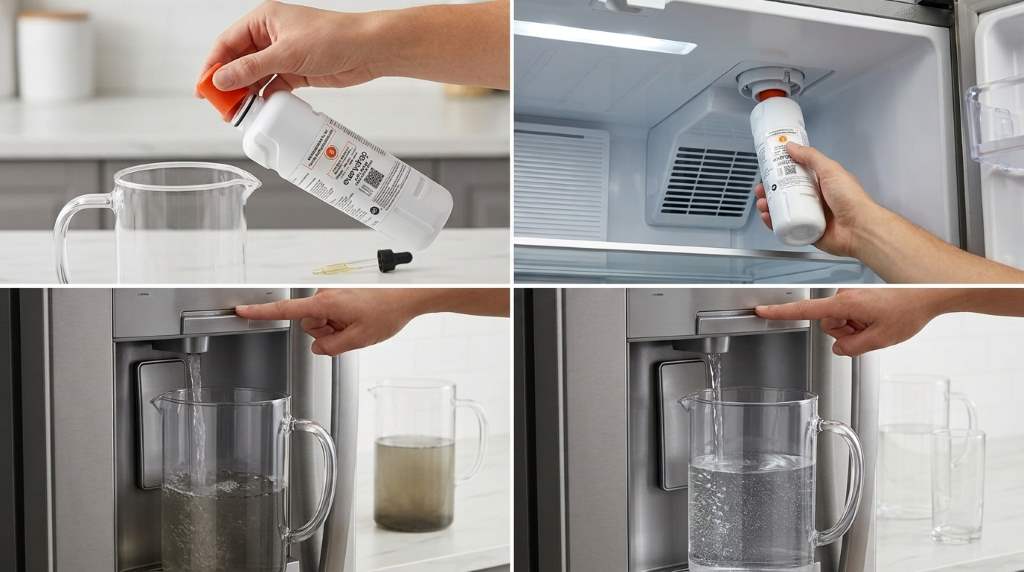
You do not need special tools for this procedure. However, preparing a large container makes the process cleaner and easier.
- A newly installed EDR2RXD1 filter
- A large pitcher, bowl, or clean container
- Access to the refrigerator water dispenser
- A clean towel for accidental spills
- The refrigerator water supply turned on
Before flushing, confirm that you installed the correct filter model. EDR2RXD1 belongs to Everydrop Filter 2 and fits selected compatible refrigerator models.
Also, check that you removed the filter packaging and sealing materials. Make sure the cartridge sits firmly in its housing before dispensing water.
How to Flush an Everydrop EDR2RXD1 Water Filter
1. Install the Filter Correctly
First, locate the refrigerator filter housing according to your refrigerator design. Many compatible models place the filter inside the fresh food compartment.
Remove the old cartridge and prepare the new EDR2RXD1. Remove its packaging and protective covers before installation.
Next, insert the filter into the housing and rotate it until it locks. Do not force the cartridge if the mechanism resists.
Then, close the filter cover completely and check the cartridge connection. A loose filter can cause poor flow or water leakage.
2. Turn On the Water Supply
Confirm that the refrigerator receives water before starting the flush. A closed supply valve prevents water from reaching the dispenser.
After installation, wait briefly for the water system to pressurize. Then place your container beneath the dispenser outlet.
Keep a towel nearby because the first flow can sputter. This simple preparation also protects the floor from accidental splashes.
3. Begin Dispensing Water
Press the dispenser lever and allow water to flow into the container. Do not drink the initial water from a new filter.
At first, the water may sputter because air remains inside the cartridge. Continue dispensing while keeping the container positioned securely.
Everydrop also recommends cycling the dispenser during air removal. Hold the dispenser for about five seconds, then release it for five seconds.
Repeat those cycles until water flows steadily. Continue flushing afterward to remove remaining air and carbon fines.
4. Flush the Full Four Gallons
The key step involves flushing approximately 4 gallons of water through the new cartridge. This amount helps clear initial carbon particles from the filter.
Use a marked container if you want accurate volume control. Otherwise, several large containers can help you estimate the total amount.
Do not rush this stage by assuming clear water means flushing has finished. Clear appearance alone does not confirm that you reached the recommended volume.
Continue dispensing until approximately 4 gallons have passed through the filter. Then stop the dispenser and inspect the water.
5. Check the Water After Flushing
After completing the flush, examine the water in a clean glass. The water should appear clear and free from visible particles.
A slight initial carbon taste can sometimes remain temporarily. If the taste persists, dispense additional water and reassess the result.
Also, check the dispenser for normal pressure and steady flow. Watch the filter housing for leaks during and after dispensing.
6. Reset the Filter Indicator
Some compatible refrigerators use a filter status indicator to track cartridge replacement. After installing the new filter, reset that indicator according to your refrigerator controls.
The exact reset sequence varies between refrigerator models. Therefore, use your refrigerator’s control instructions rather than applying one universal button sequence.
Resetting the indicator does not flush the filter. Treat these as separate tasks that both support proper filter maintenance.
Why Four Gallons Matters
The four gallon instruction provides a measurable flushing target. That approach works better than relying only on appearance or taste.
Carbon filtration depends on an activated carbon core that interacts with passing water. Initial flushing helps remove loose material generated during cartridge production.
Furthermore, adequate flushing helps stabilize the filter before regular household use. It also reduces the chance of serving water containing visible carbon particles.
| Step | What to Do | Purpose |
|---|---|---|
| Install | Secure the EDR2RXD1 cartridge | Creates a proper seal |
| Start | Dispense water into a container | Begins air and particle removal |
| Cycle | Use five second dispensing intervals | Helps purge trapped air |
| Flush | Run approximately 4 gallons | Clears initial carbon fines |
| Inspect | Check clarity, taste, flow, and leaks | Confirms normal operation |
| Reset | Reset the refrigerator filter indicator | Starts the new filter tracking period |
Common EDR2RXD1 Flushing Mistakes
Stopping After One Glass
One glass rarely provides enough flushing for a newly installed cartridge. Instead, follow the recommended four gallon volume.
Even if the first water looks clear, continue the flushing process. Carbon particles can remain inside the cartridge without obvious visual signs.
Drinking the First Water
Avoid drinking the initial water from a newly installed filter. Direct that water into a container instead.
This simple habit prevents unnecessary exposure to initial carbon fines. It also gives the cartridge time to stabilize before normal use.
Ignoring Air in the System
Air can enter the water line during filter replacement. As a result, the dispenser may sputter or produce uneven flow.
Use repeated five second dispensing cycles to help purge that air. Continue until the stream becomes consistent.
Using Hot Water
Use the refrigerator’s cold water dispenser during flushing. The EDR2RXD1 filtration system is intended for cold water applications.
Hot water can create conditions outside the filter’s intended operating range. Therefore, avoid using heated water during this procedure.
Forcing the Filter Into Place
A filter should engage smoothly when you follow the correct installation direction. Forcing the cartridge can damage the housing or sealing components.
If the filter does not fit, stop and verify the refrigerator model and cartridge orientation. Never use excessive force to make a cartridge fit.
What to Do If the Water Looks Cloudy
Slight cloudiness immediately after installation can result from tiny air bubbles. These bubbles often disappear after the water sits briefly.
Carbon fines can also make early water appear gray or contain small black particles. Continue flushing the cartridge rather than drinking that initial water.
However, persistent discoloration deserves closer attention. Check the filter installation, cartridge condition, and refrigerator water system before continuing regular use.
What to Do If Water Flow Becomes Slow
A slower stream immediately after installation can indicate trapped air. Continue the recommended dispensing cycles to purge the line.
Next, verify that the filter sits completely inside its housing. A partially engaged cartridge can restrict water movement or prevent proper sealing.
Also, check whether the refrigerator’s water supply valve remains fully open. A restricted supply can reduce dispenser flow independently of the filter.
If flow remains unusually weak after proper installation and flushing, inspect the refrigerator’s water line. A kinked line or unrelated appliance issue may cause the restriction.
How Often Should You Replace the EDR2RXD1?
Everydrop recommends replacing its compatible refrigerator water filters at regular intervals. For EDR2RXD1, the commonly stated replacement interval is every six months.
Usage also matters because filter capacity depends on water consumption. Therefore, follow the refrigerator’s filter indicator and the applicable manufacturer instructions.
Do not extend filter service indefinitely because the water still tastes acceptable. Filter performance depends on cartridge capacity, usage, and water conditions.
Replacing the cartridge on schedule also gives you a consistent maintenance routine. After every replacement, repeat the complete flushing procedure.
EDR2RXD1 Maintenance Checklist
- Verify the refrigerator accepts EDR2RXD1.
- Remove all filter packaging before installation.
- Install the cartridge without forcing it.
- Confirm the water supply remains open.
- Purge trapped air using repeated dispenser cycles.
- Flush approximately 4 gallons before drinking.
- Check water clarity and dispenser flow.
- Inspect the filter connection for leaks.
- Reset the refrigerator filter indicator.
- Replace the cartridge according to the recommended schedule.
When You Should Stop and Troubleshoot
Most filter replacements require only basic household maintenance. Still, unusual symptoms can indicate a problem beyond normal carbon flushing.
Stop using the dispenser if you notice persistent leaks, damaged filter housing, or unusual water contamination. Then inspect the installation before dispensing additional water.
If the cartridge appears damaged, do not attempt to repair it. Replace the filter with a compatible, undamaged cartridge instead.
When problems continue after correct installation, consult the refrigerator’s model specific instructions. The refrigerator model determines the filter housing and reset procedure.
Final Tips for Better Filter Performance
Good flushing starts with correct installation and ends with a careful inspection. The process becomes simple when you measure the water rather than guessing.
Keep your replacement schedule consistent and monitor changes in flow or taste. Those habits help you identify filter or refrigerator problems sooner.
Most importantly, never skip the initial flush simply because the water looks clear. Proper preparation helps your new cartridge begin normal service under better conditions.
Conclusion
Flushing an EDR2RXD1 properly requires more than running one glass through the dispenser. Install the cartridge securely, purge trapped air, and flush approximately four gallons before drinking.
Afterward, check the water, inspect for leaks, and reset your refrigerator’s filter indicator. Follow these steps whenever you install a replacement cartridge for reliable everyday performance.
If you recently installed an EDR2RXD1, flush it before serving the water to your household. Make the four gallon flush part of your regular filter replacement routine.
FAQs About Flushing the EDR2RXD1 Filter
How much water should I flush through an EDR2RXD1?
Flush approximately 4 gallons of water through the new EDR2RXD1 before drinking it.
Why does my new EDR2RXD1 produce black specks?
Black specks usually come from loose activated carbon particles released during initial filter use.
Can I drink the first water from a new EDR2RXD1?
No, discard the initial water and complete the recommended flushing process before drinking.
Why does my refrigerator dispenser sputter after filter replacement?
Trapped air commonly causes sputtering, so repeated five second dispensing cycles can help purge the water line.
How often should I replace an EDR2RXD1 filter?
Replace the filter according to the manufacturer’s schedule, commonly every six months for regular household use.
Why Is My Everydrop EDR1RXD1 Water Filter Leaking?
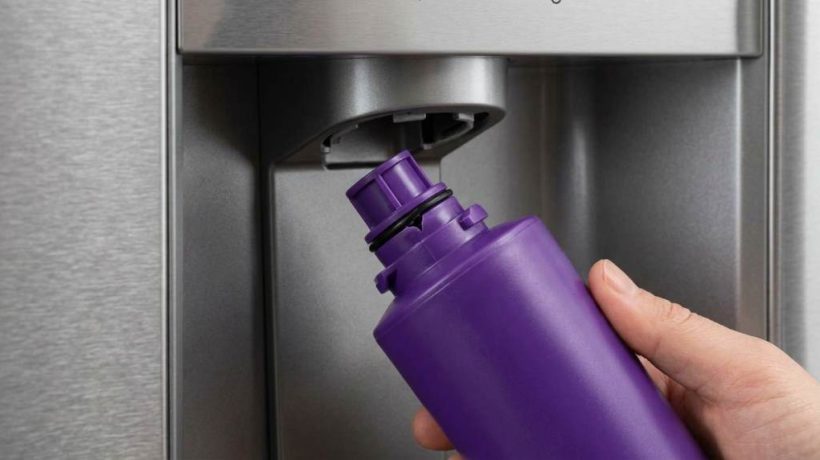
Your Everydrop EDR1RXD1 water filter usually leaks because of poor seating, damaged seals, cracks, or incorrect installation. Start by removing the filter, checking its O rings, inspecting the housing, and reinstalling it correctly.
Whirlpool recommends replacing refrigerator water filters every six months, or sooner when usage requires it. The EDR1RXD1 filter also carries a 200 gallon replacement guideline for compatible applications.
If your Everydrop by Whirlpool EDR1RXD1 water filter suddenly leaks, do not ignore it. A small drip can signal a poor seal, damaged cartridge, or filter housing problem.
Why Is the Everydrop EDR1RXD1 Water Filter Leaking?
The most common cause involves an incomplete seal between the filter and refrigerator housing. Even a small alignment problem can let pressurized water escape around the connection.
However, several other problems can create the same symptom. Checking the filter systematically helps you identify the actual cause without replacing unnecessary parts.
- The filter does not sit fully inside the housing.
- An O ring sits incorrectly or has become damaged.
- The filter cartridge contains a crack or manufacturing defect.
- The filter housing or filter head has damage.
- Debris prevents the sealing surfaces from meeting properly.
- The filter does not match the refrigerator model.
- The water line has excessive pressure or physical damage.
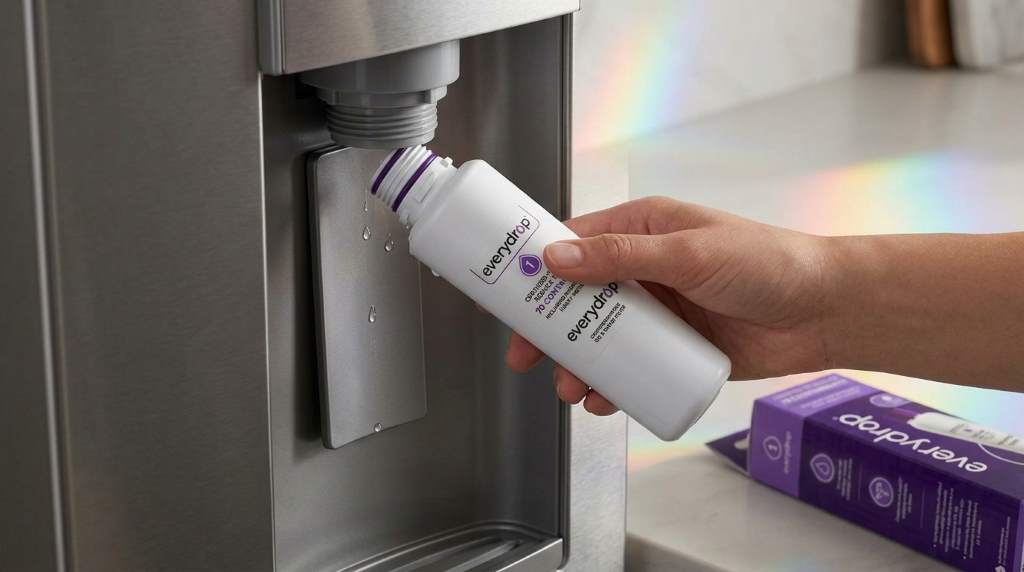
1. Check Whether the Filter Sits Correctly
Improper seating remains one of the first things you should investigate. The filter must align with the housing before you apply pressure or close the filter door.
First, stop dispensing water and remove the filter according to your refrigerator instructions. Then inspect the mounting area for visible debris, moisture, or obvious alignment problems.
Next, reinstall the filter slowly and follow the refrigerator specific locking method. Never force the cartridge when it resists normal insertion.
A properly installed filter should sit firmly without excessive force. If the cartridge feels unusually loose, investigate the housing before continuing.
Watch for These Installation Mistakes
- Installing the cartridge at the wrong angle.
- Failing to align the filter with the housing guides.
- Leaving protective material on the sealing area.
- Forcing the filter into an incorrect position.
- Closing the filter door before proper seating.
2. Inspect the O Rings Carefully
The O rings create the watertight seal around the filter connection. Therefore, even minor seal damage can produce persistent dripping.
Remove the filter and examine each visible sealing surface under good lighting. Look for flattening, cuts, distortion, brittleness, or missing sections.
Also check whether debris surrounds the sealing area. Small particles can prevent the O rings from contacting the housing evenly.
Clean the sealing surfaces gently with a soft, damp cloth. Avoid abrasive cleaners that could damage the sealing material.
Why O Ring Problems Cause Leaks
An O ring needs consistent contact around the entire sealing surface. When part of that surface loses contact, water can escape through the smallest opening.
Furthermore, excessive tightening can distort a seal instead of improving it. Always follow the refrigerator instructions rather than applying unnecessary force.
3. Look for Cracks or Physical Damage
A damaged filter cartridge can leak even when you install it correctly. Therefore, inspect the entire EDR1RXD1 cartridge before reinstalling it.
Check the plastic body, connection points, sealing areas, and visible seams. Look for hairline cracks, dents, warped plastic, or unusual discoloration.
If you find damage, replace the filter instead of attempting a temporary repair. Adhesives and sealants cannot reliably restore a pressurized water filter connection.
Also inspect the refrigerator filter housing for cracks. A damaged housing can continue leaking even after you install a new filter.
4. Confirm You Have the Correct Filter
Filter compatibility matters because different refrigerator systems use different connection designs. An incorrect cartridge may appear compatible while failing to create a reliable seal.
Check your refrigerator model number before replacing the filter. Then confirm that EDR1RXD1 matches the required filter specification for your appliance.
Do not rely only on appearance when comparing replacement cartridges. Connection geometry, sealing surfaces, and locking mechanisms can differ between similar looking filters.
Why Generic Filters Can Create Problems
Some third party cartridges may fit loosely or create inconsistent sealing. That problem can cause leaks, restricted water flow, or unusual dispensing behavior.
Therefore, verify compatibility before blaming the refrigerator itself. A correct filter should install according to the refrigerator manufacturer’s intended procedure.
5. Check the Filter Housing and Head
If a new filter still leaks, shift your attention toward the refrigerator housing. The filter may not cause the leak at all.
Inspect the filter head for cracks, mineral deposits, damaged plastic, or unusual movement. Also check the surrounding area for signs of repeated water exposure.
Mineral buildup can interfere with proper sealing around the connection. Carefully clean accessible surfaces without damaging internal components.
If the housing shows cracks or structural damage, stop using the leaking connection. Arrange professional appliance service when the damaged component requires replacement.
6. Check the Water Line and Connections
Sometimes water appears near the filter even though another connection causes the leak. Water can travel across nearby surfaces before reaching the floor.
Inspect accessible water tubing around the filter compartment and refrigerator. Look for kinks, cracks, loose connections, or moisture around fittings.
Then dry the surrounding area completely before testing the filter again. Dry surfaces make fresh leaks much easier to trace.
If water returns away from the filter connection, investigate the nearby tubing or valve system. That finding can prevent an unnecessary filter replacement.
7. Flush a Newly Installed Filter
A newly installed filter can contain trapped air inside the water system. That air can cause temporary dripping from the dispenser.
Whirlpool recommends flushing the system after replacing its water filters. Follow your refrigerator instructions for the correct flushing amount and procedure.
Many Whirlpool replacement instructions specify running four gallons through the system. However, your refrigerator model instructions should always take priority.
Flushing also removes initial carbon particles from the new filter. Consequently, proper flushing supports normal water flow and clearer dispensing.
8. Replace an Old or Clogged Filter
An old filter can restrict water flow and create unusual pressure conditions. Therefore, replacement makes sense when the filter reaches its recommended service interval.
Whirlpool generally recommends changing refrigerator water filters every six months. Some households may need earlier replacement because of water quality or heavier usage.
Reduced dispenser flow can also indicate a clogged filter. Small ice cubes and reduced ice production may provide additional clues.
If your filter has exceeded its expected service period, install a compatible replacement. Then flush the system according to your refrigerator instructions.
9. Use This Quick Leak Diagnosis Table
| Leak Symptom | Likely Cause | Recommended Action |
|---|---|---|
| Leak starts immediately after installation | Poor seating or damaged seal | Remove and reinstall the filter |
| Water leaks around the filter body | Cracked cartridge | Replace the filter |
| Leak continues with a new filter | Housing or head problem | Inspect the filter housing |
| Water flow becomes very slow | Clogged filter | Replace the filter |
| Dripping follows filter replacement | Trapped air or poor installation | Reinstall and flush the system |
| Water appears away from the filter | Nearby tubing or connection leak | Inspect accessible water lines |
How to Fix an EDR1RXD1 Filter Leak Safely
Start by placing a towel beneath the filter area to catch residual water. Then stop using the dispenser while you inspect the connection.
Remove the filter using the refrigerator’s recommended removal procedure. Inspect the cartridge, O rings, housing, and surrounding surfaces.
Clean accessible sealing surfaces and remove visible debris. Next, reinstall the filter without forcing or overtightening the connection.
After installation, dispense water slowly and watch the filter area carefully. Check for fresh moisture around the connection rather than relying on floor puddles.
If the area remains dry, continue dispensing water for several seconds. Then inspect the connection again after the system reaches normal pressure.
What If the EDR1RXD1 Still Leaks After Reinstallation?
A persistent leak usually points toward a damaged filter, seal, housing, or water connection. At that stage, repeated reinstallations rarely solve the underlying problem.
Install a known compatible replacement filter if the existing cartridge appears questionable. If the replacement also leaks, focus on the refrigerator housing and water line.
Do not continue operating a refrigerator that releases a steady amount of water. Persistent leakage can damage flooring, cabinetry, electrical components, or nearby materials.
When the source remains unclear, appliance service provides a safer next step. A technician can test the water path and identify damaged internal components.
How to Prevent Future EDR1RXD1 Leaks
Prevention starts with correct installation and timely filter replacement. A few simple habits can reduce recurring sealing problems.
- Verify filter compatibility before installation.
- Remove all protective coverings from the new filter.
- Inspect O rings before inserting the cartridge.
- Clean accessible sealing surfaces during replacement.
- Never force a filter into the housing.
- Flush the system after installing a new filter.
- Replace the filter according to the recommended schedule.
- Check the connection whenever you notice reduced water flow.
When Should You Stop Troubleshooting?
You should stop troubleshooting when the filter housing shows cracks or the leak continues with compatible filters. Water near electrical components also requires immediate caution.
Likewise, avoid disassembling internal refrigerator components without appropriate appliance repair knowledge. Incorrect repairs can create additional leaks or electrical hazards.
Instead, document where the water appears and when the leak starts. That information can help an appliance technician diagnose the problem faster.
Frequently Asked Questions
Why does my EDR1RXD1 leak immediately after installation?
The filter probably lacks proper seating, has a damaged seal, or contains a connection problem.
Can a bad O ring cause an EDR1RXD1 leak?
Yes, a damaged, missing, flattened, or displaced O ring can prevent a watertight seal.
Should I replace a leaking EDR1RXD1 filter?
Replace the filter if you find cracks, damage, missing seals, or persistent leakage after correct installation.
Why does my new refrigerator filter drip?
A new filter can drip because of poor seating, trapped air, damaged seals, or installation debris.
How often should I replace an EDR1RXD1 filter?
Whirlpool recommends replacement every six months, although water quality and usage can require earlier replacement.
Final Takeaway
Most EDR1RXD1 leaks come from installation, sealing, damage, compatibility, or housing problems. Start with the filter connection, then inspect the O rings and housing systematically.
Replace damaged cartridges rather than attempting temporary repairs. If a compatible replacement still leaks, have the refrigerator’s filter housing and water lines professionally inspected.
Take action as soon as you notice recurring moisture around the filter. A quick inspection can prevent a small filter leak from becoming expensive water damage.
How to Fix a Euhomy Countertop Ice Maker Not Making Ice
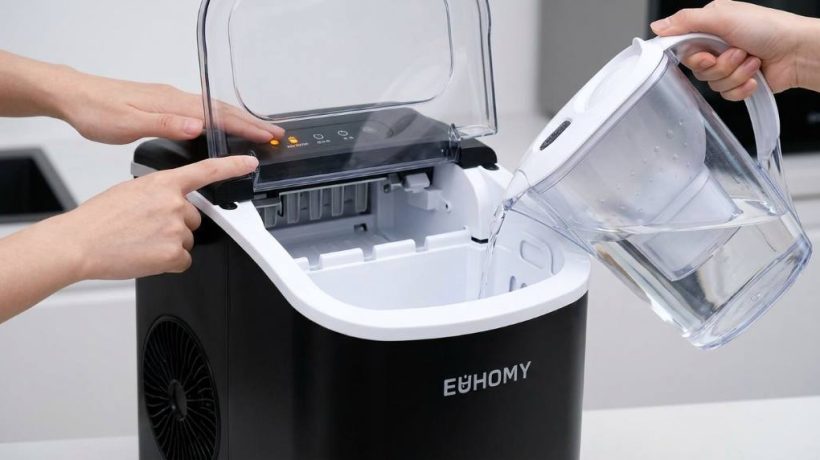
A Euhomy countertop ice maker usually stops making ice because of water flow, temperature, buildup, or sensor issues. Start by checking water, airflow, cleaning, and power before considering an internal repair.
Countertop ice makers can begin acting strangely after routine use, especially with hard water or poor ventilation. Euhomy recommends operating its ice makers below 90°F and using room temperature water.
If you use an Euhomy countertop ice maker machine, simple checks can often restore normal production. This guide explains what to inspect, what each symptom means, and when professional help makes sense.
Start With the Four Checks That Matter Most
Before taking anything apart, check the machine’s basic operating conditions. These checks quickly separate simple problems from possible mechanical or cooling faults.
- Confirm the machine has power and the ice making function remains active.
- Check the reservoir and confirm enough water reaches the intake area.
- Inspect the ice basket and sensor area for misplaced or stuck ice.
- Make sure surrounding vents have enough space for proper airflow.
After each adjustment, allow the machine to complete another cycle. This approach prevents unnecessary resets, cleaning, and part replacements.
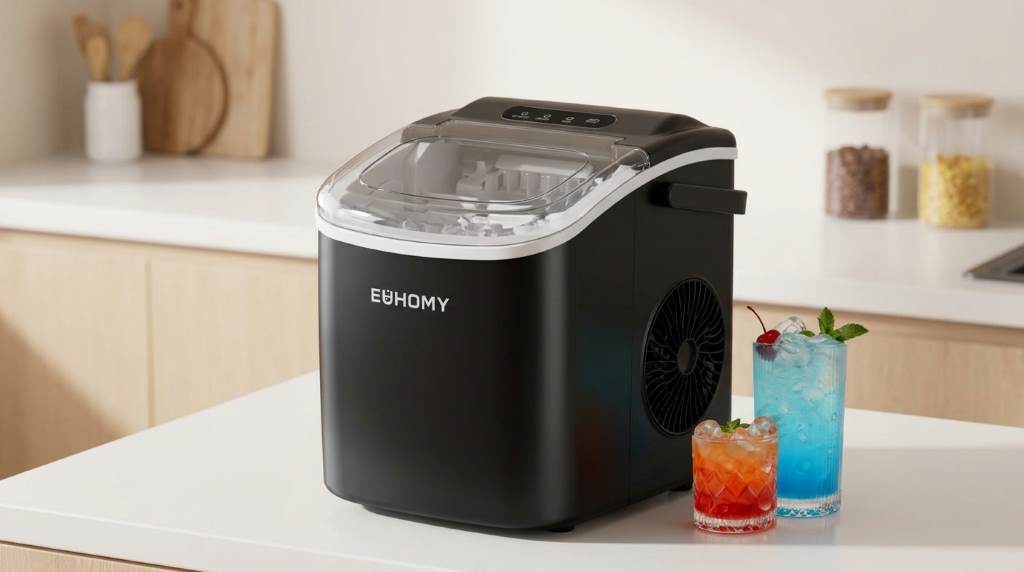
Check Whether the Machine Receives Enough Water
Water delivery remains one of the first things to inspect when ice production stops. A machine can power on normally while receiving too little water for freezing.
First, remove the reservoir if your model uses a removable tank. Then check its water level, seating position, and intake area for visible debris.
Also inspect any water line for bends, pinches, or restrictions. A restricted water path can produce weak flow and smaller ice before production stops completely.
What Different Water Symptoms Mean
| Symptom | Likely Cause | First Action |
|---|---|---|
| No water enters the freezing area | Empty reservoir or blocked intake | Check water level and intake |
| Water enters slowly | Restriction or mineral buildup | Inspect and clean the water path |
| Normal water enters but no ice forms | Cooling or temperature issue | Check ventilation and placement |
| Add Water light stays active | Detection or seating problem | Reseat the reservoir and restart |
Euhomy notes that an Add Water warning can remain active when the machine fails to detect available water properly. Reservoir seating and intake conditions therefore deserve attention.
Make Sure the Ice Maker Can Get Cold Enough
Ice cannot form properly when the machine cannot remove enough heat. Therefore, inspect the environment before assuming the refrigeration system failed.
Move the ice maker away from ovens, direct sunlight, and other heat producing appliances. Also leave adequate clearance around ventilation openings so warm air can escape.
Do not place the unit inside a cramped cabinet during operation. Restricted airflow can increase internal heat and extend freezing cycles.
Euhomy advises operating its ice makers below 90°F for better production. It also recommends room temperature water for normal ice making.
Signs That Point Toward a Cooling Problem
- The machine runs for a long time without producing ice.
- Water enters normally but never develops a solid frozen layer.
- The compressor or fan sounds active without normal ice production.
- Several cycles produce no meaningful improvement after cleaning.
If these symptoms continue after proper placement, stop changing settings repeatedly. A refrigeration problem may require qualified service rather than another household troubleshooting step.
Clean Mineral Buildup Before Replacing Anything
Mineral deposits can interfere with water movement, pumping, and heat transfer. Consequently, regular cleaning should become part of your troubleshooting routine.
Hard water can leave scale around internal water passages and freezing surfaces. Over time, that buildup can reduce performance and create unusual noises.
Start with the cleaning procedure specified for your exact Euhomy model. Avoid forcing tools into narrow passages or scraping sensitive components.
Euhomy currently recommends daily cleaning cycles for supported models and a deeper monthly cleaning routine. It also recommends replacing reservoir water every 24 hours.
Basic Cleaning Sequence
- Turn the machine off and disconnect power when the manual requires it.
- Empty the remaining water and remove accessible ice.
- Clean the reservoir and accessible surfaces using the approved method.
- Run the machine’s cleaning cycle when your model provides that function.
- Drain the cleaning solution completely after the cycle finishes.
- Rinse thoroughly with clean water before making fresh ice.
- Run another cycle and check whether ice production improves.
Never assume every Euhomy model uses the same cleaning controls. Always follow the instructions for your specific model before adding cleaner.
Inspect the Ice Full Sensor
A sensor can stop ice production when it incorrectly detects a full basket. This issue can appear confusing because the basket may look almost empty.
First, remove loose ice around the sensor area without forcing any components. Then check whether the basket sits correctly inside the machine.
Some Euhomy models use an ice full sensor that automatically stops production when the basket fills. A blocked sensor can therefore interrupt normal production.
Try a Simple Sensor Test
Turn the machine off before inspecting movable parts or reaching inside. Remove anything visibly blocking the sensor and reinstall the basket correctly.
Then restart the machine and observe the indicator lights. If the Ice Full warning returns with an empty basket, the sensor deserves closer attention.
Euhomy specifically suggests moving certain models to a darker location when the Ice Full light remains active incorrectly.
Reset the Euhomy Ice Maker Correctly
A reset can clear temporary control errors, but it cannot repair damaged hardware. Therefore, reset only after checking water, temperature, sensors, and visible buildup.
Begin by turning the machine off and disconnecting its power. Allow the unit to remain disconnected for the period specified by your model instructions.
Some Euhomy support guidance recommends unplugging certain models for two hours before restarting them. This procedure can help clear persistent indicator problems.
After reconnecting power, refill the reservoir with appropriate water. Then select the normal ice making function and monitor the first complete cycle.
Check Whether Ice Forms but Fails to Drop
Not every no ice problem means the machine cannot freeze water. Sometimes ice forms correctly but fails during the harvesting stage.
Look for frozen material attached to the freezing surface or partially formed pieces. Those signs suggest the machine may have reached the freezing stage successfully.
Also check for excessive ice thickness or pieces that remain stuck. Certain Euhomy models allow ice making time adjustments that affect thickness.
What To Do With Stuck Ice
- Turn the machine off before touching the internal ice making area.
- Allow stuck ice to soften naturally instead of forcing it loose.
- Never use a sharp metal object against the freezing surface.
- Clean mineral residue if buildup appears around the affected area.
- Restart the unit after the area becomes clear.
If the machine repeatedly freezes ice but cannot release it, stop forcing the cycle. Repeated harvest failures can indicate a mechanical or control problem.
Use the Symptoms to Find the Real Cause
The fastest troubleshooting method matches the visible symptom with the correct system. This method saves time because each symptom points toward a different inspection path.
| Observed Problem | Most Useful Check | Next Step |
|---|---|---|
| Machine has power but makes no ice | Water and temperature | Check reservoir and ventilation |
| Add Water warning appears | Reservoir seating and intake | Reseat, clean, and restart |
| Ice Full warning appears incorrectly | Sensor area | Clear obstruction and retest |
| Ice looks very small | Water flow and buildup | Clean and inspect water delivery |
| Ice forms but stays attached | Harvest mechanism | Allow release and inspect safely |
| Machine runs without freezing | Cooling performance | Improve airflow and seek service if needed |
Do Not Ignore Small or Hollow Ice
Small ice often provides an earlier warning than complete ice production failure. Water flow, mineral buildup, temperature, and operating conditions can all affect cube size.
First, verify that the reservoir contains clean water and the intake remains unobstructed. Next, check airflow and clean the machine if scale appears.
Euhomy identifies water flow, temperature, and buildup as common areas to investigate when ice becomes smaller.
If the ice remains unusually small after those checks, record the pattern before contacting support. Clear observations can make technical diagnosis much faster.
Know When DIY Troubleshooting Should Stop
Some problems require more than cleaning, resetting, or repositioning. Knowing when to stop protects both the appliance and the person troubleshooting it.
- The machine repeatedly runs without becoming cold enough to freeze water.
- The same warning returns immediately after cleaning and restarting.
- You notice damaged wiring, burning smells, or unusual electrical behavior.
- Water reaches the machine but production never resumes after basic checks.
- The unit shows repeated mechanical failures during harvesting.
Euhomy states that a machine running without making ice can indicate a refrigeration issue when basic conditions remain normal.
At that point, contact Euhomy support or a qualified appliance technician. Avoid opening sealed refrigeration components because improper service can create additional safety and performance problems.
Prevent the Problem From Returning
Once your Euhomy ice maker works again, prevention becomes much easier than repeated troubleshooting. A small maintenance routine can reduce several common causes of poor production.
- Replace reservoir water regularly instead of letting old water sit.
- Clean the machine according to your model’s recommended schedule.
- Keep ventilation openings clear during every operating cycle.
- Use suitable drinking water that matches the manufacturer’s recommendations.
- Keep the ice basket and sensor area free from buildup and obstructions.
- Store the machine properly when you will not use it for extended periods.
Regular cleaning matters because mineral residue can restrict internal water movement. Euhomy specifically connects scale buildup with pump blockage and malfunction.
A Practical Five Minute Diagnostic Routine
When the machine suddenly stops producing ice, use a consistent sequence instead of guessing. This simple routine helps identify the problem without unnecessary part replacement.
- Check power and confirm the machine remains in ice making mode.
- Check water level, reservoir seating, and visible intake restrictions.
- Inspect the ice basket and sensor area for obstructions.
- Check ventilation and move the unit away from heat sources.
- Clean visible buildup and perform the approved cleaning cycle.
- Reset the machine according to the model instructions.
- Monitor the next cycle before making additional changes.
If production returns, monitor the machine during several additional cycles. If production remains absent, document the symptoms and contact qualified support.
Final Takeaway
A Euhomy countertop ice maker that stops making ice usually needs systematic troubleshooting rather than immediate replacement. Start with water, airflow, sensors, cleaning, and resetting before investigating deeper mechanical faults.
Most importantly, match the symptom with the correct system before changing anything. Follow your exact model instructions, avoid forcing internal components, and seek professional support when cooling problems persist.
Use this troubleshooting sequence the next time your Euhomy machine stops producing ice. If basic checks fail, contact Euhomy support with your model number and a clear description of the symptoms.
Frequently Asked Questions
Why is my Euhomy ice maker running but not making ice?
Check water flow, ambient temperature, ventilation, buildup, and cooling performance before considering service.
Why does my Euhomy ice maker say Add Water when full?
The reservoir may sit incorrectly, or the machine may fail to detect water reaching its intake.
How long should I unplug my Euhomy ice maker for a reset?
Some Euhomy models recommend a two hour power disconnect, but always follow your model’s instructions.
Can dirty water stop a Euhomy ice maker from making ice?
Yes, mineral buildup can restrict water movement and interfere with normal ice production.
When should I call a technician for my Euhomy ice maker?
Seek qualified service when cooling failures, electrical faults, or repeated mechanical problems remain after basic troubleshooting.
Why Is My CreoleFeast TFS3010 Turkey Fryer Flame Yellow?
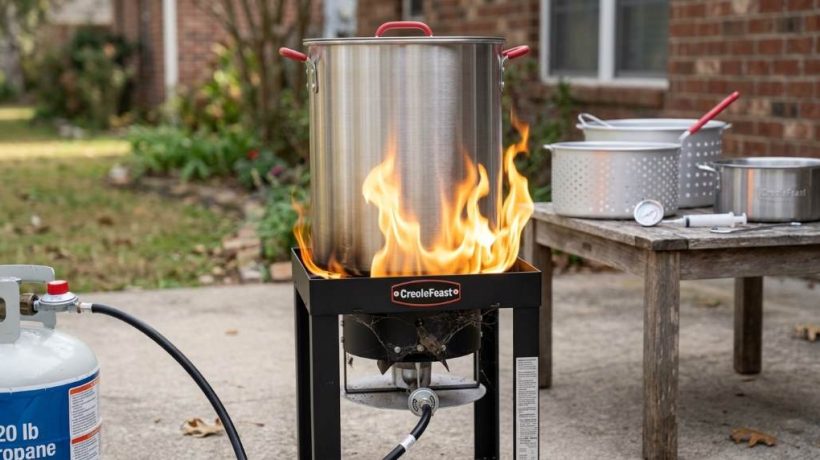
A yellow flame on a CreoleFeast TFS3010 turkey fryer usually means incomplete combustion or restricted airflow. Most often, a dirty burner, blocked air intake, moisture, or regulator problem causes the color change.
That matters because a properly adjusted propane burner should produce a mostly blue flame. Cooking fires also remain a major concern, with cooking causing about half of reported residential fires in recent federal data.
If you recently started using a CreoleFeast TFS3010 turkey fryer, inspect the burner before continuing. A careful cleaning and airflow check often solves the problem without replacing major components.
What a Yellow Flame Means on the TFS3010
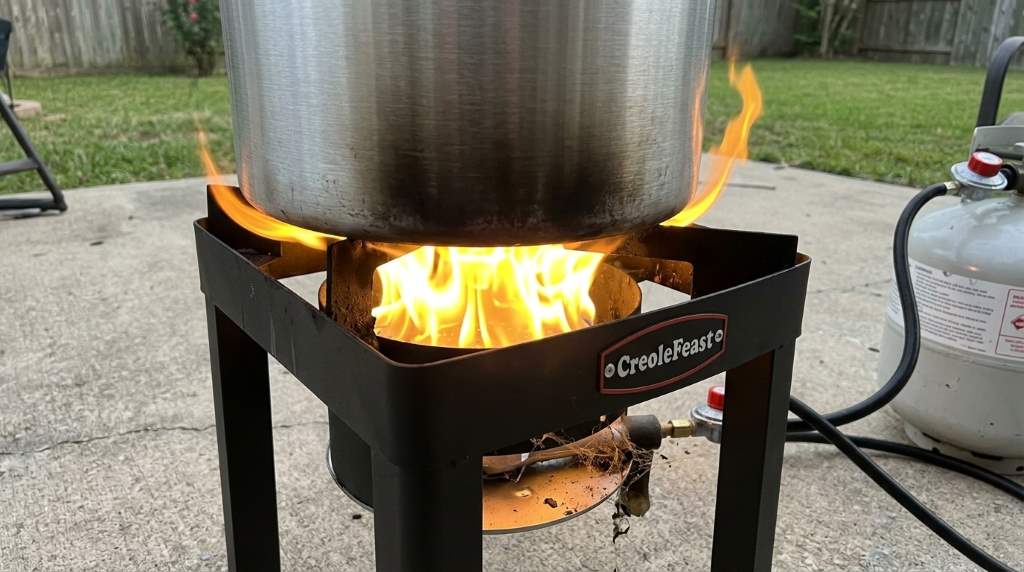
Propane needs the correct balance of fuel and oxygen to burn efficiently. When the burner receives too little oxygen, combustion becomes incomplete and the flame can turn yellow or orange.
Therefore, flame color provides a useful warning during a burner inspection. A brief color change during ignition can occur, but persistent yellow flames deserve attention.
The TFS3010 uses an adjustable air control system around its burner assembly. That system helps provide the oxygen needed for a stable blue propane flame.
Common Reasons Your TFS3010 Flame Turns Yellow
1. The Burner Ports Need Cleaning
Grease, soot, dust, and cooking residue can collect around burner openings. Those deposits can disturb gas flow and prevent proper combustion.
Creole Feast specifically recommends clearing clogged burner ports when burner performance suffers. Use a soft wire brush and avoid damaging the burner openings during cleaning.
2. The Air Intake Has a Blockage
The burner needs unrestricted air entering its mixing area. Dirt, insects, spider webs, or debris can interfere with that airflow.
This problem becomes more likely when you store the fryer outdoors. Before every use, inspect the burner and air intake for anything that could restrict oxygen.
3. The Burner Contains Moisture
Water inside the burner can interfere with normal gas and air mixing. Moisture can enter after cleaning, rain exposure, or outdoor storage.
Creole Feast lists water inside the burner as one possible reason for burner problems. Allow the burner to dry completely before lighting the fryer again.
4. The Air Control Setting Needs Attention
The TFS3010 includes adjustable air control to help maintain proper combustion. If the setting restricts airflow too much, the flame may become yellow.
However, do not make random adjustments while the fryer operates. Turn everything off, let the burner cool, then inspect the adjustment according to the owner instructions.
5. The Regulator Is Restricting Gas Flow
A regulator problem can create abnormal burner behavior even when the burner itself looks clean. Low or unstable gas flow can change flame shape, strength, and color.
The regulator also contains a flow limiting device on compatible Type 1 connections. Opening the cylinder valve incorrectly can activate that safety feature and reduce gas flow.
6. The Propane Supply Is Low
A nearly empty propane cylinder can produce inconsistent burner performance. Therefore, check the cylinder before assuming the burner needs replacement.
Creole Feast identifies low propane levels as a cause of weak or extinguished flames. A proper cylinder connection also helps maintain consistent gas delivery.
7. Wind Is Affecting the Burner
Strong wind can disturb the flame and make its appearance difficult to judge. It can also cause the flame to move away from the burner ports.
Move the fryer away from excessive wind while maintaining the required outdoor clearances. Never place the fryer inside a garage, shed, porch, or enclosed area.
How to Fix a Yellow Flame Safely
Start with the simplest inspection before touching the gas system. A structured check helps you identify the actual cause instead of changing several variables at once.
- Turn the burner control completely off.
- Close the propane cylinder valve.
- Allow the burner and fryer to cool completely.
- Inspect the burner ports for dirt or residue.
- Check the air intake for insects and debris.
- Look for moisture inside the burner.
- Inspect the hose and regulator for visible damage.
- Confirm that the propane cylinder contains fuel.
- Reconnect the regulator securely when required.
- Relight the fryer according to the owner instructions.
Never clean or adjust the burner while an open flame remains present. Also, never attempt to repair a damaged gas hose or regulator with improvised materials.
Reset the Regulator When Gas Flow Looks Weak
A flow limiting device can restrict gas delivery when it detects an abnormal flow condition. The Creole Feast troubleshooting guidance provides a specific reset sequence for compatible Type 1 connections.
First, turn the regulator off and close the propane cylinder valve completely. Then wait several seconds before restoring the connection and reopening the cylinder valve.
Afterward, turn the regulator on and relight the appliance according to the manual. This procedure can restore normal gas flow when the limiter has activated.
How to Clean the TFS3010 Burner
Begin only after the burner has cooled and the propane supply remains closed. Remove loose dirt around the burner exterior before examining the ports closely.
Use a soft wire brush to remove buildup from clogged burner openings. Avoid enlarging the openings because their size affects how the burner distributes propane.
Next, inspect the air intake and mixing area for spider webs or insect nests. Outdoor gas appliances commonly attract insects because protected openings provide convenient shelter.
After cleaning, make sure the burner remains completely dry. Reassemble the fryer correctly before conducting a controlled ignition test outdoors.
What the Flame Should Look Like
A healthy propane burner generally produces a predominantly blue flame with a steady and consistent pattern. Small variations can occur because outdoor conditions affect flame behavior.
A persistent yellow, orange, smoky, or unusually tall flame indicates that you should investigate the burner. Black soot around the burner or cookware provides another warning sign of incomplete combustion.
| Flame appearance | Possible concern | Recommended action |
|---|---|---|
| Mostly blue and steady | Normal combustion | Continue normal operation |
| Mostly yellow | Restricted airflow or combustion issue | Stop and inspect the burner |
| Weak blue flame | Low gas flow or regulator issue | Check propane and regulator |
| Large unstable flame | Gas or airflow problem | Shut down and inspect |
| Flame repeatedly goes out | Wind, blockage, moisture, or low propane | Correct the cause before relighting |
When You Should Stop Using the Fryer
Do not continue cooking simply because the fryer still produces heat. A persistent abnormal flame can indicate a gas or combustion problem that requires correction.
Stop immediately if you smell propane, hear unusual hissing, see flames outside the intended burner area, or notice damaged gas components. Turn off the gas supply and move away from the appliance if the gas odor continues.
Creole Feast advises shutting off the gas and extinguishing open flames when you smell gas. The company also recommends contacting the fire department if the odor remains.
Why You Should Never Ignore a Yellow Flame
Incomplete combustion can produce soot and unwanted combustion products. More importantly, abnormal burner behavior can indicate a condition that reduces safe and predictable operation.
Turkey frying already involves high temperatures, propane, and large quantities of hot oil. Historical federal safety reports document numerous turkey fryer incidents involving fires, burns, explosions, and related hazards.
For that reason, flame inspection should become part of your normal fryer setup. Spending several minutes checking the burner can prevent a much more serious problem later.
Prevent Yellow Flames Before They Start
Good maintenance usually prevents recurring burner problems. Store the fryer in a clean, dry location that limits exposure to rain, insects, grease, and airborne debris.
- Clean the burner after heavy cooking sessions.
- Keep burner openings free from grease buildup.
- Protect the appliance from rain during storage.
- Inspect the burner before seasonal use.
- Check the hose and regulator for visible damage.
- Keep the propane connection clean and secure.
- Follow the manufacturer lighting procedure.
- Never modify the burner or gas components.
Additionally, keep the fryer on a hard, level surface away from combustible materials. The TFS3010 instructions specify outdoor operation and minimum clearance requirements around the appliance.
Do Not Confuse Flame Problems With Oil Problems
A yellow burner flame and overheated oil represent different problems. The flame concerns combustion, while oil temperature depends on burner output and cooking conditions.
Therefore, never solve a burner problem by simply increasing the gas control. That approach can worsen an unstable flame and create unnecessary heat around the fryer.
Use the fryer thermometer to monitor cooking temperature instead of judging heat from flame height. A stable burner provides more predictable heat control during cooking.
What If Cleaning Does Not Fix the Yellow Flame?
If cleaning fails to restore a stable blue flame, stop using the fryer until you identify the cause. The problem could involve the regulator, burner alignment, gas connection, or another component.
Do not drill burner openings, replace fittings with unrelated parts, or bypass safety devices. Those changes can alter gas pressure and combustion characteristics.
Instead, consult the TFS3010 owner instructions or contact Creole Feast customer support. Manufacturer guidance remains the safest route when basic cleaning and inspection fail.
Quick TFS3010 Yellow Flame Checklist
Use this checklist whenever the burner suddenly changes color or performance. Work through each item with the propane supply turned off.
- Is the propane cylinder sufficiently full?
- Is the regulator connection tight?
- Did the flow limiter activate?
- Are burner ports clean?
- Is the air intake unobstructed?
- Could insects have entered the burner?
- Is moisture present inside the burner?
- Does the hose show damage?
- Does the flame remain yellow after cleaning?
If the final answer remains yes, do not continue operating the fryer. A persistent abnormal flame deserves professional or manufacturer guidance before further cooking.
Frequently Asked Questions
Is a yellow flame normal on the CreoleFeast TFS3010?
No, a persistent yellow flame usually indicates an airflow, gas flow, burner, or combustion problem.
Can a dirty burner cause a yellow flame?
Yes, clogged burner ports can disrupt propane distribution and contribute to abnormal flame combustion.
Can spider webs affect the TFS3010 burner?
Yes, insect nests and spider webs can obstruct airflow and interfere with normal burner operation.
Should I keep cooking with a yellow flame?
No, shut the fryer down and inspect the burner before using it again.
What if cleaning does not correct the flame?
Stop using the fryer and contact the manufacturer or a qualified gas appliance professional for further diagnosis.
Conclusion
A yellow CreoleFeast TFS3010 flame usually points toward incomplete combustion caused by restricted airflow, burner contamination, moisture, or gas delivery issues. Start with a complete shutdown, then inspect the burner, air intake, propane supply, regulator, and connections.
Most importantly, never ignore a persistent abnormal flame or continue cooking while the burner behaves unpredictably. Clean the burner carefully, follow the manufacturer instructions, and contact qualified support when basic troubleshooting fails.
Before your next cooking session, make burner inspection part of your setup routine. That simple habit helps your TFS3010 deliver steadier heat while keeping propane and hot oil hazards under better control.
How to Control Temp on Creole Feast SBK1001 Seafood Boiler
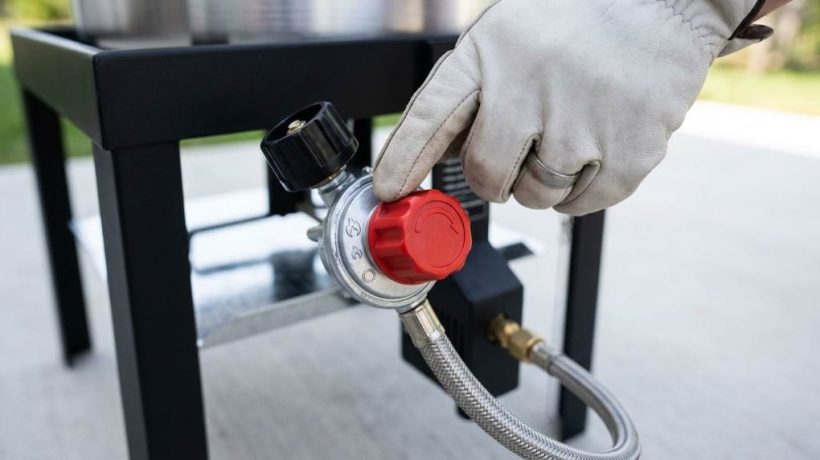
To control temperature on the Creole Feast SBK1001, adjust its propane regulator and watch the burner flame. The Creole Feast SBK1001 seafood boiler uses a 100,000 BTU burner and a 100 quart pot.
Unlike a kitchen appliance, this outdoor boiler does not maintain temperature through a digital thermostat. Instead, you control heat by adjusting propane flow and monitoring the boil. That approach gives you strong control once you learn how the regulator responds.
How Temperature Control Works on the SBK1001
The SBK1001 uses a powerful propane burner beneath the cooking pot. Its regulator controls the gas reaching that burner, which directly affects flame intensity.
Therefore, higher regulator settings produce stronger flames and faster heating. Lower settings reduce the flame and help maintain a gentler cooking level.
The key is not simply turning the regulator to maximum. Instead, match the flame strength to the cooking stage and amount of water.
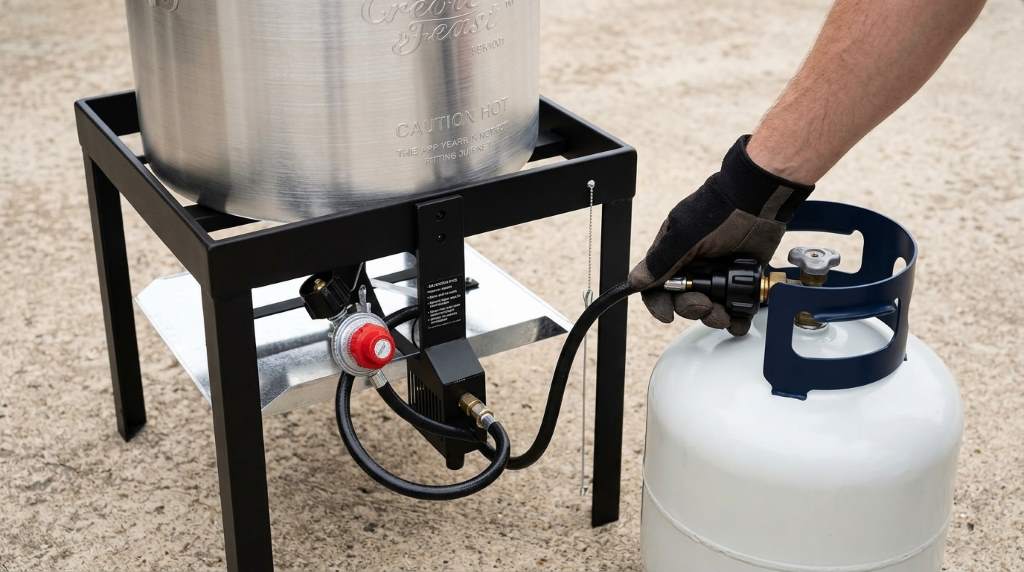
The Regulator Controls Heat
The regulator serves as your primary heat control during cooking. After lighting the burner, turn the regulator toward the desired heat setting.
Start with stronger heat while heating the water. Then reduce the flame after the water reaches your desired cooking condition.
Make small adjustments rather than constantly turning the control back and forth. This method gives the water time to respond before another adjustment.
The Flame Shows Burner Performance
Watch the burner flame whenever you adjust the regulator. The owner manual identifies a predominantly blue flame as the preferred pattern.
A strong yellow flame can indicate inefficient combustion or a burner problem. If the flame pattern looks abnormal, stop relying on temperature adjustments alone.
Instead, inspect the burner and surrounding air passages after the appliance cools. Blockages from insects, webs, dirt, or moisture can affect burner performance.
Step by Step: How to Control the Cooking Temperature
Good temperature control starts before you light the burner. Prepare the pot, water level, propane supply, and cooking ingredients first.
- Place the correct SBK1001 pot securely on its stand.
- Fill the pot between the required minimum and maximum levels.
- Check the hose, regulator, burner, and connections before lighting.
- Open the propane cylinder according to the operating instructions.
- Open the regulator and ignite the burner using the supplied ignition system.
- Begin with a stronger flame while bringing the water toward a boil.
- Reduce the regulator setting once the desired boil develops.
- Watch the water and flame after every heat adjustment.
- Increase heat slightly when adding cold ingredients reduces the boil.
- Lower the flame again after the water recovers.
The SBK1001 manual specifies a two gallon minimum and twelve gallon maximum water level. Staying within those limits supports safer operation and consistent heating.
Use Different Heat Levels for Different Cooking Stages
One heat setting rarely works well from start to finish. Large batches respond differently as ingredients enter the pot.
For that reason, divide the cooking process into three basic stages. Heat aggressively first, stabilize the boil second, and manage recovery last.
Stage One: Heat the Water Quickly
Use a stronger flame when you need to heat a large volume of water. The SBK1001’s high output helps shorten the initial heating period.
However, avoid treating maximum heat as the default cooking setting. Once the water reaches a strong boil, excessive heat can waste propane.
Therefore, reduce the regulator gradually after the water reaches the required cooking condition. Let the water settle before making another adjustment.
Stage Two: Maintain a Steady Boil
A steady boil usually needs less burner power than initial heating. Reduce the flame until the water continues boiling without excessive turbulence.
This approach also gives you better control when cooking delicate seafood. A controlled boil can reduce unnecessary movement and help prevent overcooking.
Keep the lid position consistent when possible because large changes can alter heat retention. Also, avoid frequent lid lifting during active cooking.
Stage Three: Recover Heat After Adding Food
Cold seafood and vegetables can quickly reduce the water temperature. The larger the batch, the more noticeable that temperature drop becomes.
After adding ingredients, increase the burner slightly when necessary. Once the boil returns, reduce the flame again.
This recovery method works better than leaving the burner at maximum for the entire cooking session. It also makes propane use easier to manage.
How Much Water Should You Use?
Water volume strongly affects how quickly the boiler heats and recovers. The SBK1001 has a 100 quart pot, but you should follow its marked fill limits.
| Setting | SBK1001 Guidance | Temperature Control Impact |
|---|---|---|
| Minimum water | 2 gallons | Smaller volume heats faster |
| Maximum water | 12 gallons | Larger volume needs more recovery time |
| Burner output | Up to 100,000 BTU | Provides strong heating capacity |
Never compensate for an excessive water level by simply increasing burner power. The manufacturer specifically instructs users to remain within the marked fill range.
How to Keep Temperature More Consistent
Consistent cooking depends on more than regulator position. Water volume, ingredient temperature, wind, lid use, and burner condition all affect heat.
Keep the Boiler Protected From Strong Wind
Wind can disturb the burner flame and reduce heating consistency. The troubleshooting guidance specifically identifies excessive wind as a possible cause of flame problems.
Place the boiler in a suitable outdoor location with stable conditions. Never block the ventilation needed for proper combustion.
Avoid Overloading the Basket
A heavy ingredient load can reduce water temperature dramatically. It can also make heat recovery slower after you add food.
For large batches, plan ingredient additions carefully. Give the boiler enough time to recover before making another major addition.
Use the Lid Strategically
The lid helps retain heat while the boiler works toward a boil. However, repeated opening releases heat and extends recovery time.
Keep the lid closed during appropriate heating periods. Remove it when the cooking process requires direct observation or ingredient handling.
Watch the Boil Instead of Chasing a Number
The SBK1001 relies on manual flame control rather than automatic temperature regulation. Therefore, visual cooking cues matter during operation.
Watch the strength of the boil, ingredient movement, and recovery after additions. Use a suitable food thermometer when a recipe requires a specific internal temperature.
What to Do When the Boiler Gets Too Hot
If the water boils more aggressively than necessary, reduce the regulator gradually. Avoid making a dramatic adjustment unless the cooking situation requires it.
Wait briefly after each change and observe the water again. The goal involves maintaining the desired cooking activity without unnecessary burner power.
If reducing the flame causes unusual behavior, inspect the burner rather than forcing the regulator. A clean, properly functioning burner should respond predictably.
What to Do When the Boiler Does Not Get Hot Enough
First, check whether the propane cylinder contains enough fuel. Low propane supply can contribute to weak heating or flame loss.
Next, inspect the burner for webs, insects, debris, or moisture. The manufacturer lists blocked burners and water in the burner among possible flame problems.
Also, check for strong wind around the cooking area. If the flame remains weak after basic checks, follow the manufacturer’s troubleshooting procedure.
Reset a Restricted Gas Flow
A regulator flow limiter can sometimes restrict gas flow after a connection problem. The manual provides a specific reset sequence for this situation.
- Turn the regulator off.
- Close the propane cylinder valve completely.
- Wait several seconds for pressure to equalize.
- Reconnect the Type 1 connection if required.
- Open the cylinder valve again.
- Open the regulator and relight the burner.
If the burner still performs poorly, stop troubleshooting through repeated relighting. Contact the manufacturer or a qualified gas professional when necessary.
Safety Rules That Matter During Temperature Control
Temperature adjustments should never override propane safety. The SBK1001 is designed for outdoor use only and requires proper ventilation.
- Never operate the boiler indoors.
- Never leave the appliance unattended while cooking.
- Keep combustible materials away from the burner.
- Inspect the hose before every use.
- Never operate the appliance when you smell propane.
- Keep the propane cylinder upright during operation.
- Never move the boiler while it remains hot or lit.
- Keep the heat shield correctly positioned during use.
- Keep an appropriate fire extinguisher nearby.
The manual also warns that heated liquid can remain dangerously hot after cooking ends. Allow the appliance and liquid to cool before handling or cleaning.
Cleaning Helps Maintain Stable Burner Performance
Temperature control becomes difficult when the burner cannot receive proper airflow. Therefore, regular cleaning supports both performance and safer combustion.
After the appliance cools, inspect the burner tube for webs, insect nests, mud, and other obstructions. The manufacturer recommends using an appropriate flexible brush or wire for clearing blockages.
Clean the pot after every cooking session, especially after using salty boiling water. Salt can contribute to corrosion and pitting when residue remains on aluminum surfaces.
A Simple Temperature Control Routine
For repeatable results, use the same basic routine every time you cook. Consistency makes it easier to understand how your particular setup responds.
| Cooking Moment | Recommended Approach |
|---|---|
| Before ignition | Inspect equipment and confirm correct water level |
| Initial heating | Use stronger burner output |
| Boil reached | Reduce flame gradually |
| Food added | Increase heat briefly for recovery |
| Boil restored | Lower flame to maintain cooking |
| Cooking finished | Turn off propane safely |
This routine prevents the most common temperature mistake: using maximum burner power throughout the entire cook. Instead, treat heat as a control variable that changes with cooking conditions.
Common Temperature Control Mistakes
Many temperature problems come from incorrect operation rather than inadequate burner power. Fortunately, most mistakes have simple fixes.
- Using maximum heat continuously instead of adjusting after boiling.
- Opening the lid repeatedly while trying to maintain heat.
- Adding too many cold ingredients simultaneously.
- Ignoring wind around the burner.
- Failing to inspect the burner before cooking.
- Trying to compensate for a blocked burner with more gas.
- Using the wrong regulator or hose assembly.
- Operating outside the recommended water level.
Correct these issues before making more aggressive temperature adjustments. A properly functioning setup should respond predictably to regulator changes.
When You Should Stop Using the Boiler
Stop operation immediately if you smell gas or discover a propane leak. Do not attempt to solve a gas leak by continuing to adjust the regulator.
Likewise, stop using the appliance when the hose shows cuts, severe abrasion, or other damage. Replace damaged gas components with manufacturer specified parts.
If the flame remains abnormal after cleaning and basic checks, seek qualified assistance. Reliable temperature control starts with safe and properly functioning equipment.
Final Takeaway
Controlling the Creole Feast SBK1001 temperature mainly requires careful regulator adjustment and flame observation. Start with stronger heat, reduce it after boiling, and increase it briefly when cold ingredients lower the boil.
For the best results, maintain the correct water level and keep the burner clean. Always follow the manufacturer’s safety instructions and never sacrifice safe operation for faster cooking.
Before your next seafood boil, inspect the burner, confirm the water level, and test the flame. Then use small regulator adjustments to maintain a steady cooking boil throughout the session.
Frequently Asked Questions
Does the SBK1001 have a temperature thermostat?
No, the SBK1001 uses a manual propane regulator to control burner heat rather than an automatic thermostat.
How do I lower the temperature on the SBK1001?
Turn the regulator toward a lower heat setting and wait for the boil to settle before adjusting again.
Why does my SBK1001 lose heat after adding seafood?
Cold ingredients absorb heat, so temporarily increasing burner output can help restore the boil.
Why is my SBK1001 flame weak?
Check propane supply, wind, burner obstructions, moisture, and the regulator connection before continuing operation.
What flame should the SBK1001 produce?
A predominantly blue flame with little yellow indicates the preferred burner flame pattern.
How to Fix Cosori 9-in-1 TurboBlaze Air Fryer Fan Noise
If your Cosori 9-in-1 TurboBlaze air fryer suddenly makes loud fan noise, first unplug it and let it cool completely. Then clean the airflow area, check the basket and crisper plate, and confirm the fryer sits level. The Cosori 9-in-1 TurboBlaze air fryer uses five fan speeds and operates across nine cooking functions. Its listed noise range reaches about 53 decibels, so some fan sound remains normal during cooking.
What Causes Cosori TurboBlaze Fan Noise?
The TurboBlaze relies on a DC motor and high speed airflow to move heated air around the cooking chamber. Therefore, a steady humming sound usually indicates normal fan operation rather than a defect. However, sudden rattling, scraping, buzzing, clicking, or grinding deserves closer inspection.
Several simple problems can make normal airflow sound much louder than expected. Food debris, grease buildup, poor placement, loose components, or restricted ventilation can change the sound noticeably.
- Food debris near the airflow path
- Grease buildup around internal surfaces
- A basket or crisper plate that sits incorrectly
- An unstable or uneven countertop
- Blocked ventilation around the appliance
- A damaged or obstructed fan
- An internal motor or electrical problem
First, Identify What the Noise Sounds Like
Before cleaning anything, listen carefully to the sound during a normal cooking cycle. The type of noise often provides the first useful clue about the underlying problem.
| Noise type | Likely cause | Recommended action |
|---|---|---|
| Steady hum | Normal fan operation | Continue normal use if performance remains normal |
| Rattle | Loose or poorly seated component | Check the basket and crisper plate |
| Buzzing | Vibration or airflow obstruction | Inspect placement and ventilation |
| Scraping | Possible fan obstruction | Stop using the appliance and inspect safely |
| Grinding | Possible motor or fan problem | Stop operation and contact support |
| Sudden loud vibration | Debris, placement, or component issue | Unplug and perform the basic checks |
How to Fix Fan Noise Step by Step
1. Turn Off and Unplug the Air Fryer
Start with safety before troubleshooting the noise source. Turn the appliance off, unplug it from the outlet, and allow every hot surface to cool.
Never inspect internal electrical components while the appliance remains connected to power. Also, avoid opening the upper housing because the manufacturer does not intend that area for user access.
2. Remove and Clean the Basket
Pull out the basket and remove the crisper plate after the appliance cools completely. Food particles and grease can create vibration or interfere with normal airflow.
Wash both removable parts with hot soapy water and a nonabrasive sponge. You can also use the dishwasher because the basket and crisper plate support dishwasher cleaning.
For stubborn grease, apply a baking soda paste and let it sit before rinsing thoroughly. Then dry every removable component completely before reinstalling it.
3. Check the Crisper Plate
A poorly seated crisper plate can create movement that sounds like fan trouble. Therefore, inspect the four silicone stoppers and confirm the plate sits securely inside the basket.
Insert one side first, then press the opposite side downward until the plate sits correctly. Do not force the plate into position because incorrect installation can damage the component.
4. Inspect the Cooking Chamber
Use a flashlight to examine the inside after unplugging and cooling the appliance. Look for crumbs, grease, food particles, or other debris around the heating area.
Clean accessible surfaces with a slightly damp, nonabrasive cloth or sponge. Never immerse the main appliance in water or pour liquid into its housing.
5. Clean Around the Heating Element
Food debris near the heating element can contribute to unusual smells, smoke, and abnormal sounds. Carefully inspect the accessible heating area without touching electrical components.
Use a slightly damp, nonabrasive sponge or cloth to remove visible residue. Afterward, allow the heating area to dry completely before reconnecting the appliance.
6. Check the Airflow Around the Unit
The TurboBlaze needs clear airflow around its ventilation openings during operation. If cabinets, walls, or objects restrict those openings, the appliance can experience poor airflow and increased operating noise.
Place the fryer on a flat, stable, heat resistant countertop. Keep approximately five inches of clearance behind and above the unit for proper ventilation.
7. Move It Away From Hard Surfaces
A countertop can amplify vibration even when the appliance itself works correctly. Glass, thin metal, or hollow surfaces can make ordinary fan movement sound unusually loud.
Move the air fryer to a sturdy, level countertop and test it again. Avoid placing it on an unstable surface because vibration can increase during high speed fan operation.
8. Check the Basket Fit
A basket that does not sit securely can create rattling during cooking. Remove it, inspect the surrounding edges, and reinstall it firmly without forcing the drawer.
Also check whether excessive food prevents the basket from seating correctly. A properly inserted basket should remain stable while the fan operates.
9. Test Different Cooking Functions
The TurboBlaze uses different fan speeds depending on the selected cooking function. Turbo modes such as Air Fry, Roast, Broil, and Frozen use the highest fan speed.
Consequently, those settings naturally produce stronger airflow and more noticeable fan sound. Test a lower speed function, such as Dehydrate, and compare the sound.
If the noise appears only at the highest fan speed, strong airflow may explain the difference. However, scraping or grinding sounds still require attention even at normal operating speeds.
When Fan Noise Is Normal
Not every fan sound indicates a malfunction. The TurboBlaze uses a DC motor with five fan speeds, so airflow intensity changes between cooking programs.
A smooth, consistent hum usually represents normal operation. The sound should remain relatively stable without sudden grinding, scraping, harsh rattling, or repeated clicking.
You may also hear the fan change speed during cooking. That change can occur because different programs use different airflow settings for their cooking requirements.
When Fan Noise Indicates a Problem
A sudden change from normal humming to mechanical noise deserves more attention. In particular, grinding or scraping can indicate an obstruction or mechanical issue involving the fan assembly.
Stop using the fryer if the noise becomes severe or accompanies smoke, burning smells, overheating, or abnormal electrical behavior. Continuing operation could worsen an internal fault.
- Grinding or scraping continues after cleaning
- The fan vibrates strongly during operation
- The appliance produces dark smoke
- A burning electrical smell appears
- The unit repeatedly overheats
- An error code appears on the display
- The appliance stops heating or circulating air properly
What Not to Do When Fixing Fan Noise
Some DIY approaches can create more problems than they solve. Avoid opening the housing, spraying lubricant into the fan area, or inserting tools through ventilation openings.
Do not remove electrical components simply to locate the noise. Instead, limit your troubleshooting to accessible parts, cleaning, placement, ventilation, and basket installation.
Also, avoid using third party replacement components without confirming compatibility. Electrical appliances require correctly rated parts and proper installation for safe operation.
How to Prevent TurboBlaze Fan Noise
Regular cleaning provides the simplest way to reduce avoidable airflow problems. Clean the basket and crisper plate after every use, especially after cooking greasy foods.
Additionally, wipe accessible interior surfaces when residue becomes visible. Keep ventilation openings clear and never place objects on top of the air fryer.
- Clean removable parts after every use
- Remove grease before buildup becomes heavy
- Keep ventilation openings unobstructed
- Use a flat and stable countertop
- Seat the crisper plate correctly
- Keep the basket free from excessive food
- Allow the unit to cool before cleaning
- Inspect unusual sounds early
What to Do If Cleaning Does Not Fix the Noise
If the fan remains unusually loud after these checks, stop repeated testing. A persistent mechanical sound can indicate a fan, motor, control, or internal component problem.
At that stage, contact the manufacturer’s customer support rather than attempting an internal repair. Describe the noise clearly and provide the model number, purchase information, and circumstances when the noise occurs.
For example, explain whether the noise happens during every function or only during high speed modes. Also mention whether cleaning, repositioning, and reseating the basket changed the sound.
A Simple Five Minute Fan Noise Check
You can quickly narrow down the problem without dismantling the appliance. Follow this sequence whenever the fan suddenly sounds louder than usual.
- Turn off and unplug the air fryer.
- Wait until the appliance cools completely.
- Remove and clean the basket and crisper plate.
- Inspect accessible interior surfaces for debris.
- Confirm the crisper plate sits correctly.
- Place the fryer on a stable countertop.
- Clear the ventilation space around the appliance.
- Run a brief test using a normal cooking function.
- Compare the sound with its previous normal operation.
If the sound returns to a smooth hum, debris, placement, or component seating likely caused the problem. If the harsh noise continues, discontinue use and seek professional assistance.
Final Takeaway
Fixing Cosori TurboBlaze fan noise usually starts with cleaning, checking component placement, and improving ventilation. A smooth fan hum remains normal, especially when the fryer uses higher fan speeds.
However, grinding, scraping, severe rattling, dark smoke, or burning smells require immediate attention. Complete the safe checks first, then contact customer support if the abnormal noise continues.
Take a few minutes to inspect your fryer before the next cooking session. Early cleaning and careful maintenance can prevent minor airflow problems from becoming larger equipment issues.
FAQs About Cosori TurboBlaze Fan Noise
Is the Cosori TurboBlaze supposed to make fan noise?
Yes, the TurboBlaze naturally makes fan noise because its DC motor circulates hot air during cooking.
Why is my Cosori TurboBlaze suddenly louder?
Sudden loudness can result from debris, vibration, poor placement, component movement, or a developing fan problem.
Can I clean the TurboBlaze fan myself?
You should clean only accessible surfaces and ventilation areas without opening the appliance housing.
Why does my TurboBlaze sound louder on Air Fry?
Air Fry uses the highest fan speed, so stronger airflow naturally creates more noticeable operating noise.
When should I stop using my TurboBlaze?
Stop using it when grinding, scraping, dark smoke, burning smells, overheating, or other abnormal electrical symptoms appear.
Why Is My Comfee Portable Mini Dishwasher Leaking?
Your Comfee portable mini dishwasher usually leaks because of a loose hose, damaged seal, blocked drain, or overfilling. First, stop the cycle, unplug the machine, and locate the exact leak point before using it again.
A Comfee portable mini dishwasher can save counter space while handling everyday dishes efficiently. Some models use a compact five liter water tank and support two place settings. Because these machines use several gallons of water during operation, even a small seal problem deserves attention.
Common Reasons Your Comfee Dishwasher Leaks
Most leaks come from a small number of mechanical or installation problems. Therefore, checking each area systematically can save time and prevent unnecessary repairs.
- Loose or damaged water supply connections
- Drain hose problems or poor hose positioning
- Door gasket damage or food debris
- Blocked filters or drainage passages
- Excess detergent or incorrect detergent
- Overloading that interferes with the door seal
- Excessive water entering the dishwasher
- Internal pump, valve, or seal failure
The location of the water often reveals the cause. Water near the front usually points toward the door, while water underneath suggests an internal issue.
Start With a Safe Leak Check
Before troubleshooting, turn off the dishwasher and disconnect its electrical power. If the machine connects directly to a faucet, shut off the water supply as well.
Next, dry the countertop and surrounding area completely. Then run a short cycle while watching the machine carefully from a safe distance.
Do not reach underneath an operating dishwasher or touch wet electrical connections. Instead, stop the cycle immediately if water reaches the power cord or electrical outlet.
Find the Exact Leak Location
Place a dry paper towel around the dishwasher’s base and hose connections. The first wet area can help identify where the water originates.
Check the front, rear, sides, and underneath the machine separately. Also inspect the faucet connection if your model uses a direct water hookup.
Check the Water Supply Hose
A loose inlet connection can create a surprisingly large leak during filling. Inspect both ends of the water supply hose for moisture, cracks, or damaged threads.
Turn off the faucet before tightening any connection. Then reconnect the fitting firmly without forcing or cross threading the connection.
If the fitting still leaks, inspect its washer or sealing surface. A damaged washer can prevent a tight seal even when the connection feels secure.
Inspect the Faucet Adapter
Faucet adapters can leak when they do not match the faucet threads correctly. Remove the adapter and inspect both threaded surfaces for damage.
Also check whether the faucet aerator needs removal before installing the adapter. A poor fit can cause water to escape around the connection during operation.
Never force an incompatible adapter onto the faucet. Instead, use the correct fitting recommended for your specific dishwasher model.
Inspect the Drain Hose
The drain hose carries wastewater away from the dishwasher during and after each cycle. A loose clamp, crack, kink, or damaged connection can cause water to escape.
Follow the entire hose from the dishwasher to its discharge point. Look for sharp bends, crushed sections, loose fittings, and visible splits.
If the hose enters a sink or bucket, make sure its end stays securely positioned. A moving hose can spray wastewater across the counter or floor.
Fix a Loose Drain Connection
Turn off the dishwasher before touching the drain connection. Then inspect the clamp and tighten it carefully if the connection feels loose.
Do not overtighten plastic fittings because excessive pressure can damage the connection. Replace a cracked hose rather than attempting a temporary patch.
Examine the Door Gasket
A damaged door gasket ranks among the most common causes of front leaks. The gasket creates a seal between the dishwasher door and the washing compartment.
Open the door and inspect the entire gasket for cuts, distortion, hardened sections, or trapped food particles. Even a small obstruction can create a path for water.
Clean the gasket gently with a damp cloth and mild dish soap. Then dry the sealing surface before testing another cycle.
Check for Door Obstructions
Dish placement can affect the door seal more than many owners expect. A tall plate, utensil, or container can press against the door.
Remove anything that prevents the door from closing naturally. Then close the door and confirm that it sits evenly around the frame.
If the door requires unusual force, stop using the dishwasher until you identify the obstruction. A forced door can worsen gasket damage over time.
Look for an Overfilled Dishwasher
Too much water can escape through areas that normally remain completely dry. An overfill condition may result from a sensor, valve, or internal plumbing problem.
Some Comfee models use leak detection and display an error when water reaches the base area. Never bypass or remove the float mechanism to keep the machine running.
The float helps detect abnormal water levels and can protect the appliance from continued flooding. If the machine repeatedly overfills, professional service may provide the safest solution.
Clean the Filter and Drain Area
Food particles can collect around the filter and restrict normal drainage. Poor drainage can leave excessive water inside the dishwasher after a cycle.
Remove the filter according to your model’s instructions. Rinse it thoroughly and remove visible debris from the surrounding drain area.
After cleaning, reinstall every component correctly. A poorly seated filter can create drainage problems and may affect the dishwasher’s internal water flow.
Watch for Standing Water
Small amounts of residual water can occur after normal operation. However, a large pool that remains after draining deserves further investigation.
Check whether the drain hose contains a blockage or sharp bend. If the hose looks clear, the drain pump may require professional inspection.
Use the Correct Dishwasher Detergent
Excess suds can push water through seals that normally contain wash water. This problem often appears after someone uses regular dish soap inside the dishwasher.
Only use detergent intended for automatic dishwashers. Follow the recommended amount instead of assuming more detergent provides better cleaning.
If excessive foam caused the leak, stop the machine and allow the suds to settle. Then remove the remaining water according to your model’s instructions.
Check How You Load the Dishwasher
Improper loading can redirect spray toward the door instead of the intended washing surfaces. Therefore, loading technique can directly influence leakage.
- Keep tall items away from the door.
- Prevent dishes from blocking the spray arm.
- Avoid stacking items tightly together.
- Keep sharp objects away from the door seal.
- Make sure the racks sit correctly before starting.
After loading, spin the spray arm gently by hand if your model allows access. It should move freely without striking dishes or utensils.
Check the Dishwasher’s Position
A countertop dishwasher needs a stable, level position for reliable operation. An uneven surface can affect water movement and door sealing.
Place the dishwasher on a strong, level countertop near the required water and drainage connections. Keep the appliance stable when opening or closing the door.
Do not place the machine on an unstable cart or surface unless the manufacturer specifically supports that setup. Movement can stress hoses and connections during operation.
What Different Leak Locations Can Tell You
| Leak Location | Likely Cause | First Check |
|---|---|---|
| Front of door | Gasket or loading problem | Inspect gasket and door clearance |
| Water inlet area | Loose connection or washer | Check faucet adapter and hose |
| Rear of machine | Drain hose issue | Inspect hose and clamp |
| Underneath machine | Internal leak | Stop use and inspect professionally |
| Water after draining | Drain restriction | Clean filter and check hose |
When an Internal Part May Have Failed
Sometimes external troubleshooting cannot solve a dishwasher leak. Internal hoses, pumps, valves, seals, and other components can eventually develop faults.
Repeated leakage from underneath the appliance strongly suggests an internal problem. Continued operation can expose electrical components to water and increase the risk of damage.
At that point, stop using the dishwasher and arrange qualified service. Avoid opening sealed internal components unless you have the required appliance repair experience.
Watch for Error Codes
Some Comfee countertop dishwasher models use error codes to identify abnormal operating conditions. A leak detection code can indicate water has reached the machine’s base area.
Record the displayed code before switching the appliance off. This information can help a technician identify the problem more quickly.
Never remove a safety sensor simply because it prevents the dishwasher from operating. That sensor exists to detect conditions that could cause further water damage.
How to Prevent Future Leaks
Regular maintenance can prevent many leaks before they become serious. A few minutes of inspection can also extend the useful life of the dishwasher.
- Inspect hoses regularly for cracks and stiffness.
- Clean the filter frequently.
- Keep the door gasket free from debris.
- Use only automatic dishwasher detergent.
- Avoid overloading the racks.
- Check connections after moving the appliance.
- Keep the dishwasher level and stable.
- Inspect the countertop for water after each unusual cycle.
Furthermore, inspect the appliance whenever you move it to another location. Moving can loosen fittings that previously remained secure.
A Simple Five Minute Leak Troubleshooting Routine
When you notice water, follow a fixed troubleshooting order instead of randomly tightening components. This approach helps you identify the source without creating additional problems.
- Stop the dishwasher and disconnect electrical power.
- Shut off the water supply if connected to a faucet.
- Dry the countertop and surrounding area.
- Inspect the door gasket and door clearance.
- Check the inlet hose and faucet adapter.
- Inspect the drain hose and clamp.
- Clean the filter and drain area.
- Check for standing water underneath the appliance.
- Run a short test cycle only after fixing obvious issues.
- Contact qualified service if the leak returns.
This sequence separates simple installation problems from problems that require technical attention. More importantly, it prevents repeated operation while water continues entering the base.
When Should You Stop Troubleshooting?
Stop troubleshooting when water appears underneath the dishwasher after you correct external connections. You should also stop when the machine repeatedly reports a leak condition.
Likewise, stop using the appliance if water approaches electrical components or the power connection. Safety matters more than completing another wash cycle.
If the dishwasher remains under its applicable manufacturer coverage, contact the manufacturer before attempting internal repairs. Unauthorized disassembly can complicate service and may create additional damage.
Frequently Asked Questions
Why is my Comfee dishwasher leaking from the door?
A dirty gasket, damaged seal, overloaded rack, or blocked door can cause water to escape from the front.
Why does my Comfee dishwasher leak underneath?
A leak underneath often indicates an internal hose, pump, valve, seal, or overflow problem.
Can too much detergent make a Comfee dishwasher leak?
Yes, excessive suds can push water through the door seal and cause visible leakage.
Why does my Comfee dishwasher show a leak error?
A leak error can indicate water has entered the base area because of an overflow or internal leak.
Should I keep using a leaking Comfee dishwasher?
No, stop using it until you identify and correct the leak or obtain professional service.
Conclusion
A leaking Comfee portable mini dishwasher usually has a practical cause that you can identify through systematic inspection. Start with the door gasket, water connections, drain hose, filter, detergent, and loading pattern.
However, water underneath the machine or repeated leak detection requires greater caution. Stop operation, protect the surrounding area, and arrange qualified service when external checks cannot solve the problem.
Take a few minutes to locate the leak before running another cycle. Acting early can prevent countertop damage, electrical problems, and a much more expensive dishwasher repair.
How to Clean a Clogged Breetee Portable Range Hood Filter
To clean a clogged Breetee portable range hood filter, remove the washable filter and rinse it with warm water. Use mild dish soap for stubborn grease, then rinse thoroughly and let the filter dry completely before reinstalling it.
Cooking caused about 44% of reported home fires during the 2017 to 2021 period. Ranges and cooktops also appeared in 53% of reported home cooking fires. Those figures make routine kitchen equipment care more than a cosmetic task.
A clogged filter can restrict airflow, trap grease, and reduce smoke capture during cooking. The Breetee portable range hood uses a washable condensation filter for grease and moisture capture. However, its carbon filter serves a different purpose and should not receive the same cleaning treatment.
Why a Breetee Filter Gets Clogged
Every cooking session sends grease, moisture, food particles, and smoke toward the hood. The condensation filter catches much of that material before it reaches deeper parts of the appliance.
Over time, grease forms a sticky layer across the filter mesh. That layer can block airflow and make the fan work harder during normal cooking.
Frying usually creates heavier grease buildup than boiling or steaming. Therefore, frequent frying requires more regular filter cleaning than occasional low grease cooking.
Cooking several meals without cleaning can also create a thicker residue. Once the filter becomes visibly greasy, delaying maintenance usually makes cleaning harder.
Know Which Breetee Filter You Can Wash
Breetee uses different filtration components, so identifying each filter prevents costly cleaning mistakes. The washable condensation filter handles grease and moisture from cooking vapors.
The carbon filter helps reduce cooking odors and cannot be washed. Water can damage the carbon filter and reduce its intended performance.
The Washable Condensation Filter
The main condensation filter contains multiple mesh layers designed to capture cooking residue. You can clean this filter with warm water and mild dish soap.
Regular washing removes accumulated grease before it hardens inside the mesh. That simple habit can help maintain better airflow during everyday cooking.
The Carbon Filter
The carbon filter works differently because activated carbon helps reduce unwanted cooking odors. Instead of washing it, replace the carbon filter when it becomes exhausted.
Never soak or scrub the carbon filter while cleaning the washable filter. Keep the two components separate throughout the maintenance process.
What You Need Before Cleaning
You do not need specialized tools for routine Breetee filter maintenance. Gather a few simple household supplies before starting the cleaning process.
- Warm water
- Mild dish soap
- Soft cleaning sponge
- Clean microfiber cloth
- Dry towel
- Small basin or sink
- Kitchen gloves if heavy grease covers the filter
A soft sponge works better than an abrasive scrubber for routine cleaning. Harsh tools can damage delicate mesh layers or protective surfaces.
Keep the cleaning area away from active burners and hot cookware. Always work with the appliance turned off and fully cooled.
How to Clean a Clogged Breetee Portable Range Hood Filter
1. Turn Off and Cool the Hood
Switch off the Breetee hood before touching the filter or other removable parts. Allow the appliance to cool completely if you recently finished cooking.
Never clean components while the fan or cooking surface remains hot. A cool appliance makes the process safer and easier to control.
2. Remove the Grease Collection Cup
Start by removing the grease collection cup from the appliance. Empty any collected oil into an appropriate waste container.
Do not pour cooking grease directly into the drain. Grease can cool inside plumbing and contribute to stubborn blockages.
Wash the collection cup separately with warm water and mild dish soap. Rinse away every trace of soap before drying the cup.
3. Remove the Washable Filter
Carefully remove the condensation filter according to the appliance design. Avoid forcing the filter if grease has made the component difficult to move.
Excessive force can bend mesh layers or damage the filter frame. Instead, inspect the attachment points and release the filter gently.
Place the removed filter over the sink before beginning the washing process. This approach keeps grease and dirty water away from clean surfaces.
4. Rinse Away Loose Grease
Hold the washable filter under warm running water to loosen surface grease. Let the water pass through the mesh instead of blasting it aggressively.
Warm water softens oily residue and makes the following cleaning step easier. However, extremely hot water can create unnecessary handling risks.
Rotate the filter while rinsing so water reaches different areas. Pay particular attention to corners where grease often collects.
5. Apply Mild Dish Soap
Add a small amount of mild dish soap to a soft sponge. Gently work the soap across both sides of the washable filter.
Focus on areas with visible grease rather than scrubbing the entire filter aggressively. Gentle pressure usually works better when soap has enough time.
For heavy buildup, allow the soapy solution to sit briefly on the surface. This gives the detergent time to loosen stubborn grease.
6. Clean Between the Mesh Layers
Grease can remain trapped between mesh layers even when the outer surface looks clean. Rinse from different directions to help release hidden residue.
Use a soft sponge rather than a stiff brush inside the mesh. A gentle technique reduces the chance of deforming the filter structure.
If residue remains, repeat the warm water and soap process. Several gentle cleaning cycles work better than one aggressive scrubbing session.
7. Rinse Until the Water Runs Clear
Rinse the washable filter thoroughly under clean running water. Continue until you no longer see soap, foam, or greasy residue.
Soap left inside the mesh can attract residue during later cooking. Therefore, thorough rinsing remains an important part of the process.
8. Inspect the Filter Carefully
Hold the clean filter under good lighting and inspect every section. Look for remaining grease, damaged mesh, bent areas, or loose components.
A filter can appear clean from one angle while retaining residue elsewhere. Rotate it slowly before deciding that cleaning is complete.
If the mesh remains heavily blocked after repeated cleaning, consider replacing the filter. A damaged filter should also receive replacement rather than continued aggressive cleaning.
9. Dry the Filter Completely
Shake away excess water and place the washable filter on a clean towel. Allow both sides to air dry completely before reinstalling it.
Do not reinstall a visibly wet filter inside the appliance. Complete drying helps prevent unnecessary moisture from remaining inside the filtration area.
You can gently pat the filter with a clean towel to speed surface drying. However, give the mesh enough time to dry naturally.
10. Reinstall the Clean Components
Once completely dry, reinstall the washable condensation filter securely. Return the clean grease collection cup to its proper position.
Check that each component sits correctly before operating the hood. A loose filter can create poor airflow or unusual operating noise.
Finally, run the hood briefly without cooking. Listen for normal airflow and check that the fan operates smoothly.
How to Unclog a Heavily Greased Breetee Filter
A heavily clogged filter needs more patience rather than stronger chemicals. Start with warm water and mild dish soap as your primary cleaning method.
Let the soapy solution soften the grease before scrubbing. Then gently clean the mesh with a soft sponge and rinse thoroughly.
Repeat the process when thick residue remains after the first attempt. Multiple gentle cycles protect the filter better than harsh mechanical cleaning.
Avoid aggressive scraping tools, abrasive powders, and harsh chemical cleaners. These products can damage the filter surface or leave unwanted residues.
Do not use oven cleaner unless the specific Breetee instructions explicitly permit it. A washable condensation filter does not automatically tolerate every degreasing product.
Signs Your Breetee Filter Needs Cleaning
You can often identify a clogged filter before airflow becomes noticeably weak. Watch for several practical warning signs during regular cooking.
- Visible grease covering the mesh
- Reduced smoke capture
- Stronger cooking odors around the hood
- Noticeably weaker airflow
- Grease collecting around the filter area
- Residue dripping toward the collection cup
- More frequent surface grease around the cooking area
One symptom does not always prove that the filter caused the problem. However, several symptoms together justify immediate inspection and cleaning.
How Often Should You Clean the Filter?
Cleaning frequency depends mainly on cooking habits and the amount of grease your meals produce. People who fry frequently should inspect the filter more often.
For light cooking, inspect the filter weekly and clean it whenever residue becomes visible. Frequent frying may require cleaning after several cooking sessions.
Heavy users should avoid relying on a fixed calendar alone. Instead, inspect the filter regularly and respond to visible grease buildup.
This approach works because cooking patterns vary considerably between households. A single schedule cannot accurately fit every kitchen.
How to Keep the Filter Cleaner Longer
Good cooking habits can reduce the amount of grease reaching the filtration system. Start by using the hood close to the actual smoke source.
Breetee recommends positioning the hood within four inches of the smoke or steam source. Close placement helps the appliance capture cooking vapors more effectively.
Use the appropriate fan setting when frying or producing substantial smoke. Higher airflow can help capture cooking vapors before they spread around the room.
Keep the hood focused on one cooking zone whenever possible. Multiple active burners can reduce overall capture efficiency for a compact portable hood.
Wipe the surrounding surfaces regularly as well. Removing grease from nearby areas reduces the chance of residue spreading back toward the appliance.
Common Cleaning Mistakes to Avoid
Washing the Carbon Filter
The carbon filter should not go into the sink with the washable filter. Replace it according to its condition and intended service life.
Using Abrasive Tools
Steel wool and aggressive brushes can damage delicate mesh surfaces. Choose a soft sponge and controlled pressure instead.
Reinstalling a Wet Filter
Putting a wet filter back into the appliance defeats the drying step. Always wait until the washable filter feels completely dry.
Ignoring the Grease Cup
The collection cup also accumulates cooking residue during normal operation. Clean it whenever you clean the washable filter.
Cleaning Only the Visible Surface
Grease can remain inside the mesh even when the front looks clean. Always rinse and inspect both sides carefully.
When Cleaning Does Not Solve the Problem
Sometimes poor airflow continues even after the filter looks completely clean. In that situation, inspect the filter installation and surrounding airflow path.
Check whether the carbon filter has become saturated and needs replacement. Also confirm that the hood sits close enough to the cooking source.
Remember that Breetee works best as a close range solution for a single cooking zone. It does not replace a traditional full size range hood.
If unusual noise, electrical problems, or persistent performance issues appear, stop using the appliance. Contact Breetee support when routine cleaning cannot explain the problem.
A Simple Breetee Filter Cleaning Routine
A consistent routine prevents most serious filter buildup. You can keep the process simple by combining inspection, cleaning, drying, and replacement checks.
- Inspect the filter after regular cooking.
- Remove the grease collection cup.
- Remove the washable condensation filter.
- Rinse the filter with warm water.
- Wash it gently with mild dish soap.
- Rinse away all soap and grease.
- Inspect the mesh for remaining buildup.
- Air dry the filter completely.
- Clean and dry the grease collection cup.
- Reinstall every component securely.
- Replace the carbon filter when necessary.
This routine takes little effort when performed regularly. More importantly, it prevents a small grease problem from becoming a difficult cleaning job.
Final Thoughts
Cleaning a clogged Breetee portable range hood filter requires warm water, mild dish soap, and gentle handling. The washable condensation filter can be cleaned, while the carbon filter should remain dry.
Start cleaning as soon as grease becomes visible instead of waiting for airflow to decline. Afterward, dry every washable component completely and reinstall everything securely.
Make filter inspection part of your normal kitchen routine for more consistent performance. Clean the filter today if grease has already restricted its mesh.
Frequently Asked Questions
Can I wash the Breetee condensation filter?
Yes, you can wash the Breetee condensation filter with warm water and mild dish soap.
Can I wash the Breetee carbon filter?
No, the carbon filter should not be washed because it requires replacement instead.
How do I clean heavy grease from the filter?
Soak the washable filter briefly with warm soapy water, then gently scrub and rinse it.
How often should I clean the Breetee filter?
Inspect it weekly and clean it whenever visible grease or restricted airflow appears.
Why does my Breetee hood still have weak airflow?
Check filter cleanliness, filter installation, carbon filter condition, and the hood’s distance from the cooking source.