Why Is My Aroma Digital Rice Cooker Burning Rice?

How to Fix an Amazon Basics 2-Slice Toaster
August 11, 2026
How to Stop Bakers Signature Air Fryer Paper Liners From Burning
August 11, 2026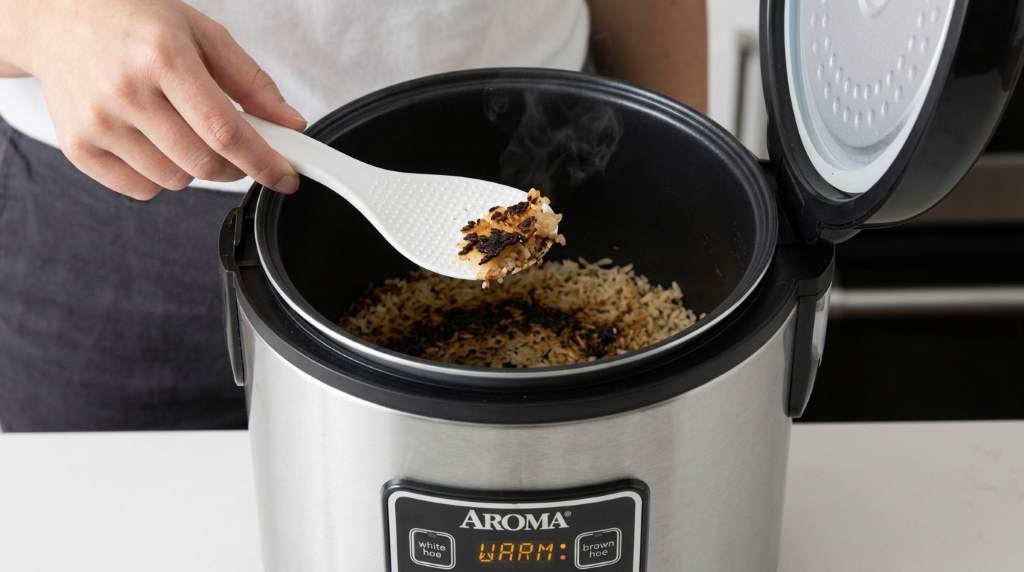
If your Aroma digital rice cooker burns rice, incorrect water levels, residue, or sensor problems usually cause it. A typical rice cooking cycle lasts about 20 to 40 minutes, depending on rice type and quantity.
Even small changes in water, rice volume, or heat sensing can create scorched bottoms. This guide explains the causes, fixes, cleaning steps, and warning signs for your Aroma digital rice cooker.
Why Does an Aroma Digital Rice Cooker Burn Rice?
An Aroma cooker can burn rice when the cooking pot loses enough moisture before cooking finishes. Once the water disappears, the heating plate can continue transferring strong heat.
Normally, the cooker changes temperature after detecting that most water has evaporated. However, incorrect measurements or sensor problems can interrupt that process.
Several issues can create this problem, so inspect the simple causes before assuming the cooker needs replacement.
- Too little water
- Incorrect rice to water ratios
- Excess rice in the cooking pot
- Dirty temperature sensors
- Food residue beneath the inner pot
- A damaged or warped cooking pot
- Uneven contact with the heating plate
- Using the wrong cooking program
- Leaving rice on Keep Warm too long
1. Check the Rice to Water Ratio
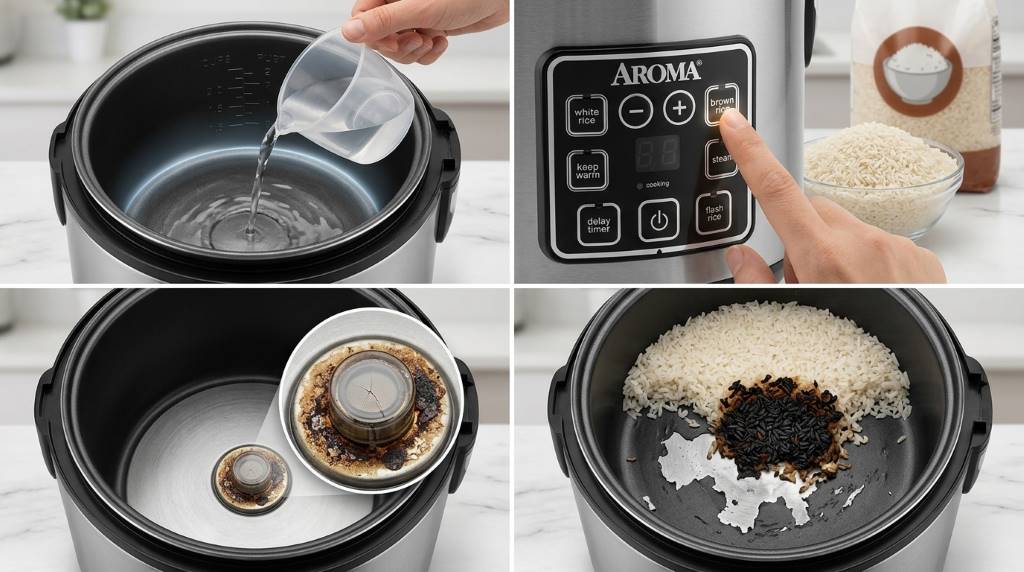
The most common cause involves insufficient water during the cooking cycle. Rice needs enough moisture to absorb water and soften without exposing its bottom to excessive heat.
Start with the measuring instructions supplied for your specific Aroma model. Different rice varieties and programs can require different water amounts.
Why Water Levels Matter
White rice generally needs less water than brown rice because brown rice retains its outer bran layer. Consequently, using a white rice ratio for brown rice can produce undercooked grains.
However, adding excessive water can also create poor results. Too much water may produce mushy rice, while too little can encourage scorching.
Use the cooker cup supplied with your appliance whenever possible. Also, fill water according to the markings inside the cooking pot.
2. Measure Rice Before Adding Water
Measurement errors can change the cooking balance considerably. Therefore, always measure dry rice before placing it inside the inner pot.
Then rinse the rice when appropriate and drain it consistently. Extra water from inconsistent rinsing can alter the final cooking texture.
For repeatable results, use the same measuring cup and preparation method each time. This approach makes troubleshooting much easier.
3. Clean the Heating Plate and Sensor
A dirty heating area can prevent the inner pot from sitting correctly. As a result, the cooker may transfer heat unevenly across the pot.
Remove the inner pot and inspect the heating plate underneath. Look for dried rice, starch, grease, crumbs, or other residue.
Clean the area after unplugging the appliance and allowing it to cool completely. Use a soft, slightly damp cloth rather than abrasive materials.
Pay Attention to the Temperature Sensor
Many digital rice cookers rely on temperature changes to determine when cooking should transition. A dirty sensor can interfere with that temperature detection.
Inspect the small sensor area in the center of the heating plate. Keep it clean, dry, and free from food particles.
Never pour water directly into the cooker base. Moisture inside the electrical housing can create a serious safety hazard.
4. Make Sure the Inner Pot Sits Correctly
The inner pot should sit flat against the heating surface. Even a small obstruction underneath can create uneven heating.
Before starting a cycle, rotate the pot gently into position. Check that it does not wobble, tilt, or sit unusually high.
Also inspect the bottom of the pot for dents or warping. A damaged base can prevent proper contact with the heating plate.
5. Avoid Overloading the Cooker
Adding too much rice can interfere with proper water distribution. Moreover, overloaded pots may cook unevenly from the center toward the edges.
Check your model’s maximum capacity before preparing large batches. Remember that cooked rice expands considerably during cooking.
For consistent results, stay comfortably below the maximum capacity when troubleshooting burning. Smaller batches can also help identify whether capacity causes the problem.
6. Use the Correct Cooking Setting
Aroma digital cookers can offer several programs for different foods and rice varieties. Each program controls cooking conditions differently.
Using a specialized setting for the wrong food can therefore produce poor texture. For example, brown rice generally benefits from its designated cooking program.
Check the control panel before starting the cycle. Select the setting that matches the rice variety and preparation method.
7. Consider the Type of Rice
Different rice varieties absorb water at different rates. Therefore, one measurement method cannot always deliver identical results.
Brown rice, jasmine rice, basmati rice, sushi rice, and wild rice can behave differently. Adjust preparation according to the cooker instructions for each variety.
Additionally, older rice can sometimes require slightly different preparation than freshly packaged rice. Keep your method consistent while testing adjustments.
8. Rinse Rice Properly
Rinsing removes excess surface starch from many rice varieties. Excess starch can create a sticky layer that settles against the cooking surface.
Place the rice in a separate bowl or suitable strainer before rinsing. Continue until the water becomes noticeably clearer.
Afterward, drain the rice consistently before adding it to the cooking pot. Avoid leaving large amounts of rinse water behind.
9. Check Whether Keep Warm Is Causing the Burning
Sometimes the cooker does not burn rice during cooking itself. Instead, extended Keep Warm operation can dry the bottom and create browning.
Keep Warm maintains heat after the cooking cycle ends. Over time, moisture gradually leaves the rice, especially from the bottom layer.
If fresh rice tastes fine initially but develops a hard, brown base later, Keep Warm may cause the issue. Serve the rice sooner or transfer it into another container.
Signs Keep Warm Causes the Problem
- The rice looks normal immediately after cooking.
- The bottom becomes dry after extended holding.
- The upper rice remains soft while the bottom hardens.
- Burning appears mainly after the cooking cycle ends.
10. Inspect the Cooking Pot for Damage
The inner pot directly affects how heat reaches the rice. Scratches, dents, warping, or damaged surfaces can affect cooking performance.
Remove the pot and place it on a flat surface. If it rocks or fails to sit evenly, inspect it closely for deformation.
Do not continue using a severely damaged pot. Replacing the compatible inner pot can solve problems caused by poor heating contact.
11. Reset Your Aroma Rice Cooker
A basic reset can help after unusual cooking behavior or control issues. First, stop the cooking cycle and unplug the appliance.
Allow the cooker to cool before reconnecting it. Then prepare a small batch using the correct rice and water measurements.
If the cooker repeatedly burns properly measured rice after cleaning, resetting probably will not solve the underlying problem. At that point, inspect the appliance more carefully.
12. Run a Simple Troubleshooting Test
A controlled test can help identify whether the problem involves ingredients or the appliance. Use a small, familiar batch of white rice for this test.
Follow these steps carefully:
- Unplug and clean the cooker base.
- Clean the heating plate and temperature sensor.
- Inspect the inner pot for dents or warping.
- Measure the rice using the supplied cup.
- Use the recommended water level.
- Place the pot firmly into position.
- Select the appropriate rice setting.
- Observe the rice immediately after cooking.
If the rice cooks normally, your earlier preparation method likely caused the burning. If scorching continues, investigate the appliance itself.
What If My Aroma Rice Cooker Still Burns Rice?
Persistent burning can indicate a temperature sensing or heating problem. The cooker may fail to reduce heating when the cooking cycle reaches its transition point.
At that stage, stop repeatedly testing the appliance with large batches. Repeated scorching wastes food and can worsen damage to the cooking pot.
Check the model specific instructions for troubleshooting procedures. If the cooker still behaves abnormally, contact the manufacturer or a qualified appliance technician.
When Should You Replace the Rice Cooker?
You may need replacement when the appliance repeatedly overheats despite correct preparation. Physical damage, electrical faults, or unreliable temperature control can make continued use impractical.
However, replacement should not become the first solution. Cleaning, correct measurements, proper placement, and suitable settings solve many burning problems.
Consider replacement when several controlled tests produce the same scorching result. Also stop using the cooker if you notice smoke, damaged wiring, unusual electrical smells, or other unsafe behavior.
How to Prevent Burned Rice in the Future
Prevention becomes easier once you establish a consistent cooking routine. Small habits can keep the rice cooker performing more predictably.
- Use the supplied measuring cup.
- Follow the correct water markings.
- Match the cooking program to your rice.
- Rinse rice consistently when appropriate.
- Clean the heating plate regularly.
- Keep the temperature sensor free from residue.
- Check the inner pot for damage.
- Avoid exceeding the recommended capacity.
- Do not leave cooked rice warm for excessive periods.
- Inspect unusual cooking behavior early.
A Practical Cleaning Routine
Regular cleaning protects both cooking performance and food quality. Always unplug the appliance before cleaning the cooker base.
Wash the removable inner pot according to its care instructions. Wipe the heating plate carefully and keep the electrical base dry.
Also clean removable steam components when your model includes them. Finally, allow washable components to dry fully before reassembly.
Quick Diagnosis: What the Burn Pattern Tells You
| Burning Pattern | Likely Cause | First Action |
|---|---|---|
| Thin brown layer | Low water or extended warming | Check water and serving time |
| Heavy bottom scorching | Sensor or heating issue | Clean and inspect the sensor |
| Uneven burning | Poor pot contact | Check the inner pot base |
| Burning after Keep Warm | Extended warming | Transfer rice sooner |
| Burning every cycle | Possible appliance fault | Stop testing and inspect further |
Frequently Asked Questions
Why does my Aroma rice cooker burn rice on the bottom?
Low water, residue, poor pot contact, or excessive heating can cause rice to burn underneath.
How much water should I add to my Aroma rice cooker?
Use the water markings and rice specific instructions provided for your particular Aroma model.
Can a dirty sensor make a rice cooker burn rice?
Yes, residue around the temperature sensor can interfere with heat detection and cause improper cooking.
Why does rice burn only during Keep Warm?
Extended warming gradually removes moisture, which can dry and brown the rice touching the bottom.
Should I replace my Aroma rice cooker if it keeps burning rice?
Consider replacement after cleaning and correct measurements fail to solve repeated scorching.
Conclusion
An Aroma digital rice cooker usually burns rice because of water, measurement, cleaning, contact, or temperature issues. Start with simple fixes before assuming the appliance has failed.
Clean the heating area, verify measurements, inspect the pot, and test a small batch. If burning continues despite correct preparation, stop using the appliance and seek qualified support.
Take a few minutes to inspect your cooker before your next batch. A consistent preparation routine can restore better rice and prevent unnecessary scorching.