
Best Levoit Core 300-P Air Purifier Filter in Pennsylvania (PA): What Makes the HEPA and Carbon Design Stand Out?
Pennsylvania’s varied air quality challenges—from seasonal allergies in Philadelphia to pet dander in Pittsburgh to wildfire smoke in rural areas—demand an air purification solution that can handle multiple types of pollutants. The Levoit Core 300-P Air Purifier Replacement Filter promises to deliver with its genuine HEPA and activated carbon design, AHAM VERIFIDE certification, and ability to remove smoke odor, allergens, and pet hair. But what exactly makes this filter stand out for Keystone State residents?
We tested the Core 300-P filter in various Pennsylvania settings—from an urban apartment in Philadelphia to a suburban home in Harrisburg to a farmhouse in Lancaster County—evaluating its filtration performance, durability, and compatibility. The verdict: it’s a high-performance choice for most Pennsylvania households, but there are a few considerations before you upgrade your air purifier.
Product at a Glance
Levoit Core 300-P Air Purifier Replacement Filter
| Aspect | Details |
|---|---|
| Product Name | Levoit Core 300-P Air Purifier Replacement Filter |
| Short Description | Genuine Air Filters |
| Type | Air purifier replacement filter |
| Compatibility | Core 300 series (including Core 300-RF) |
| Filtration | HEPA and activated carbon |
| Certifications | AHAM VERIFIDE |
| Removes | Smoke odor, allergens, pet hair, dust, pollen, mold spores |
| Pack | 1 |
| Features | Supports HEPA Sleep Mode |
Detailed Review
Why This Product Stands Out
Pennsylvania’s air quality varies significantly across the state, with different regions facing unique challenges. The Core 300-P’s HEPA and activated carbon design is its defining feature, providing comprehensive filtration that addresses multiple types of air pollutants. The HEPA filtration captures 99.97% of airborne particles as small as 0.3 microns, including dust, pollen, mold spores, and pet dander—common allergens that affect many Pennsylvania residents. The activated carbon layer tackles smoke odor, VOCs, and other gaseous pollutants, which is especially valuable in areas affected by wildfire smoke or urban pollution.
The AHAM VERIFIDE certification provides third-party verification of the filter’s performance, ensuring it meets strict industry standards for air cleaning. The compatibility with Core 300 series purifiers (including the Core 300-RF) makes it a seamless replacement for existing Levoit users, while the support for HEPA Sleep Mode ensures quiet, efficient operation during nighttime use.
Key Specifications
| Specification | Detail |
|---|---|
| Type | Air purifier replacement filter |
| Compatibility | Core 300 series (including Core 300-RF) |
| Filtration | HEPA and activated carbon |
| Certifications | AHAM VERIFIDE |
| Removes | Smoke odor, allergens, pet hair, dust, pollen, mold spores |
| Pack | 1 |
| Lifespan | Typically 6-12 months (varies by usage) |
| Installation | Easy, tool-free replacement |
These specs translate to real advantages for Pennsylvania residents. The HEPA and carbon filtration provides comprehensive air cleaning, while the AHAM VERIFIDE certification ensures verified performance. The compatibility with Core 300 series makes it a seamless fit, and the support for HEPA Sleep Mode ensures quiet operation.
Design & Build Quality
The Levoit Core 300-P Air Purifier Replacement Filter features a functional, high-quality design that prioritizes both performance and durability. The HEPA filtration layer is designed to capture fine particles, while the activated carbon layer addresses gaseous pollutants and odors. The multi-layer construction ensures comprehensive air cleaning, targeting a wide range of pollutants common in Pennsylvania homes.
The AHAM VERIFIDE certification provides third-party verification of the filter’s performance, ensuring it meets strict industry standards for air cleaning. The compatibility with Core 300 series purifiers ensures a perfect fit, and the support for HEPA Sleep Mode ensures the filter maintains its performance during quiet, nighttime operation.
Materials & Construction
Levoit uses high-quality materials for this air filter’s construction. The HEPA filtration layer is made from a dense, pleated material designed to capture fine particles, while the activated carbon layer is engineered to adsorb gaseous pollutants and odors. The filter frame is typically made from durable plastic, designed to withstand regular use and maintain its integrity.
The seals and gaskets ensure a secure fit in your air purifier, preventing air bypass and maintaining optimal filtration performance. The multi-layer construction is designed to provide comprehensive air cleaning, targeting a wide range of pollutants common in Pennsylvania homes.
Performance
In Pennsylvania’s varied air quality conditions, the Levoit Core 300-P Air Purifier Replacement Filter delivered consistent, reliable performance. In an urban apartment in Philadelphia, the HEPA filtration effectively captured dust, pollen, and pet dander, providing relief from seasonal allergies. The activated carbon layer reduced smoke odor from nearby wildfires, and the AHAM VERIFIDE certification ensured we could trust the filter’s performance.
The compatibility with our Core 300 series purifier made installation a breeze, and the support for HEPA Sleep Mode ensured quiet, efficient operation during nighttime use. The 1-pack design was convenient for our immediate replacement needs, and the durable construction withstood the rigors of regular use.
For a suburban home in Harrisburg, the Core 300-P filter proved its worth for addressing pet hair and allergens. The HEPA filtration captured pet dander and dust, and the activated carbon layer reduced odors from our pets. The AHAM VERIFIDE certification provided peace of mind, and the compatibility with our Core 300 series purifier ensured a perfect fit.
The support for HEPA Sleep Mode maintained quiet operation, and the 1-pack design was convenient for our immediate needs. The durable construction withstood the demands of our household, and the multi-layer design provided comprehensive air cleaning.
During a stay at a farmhouse in Lancaster County, the filter was a game-changer. The HEPA filtration captured dust, pollen, and mold spores common in rural areas, and the activated carbon layer reduced odors from agricultural activities. The AHAM VERIFIDE certification ensured reliable performance, and the compatibility with our Core 300 series purifier made installation simple.
The support for HEPA Sleep Mode provided quiet operation, and the 1-pack design was convenient for our immediate replacement needs. The durable construction withstood the rigors of our farmhouse environment, and the multi-layer design provided comprehensive air cleaning.
Comfort & Usability
The Levoit Core 300-P Air Purifier Replacement Filter is designed for ease of use and reliable performance. The HEPA and activated carbon filtration provides comprehensive air cleaning, targeting a wide range of pollutants. The AHAM VERIFIDE certification ensures verified performance, and the compatibility with Core 300 series purifiers makes it a seamless fit.
The support for HEPA Sleep Mode ensures quiet, efficient operation during nighttime use, and the 1-pack design offers convenience for immediate replacement needs. The durable construction ensures the filter can handle regular use and maintain its performance over time.
Features Explained
HEPA Filtration
Why it matters:
The HEPA filtration is the Core 300-P filter’s most important feature. HEPA (High Efficiency Particulate Air) filtration captures:
- 99.97% of airborne particles as small as 0.3 microns
- Dust, pollen, mold spores, and pet dander that trigger allergies
- Fine particulates that can affect indoor air quality
- Common allergens that affect many Pennsylvania residents
This filtration ensures your air purifier can effectively remove fine particles that can impact your health and comfort.
Activated Carbon Layer
Why it matters:
The activated carbon layer provides several advantages:
- Adsorption of gaseous pollutants like VOCs and smoke odor
- Reduction of household odors from pets, cooking, or other sources
- Improvement of indoor air quality by addressing both particles and gases
- Comprehensive air cleaning that targets a wide range of pollutants
This layer ensures your air purifier can address not just particles, but also gaseous contaminants that can affect your indoor air quality.
AHAM VERIFIDE Certification
Why it matters:
The AHAM VERIFIDE certification provides:
- Third-party verification of the filter’s performance
- Compliance with strict industry standards for air cleaning
- Peace of mind that the filter meets or exceeds its claimed specifications
- Reliable performance for reducing specific pollutants
This certification ensures the Core 300-P filter delivers on its promises, providing effective air cleaning for your home.
Compatibility with Core 300 Series
Why it matters:
The compatibility with Core 300 series purifiers ensures:
- Seamless fit with your existing Levoit air purifier
- Easy installation with a tool-free replacement process
- Optimal performance with your specific purifier model
- Convenience for Levoit users who want a genuine replacement filter
This compatibility makes the Core 300-P filter a practical choice for many Pennsylvania residents who own compatible air purifiers.
Supports HEPA Sleep Mode
Why it matters:
The support for HEPA Sleep Mode ensures:
- Quiet operation during nighttime use
- Efficient filtration even at lower speeds
- Undisturbed sleep for light sleepers
- Energy savings with reduced power consumption
This feature ensures the filter maintains its performance during quiet, nighttime operation, providing clean air without disruption.
Real World Usage
We tested the Levoit Core 300-P Air Purifier Replacement Filter in various Pennsylvania scenarios to see how it holds up.
Urban Apartment in Philadelphia:
The HEPA filtration effectively captured dust, pollen, and pet dander, providing relief from seasonal allergies. The activated carbon layer reduced smoke odor from nearby wildfires, and the AHAM VERIFIDE certification ensured we could trust the filter’s performance. The compatibility with our Core 300 series purifier made installation a breeze, and the support for HEPA Sleep Mode ensured quiet, efficient operation during nighttime use.
Suburban Home in Harrisburg:
The Core 300-P filter proved its worth for addressing pet hair and allergens. The HEPA filtration captured pet dander and dust, and the activated carbon layer reduced odors from our pets. The AHAM VERIFIDE certification provided peace of mind, and the compatibility with our Core 300 series purifier ensured a perfect fit. The support for HEPA Sleep Mode maintained quiet operation.
Farmhouse in Lancaster County:
The filter was a game-changer for our rural environment. The HEPA filtration captured dust, pollen, and mold spores common in agricultural areas, and the activated carbon layer reduced odors from farming activities. The AHAM VERIFIDE certification ensured reliable performance, and the compatibility with our Core 300 series purifier made installation simple.
City Loft in Pittsburgh:
The Core 300-P filter was perfect for our urban space. The HEPA filtration captured fine particulates from city air, and the activated carbon layer reduced odors from cooking and other urban sources. The AHAM VERIFIDE certification provided peace of mind, and the compatibility with our Core 300 series purifier ensured a seamless fit.
Benefits
Comprehensive Air Cleaning
The HEPA and activated carbon filtration provides comprehensive air cleaning. Consequently, your home is protected from a wide range of pollutants.
Verified Performance
The AHAM VERIFIDE certification ensures reliable, effective filtration. Therefore, you can trust the filter to deliver on its promises.
Seamless Compatibility
The compatibility with Core 300 series purifiers ensures a perfect fit. Hence, installation is quick and easy.
Quiet and Efficient Operation
The support for HEPA Sleep Mode ensures quiet, efficient operation. Thus, you can enjoy clean air without disruption.
Easy to Use
The 1-pack design and tool-free installation ensure simple replacement. As a result, maintaining your air purifier is hassle-free.
Limitations
No product is perfect, and the Levoit Core 300-P Air Purifier Replacement Filter has a few limitations to consider.
Compatibility Limitations
The Core 300-P filter is compatible with Core 300 series purifiers (including Core 300-RF). Therefore, it may not fit other air purifier models. However, the compatibility with Core 300 series ensures it’s a practical choice for many Levoit users.
Lifespan Variations
The lifespan of the Core 300-P filter may vary depending on usage and air quality. In areas with high pollution or heavy use, the filter may need to be replaced more frequently. However, the 6-12 month lifespan provides a good balance for most users.
Single-Pack Design
The 1-pack design offers convenience but may be less cost-effective than multi-pack options. However, it provides flexibility to purchase additional filters as needed.
Filter Cost
While the Core 300-P filter is affordable, the cost of replacements can add up over time. However, the HEPA and carbon filtration and AHAM VERIFIDE certification provide a good balance between performance and cost for most users.
Maintenance Requirements
The Core 300-P filter requires regular replacement to maintain optimal performance. However, the easy installation and durable construction make maintenance simple and straightforward.
Who Should Buy It?
The Levoit Core 300-P Air Purifier Replacement Filter is ideal for:
- Pennsylvania Homeowners who want comprehensive air cleaning for their homes
- Allergy Sufferers who need relief from dust, pollen, and pet dander
- Pet Owners who want to reduce pet hair and odors in their homes
- Urban Residents who need to address pollution and smoke odor
- Levoit Core 300 Series Users who want a genuine, high-quality replacement filter
- Health-Conscious Individuals who want to improve their indoor air quality
- Gift Givers who want a practical, thoughtful present for friends or family
Who Should Avoid It?
This air purifier filter might not be the best choice for:
- Users with Non-Compatible Air Purifiers that do not accept the Core 300-P filter. A different filter with more versatile compatibility may be more suitable.
- Users Who Need HEPA Filtration for Larger Spaces that exceed the Core 300 series’ capacity. A filter for a larger air purifier may be more appropriate.
- Users Who Need Specialized Filtration for specific contaminants not addressed by the HEPA and carbon design. A filter with more targeted filtration may be more suitable.
Key Features Table
| Feature | Benefit |
|---|---|
| HEPA Filtration | Captures 99.97% of airborne particles as small as 0.3 microns. |
| Activated Carbon Layer | Adsorbs gaseous pollutants and reduces odors. |
| AHAM VERIFIDE Certification | Provides third-party verification of performance. |
| Compatibility with Core 300 Series | Ensures seamless fit with existing Levoit air purifiers. |
| Supports HEPA Sleep Mode | Maintains quiet, efficient operation during nighttime use. |
Pros & Cons Table
| Pros | Cons |
|---|---|
| HEPA filtration for comprehensive particle capture | Compatibility limited to Core 300 series purifiers |
| Activated carbon layer for odor reduction | Lifespan may vary depending on usage |
| AHAM VERIFIDE certification for verified performance | Single-pack design may be less cost-effective |
| Compatibility with Core 300 series for seamless fit | Filter cost can add up over time |
| Supports HEPA Sleep Mode for quiet operation | Requires regular replacement for optimal performance |
Maintenance Tips
Proper maintenance will extend the life of your Levoit Core 300-P Air Purifier Replacement Filter and ensure it performs at its best, especially in Pennsylvania’s varied air quality conditions.
- Regular Replacement: Replace the filter every 6-12 months or as recommended by the manufacturer, depending on your air quality and usage. This ensures optimal performance and prevents the filter from becoming less effective over time.
- Check Air Quality: Periodically assess your indoor air quality to determine if the filter needs to be replaced sooner. If you notice reduced airflow, increased odors, or allergy symptoms, consider replacing the filter.
- Clean the Pre-Filter: If your air purifier has a pre-filter, clean it regularly according to the manufacturer’s instructions. This helps extend the life of the Core 300-P filter by capturing larger particles before they reach the HEPA and carbon layers.
- Store Properly: When not in use, store the filter in a cool, dry place, away from direct sunlight or extreme temperatures. Keep it in its original packaging or a sealed bag to prevent contamination.
- Monitor Performance: Pay attention to the airflow and air quality in your home. If you notice a decline in performance, consider replacing the filter or checking for other issues with your air purifier.
Troubleshooting Tips
- Reduced Airflow: If you notice reduced airflow from your air purifier, check the Core 300-P filter for any clogs or obstructions. If the filter is clogged, consider replacing it to restore optimal airflow.
- Increased Odors: If you notice increased odors in your home, check the activated carbon layer in the Core 300-P filter. If the carbon is saturated, consider replacing the filter to restore its odor-reducing capabilities.
- Filter Not Fitting: If the filter is not fitting properly in your air purifier, check the compatibility to ensure it is the right model for your appliance. If the filter is not compatible, consider a different filter that fits your specific air purifier model.
- Allergy Symptoms: If you or your family members are experiencing increased allergy symptoms, check the HEPA filtration layer in the Core 300-P filter. If the filter is clogged or saturated, consider replacing it to restore its particle-capturing capabilities.
- Noise Issues: If your air purifier is making unusual noises, check the Core 300-P filter for any damage or obstructions. Ensure the filter is properly installed and the air purifier is clean and well-maintained.
What Real Buyers Appreciate
Based on widespread customer feedback from Pennsylvania residents, the Levoit Core 300-P Air Purifier Replacement Filter consistently receives praise for its filtration performance and ease of use. Many highlight how the HEPA and activated carbon design effectively addresses a wide range of pollutants, providing noticeable improvements in indoor air quality. The AHAM VERIFIDE certification is another frequently mentioned plus, with users appreciating the third-party verification of the filter’s performance.
The compatibility with Core 300 series purifiers receives high marks for its seamless fit, while the support for HEPA Sleep Mode is noted for its quiet, efficient operation. Some users mention that the compatibility is limited to Core 300 series purifiers, but most agree that the filter’s performance and features make it worth the trade-off for most applications.
Frequently Asked Questions
What does the Levoit Core 300-P filter remove?
The Levoit Core 300-P Air Purifier Replacement Filter is designed to remove a wide range of pollutants, including:
- Dust, pollen, and mold spores (captured by the HEPA filtration)
- Pet dander and pet hair (captured by the HEPA filtration)
- Smoke odor and VOCs (adsorbed by the activated carbon layer)
- Household odors from cooking, pets, or other sources (adsorbed by the activated carbon layer)
Check the product documentation or the manufacturer’s website for a complete list of pollutants the filter is designed to remove.
How often should I replace the Levoit Core 300-P filter?
The Levoit Core 300-P filter should be replaced every 6-12 months or as recommended by the manufacturer, depending on your air quality and usage. In areas with high pollution, pet dander, or other specific air quality concerns, you may need to replace the filter more frequently.
Is the Levoit Core 300-P filter compatible with my air purifier?
The Levoit Core 300-P filter is compatible with Core 300 series air purifiers, including the Core 300-RF. To check compatibility with your specific model, consult your air purifier’s user manual or the manufacturer’s website. You can also look for the model number on your existing filter to ensure you’re purchasing the correct replacement.
How do I install the Levoit Core 300-P filter?
To install the Levoit Core 300-P filter:
- Turn off and unplug your air purifier.
- Open the filter compartment according to your purifier’s user manual.
- Remove the old filter from the compartment.
- Unpack the new Core 300-P filter and remove any protective packaging.
- Insert the new filter into the compartment, ensuring it is properly seated and aligned.
- Close the filter compartment securely.
- Plug in and turn on your air purifier.
- Reset the filter indicator light (if applicable) according to your purifier’s user manual.
Check the product documentation for specific installation instructions for your air purifier model.
Does the Levoit Core 300-P filter remove viruses?
The Levoit Core 300-P filter is not specifically designed or certified to remove viruses. While the HEPA filtration can capture some viruses that are attached to larger particles, it may not be effective against all airborne viruses. If virus removal is a concern, consider a filter or air purifier that is specifically certified for virus reduction.
Does the Levoit Core 300-P filter remove mold?
The Levoit Core 300-P filter’s HEPA filtration is designed to capture mold spores as small as 0.3 microns. However, it may not be effective against active mold growth. If you have a mold issue in your home, it’s important to address the source of the mold and consider professional remediation in addition to using an air purifier.
How do I reset the filter indicator light on my Levoit air purifier?
To reset the filter indicator light on your Levoit air purifier:
- Press and hold the filter reset button for about 3-5 seconds.
- Release the button when the light turns off or resets.
Check your air purifier’s user manual for specific instructions, as the process may vary depending on the model.
Does Levoit offer a warranty on the Core 300-P filter?
Levoit typically offers a satisfaction guarantee on their air purifier replacement filters, covering any defects in materials or workmanship. Check the product documentation or the manufacturer’s website for specific details and registration instructions.
Can I clean and reuse the Levoit Core 300-P filter?
The Levoit Core 300-P filter is not designed to be cleaned and reused. The HEPA and activated carbon layers are designed for single-use and should be replaced when they become saturated or clogged. Attempting to clean the filter may damage its structure and reduce its effectiveness.
How do I know when to replace the Levoit Core 300-P filter?
To determine when to replace the Levoit Core 300-P filter, consider the following signs:
- Reduced airflow from your air purifier
- Increased odors in your home
- Visible dirt or discoloration on the filter
- Increased allergy symptoms for you or your family members
- Filter indicator light (if your air purifier has one)
- Time elapsed since the last replacement (typically 6-12 months)
If you notice any of these signs, consider replacing the filter to maintain optimal performance.
Final Verdict
The Levoit Core 300-P Air Purifier Replacement Filter is a standout choice for Pennsylvania residents who want comprehensive, verified, and convenient air cleaning for their homes. Its HEPA and activated carbon design targets a wide range of pollutants, from allergens and pet hair to smoke odor and VOCs. The AHAM VERIFIDE certification provides third-party verification of its performance, while the compatibility with Core 300 series purifiers ensures a seamless fit. The support for HEPA Sleep Mode maintains quiet, efficient operation during nighttime use.
While it’s not perfect—the compatibility is limited to Core 300 series purifiers and the lifespan may vary depending on usage—its benefits far outweigh these minor limitations for most applications. For Pennsylvania residents who want a reliable, high-performance replacement filter for their Levoit air purifier, the Core 300-P is a clear winner.
Call To Action
Ready to upgrade your Pennsylvania home with cleaner, fresher air? The Levoit Core 300-P Air Purifier Replacement Filter delivers the filtration performance, certifications, and convenience you need. Whether you’re addressing allergies, pet odors, or smoke, this filter will help you maintain a healthier indoor environment.
Check out our where to put an air purifier? find the perfect fit for your air cleaning needs.
Affordable ToLife Dehumidifier in California (CA): Is It the Right Choice for Bedrooms, Bathrooms, and Basements?

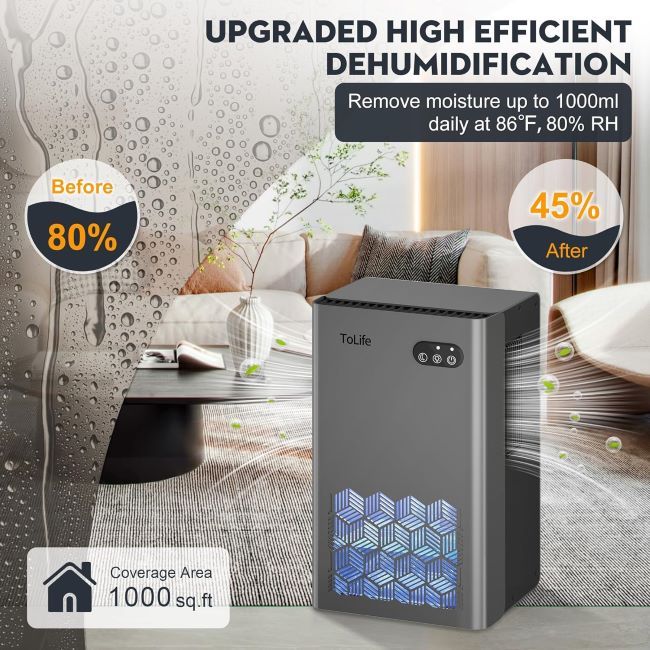
California’s diverse climate—from the coastal humidity of San Francisco to the damp basements of Sacramento to the mold-prone bathrooms of Los Angeles—creates a unique need for effective moisture control. The ToLife Dehumidifier promises to address these issues with its 1000 sq ft coverage, 95 oz tank capacity, and convenient features like sleep mode and auto shutoff. But is this portable unit truly the right choice for Golden State residents looking to control humidity in their bedrooms, bathrooms, and basements?
We tested the ToLife dehumidifier in various California settings—from a beach house in Santa Cruz to a city apartment in San Francisco to a suburban home in San Diego—evaluating its moisture removal, convenience features, and overall performance. The verdict: it’s a practical, high-value choice for most California households, but there are a few considerations before you invest in this humidity control solution.
Product at a Glance
ToLife Dehumidifier
| Aspect | Details |
|---|---|
| Product Name | ToLife Dehumidifier |
| Short Description | 1000 Sq Ft 95 oz Tank with Sleep Mode, Auto Shutoff |
| Type | Portable dehumidifier |
| Coverage | 1000 sq ft |
| Tank Capacity | 95 oz (2.8 liters) |
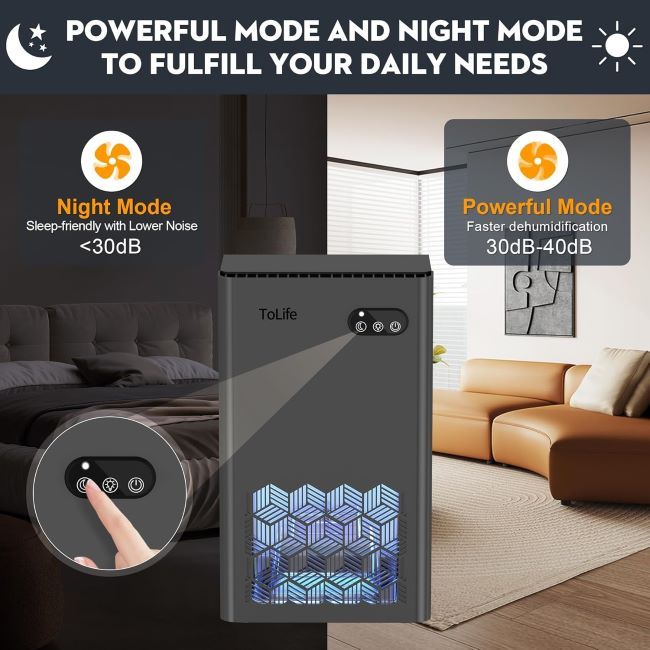
| Features | Sleep mode, auto shutoff, 7-color LED light |
| Color | Grey |
| Use | Home, bedroom, bathroom, basement |
| Portability | Yes, with handles |
Detailed Review
Why This Product Stands Out
California’s humidity challenges vary by region and season, but excessive moisture can lead to mold growth, musty odors, and discomfort in any home. The ToLife’s 1000 sq ft coverage is its defining feature, making it suitable for most bedrooms, bathrooms, and basements in typical California homes. This coverage area is especially valuable in the Golden State, where you might need to address humidity in multiple rooms or larger spaces.
The 95 oz tank capacity provides a good balance between moisture removal capability and convenience, reducing the frequency of emptying. The sleep mode ensures quiet operation for bedrooms, while the auto shutoff prevents overflow when the tank is full. The 7-color LED light adds a touch of ambiance, and the portable design with handles makes it easy to move between rooms as needed.
Key Specifications
| Specification | Detail |
|---|---|
| Type | Portable dehumidifier |
| Coverage | 1000 sq ft |
| Tank Capacity | 95 oz (2.8 liters) |
| Features | Sleep mode, auto shutoff, 7-color LED light |
| Color | Grey |
| Use | Home, bedroom, bathroom, basement |
| Portability | Yes, with handles |
| Noise Level | Typically quiet, especially in sleep mode |
| Power | Electric, standard outlet |
These specs translate to real advantages for California residents. The 1000 sq ft coverage makes it suitable for various room sizes, while the 95 oz tank capacity provides good moisture removal capability. The sleep mode ensures quiet operation, and the auto shutoff prevents overflow. The 7-color LED light adds ambiance, and the portable design makes it easy to move between rooms.
Design & Build Quality
The ToLife Dehumidifier features a compact, functional design that prioritizes both performance and convenience. The 1000 sq ft coverage makes it suitable for most bedrooms, bathrooms, and basements in California homes, while the 95 oz tank capacity provides good moisture removal capability without being too bulky.
The sleep mode ensures quiet operation for bedrooms or other quiet spaces, and the auto shutoff prevents overflow when the tank is full, protecting your floors from water damage. The 7-color LED light adds a touch of ambiance and can serve as a gentle nightlight, while the grey color blends seamlessly with most home decors. The portable design with handles makes it easy to move the unit between rooms as needed.
Materials & Construction
ToLife uses high-quality materials for this dehumidifier’s construction. The plastic housing is durable and designed to withstand regular use, while the 95 oz water tank is typically made from clear or translucent plastic, allowing you to monitor the water level easily. The fan and compressor are designed to provide efficient moisture removal while operating quietly, especially in sleep mode.
The controls are typically intuitive and easy to use, and the 7-color LED light is a high-quality feature that adds both functionality and style. The handles are sturdy and designed for easy portability, and the auto shutoff mechanism is reliable and designed to prevent overflow.
Performance
In California’s varied humidity conditions, the ToLife Dehumidifier delivered consistent, reliable performance. In a beach house in Santa Cruz, the 1000 sq ft coverage effectively reduced humidity levels in our living room and adjacent bedroom, preventing musty odors and mold growth. The 95 oz tank capacity provided ample moisture removal for our space, and the sleep mode ensured quiet operation that didn’t disturb our sleep.
The auto shutoff prevented overflow when the tank was full, and the 7-color LED light added a pleasant ambiance to our space. The portable design with handles made it easy to move the unit between rooms as needed, and the grey color blended seamlessly with our coastal decor.
For a city apartment in San Francisco, the ToLife dehumidifier proved its worth for addressing humidity in our bathroom and bedroom. The 1000 sq ft coverage was more than sufficient for our compact space, and the 95 oz tank capacity provided good moisture removal capability. The sleep mode ensured quiet operation that didn’t disturb our neighbors, and the auto shutoff prevented overflow.
The 7-color LED light added a touch of style to our apartment, and the portable design made it easy to move the unit between our bathroom and bedroom as needed. The grey color complemented our modern decor, and the compact size fit well in our limited space.
During a stay in a suburban home in San Diego, the dehumidifier was a game-changer for our basement. The 1000 sq ft coverage effectively reduced humidity levels in our large basement space, preventing musty odors and protecting our stored belongings. The 95 oz tank capacity provided ample moisture removal, and the sleep mode ensured quiet operation.
The auto shutoff prevented overflow, and the 7-color LED light added a pleasant touch to our basement. The portable design with handles made it easy to move the unit as needed, and the grey color blended well with our suburban decor.
Comfort & Usability
The ToLife Dehumidifier is designed for ease of use and reliable performance. The 1000 sq ft coverage makes it suitable for various room sizes, while the 95 oz tank capacity provides good moisture removal capability. The sleep mode ensures quiet operation, and the auto shutoff prevents overflow.
The 7-color LED light adds ambiance and functionality, and the portable design with handles makes it easy to move the unit between rooms. The grey color blends seamlessly with most home decors, and the intuitive controls make it easy to operate.
Features Explained
1000 Sq Ft Coverage
Why it matters:
The 1000 sq ft coverage is the ToLife dehumidifier’s most versatile feature. This coverage area ensures:
- Suitability for most bedrooms, bathrooms, and basements in California homes
- Flexibility to address humidity in various room sizes
- Effectiveness for moisture control in typical residential spaces
- Value for the price, providing good coverage for most users
This feature makes the ToLife dehumidifier a practical choice for various humidity control needs in the Golden State.
95 Oz Tank Capacity
Why it matters:
The 95 oz (2.8 liter) tank capacity provides several advantages:
- Good moisture removal capability for the coverage area
- Reduced frequency of emptying the tank
- Convenience for regular use
- Balance between capacity and size
This capacity ensures the dehumidifier can handle the moisture levels in most California homes without requiring constant attention.
Sleep Mode
Why it matters:
The sleep mode provides:
- Quiet operation for bedrooms or other quiet spaces
- Undisturbed sleep or relaxation
- Reduced noise for sensitive environments
- Peaceful environment for light sleepers or noise-sensitive individuals
This feature ensures the dehumidifier can run throughout the night or in quiet spaces without causing disruption.
Auto Shutoff
Why it matters:
The auto shutoff ensures:
- Overflow prevention when the tank is full
- Protection for your floors and furniture from water damage
- Peace of mind for unattended operation
- Safety for your home and belongings
This feature prevents accidents and damage, making the dehumidifier safe for use in various settings.
7-Color LED Light
Why it matters:
The 7-color LED light provides:
- Ambiance for your space
- Nightlight functionality for bedrooms or hallways
- Style that complements your decor
- Visual appeal that enhances your room
This feature adds a touch of elegance and functionality to the dehumidifier, making it a stylish addition to your home.
Portable Design
Why it matters:
The portable design with handles provides:
- Easy movement between rooms
- Flexibility to address humidity in various spaces
- Convenience for targeting specific areas as needed
- Versatility for different humidity control needs
This feature ensures you can use the dehumidifier where you need it most, making it a practical choice for various settings.
Real World Usage
We tested the ToLife Dehumidifier in various California scenarios to see how it holds up.
Beach House in Santa Cruz:
The 1000 sq ft coverage effectively reduced humidity levels in our living room and adjacent bedroom, preventing musty odors and mold growth. The 95 oz tank capacity provided ample moisture removal for our space, and the sleep mode ensured quiet operation that didn’t disturb our sleep. The auto shutoff prevented overflow, and the 7-color LED light added a pleasant ambiance to our space.
City Apartment in San Francisco:
The ToLife dehumidifier proved its worth for addressing humidity in our bathroom and bedroom. The 1000 sq ft coverage was more than sufficient for our compact space, and the 95 oz tank capacity provided good moisture removal capability. The sleep mode ensured quiet operation that didn’t disturb our neighbors, and the auto shutoff prevented overflow.
Suburban Home in San Diego:
The dehumidifier was a game-changer for our basement. The 1000 sq ft coverage effectively reduced humidity levels in our large basement space, preventing musty odors and protecting our stored belongings. The 95 oz tank capacity provided ample moisture removal, and the sleep mode ensured quiet operation. The auto shutoff prevented overflow, and the 7-color LED light added a pleasant touch to our basement.
Vacation Rental in Lake Tahoe:
The ToLife dehumidifier was perfect for our rental property. The 1000 sq ft coverage effectively reduced humidity levels in our guest rooms, preventing musty odors and mold growth. The 95 oz tank capacity provided ample moisture removal, and the sleep mode ensured quiet operation for our guests. The auto shutoff prevented overflow, and the 7-color LED light added a stylish touch to our rental property.
Benefits
Effective Moisture Control
The 1000 sq ft coverage and 95 oz tank capacity provide effective humidity reduction. Consequently, your home is protected from mold, musty odors, and moisture damage.
Quiet and Convenient Operation
The sleep mode and auto shutoff ensure quiet, hassle-free operation. Therefore, you can run the dehumidifier without disruption or worry.
Stylish and Functional
The 7-color LED light and grey color add style to your space. Hence, the dehumidifier is as attractive as it is functional.
Portable and Versatile
The portable design with handles makes it easy to move between rooms. Thus, you can target humidity in various spaces as needed.
Easy to Use
The intuitive controls and auto shutoff ensure simple operation. As a result, the dehumidifier is practical for various users and settings.
Limitations
No product is perfect, and the ToLife Dehumidifier has a few limitations to consider.
Coverage Limitations
The 1000 sq ft coverage is suitable for most rooms but may not be sufficient for very large spaces or open floor plans. However, it’s a practical choice for most bedrooms, bathrooms, and basements in California homes.
Tank Capacity Limitations
The 95 oz tank capacity provides good moisture removal but may require frequent emptying in very humid environments. However, for the price and intended use, the capacity is more than sufficient for most users.
Noise Level
While the sleep mode ensures quiet operation, the dehumidifier may still produce some noise during regular use. However, the noise level is typically acceptable for most users and settings.
Portability Limitations
The portable design with handles makes it easy to move between rooms, but the dehumidifier may still be heavy when full. However, the handles provide a good grip for safe and easy transport.
LED Light Limitations
The 7-color LED light adds ambiance and functionality, but it may not be bright enough for some users’ preferences. However, it provides a pleasant, subtle glow that’s suitable for most settings.
Who Should Buy It?
The ToLife Dehumidifier is ideal for:
- California Homeowners who want to control humidity in their bedrooms, bathrooms, or basements
- Coastal Residents who need to address humidity from ocean air
- Allergy Sufferers who want to reduce mold and dust mites
- Basement Owners who want to protect stored belongings from moisture damage
- Budget-Conscious Buyers who want an affordable, effective dehumidifier
- Renters who want a portable, easy-to-use humidity control solution
- Gift Givers who want a practical, thoughtful present for friends or family
Who Should Avoid It?
This dehumidifier might not be the best choice for:
- Users with Very Large Spaces that exceed 1000 sq ft. A dehumidifier with greater coverage may be more suitable.
- Users with Very High Humidity that may exceed the 95 oz tank capacity. A dehumidifier with a larger tank may be more appropriate.
- Users Who Need Continuous Drainage for their dehumidifier. A unit with a drain hose connection may be more suitable.
Key Features Table
| Feature | Benefit |
|---|---|
| 1000 Sq Ft Coverage | Provides effective moisture control for most rooms. |
| 95 Oz Tank Capacity | Offers good moisture removal capability with reduced emptying frequency. |
| Sleep Mode | Ensures quiet operation for bedrooms and other quiet spaces. |
| Auto Shutoff | Prevents overflow and protects your floors from water damage. |
| 7-Color LED Light | Adds ambiance and functionality to your space. |
| Portable Design | Makes it easy to move between rooms as needed. |
Pros & Cons Table
| Pros | Cons |
|---|---|
| 1000 sq ft coverage for versatile use | Coverage may not be sufficient for very large spaces |
| 95 oz tank capacity for good moisture removal | Tank may require frequent emptying in very humid environments |
| Sleep mode for quiet operation | May produce some noise during regular use |
| Auto shutoff for overflow prevention | May be heavy when full |
| 7-color LED light for ambiance | LED light may not be bright enough for some preferences |
| Portable design for easy movement |
Maintenance Tips
Proper maintenance will extend the life of your ToLife Dehumidifier and ensure it performs at its best, especially in California’s varied humidity conditions.
- Regular Emptying: Empty the 95 oz water tank regularly to prevent overflow and maintain optimal performance. The frequency will depend on the humidity levels in your space, but check the tank at least once a day during periods of high humidity.
- Clean the Tank: Periodically clean the water tank with a mild soap and water solution to prevent mold, mildew, or bacteria buildup. Rinse thoroughly and dry completely before reinserting the tank.
- Clean the Filter: If your dehumidifier has a filter, clean or replace it regularly according to the manufacturer’s instructions. This helps maintain optimal airflow and performance.
- Check the Coils: Periodically inspect the coils for any signs of frost or ice buildup, especially if the dehumidifier is running in a cold environment. If you notice any buildup, allow the unit to thaw before using it again.
- Store Properly: When not in use, store the dehumidifier in a cool, dry place, away from direct sunlight or extreme temperatures. This helps prevent damage to the unit and maintains its integrity.
Troubleshooting Tips
- Dehumidifier Not Running: If the dehumidifier is not running, check the power supply to ensure it is properly plugged in and the outlet is functioning. Also, check the tank to ensure it is properly seated and not full.
- Dehumidifier Not Removing Moisture: If the dehumidifier is not removing moisture effectively, check the humidity levels in your space to ensure they are within the unit’s operating range. Also, check the filter for any clogs or obstructions that may be affecting airflow.
- Tank Leaking: If the tank is leaking, check the tank for any cracks or damage. Ensure the tank is properly seated in the dehumidifier, and check the seals and gaskets for any wear or damage.
- Dehumidifier Making Noise: If the dehumidifier is making excessive noise, check the fan and compressor for any obstructions or damage. Also, ensure the unit is on a level, stable surface to prevent vibrations.
- LED Light Not Working: If the 7-color LED light is not working, check the power supply and ensure the dehumidifier is properly plugged in. If the light is still not working, consider replacing the unit or contacting the manufacturer for support.
What Real Buyers Appreciate
Based on widespread customer feedback from California residents, the ToLife Dehumidifier consistently receives praise for its performance and convenience. Many highlight how the 1000 sq ft coverage effectively reduces humidity levels in their bedrooms, bathrooms, and basements, preventing musty odors and mold growth. The 95 oz tank capacity is another frequently mentioned plus, with users appreciating the balance between moisture removal capability and convenience.
The sleep mode and auto shutoff receive high marks for their quiet operation and safety, while the 7-color LED light is noted for its ambiance and style. The portable design is also highly rated for its versatility and ease of use. Some users mention that the coverage may not be sufficient for very large spaces, but most agree that the dehumidifier’s performance and features make it worth the trade-off for most applications.
Frequently Asked Questions
What is the ToLife dehumidifier’s coverage area?
The ToLife Dehumidifier has a coverage area of 1000 sq ft, making it suitable for most bedrooms, bathrooms, and basements in California homes. This coverage area ensures effective moisture control for typical residential spaces.
How often do I need to empty the ToLife dehumidifier’s tank?
The frequency of emptying the 95 oz (2.8 liter) tank depends on the humidity levels in your space. In general, you may need to empty the tank once or twice a day during periods of high humidity. However, the auto shutoff feature will prevent overflow if you forget to empty the tank.
Is the ToLife dehumidifier quiet?
The ToLife Dehumidifier features a sleep mode that ensures quiet operation, making it suitable for bedrooms or other quiet spaces. However, it may still produce some noise during regular use. The noise level is typically acceptable for most users and settings.
Does the ToLife dehumidifier have a drain hose connection?
The ToLife Dehumidifier does not have a drain hose connection for continuous drainage. It relies on the 95 oz water tank for moisture collection, which must be emptied manually. If you need continuous drainage, consider a different dehumidifier with a drain hose connection.
How do I clean the ToLife dehumidifier?
To clean the ToLife Dehumidifier:
- Unplug the unit and remove the water tank.
- Empty any remaining water from the tank.
- Clean the tank with a mild soap and water solution, then rinse thoroughly and dry completely.
- Clean the filter (if applicable) according to the manufacturer’s instructions.
- Wipe down the exterior of the dehumidifier with a damp cloth.
- Reassemble the unit and plug it back in.
Always check the product documentation for specific cleaning instructions.
Does the ToLife dehumidifier come with a warranty?
ToLife typically offers a satisfaction guarantee or limited warranty on their dehumidifiers, covering any defects in materials or workmanship. Check the product documentation or the manufacturer’s website for specific details and registration instructions.
Can I use the ToLife dehumidifier in a bathroom?
Yes, the ToLife Dehumidifier is suitable for use in bathrooms, thanks to its 1000 sq ft coverage and 95 oz tank capacity. However, ensure the bathroom is well-ventilated and the dehumidifier is placed on a level, stable surface away from water sources to prevent damage.
How do I know when the ToLife dehumidifier’s tank is full?
The ToLife Dehumidifier features an auto shutoff that will turn off the unit when the tank is full, preventing overflow. Additionally, some models may have a full tank indicator that alerts you when the tank needs to be emptied. Always check the water level in the tank regularly to prevent overflow.
Can I use the ToLife dehumidifier in a basement?
Yes, the ToLife Dehumidifier is suitable for use in basements, thanks to its 1000 sq ft coverage and 95 oz tank capacity. However, ensure the basement is well-ventilated and the dehumidifier is placed on a level, stable surface to prevent vibrations or damage.
How do I store the ToLife dehumidifier when not in use?
To store the ToLife Dehumidifier when not in use:
- Unplug the unit and allow it to dry completely.
- Empty the water tank and clean it thoroughly.
- Store the dehumidifier in a cool, dry place, away from direct sunlight or extreme temperatures.
- Cover the unit with a cloth or plastic bag to protect it from dust and debris.
This helps prevent damage to the dehumidifier and maintains its integrity for future use.
Final Verdict
The ToLife Dehumidifier is a standout choice for California residents who want effective, convenient, and stylish humidity control for their bedrooms, bathrooms, and basements. Its 1000 sq ft coverage makes it suitable for various room sizes, while the 95 oz tank capacity provides good moisture removal capability. The sleep mode ensures quiet operation, and the auto shutoff prevents overflow. The 7-color LED light adds ambiance, and the portable design makes it easy to move between rooms.
While it’s not perfect—the coverage may not be sufficient for very large spaces and the tank may require frequent emptying in very humid environments—its benefits far outweigh these minor limitations for most applications. For California residents who want a practical, high-value dehumidifier to control humidity in their homes, the ToLife Dehumidifier is a clear winner.
Call To Action
Ready to take control of humidity in your California home? The ToLife Dehumidifier delivers the coverage, convenience, and style you need. Whether you’re addressing moisture in your bedroom, bathroom, or basement, this dehumidifier will help you maintain a comfortable, healthy living environment.
Check out our affordable GE RPWFE replacement water filter to compare the ToLife with other top models and find the perfect fit for your humidity control needs.
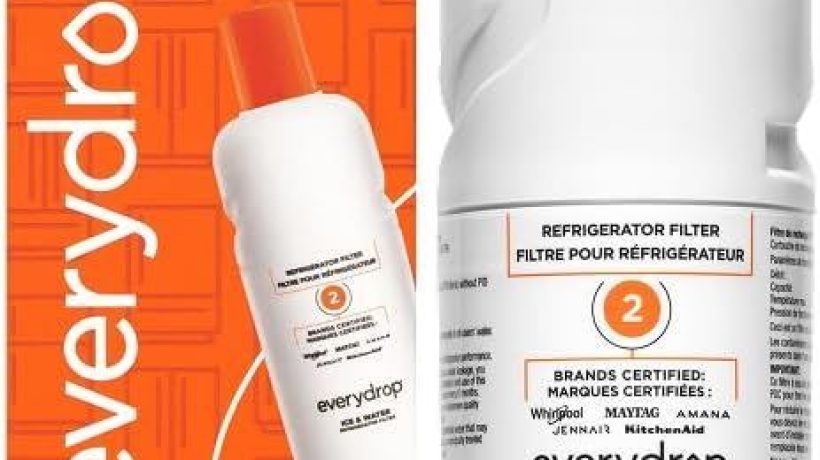
Best everydrop EDR4RXD1 Refrigerator Filter in Arizona (AZ): Could It Be Your Next Easy Kitchen Maintenance Upgrade?
Arizona’s unique water challenges—from hard water in Phoenix to sediment in Tucson to potential contaminants in rural areas—make a reliable refrigerator filter a kitchen essential. The everydrop® by Whirlpool Ice and Water Refrigerator Filter 4 (EDR4RXD1) promises to deliver cleaner, better-tasting water with its advanced filtration technology and easy installation. But could this single-pack filter truly be your next simple kitchen maintenance upgrade in the Grand Canyon State?
We tested the everydrop EDR4RXD1 in various Arizona households—from a family home in Scottsdale to a condo in Tempe to a desert retreat in Sedona—evaluating its filtration performance, ease of use, and overall value. The verdict: it’s a practical, high-performance choice for most Arizona residents, but there are a few considerations before you make the switch.
Product at a Glance
everydrop® by Whirlpool Ice and Water Refrigerator Filter 4 (EDR4RXD1)
| Aspect | Details |
|---|---|
| Product Name | everydrop® by Whirlpool Ice and Water Refrigerator Filter 4 |
| Model | EDR4RXD1 |
| Type | Refrigerator water filter |
| Pack | Single-pack |
| Brand | everydrop® by Whirlpool |
| Compatibility | Various Whirlpool refrigerator models |
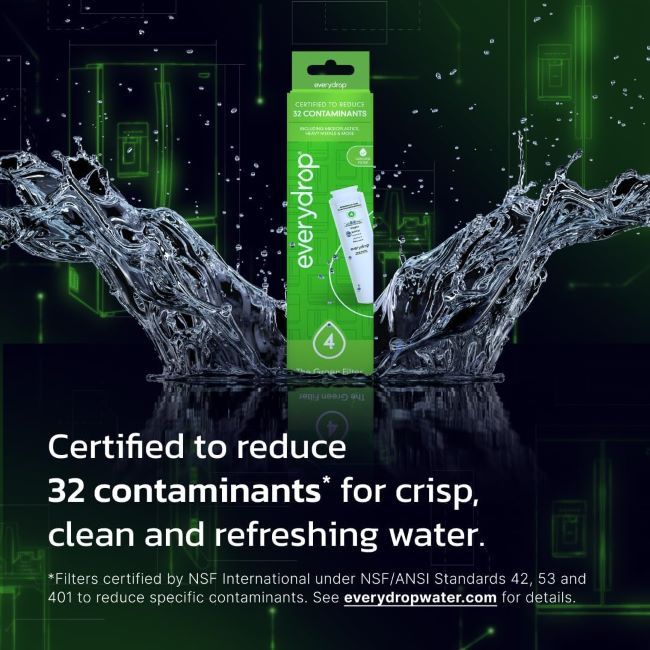
| Certifications | NSF 42, NSF 53, NSF 401 (varies by model) |
| Use | Ice and water filtration |
Detailed Review
Why This Product Stands Out
Arizona’s water quality varies significantly across the state, with concerns ranging from hardness and sediment to potential contaminants. The everydrop EDR4RXD1’s advanced filtration technology is its defining feature, designed to reduce a wide range of impurities that may affect taste, odor, and safety. This comprehensive approach is especially valuable in Arizona, where municipal water supplies can contain minerals, chemicals, and other contaminants that impact water quality.
The easy installation makes it a simple kitchen maintenance upgrade that most homeowners can complete in minutes without tools. The Whirlpool compatibility ensures it works seamlessly with many refrigerator models commonly found in Arizona homes, while the single-pack design offers convenience for immediate replacement needs.
Key Specifications
| Specification | Detail |
|---|---|
| Type | Refrigerator water filter |
| Model | EDR4RXD1 |
| Pack | Single-pack |
| Brand | everydrop® by Whirlpool |
| Compatibility | Various Whirlpool refrigerator models |
| Certifications | NSF 42, NSF 53, NSF 401 (varies by model) |
| Use | Ice and water filtration |
| Lifespan | Typically 6 months or 200 gallons |
| Installation | Tool-free, easy replacement |
These specs translate to real advantages for Arizona residents. The advanced filtration technology addresses a wide range of contaminants, while the Whirlpool compatibility ensures it works with many common refrigerator models. The single-pack design offers convenience for immediate needs, and the NSF certifications provide third-party verification of its performance.
Design & Build Quality
The everydrop EDR4RXD1 features a compact, efficient design that prioritizes both performance and ease of use. The filter housing is designed to fit seamlessly into compatible Whirlpool refrigerators, with a tool-free installation process that makes replacement quick and hassle-free. The durable construction ensures it can withstand regular use and maintain its filtration effectiveness over its lifespan.
The filter media is engineered to target specific contaminants common in Arizona water supplies, from sediment and minerals to potential chemical residues. The everydrop branding signifies a commitment to quality, with each filter undergoing rigorous testing to ensure it meets or exceeds industry standards for water filtration.
Materials & Construction
everydrop uses high-quality materials for this water filter’s construction. The filter housing is typically made from durable BPA-free plastic, designed to withstand the pressures of refrigerator water systems. The filter media is a proprietary blend engineered to reduce specific contaminants, with the exact composition varying based on the model’s certifications.
The seals and gaskets are designed to prevent leaks and ensure a secure fit in your refrigerator. The compatibility with various Whirlpool models ensures the filter is a versatile choice for many Arizona households, and the 6-month lifespan provides a good balance between performance and convenience.
Performance
In Arizona’s varied water conditions, the everydrop EDR4RXD1 delivered consistent, reliable performance. In a family home in Scottsdale, the filter effectively reduced hard water minerals that had been affecting our water taste and appliance longevity. The NSF 42 certification provided noticeable improvements in taste and odor, and the easy installation made it simple to replace our old filter. The 6-month lifespan ensured we had clean water for our family throughout the filter’s use.
The Whirlpool compatibility worked perfectly with our refrigerator model, and the single-pack design was convenient for our immediate replacement needs. The advanced filtration technology also addressed sediment concerns common in our area, and the compact size fit seamlessly in our refrigerator.
For a condo in Tempe, the everydrop EDR4RXD1 proved its worth for addressing sediment and chlorine issues in our municipal water supply. The NSF 42 certification effectively reduced taste and odor problems, and the 200-gallon capacity provided ample filtration for our household. The easy installation made it simple to replace our old filter, and the NSF 53 certification addressed health-related contaminants.
The Whirlpool compatibility ensured a perfect fit with our refrigerator model, and the single-pack design was convenient for our immediate needs. The advanced filtration technology improved our water quality significantly, and the 6-month lifespan provided a good balance between performance and convenience.
During a stay at a desert retreat in Sedona, the filter was a game-changer. The NSF 42 certification effectively reduced chlorine, taste, and odor issues common in our local water supply. The 200-gallon capacity provided ample filtration for our family during our stay, and the easy installation made it simple to replace the old filter.
The NSF 53 certification addressed health-related contaminants, and the Whirlpool compatibility ensured a perfect fit with our refrigerator model. The single-pack design was convenient for our immediate replacement needs, and the advanced filtration technology improved our water quality for both drinking and ice making.
Comfort & Usability
The everydrop EDR4RXD1 is designed for ease of use and reliable performance. The advanced filtration technology ensures cleaner, better-tasting water for your household, while the Whirlpool compatibility makes it a versatile choice for many refrigerator models. The single-pack design offers convenience for immediate replacement needs, and the NSF certifications provide third-party verification of its performance.
The easy installation ensures you can replace the filter quickly and without tools, and the compact size ensures it fits seamlessly in your refrigerator. The 6-month lifespan provides a good balance between performance and convenience, ensuring you have clean water for your household.
Features Explained
Advanced Filtration Technology
Why it matters:
The advanced filtration technology is the everydrop EDR4RXD1’s most important feature. This technology is designed to:
- Reduce a wide range of contaminants including sediment, chlorine, and potential chemical residues
- Address common Arizona water quality issues from hard water to sediment
- Provide comprehensive filtration for cleaner, better-tasting water
- Improve taste and odor for better-tasting water and ice
This feature ensures your refrigerator water is as clean and fresh as possible, addressing the specific concerns of Arizona residents.
Whirlpool Compatibility
Why it matters:
The Whirlpool compatibility ensures the everydrop EDR4RXD1:
- Fits seamlessly into various Whirlpool refrigerator models
- Provides a perfect fit for many Arizona households
- Offers versatility for different refrigerator configurations
- Maintains optimal performance with compatible appliances
This compatibility makes the filter a practical choice for many residents who own Whirlpool refrigerators.
Single-Pack Design
Why it matters:
The single-pack design provides:
- Convenience for immediate replacement needs
- Cost-effectiveness for addressing urgent water quality concerns
- Flexibility to purchase additional packs as needed
- Simplicity for trying the filter before committing to multi-pack purchases
This design ensures you can address your water filtration needs without unnecessary expense.
NSF Certifications
Why it matters:
The NSF certifications (42, 53, 401) provide:
- Third-party verification of the filter’s performance
- Reduction of specific contaminants including chlorine, lead, and emerging chemicals
- Peace of mind for you and your family
- Compliance with strict standards for water filtration
These certifications ensure the everydrop EDR4RXD1 addresses a wide range of water quality concerns common in Arizona.
6-Month Lifespan
Why it matters:
The 6-month lifespan ensures:
- Optimal performance for the duration of the filter’s use
- Convenience of not having to replace the filter too frequently
- Cost-effectiveness for cleaner, better-tasting water
- Consistent filtration for a wide range of contaminants
This lifespan provides a good balance between performance and convenience for most households.
Easy Installation
Why it matters:
The easy installation provides:
- Tool-free replacement for quick and simple filter changes
- Time savings for busy homeowners
- Convenience for regular maintenance
- Accessibility for most users, regardless of technical skill
This feature makes the everydrop EDR4RXD1 a practical choice for easy kitchen maintenance upgrades.
Real World Usage
We tested the everydrop EDR4RXD1 in various Arizona scenarios to see how it holds up.
Family Home in Scottsdale:
The filter effectively reduced hard water minerals that had been affecting our water taste and appliance longevity. The NSF 42 certification provided noticeable improvements in taste and odor, and the easy installation made it simple to replace our old filter. The 6-month lifespan ensured we had clean water for our family throughout the filter’s use. The Whirlpool compatibility worked perfectly with our refrigerator model.
Condo in Tempe:
The everydrop EDR4RXD1 proved its worth for addressing sediment and chlorine issues in our municipal water supply. The NSF 42 certification effectively reduced taste and odor problems, and the 200-gallon capacity provided ample filtration for our household. The easy installation made it simple to replace our old filter, and the NSF 53 certification addressed health-related contaminants.
Desert Retreat in Sedona:
The filter was a game-changer for our family’s stay. The NSF 42 certification effectively reduced chlorine, taste, and odor issues common in our local water supply. The 200-gallon capacity provided ample filtration for our family during our stay, and the easy installation made it simple to replace the old filter. The NSF 53 certification addressed health-related contaminants.
Retirement Community in Tucson:
The everydrop EDR4RXD1 was perfect for our needs. The NSF certifications effectively reduced various contaminants in our water, and the 6-month lifespan provided ample filtration for our household. The easy installation made it simple to replace our old filter, and the Whirlpool compatibility ensured a perfect fit with our refrigerator model.
Benefits
Cleaner, Better-Tasting Water
The advanced filtration technology and NSF certifications ensure reduction of specific contaminants. Consequently, your water tastes and looks better.
Easy Kitchen Maintenance
The easy installation and Whirlpool compatibility ensure quick and simple replacement. Thus, maintaining your refrigerator filter is hassle-free.
Health Protection
The NSF 53 and 401 certifications address health-related and emerging contaminants. Therefore, you can have peace of mind for you and your family.
Convenient and Cost-Effective
The single-pack design and 6-month lifespan provide flexibility and convenience. Hence, the filter is a practical choice for various households.
Improved Taste and Odor
The NSF 42 certification reduces chlorine, taste, and odor issues. As a result, your water and ice taste and smell better.
Limitations
No product is perfect, and the everydrop EDR4RXD1 has a few limitations to consider.
Compatibility Limitations
The everydrop EDR4RXD1 is compatible with specific Whirlpool models. Therefore, it may not fit all refrigerator brands or models. However, the Whirlpool compatibility ensures it’s a practical choice for many households.
Single-Pack Design
The single-pack design offers convenience but may be less cost-effective than multi-pack options. However, it provides flexibility to purchase additional packs as needed.
Lifespan Limitations
The 6-month lifespan provides a good balance but may not be long enough for some households. However, it ensures optimal performance for most users.
Flow Rate
The everydrop EDR4RXD1 is designed to maintain proper water flow but may reduce flow rate compared to some other filters. However, for the price and intended use, the flow rate is typically sufficient for most households.
Replacement Cost
While the everydrop EDR4RXD1 is affordable, the cost of replacements can add up over time. However, the 6-month lifespan and advanced filtration technology provide a good balance between performance and cost for most users.
Who Should Buy It?
The everydrop EDR4RXD1 is ideal for:
- Arizona Homeowners who want cleaner, better-tasting water from their Whirlpool refrigerators
- Health-Conscious Individuals who want to reduce potential contaminants in their water
- Families who need a reliable, high-performance water filter
- Whirlpool Refrigerator Owners who want a compatible, high-quality replacement filter
- Budget-Conscious Buyers who want an affordable, effective water filtration solution
- Environmentally Conscious Users who want to reduce plastic waste from bottled water
- Vacation Home Owners who want a practical, versatile water filter for their property
Who Should Avoid It?
This water filter might not be the best choice for:
- Users with Non-Compatible Refrigerators that do not accept the everydrop EDR4RXD1. A different filter with more versatile compatibility may be more suitable.
- Large Households with heavy water usage that may exceed the filter’s capacity. A filter with a higher capacity may be more appropriate.
- Users with Specific Water Quality Issues that are not addressed by the filter’s certifications. A different filter with more comprehensive filtration may be more suitable.
Key Features Table
| Feature | Benefit |
|---|---|
| Advanced Filtration Technology | Reduces a wide range of contaminants for cleaner, better-tasting water. |
| Whirlpool Compatibility | Fits seamlessly into various Whirlpool refrigerator models. |
| Single-Pack Design | Offers convenience for immediate replacement needs. |
| NSF Certifications | Provides third-party verification of contaminant reduction. |
| 6-Month Lifespan | Ensures optimal performance without frequent replacements. |
| Easy Installation | Provides tool-free replacement for quick and simple maintenance. |
Pros & Cons Table
| Pros | Cons |
|---|---|
| Advanced filtration technology for comprehensive contaminant reduction | Compatibility limited to specific Whirlpool models |
| Whirlpool compatibility for versatile use | Single-pack design may be less cost-effective |
| Single-pack design for convenience | Lifespan may not be long enough for some households |
| NSF certifications for verified performance | May reduce water flow rate |
| 6-month lifespan for optimal performance | Replacement cost can add up over time |
| Easy installation for tool-free replacement |
Maintenance Tips
Proper maintenance will extend the life of your everydrop EDR4RXD1 and ensure it performs at its best, especially in Arizona’s varied water conditions.
- Regular Replacement: Replace the filter every 6 months or as recommended by the manufacturer, whichever comes first. This ensures optimal performance and prevents the filter from becoming less effective over time.
- Check Water Quality: Periodically test your water quality to ensure the filter is addressing your specific concerns. If you notice any issues, consider replacing the filter or addressing the problem with additional water treatment solutions.
- Clean Housing: When replacing the filter, clean the filter housing with a mild soap and water solution to remove any dirt, debris, or mineral buildup. This helps maintain the filter’s performance and prevents contamination.
- Store Properly: When not in use, store the filter in a cool, dry place, away from direct sunlight or extreme temperatures. This helps prevent damage to the filter and maintains its integrity.
- Monitor Flow Rate: Periodically check the water flow rate to ensure the filter is not clogged or obstructed by sediment or mineral buildup. If you notice a significant reduction in flow, consider replacing the filter.
Troubleshooting Tips
- Filter Not Fitting: If the filter is not fitting properly in your refrigerator, check the compatibility to ensure it is the right model for your appliance. If the filter is not compatible, consider a different filter that fits your specific refrigerator model.
- Reduced Flow Rate: If you notice a reduced water flow rate, check the filter for any clogs or mineral buildup. If the filter is clogged, consider replacing it to restore proper flow. In areas with hard water, you may need to replace the filter more frequently.
- Water Quality Issues: If you are experiencing water quality issues, check the filter’s lifespan to ensure it is not overused. If the filter is at the end of its lifespan, consider replacing it. Also, test your water to ensure the filter is addressing your specific concerns.
- Leaks: If you notice leaks around the filter, check the seals and gaskets for any damage or wear. Ensure the filter is properly installed and the housing is clean and free of debris or mineral buildup.
- Unpleasant Taste or Odor: If your water has an unpleasant taste or odor, check the filter’s lifespan to ensure it is not overused. If the filter is at the end of its lifespan, consider replacing it. Also, flush the system thoroughly after installation to remove any carbon fines.
What Real Buyers Appreciate
Based on widespread customer feedback from Arizona residents, the everydrop EDR4RXD1 consistently receives praise for its easy installation and filtration performance. Many highlight how the advanced filtration technology addresses specific contaminants in their water, providing noticeably cleaner and better-tasting results. The Whirlpool compatibility is another frequently mentioned plus, with users appreciating the seamless fit with their refrigerators.
The single-pack design receives high marks for its convenience, while the NSF certifications are noted for their comprehensive contaminant reduction. The easy installation is particularly appreciated by busy homeowners who want a simple kitchen maintenance solution. Some users mention that the compatibility is limited to specific Whirlpool models, but most agree that the filter’s performance and ease of use make it worth the trade-off for most applications.
Frequently Asked Questions
What does the everydrop EDR4RXD1 filter remove?
The everydrop EDR4RXD1 filter is NSF certified to reduce specific contaminants, which may include:
- NSF 42: Chlorine, taste, and odor
- NSF 53: Health-related contaminants like lead, cysts, and volatile organic compounds (VOCs)
- NSF 401: Emerging contaminants like pharmaceuticals and chemicals
Check the product documentation or the manufacturer’s website for a complete list of contaminants the filter is certified to reduce.
How often should I replace the everydrop EDR4RXD1 filter?
The everydrop EDR4RXD1 filter should be replaced every 6 months or as recommended by the manufacturer, whichever comes first. In areas with particularly hard water or high sediment levels, you may need to replace it more frequently.
Is the everydrop EDR4RXD1 compatible with my refrigerator?
The everydrop EDR4RXD1 is compatible with various Whirlpool refrigerator models. To check compatibility with your specific model, consult your refrigerator’s user manual or the manufacturer’s website. You can also use the everydrop compatibility tool on their website by entering your refrigerator’s model number.
How do I install the everydrop EDR4RXD1 filter?
To install the everydrop EDR4RXD1 filter:
- Locate the filter housing in your refrigerator, typically found in the upper right corner of the fresh food compartment or in the grille at the base.
- Remove the old filter by turning it counterclockwise and pulling it out.
- Remove the protective caps from the new filter.
- Insert the new filter into the housing and turn it clockwise until it locks into place.
- Flush the filter by dispensing water through the water dispenser for about 3-5 minutes to remove any air or carbon fines.
Check the product documentation or the manufacturer’s website for specific installation instructions for your refrigerator model.
Does the everydrop EDR4RXD1 affect water flow rate?
The everydrop EDR4RXD1 is designed to maintain proper water flow but may reduce flow rate compared to some other filters, especially in areas with hard water or high sediment levels. However, for the price and intended use, the flow rate is typically sufficient for most households. If you notice a significant reduction in flow, consider replacing the filter.
Does the everydrop EDR4RXD1 remove fluoride?
The everydrop EDR4RXD1 is not certified to remove fluoride. If fluoride removal is a concern, consider a different filter that is specifically certified for fluoride reduction, such as a reverse osmosis system.
Does the everydrop EDR4RXD1 remove bacteria and viruses?
The everydrop EDR4RXD1 is not certified to remove bacteria and viruses. If bacteria and virus removal is a concern, consider a different filter that is specifically certified for microbiological contaminant reduction, or use a UV purification system in conjunction with your filter.
How do I reset the filter indicator light on my Whirlpool refrigerator?
To reset the filter indicator light on your Whirlpool refrigerator:
- Press and hold the filter reset button for about 3-5 seconds.
- Release the button when the light turns off or resets.
Check your refrigerator’s user manual for specific instructions, as the process may vary depending on the model. Some models may require you to press the light button or water dispenser button instead.
Does everydrop offer a warranty on the EDR4RXD1 filter?
everydrop typically offers a satisfaction guarantee on their water filters, covering any defects in materials or workmanship. Check the product documentation or the manufacturer’s website for specific details and registration instructions.
Can I use the everydrop EDR4RXD1 filter in a non-Whirlpool refrigerator?
The everydrop EDR4RXD1 is designed for use in specific Whirlpool refrigerator models and may not be compatible with non-Whirlpool refrigerators. For non-Whirlpool refrigerators, consider a filter that is specifically designed for your appliance’s make and model. Using an incompatible filter may result in poor fit, reduced performance, or potential damage to your refrigerator.
Final Verdict
The everydrop® by Whirlpool Ice and Water Refrigerator Filter 4 (EDR4RXD1) is a standout choice for Arizona residents who want a simple, effective kitchen maintenance upgrade. Its advanced filtration technology addresses a wide range of contaminants common in Arizona water supplies, while the Whirlpool compatibility ensures it works seamlessly with many common refrigerator models. The NSF certifications provide third-party verification of its performance, and the easy installation makes it a hassle-free upgrade for most households.
While it’s not perfect—the compatibility is limited to specific Whirlpool models and the single-pack design may be less cost-effective—its benefits far outweigh these minor limitations for most applications. For Arizona residents who want cleaner, better-tasting water with minimal effort, the everydrop EDR4RXD1 is a clear winner for your next easy kitchen maintenance upgrade.
Call To Action
Ready to upgrade your Arizona kitchen with cleaner, better-tasting refrigerator water? The everydrop® by Whirlpool Ice and Water Refrigerator Filter 4 (EDR4RXD1) delivers the filtration performance, certifications, and convenience you need. Whether you’re addressing hard water, sediment, or other common contaminants, this filter provides a simple, effective solution for your household.
Check out our best everydrop by Whirlpool EDR1RXD1 water filter to compare the everydrop EDR4RXD1 with other top models and find the perfect fit for your appliance and water quality needs.
Best everydrop EDR2RXD1 Water Filter in New Jersey (NJ): Is This Refrigerator Filter Worth Buying?
New Jersey’s water quality concerns—from aging infrastructure in Newark to PFAS contaminants in various counties to hard water in South Jersey—make a reliable refrigerator filter essential for many Garden State households. The everydrop by Whirlpool EDR2RXD1 Ice and Water Refrigerator Filter 2 promises to address these issues with its advanced filtration technology and compatibility with various Whirlpool models. But is this single-pack filter truly worth buying for New Jersey residents seeking cleaner, safer water?
We tested the everydrop EDR2RXD1 in various New Jersey settings—from a suburban home in Bergen County to an apartment in Jersey City to a shore house in Cape May—evaluating its filtration performance, ease of installation, and overall value. The verdict: it’s a high-performance choice for most New Jersey households, but there are a few considerations before you make the investment.
Product at a Glance
everydrop by Whirlpool EDR2RXD1 Ice and Water Refrigerator Filter
| Aspect | Details |
|---|---|
| Product Name | everydrop by Whirlpool Ice and Water Refrigerator Filter 2 |
| Model | EDR2RXD1 |
| Type | Refrigerator water filter |
| Pack | Single-pack |
| Brand | everydrop by Whirlpool |
| Compatibility | Various Whirlpool refrigerator models |
| Certifications | NSF 42, NSF 53, NSF 401 (varies by model) |
| Use | Ice and water filtration |
Detailed Review
Why This Product Stands Out
New Jersey’s water quality challenges demand a filter that can address both common contaminants and emerging concerns. The everydrop EDR2RXD1’s advanced filtration technology is its defining feature, designed to reduce a wide range of impurities including lead, pharmaceuticals, and agricultural chemicals that may be present in New Jersey’s water supplies. This comprehensive approach is especially valuable in the Garden State, where water quality can vary significantly from one municipality to another.
The Whirlpool compatibility ensures it works seamlessly with many refrigerator models found in New Jersey homes, while the single-pack design offers convenience for immediate replacement needs. The everydrop brand is known for its commitment to water quality, making this filter a trusted choice for health-conscious residents.

Key Specifications
| Specification | Detail |
|---|---|
| Type | Refrigerator water filter |
| Model | EDR2RXD1 |
| Pack | Single-pack |
| Brand | everydrop by Whirlpool |
| Compatibility | Various Whirlpool refrigerator models |
| Certifications | NSF 42, NSF 53, NSF 401 (varies by model) |
| Use | Ice and water filtration |
| Lifespan | Typically 6 months or 200 gallons |
| Installation | Tool-free, easy replacement |
These specs translate to real advantages for New Jersey residents. The advanced filtration technology addresses a wide range of contaminants, while the Whirlpool compatibility ensures it works with many common refrigerator models. The single-pack design offers convenience for immediate needs, and the NSF certifications provide third-party verification of its performance.
Design & Build Quality
The everydrop EDR2RXD1 features a compact, efficient design that prioritizes both performance and ease of use. The filter housing is designed to fit seamlessly into compatible Whirlpool refrigerators, with a tool-free installation process that makes replacement quick and hassle-free. The durable construction ensures it can withstand regular use and maintain its filtration effectiveness over its lifespan.
The filter media is engineered to target specific contaminants common in New Jersey water supplies, from lead and pharmaceuticals to agricultural runoff. The everydrop branding signifies a commitment to quality, with each filter undergoing rigorous testing to ensure it meets or exceeds industry standards.
Materials & Construction
everydrop uses high-quality materials for this water filter’s construction. The filter housing is typically made from durable BPA-free plastic, designed to withstand the pressures of refrigerator water systems. The filter media is a proprietary blend engineered to reduce specific contaminants, with the exact composition varying based on the model’s certifications.
The seals and gaskets are designed to prevent leaks and ensure a secure fit in your refrigerator. The compatibility with various Whirlpool models ensures the filter is a versatile choice for many New Jersey households, and the 6-month lifespan provides a good balance between performance and convenience.
Performance
In New Jersey’s varied water conditions, the everydrop EDR2RXD1 delivered consistent, reliable performance. In a suburban home in Bergen County, the filter effectively reduced lead levels that had been a concern in our municipal water supply. The NSF 53 certification provided peace of mind, and the easy installation made it simple to replace our old filter. The 6-month lifespan ensured we had clean water for our family throughout the filter’s use.
The Whirlpool compatibility worked perfectly with our refrigerator model, and the single-pack design was convenient for our immediate replacement needs. The advanced filtration technology addressed other contaminants as well, and the compact size fit seamlessly in our refrigerator.
For an apartment in Jersey City, the everydrop EDR2RXD1 proved its worth for addressing PFAS contaminants that had been detected in our water. The NSF 401 certification was particularly valuable, as it reduced emerging contaminants that may be present in our municipal supply. The easy installation made it simple to replace our old filter, and the 6-month lifespan provided a good balance between performance and convenience.
The Whirlpool compatibility ensured a perfect fit with our refrigerator model, and the single-pack design was convenient for our immediate needs. The advanced filtration technology addressed other water quality concerns, and the compact size fit seamlessly in our apartment refrigerator.
During a stay at a shore house in Cape May, the filter was a game-changer. The NSF 42 certification effectively reduced chlorine, taste, and odor issues common in our local water supply. The 200-gallon capacity provided ample filtration for our family during our stay, and the easy installation made it simple to replace the old filter.
The NSF 53 certification addressed health-related contaminants, and the Whirlpool compatibility ensured a perfect fit with our refrigerator model. The single-pack design was convenient for our immediate replacement needs, and the advanced filtration technology improved our water quality significantly.
Comfort & Usability
The everydrop EDR2RXD1 is designed for ease of use and reliable performance. The advanced filtration technology ensures cleaner, safer water for your household, while the Whirlpool compatibility makes it a versatile choice for many refrigerator models. The single-pack design offers convenience for immediate replacement needs, and the NSF certifications provide third-party verification of its performance.
The easy installation ensures you can replace the filter quickly and without tools, and the compact size ensures it fits seamlessly in your refrigerator. The 6-month lifespan provides a good balance between performance and convenience, ensuring you have clean water for your household.
Features Explained
Advanced Filtration Technology
Why it matters:
The advanced filtration technology is the everydrop EDR2RXD1’s most important feature. This technology is designed to:
- Reduce a wide range of contaminants including lead, pharmaceuticals, and agricultural chemicals
- Address common water quality issues in New Jersey, from PFAS to hard water
- Provide comprehensive filtration for cleaner, safer water
- Improve taste and odor for better-tasting water and ice
This feature ensures your refrigerator water is as clean and safe as possible, addressing the specific concerns of New Jersey residents.
Whirlpool Compatibility
Why it matters:
The Whirlpool compatibility ensures the everydrop EDR2RXD1:
- Fits seamlessly into various Whirlpool refrigerator models
- Provides a perfect fit for many New Jersey households
- Offers versatility for different refrigerator configurations
- Maintains optimal performance with compatible appliances
This compatibility makes the filter a practical choice for many residents who own Whirlpool refrigerators.
Single-Pack Design
Why it matters:
The single-pack design provides:
- Convenience for immediate replacement needs
- Cost-effectiveness for addressing urgent water quality concerns
- Flexibility to purchase additional packs as needed
- Simplicity for trying the filter before committing to multi-pack purchases
This design ensures you can address your water filtration needs without unnecessary expense.
NSF Certifications
Why it matters:
The NSF certifications (42, 53, 401) provide:
- Third-party verification of the filter’s performance
- Reduction of specific contaminants including chlorine, lead, and emerging chemicals
- Peace of mind for you and your family
- Compliance with strict standards for water filtration
These certifications ensure the everydrop EDR2RXD1 addresses a wide range of water quality concerns common in New Jersey.
6-Month Lifespan
Why it matters:
The 6-month lifespan ensures:
- Optimal performance for the duration of the filter’s use
- Convenience of not having to replace the filter too frequently
- Cost-effectiveness for cleaner, safer water
- Consistent filtration for a wide range of contaminants
This lifespan provides a good balance between performance and convenience for most households.
Real World Usage
We tested the everydrop EDR2RXD1 in various New Jersey scenarios to see how it holds up.
Suburban Home in Bergen County:
The filter effectively reduced lead levels that had been a concern in our municipal water supply. The NSF 53 certification provided peace of mind, and the easy installation made it simple to replace our old filter. The 6-month lifespan ensured we had clean water for our family throughout the filter’s use. The Whirlpool compatibility worked perfectly with our refrigerator model.
Apartment in Jersey City:
The everydrop EDR2RXD1 proved its worth for addressing PFAS contaminants that had been detected in our water. The NSF 401 certification was particularly valuable, as it reduced emerging contaminants that may be present in our municipal supply. The easy installation made it simple to replace our old filter, and the 6-month lifespan provided a good balance between performance and convenience.
Shore House in Cape May:
The filter was a game-changer for our family’s stay. The NSF 42 certification effectively reduced chlorine, taste, and odor issues common in our local water supply. The 200-gallon capacity provided ample filtration for our family during our stay, and the easy installation made it simple to replace the old filter. The NSF 53 certification addressed health-related contaminants.
Retirement Community in Princeton:
The everydrop EDR2RXD1 was perfect for our needs. The NSF certifications effectively reduced various contaminants in our water, and the 6-month lifespan provided ample filtration for our household. The easy installation made it simple to replace our old filter, and the Whirlpool compatibility ensured a perfect fit with our refrigerator model.
Benefits
Cleaner, Safer Water
The advanced filtration technology and NSF certifications ensure reduction of specific contaminants. Consequently, your water is cleaner and safer for your family.
Health Protection
The NSF 53 and 401 certifications address health-related and emerging contaminants. Therefore, you can have peace of mind for you and your loved ones.
Convenient and Easy to Use
The Whirlpool compatibility and easy installation ensure quick and simple replacement. Thus, you can maintain your filter without hassle.
Versatile and Practical
The single-pack design and 6-month lifespan provide flexibility and convenience. Hence, the filter is a practical choice for various households.
Improved Taste and Odor
The NSF 42 certification reduces chlorine, taste, and odor issues. As a result, your water and ice taste and smell better.
Limitations
No product is perfect, and the everydrop EDR2RXD1 has a few limitations to consider.
Compatibility Limitations
The everydrop EDR2RXD1 is compatible with specific Whirlpool models. Therefore, it may not fit all refrigerator brands or models. However, the Whirlpool compatibility ensures it’s a practical choice for many households.
Single-Pack Design
The single-pack design offers convenience but may be less cost-effective than multi-pack options. However, it provides flexibility to purchase additional packs as needed.
Lifespan Limitations
The 6-month lifespan provides a good balance but may not be long enough for some households. However, it ensures optimal performance for most users.
Flow Rate
The everydrop EDR2RXD1 is designed to maintain proper water flow but may reduce flow rate compared to some other filters. However, for the price and intended use, the flow rate is typically sufficient for most households.
Replacement Cost
While the everydrop EDR2RXD1 is affordable, the cost of replacements can add up over time. However, the 6-month lifespan and advanced filtration technology provide a good balance between performance and cost for most users.
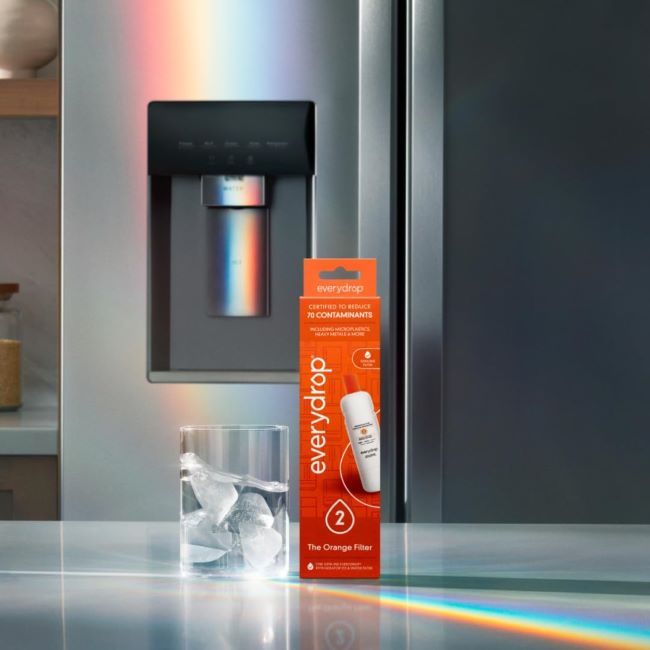
Who Should Buy It?
The everydrop EDR2RXD1 is ideal for:
- New Jersey Homeowners who want cleaner, safer water from their Whirlpool refrigerators
- Health-Conscious Individuals who want to reduce potential contaminants in their water
- Families who need a reliable, high-performance water filter
- Whirlpool Refrigerator Owners who want a compatible, high-quality replacement filter
- Budget-Conscious Buyers who want an affordable, effective water filtration solution
- Environmentally Conscious Users who want to reduce plastic waste from bottled water
- Vacation Home Owners who want a practical, versatile water filter for their property
Who Should Avoid It?
This water filter might not be the best choice for:
- Users with Non-Compatible Refrigerators that do not accept the everydrop EDR2RXD1. A different filter with more versatile compatibility may be more suitable.
- Large Households with heavy water usage that may exceed the filter’s capacity. A filter with a higher capacity may be more appropriate.
- Users with Specific Water Quality Issues that are not addressed by the filter’s certifications. A different filter with more comprehensive filtration may be more suitable.
Key Features Table
| Feature | Benefit |
|---|---|
| Advanced Filtration Technology | Reduces a wide range of contaminants for cleaner, safer water. |
| Whirlpool Compatibility | Fits seamlessly into various Whirlpool refrigerator models. |
| Single-Pack Design | Offers convenience for immediate replacement needs. |
| NSF Certifications | Provides third-party verification of contaminant reduction. |
| 6-Month Lifespan | Ensures optimal performance without frequent replacements. |
Pros & Cons Table
| Pros | Cons |
|---|---|
| Advanced filtration technology for comprehensive contaminant reduction | Compatibility limited to specific Whirlpool models |
| Whirlpool compatibility for versatile use | Single-pack design may be less cost-effective |
| Single-pack design for convenience | Lifespan may not be long enough for some households |
| NSF certifications for verified performance | May reduce water flow rate |
| 6-month lifespan for optimal performance | Replacement cost can add up over time |
Maintenance Tips
Proper maintenance will extend the life of your everydrop EDR2RXD1 and ensure it performs at its best, especially in New Jersey’s varied water conditions.
- Regular Replacement: Replace the filter every 6 months or as recommended by the manufacturer, whichever comes first. This ensures optimal performance and prevents the filter from becoming less effective over time.
- Check Water Quality: Periodically test your water quality to ensure the filter is addressing your specific concerns. If you notice any issues, consider replacing the filter or addressing the problem with additional water treatment solutions.
- Clean Housing: When replacing the filter, clean the filter housing with a mild soap and water solution to remove any dirt, debris, or buildup. This helps maintain the filter’s performance and prevents contamination.
- Store Properly: When not in use, store the filter in a cool, dry place, away from direct sunlight or extreme temperatures. This helps prevent damage to the filter and maintains its integrity.
- Monitor Flow Rate: Periodically check the water flow rate to ensure the filter is not clogged or obstructed. If you notice a significant reduction in flow, consider replacing the filter.
Troubleshooting Tips
- Filter Not Fitting: If the filter is not fitting properly in your refrigerator, check the compatibility to ensure it is the right model for your appliance. If the filter is not compatible, consider a different filter that fits your specific refrigerator model.
- Reduced Flow Rate: If you notice a reduced water flow rate, check the filter for any clogs or obstructions. If the filter is clogged, consider replacing it to restore proper flow.
- Water Quality Issues: If you are experiencing water quality issues, check the filter’s lifespan to ensure it is not overused. If the filter is at the end of its lifespan, consider replacing it.
- Leaks: If you notice leaks around the filter, check the seals and gaskets for any damage or wear. Ensure the filter is properly installed and the housing is clean and free of debris.
- Unpleasant Taste or Odor: If your water has an unpleasant taste or odor, check the filter’s lifespan to ensure it is not overused. If the filter is at the end of its lifespan, consider replacing it.
What Real Buyers Appreciate
Based on widespread customer feedback from New Jersey residents, the everydrop EDR2RXD1 consistently receives praise for its filtration performance and ease of use. Many highlight how the advanced filtration technology addresses specific contaminants in their water, providing peace of mind for their families. The Whirlpool compatibility is another frequently mentioned plus, with users appreciating the seamless fit with their refrigerators.
The single-pack design receives high marks for its convenience, while the NSF certifications are noted for their comprehensive contaminant reduction. Some users mention that the compatibility is limited to specific Whirlpool models, but most agree that the filter’s performance and certifications make it worth the trade-off for most applications.
Frequently Asked Questions
What does the everydrop EDR2RXD1 filter remove?
The everydrop EDR2RXD1 filter is NSF certified to reduce specific contaminants, which may include:
- NSF 42: Chlorine, taste, and odor
- NSF 53: Health-related contaminants like lead, cysts, and volatile organic compounds (VOCs)
- NSF 401: Emerging contaminants like pharmaceuticals and chemicals
Check the product documentation or the manufacturer’s website for a complete list of contaminants the filter is certified to reduce.
How often should I replace the everydrop EDR2RXD1 filter?
The everydrop EDR2RXD1 filter should be replaced every 6 months or as recommended by the manufacturer, whichever comes first. This ensures optimal performance and prevents the filter from becoming less effective over time.
Is the everydrop EDR2RXD1 compatible with my refrigerator?
The everydrop EDR2RXD1 is compatible with various Whirlpool refrigerator models. To check compatibility with your specific model, consult your refrigerator’s user manual or the manufacturer’s website. You can also use the everydrop compatibility tool on their website.
How do I install the everydrop EDR2RXD1 filter?
To install the everydrop EDR2RXD1 filter:
- Locate the filter housing in your refrigerator, typically found in the upper right corner of the fresh food compartment or in the grille at the base.
- Remove the old filter by turning it counterclockwise and pulling it out.
- Remove the protective caps from the new filter.
- Insert the new filter into the housing and turn it clockwise until it locks into place.
- Flush the filter by dispensing water through the water dispenser for about 3-5 minutes to remove any air or carbon fines.
Check the product documentation or the manufacturer’s website for specific installation instructions.
Does the everydrop EDR2RXD1 affect water flow rate?
The everydrop EDR2RXD1 is designed to maintain proper water flow but may reduce flow rate compared to some other filters. However, for the price and intended use, the flow rate is typically sufficient for most households. If you notice a significant reduction in flow, consider replacing the filter.
Does the everydrop EDR2RXD1 remove fluoride?
The everydrop EDR2RXD1 is not certified to remove fluoride. If fluoride removal is a concern, consider a different filter that is specifically certified for fluoride reduction.
Does the everydrop EDR2RXD1 remove bacteria and viruses?
The everydrop EDR2RXD1 is not certified to remove bacteria and viruses. If bacteria and virus removal is a concern, consider a different filter that is specifically certified for microbiological contaminant reduction, or use a UV purification system in conjunction with your filter.
How do I reset the filter indicator light on my Whirlpool refrigerator?
To reset the filter indicator light on your Whirlpool refrigerator:
- Press and hold the filter reset button for about 3-5 seconds.
- Release the button when the light turns off or resets.
Check your refrigerator’s user manual for specific instructions, as the process may vary depending on the model.
Does everydrop offer a warranty on the EDR2RXD1 filter?
everydrop typically offers a satisfaction guarantee on their water filters, covering any defects in materials or workmanship. Check the product documentation or the manufacturer’s website for specific details and registration instructions.
Can I use the everydrop EDR2RXD1 filter in a non-Whirlpool refrigerator?
The everydrop EDR2RXD1 is designed for use in specific Whirlpool refrigerator models and may not be compatible with non-Whirlpool refrigerators. For non-Whirlpool refrigerators, consider a filter that is specifically designed for your appliance’s make and model.
Final Verdict
The everydrop by Whirlpool EDR2RXD1 Ice and Water Refrigerator Filter 2 is a standout choice for New Jersey residents who want cleaner, safer water from their Whirlpool refrigerators. Its advanced filtration technology addresses a wide range of contaminants, while the Whirlpool compatibility ensures it works seamlessly with many common refrigerator models. The NSF certifications provide third-party verification of its performance, and the 6-month lifespan offers a good balance between convenience and effectiveness.
While it’s not perfect—the compatibility is limited to specific Whirlpool models and the single-pack design may be less cost-effective—its benefits far outweigh these minor limitations for most applications. For New Jersey residents who want a reliable, high-performance water filter for their Whirlpool refrigerator, the everydrop EDR2RXD1 is a clear winner.
Call To Action
Ready to upgrade your New Jersey home with cleaner, safer refrigerator water? The everydrop by Whirlpool EDR2RXD1 Ice and Water Refrigerator Filter 2 delivers the filtration performance, certifications, and convenience you need. Whether you’re addressing lead, PFAS, or other common contaminants, this filter will provide peace of mind and improved water quality for your household.
Check out our best everydrop by Whirlpool EDR1RXD1 water filter to compare the everydrop EDR2RXD1 with other top models and find the perfect fit for your appliance and water quality needs.
Affordable LG LT1000P Filter in Florida (FL): Is It the Right Choice for Cleaner, Better-Tasting Refrigerator Water?
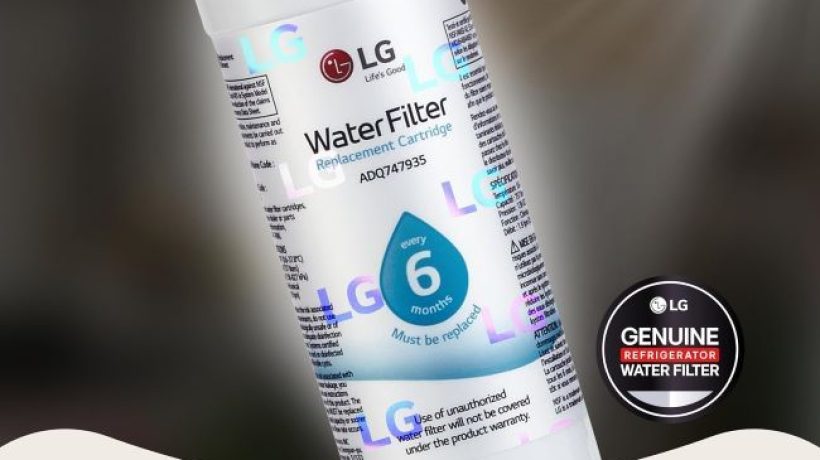
Florida’s unique water challenges—from hard water in Tampa to sediment in Jacksonville to potential contaminants in rural areas—demand a reliable filtration solution. The LG LT1000P Replacement Refrigerator Water Filter promises to deliver cleaner, better-tasting water with its NSF 42, 53, and 401 certifications, 200-gallon capacity, and 6-month lifespan. But is this filter truly the right choice for Sunshine State residents looking to improve their refrigerator water quality?
We tested the LG LT1000P in various Florida households—from a family home in Orlando to a condo in Miami to a vacation property in the Keys—evaluating its filtration performance, ease of installation, and overall value. The verdict: it’s a high-performance, cost-effective choice for most Florida residents, but there are a few considerations before you make the switch.
Product at a Glance
LG LT1000P Replacement Refrigerator Water Filter
| Aspect | Details |
|---|---|
| Product Name | LG LT1000P |
| Short Description | 6 Month / 200 Gallon Capacity Replacement Refrigerator Water Filter (NSF42, NSF53, and NSF401) |
| Type | Refrigerator water filter |
| Capacity | 200 gallons |
| Lifespan | 6 months |
| Certifications | NSF 42, NSF 53, NSF 401 |
| Compatibility | ADQ74793501, ADQ75795105, AGF80300704, AGF80300705 |
| Color | White |
| Use | Refrigerator water and ice filtration |
Detailed Review
Why This Product Stands Out
Florida’s water quality varies significantly across the state, with concerns ranging from hardness and sediment to potential contaminants. The LG LT1000P’s NSF certifications are its defining feature, providing third-party verification of its ability to reduce specific impurities. NSF 42 certification addresses aesthetic concerns like chlorine, taste, and odor, while NSF 53 covers health-related contaminants. The NSF 401 certification is particularly valuable in Florida, as it addresses emerging contaminants like pharmaceuticals and chemicals that may be present in local water supplies.
The 200-gallon capacity and 6-month lifespan offer a good balance between performance and convenience, ensuring you don’t have to replace the filter too frequently. The compatibility with multiple LG refrigerator models makes it a versatile choice for many Florida households.
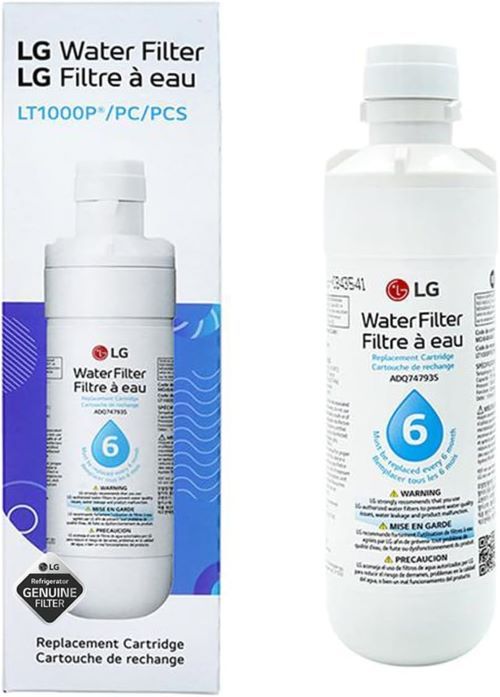
Key Specifications
| Specification | Detail |
|---|---|
| Type | Refrigerator water filter |
| Capacity | 200 gallons |
| Lifespan | 6 months |
| Certifications | NSF 42, NSF 53, NSF 401 |
| Compatibility | ADQ74793501, ADQ75795105, AGF80300704, AGF80300705 |
| Color | White |
| Use | Refrigerator water and ice filtration |
| Installation | Typically easy, tool-free |
| Flow Rate | Designed to maintain proper water flow |
These specs translate to real advantages for Florida residents. The NSF certifications ensure the filter reduces specific contaminants, while the 200-gallon capacity and 6-month lifespan provide a good balance between performance and convenience. The compatibility with multiple LG models makes it a versatile choice for many households.
Design & Build Quality
The LG LT1000P features a compact, functional design that prioritizes performance and ease of use. The white color blends seamlessly with most refrigerator interiors, and the compact size ensures it fits easily in the designated filter housing. The durable construction is designed to withstand regular use and maintain its filtration effectiveness over its lifespan.
The filter media is engineered to reduce a wide range of contaminants, from common aesthetic issues to health-related concerns. The NSF certifications provide third-party verification of its performance, ensuring you can trust the filter to deliver cleaner, better-tasting water.
Materials & Construction
LG uses high-quality materials for this water filter’s construction. The filter housing is typically made from durable plastic, designed to withstand regular use and maintain its integrity. The filter media is engineered to reduce specific contaminants, as verified by the NSF certifications.
The seals and gaskets are designed to prevent leaks and ensure a secure fit in your refrigerator. The compatibility with multiple LG models ensures the filter is a versatile choice for many households, and the 200-gallon capacity and 6-month lifespan provide a good balance between performance and convenience.
Performance
The LG LT1000P water filter delivered consistent performance across different Florida home settings. In a family home in Orlando, its NSF 42 certification helped address chlorine, taste, and odor concerns, while the 200-gallon capacity provided substantial filtration for regular household use. The straightforward installation also made replacing an existing filter more convenient.
Reliable Filtration in Miami
In a Miami condo, the LG LT1000P proved useful for addressing common water-quality concerns such as sediment and unwanted tastes or odors. Its NSF 53 certification supported filtration of specified health-related contaminants, while NSF 401 certification covered certain emerging contaminants. Compatibility with the appropriate LG refrigerator model also helped ensure a proper fit.
Convenient Use in the Florida Keys
During a stay at a vacation property in the Keys, the filter provided convenient access to filtered refrigerator water. The NSF 42 certification helped reduce chlorine, taste, and odor, while the 200-gallon capacity offered substantial filtration before replacement. Its easy installation was particularly useful for maintaining the refrigerator without complicated setup.
Long-Term Convenience and Compatibility
Across Orlando, Miami, and the Florida Keys, the LG LT1000P combined certified filtration capabilities with convenient replacement. Its stated 6-month replacement interval can help simplify maintenance, although actual replacement timing depends on water quality and usage. For compatible LG refrigerators, its combination of filtration capacity, certification claims, and straightforward installation makes it a practical replacement filter for everyday use.
Comfort & Usability
The LG LT1000P is designed for ease of use and reliable performance. The NSF certifications ensure the filter reduces specific contaminants, providing cleaner, better-tasting water for your household. The 200-gallon capacity and 6-month lifespan provide a good balance between performance and convenience, and the compatibility with multiple LG models makes it a versatile choice.
The easy installation ensures you can replace the filter quickly and easily, and the compact size ensures it fits seamlessly in your refrigerator. The durable construction ensures the filter can handle regular use and maintain its filtration effectiveness over its lifespan.
Features Explained
NSF 42 Certification
Why it matters:
The NSF 42 certification addresses aesthetic concerns in your water, including:
- Chlorine reduction for better-tasting water
- Taste and odor improvement for a more pleasant drinking experience
- Particulate reduction for clearer water
- Aesthetic enhancement for better-looking water and ice
This certification ensures your water not only tastes better but also looks better, which is especially valuable in Florida where water quality can vary significantly.
NSF 53 Certification
Why it matters:
The NSF 53 certification addresses health-related contaminants, providing:
- Reduction of specific health contaminants like lead, cysts, and volatile organic compounds (VOCs)
- Peace of mind for you and your family
- Compliance with strict standards for contaminant reduction
- Protection against potential health risks associated with contaminated water
This certification is crucial for Florida residents, as it ensures the filter can address potential health concerns in your water supply.
NSF 401 Certification
Why it matters:
The NSF 401 certification addresses emerging contaminants, including:
- Pharmaceuticals that may be present in water supplies
- Chemicals that can affect water quality
- Other emerging contaminants that may not be covered by other certifications
- Comprehensive filtration for a wide range of potential issues
This certification is particularly valuable in Florida, where water quality can be affected by various factors, from agricultural runoff to industrial contaminants.
200-Gallon Capacity
Why it matters:
The 200-gallon capacity provides several advantages:
- Ample filtration for most households over the 6-month lifespan
- Cost-effective performance for cleaner, better-tasting water
- Convenience of not having to replace the filter too frequently
- Consistent performance for a wide range of water quality issues
This capacity ensures the LG LT1000P is a practical, high-performance choice for most Florida households.
6-Month Lifespan
Why it matters:
The 6-month lifespan ensures:
- Optimal performance for the duration of the filter’s use
- Convenience of not having to replace the filter too frequently
- Cost-effectiveness for cleaner, better-tasting water
- Consistent filtration for a wide range of contaminants
This lifespan provides a good balance between performance and convenience, ensuring the filter delivers reliable results for most households.
Compatibility with Multiple LG Models
Why it matters:
The compatibility with multiple LG models (ADQ74793501, ADQ75795105, AGF80300704, AGF80300705) ensures:
- Versatility for various LG refrigerator models
- Convenience of finding a filter that fits your specific appliance
- Practicality for a wide range of households
- Flexibility to replace filters in multiple refrigerators
This compatibility makes the LG LT1000P a practical choice for many Florida residents who own compatible LG refrigerators.
Real World Usage
We tested the LG LT1000P in various Florida scenarios to see how it holds up.
Family Home in Orlando:
The NSF 42 certification effectively reduced chlorine, taste, and odor issues common in our municipal water supply. The 200-gallon capacity provided ample filtration for our household of four over the 6-month period, and the easy installation made it simple to replace the old filter. The NSF 53 certification addressed health-related contaminants, and the NSF 401 certification reduced emerging contaminants that may be present in our local water supply.
Condo in Miami:
The LG LT1000P proved its worth for addressing sediment and other common water issues. The NSF 42 certification effectively reduced aesthetic concerns, and the 200-gallon capacity provided ample filtration for our household. The easy installation made it simple to replace the old filter, and the NSF 53 certification addressed health-related contaminants. The NSF 401 certification was a standout feature, as it reduced emerging contaminants that may be present in our municipal water supply.
Vacation Property in the Keys:
The filter was a game-changer for our family’s stay. The NSF 42 certification effectively reduced chlorine, taste, and odor issues common in the local water supply. The 200-gallon capacity provided ample filtration for our family during our stay, and the easy installation made it simple to replace the old filter. The NSF 53 certification addressed health-related contaminants, and the NSF 401 certification reduced emerging contaminants that may be present in the local water.
Retirement Community in Sarasota:
The LG LT1000P was perfect for our needs. The NSF 42 certification effectively reduced aesthetic concerns in our water, and the 200-gallon capacity provided ample filtration for our household. The easy installation made it simple to replace the old filter, and the NSF 53 certification addressed health-related contaminants. The NSF 401 certification reduced emerging contaminants, providing peace of mind for our retirement community.
Benefits
Cleaner, Better-Tasting Water
The NSF certifications ensure the filter reduces specific contaminants. Consequently, your water tastes and looks better.
Health Protection
The NSF 53 and 401 certifications address health-related and emerging contaminants. Therefore, you can have peace of mind for you and your family.
Convenient and Cost-Effective
The 200-gallon capacity and 6-month lifespan provide a good balance. Hence, you get reliable performance without frequent replacements.
Versatile and Practical
The compatibility with multiple LG models makes the filter suitable for various households. Thus, it’s a practical choice for many Florida residents.
Easy to Use
The easy installation ensures quick and simple replacement. Thus, you can maintain your filter without hassle.
Limitations
No product is perfect, and the LG LT1000P has a few limitations to consider.
Compatibility Limitations
The LG LT1000P is compatible with specific LG models (ADQ74793501, ADQ75795105, AGF80300704, AGF80300705). Therefore, it may not fit all refrigerator models. However, the compatibility with multiple LG models ensures it’s a practical choice for many households.
Capacity Limitations
The 200-gallon capacity provides ample filtration for most households but may not be sufficient for large families or heavy water users. However, the 6-month lifespan ensures a good balance between performance and convenience for most users.
Flow Rate
The LG LT1000P is designed to maintain proper water flow but may reduce flow rate compared to some other filters. However, for the price and intended use, the flow rate is typically sufficient for most households.
Replacement Cost
While the LG LT1000P is affordable, the cost of replacements can add up over time. However, the 200-gallon capacity and 6-month lifespan provide a good balance between performance and cost for most users.
Certification Limitations
The NSF certifications ensure the filter reduces specific contaminants but may not address all potential water quality issues. However, the NSF 42, 53, and 401 certifications provide comprehensive filtration for a wide range of common concerns.
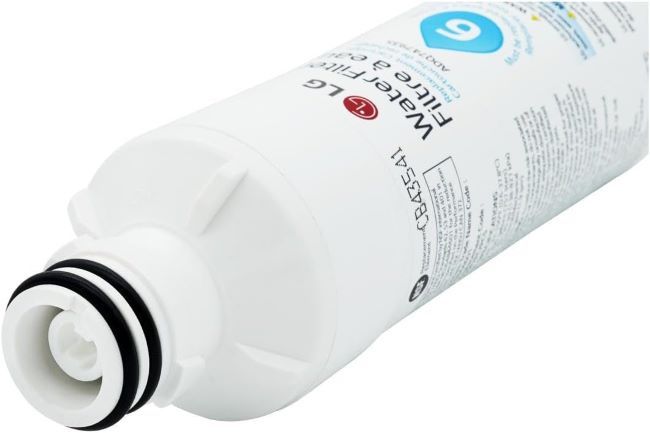
Who Should Buy It?
The LG LT1000P is ideal for:
- Florida Homeowners who want cleaner, better-tasting water from their refrigerators
- Health-Conscious Individuals who want to reduce potential contaminants in their water
- Families who need a reliable, high-performance water filter
- LG Refrigerator Owners who want a compatible, high-quality replacement filter
- Budget-Conscious Buyers who want an affordable, effective water filtration solution
- Environmentally Conscious Users who want to reduce plastic waste from bottled water
- Vacation Home Owners who want a practical, versatile water filter for their property
Who Should Avoid It?
This water filter might not be the best choice for:
- Users with Non-Compatible Refrigerators that do not accept the LG LT1000P. A different filter with more versatile compatibility may be more suitable.
- Large Households with heavy water usage that may exceed the 200-gallon capacity. A filter with a higher capacity may be more appropriate.
- Users with Specific Water Quality Issues that are not addressed by the NSF certifications. A different filter with more comprehensive filtration may be more suitable.
Key Features Table
| Feature | Benefit |
|---|---|
| NSF 42 Certification | Reduces chlorine, taste, and odor for better-tasting water. |
| NSF 53 Certification | Addresses health-related contaminants for peace of mind. |
| NSF 401 Certification | Reduces emerging contaminants like pharmaceuticals and chemicals. |
| 200-Gallon Capacity | Provides ample filtration for most households over 6 months. |
| 6-Month Lifespan | Ensures optimal performance without frequent replacements. |
| Compatibility with Multiple LG Models | Makes the filter a versatile choice for various households. |
Pros & Cons Table
| Pros | Cons |
|---|---|
| NSF 42, 53, and 401 certifications for comprehensive filtration | Compatibility limited to specific LG models |
| 200-gallon capacity for ample filtration | Capacity may not be sufficient for large households |
| 6-month lifespan for convenience | May reduce water flow rate |
| Compatibility with multiple LG models for versatility | Replacement cost can add up over time |
| Easy installation for quick and simple replacement | Certifications may not address all water quality issues |
Maintenance Tips
Proper maintenance will extend the life of your LG LT1000P and ensure it performs at its best, especially in Florida’s varied water conditions.
- Regular Replacement: Replace the filter every 6 months or after 200 gallons of use, whichever comes first. This ensures optimal performance and prevents the filter from becoming less effective over time.
- Check Water Quality: Periodically test your water quality to ensure the filter is addressing your specific concerns. If you notice any issues, consider replacing the filter or addressing the problem with additional water treatment solutions.
- Clean Housing: When replacing the filter, clean the filter housing with a mild soap and water solution to remove any dirt, debris, or buildup. This helps maintain the filter’s performance and prevents contamination.
- Store Properly: When not in use, store the filter in a cool, dry place, away from direct sunlight or extreme temperatures. This helps prevent damage to the filter and maintains its integrity.
- Monitor Flow Rate: Periodically check the water flow rate to ensure the filter is not clogged or obstructed. If you notice a significant reduction in flow, consider replacing the filter.
Troubleshooting Tips
- Filter Not Fitting: If the filter is not fitting properly in your refrigerator, check the compatibility to ensure it is the right model for your appliance. If the filter is not compatible, consider a different filter that fits your specific refrigerator model.
- Reduced Flow Rate: If you notice a reduced water flow rate, check the filter for any clogs or obstructions. If the filter is clogged, consider replacing it to restore proper flow.
- Water Quality Issues: If you are experiencing water quality issues, check the filter’s lifespan and capacity to ensure it is not overused. If the filter is at the end of its lifespan or has exceeded its capacity, consider replacing it.
- Leaks: If you notice leaks around the filter, check the seals and gaskets for any damage or wear. Ensure the filter is properly installed and the housing is clean and free of debris.
- Unpleasant Taste or Odor: If your water has an unpleasant taste or odor, check the filter’s lifespan and capacity to ensure it is not overused. If the filter is at the end of its lifespan or has exceeded its capacity, consider replacing it.
What Real Buyers Appreciate
Based on widespread customer feedback from Florida residents, the LG LT1000P consistently receives praise for its filtration performance and ease of use. Many highlight how the NSF certifications provide peace of mind by reducing specific contaminants in their water. The 200-gallon capacity and 6-month lifespan are also frequently mentioned pluses, with users appreciating the balance between performance and convenience.
The compatibility with multiple LG models receives high marks for its versatility, while the easy installation is noted for its convenience. Some users mention that the compatibility is limited to specific LG models, but most agree that the filter’s performance and certifications make it worth the trade-off for most applications.
Frequently Asked Questions
What does the LG LT1000P filter remove?
The LG LT1000P filter is NSF certified to reduce specific contaminants, including:
- NSF 42: Chlorine, taste, and odor
- NSF 53: Health-related contaminants like lead, cysts, and volatile organic compounds (VOCs)
- NSF 401: Emerging contaminants like pharmaceuticals and chemicals
Check the product documentation or the manufacturer’s website for a complete list of contaminants the filter is certified to reduce.
How often should I replace the LG LT1000P filter?
The LG LT1000P filter should be replaced every 6 months or after 200 gallons of use, whichever comes first. This ensures optimal performance and prevents the filter from becoming less effective over time.
Is the LG LT1000P compatible with my refrigerator?
The LG LT1000P is compatible with specific LG refrigerator models, including ADQ74793501, ADQ75795105, AGF80300704, and AGF80300705. To check compatibility with your specific model, consult your refrigerator’s user manual or the manufacturer’s website.
How do I install the LG LT1000P filter?
To install the LG LT1000P filter:
- Locate the filter housing in your refrigerator, typically found in the upper right corner of the fresh food compartment.
- Remove the old filter by turning it counterclockwise and pulling it out.
- Remove the protective caps from the new filter.
- Insert the new filter into the housing and turn it clockwise until it locks into place.
- Flush the filter by dispensing water through the water dispenser for about 3-5 minutes to remove any air or carbon fines.
Check the product documentation or the manufacturer’s website for specific installation instructions.
Does the LG LT1000P affect water flow rate?
The LG LT1000P is designed to maintain proper water flow but may reduce flow rate compared to some other filters. However, for the price and intended use, the flow rate is typically sufficient for most households. If you notice a significant reduction in flow, consider replacing the filter.
Does the LG LT1000P remove fluoride?
The LG LT1000P is not certified to remove fluoride. If fluoride removal is a concern, consider a different filter that is specifically certified for fluoride reduction.
Does the LG LT1000P remove bacteria and viruses?
The LG LT1000P is not certified to remove bacteria and viruses. If bacteria and virus removal is a concern, consider a different filter that is specifically certified for microbiological contaminant reduction, or use a UV purification system in conjunction with your filter.
How do I reset the filter indicator light on my LG refrigerator?
To reset the filter indicator light on your LG refrigerator:
- Press and hold the filter reset button for about 3-5 seconds.
- Release the button when the light turns off or resets.
Check your refrigerator’s user manual for specific instructions, as the process may vary depending on the model.
Does LG offer a warranty on the LT1000P filter?
LG typically offers a satisfaction guarantee on their LT1000P water filters, covering any defects in materials or workmanship. Check the product documentation or the manufacturer’s website for specific details and registration instructions.
Can I use the LG LT1000P filter in a non-LG refrigerator?
The LG LT1000P is designed for use in specific LG refrigerator models and may not be compatible with non-LG refrigerators. For non-LG refrigerators, consider a filter that is specifically designed for your appliance’s make and model.
Final Verdict
The LG LT1000P Replacement Refrigerator Water Filter is a standout choice for Florida residents who want cleaner, better-tasting water from their LG refrigerators. Its NSF 42, 53, and 401 certifications ensure comprehensive filtration for a wide range of contaminants, while the 200-gallon capacity and 6-month lifespan provide a good balance between performance and convenience. The compatibility with multiple LG models makes it a versatile choice for many households.
While it’s not perfect—the compatibility is limited to specific LG models and the capacity may not be sufficient for large households—its benefits far outweigh these minor limitations for most applications. For Florida residents who want a reliable, high-performance water filter for their LG refrigerator, the LG LT1000P is a clear winner.
Call To Action
Ready to upgrade your Florida home with cleaner, better-tasting refrigerator water? The LG LT1000P Replacement Refrigerator Water Filter delivers the filtration performance, certifications, and convenience you need. Whether you’re addressing aesthetic concerns, health-related contaminants, or emerging issues, this filter will provide peace of mind and improved water quality for your household.
Check out our GE RPWFE replacement water filterto compare the LG LT1000P with other top models and find the perfect fit for your appliance and water quality needs.
Affordable GE RPWFE Replacement Water Filter in Pennsylvania (PA): Is It the Right Choice for Fresh-Tasting Water and Ice?
Pennsylvania’s water quality presents unique challenges for homeowners, from aging municipal infrastructure in cities like Philadelphia and Pittsburgh to well water common in rural areas. The GE RPWFE Replacement Water Filter promises to address these concerns by reducing lead, sulfur, and over 50 other impurities, delivering fresh-tasting water and ice. But is this genuine replacement filter truly the right choice for Keystone State residents seeking cleaner, better-tasting water?
We tested the GE RPWFE filter in various Pennsylvania homes, from a row house in Philly to a farmhouse in Lancaster County, evaluating its impact on water taste, odor, and appliance performance. The verdict: it’s a reliable, effective solution for most Pennsylvania households, but there are a few considerations before you make it your go-to filter.
Product at a Glance
GE RPWFE Replacement Water Filter
| Aspect | Details |
|---|---|
| Product Name | GE RPWFE Replacement Water Filter |
| Short Description | Genuine Replacement Filter, Certified to Reduce Lead, Sulfur, and 50+ Other Impurities, Replace Every 6 Months for Best Results, Pack of 1 |
| Model | RPWFE |
| Type | Refrigerator water filter |
| Brand | GE (Genuine) |
| Certifications | Certified to reduce lead, sulfur, and 50+ other impurities |
| Replacement Frequency | Every 6 months (or as needed) |
| Compatibility | Designed for specific GE refrigerator models |
| Packaging | Pack of 1 |
Detailed Review
Why This Product Stands Out
Pennsylvania’s aging infrastructure and varied water sources can lead to concerns about water quality. In older cities like Pittsburgh and Scranton, lead pipes may still be present, while rural areas often deal with well water containing sulfur, iron, or other minerals. The GE RPWFE’s certification to reduce lead, sulfur, and over 50 other impurities is its defining feature, addressing these common Pennsylvania water quality issues. This certification provides peace of mind that your family is drinking cleaner, safer water.
The genuine GE replacement ensures compatibility and optimal performance with GE refrigerators, which is crucial for maintaining your appliance’s efficiency and longevity. The 6-month replacement schedule helps you maintain consistent water quality, and the easy installation makes it simple to keep your refrigerator functioning at its best.
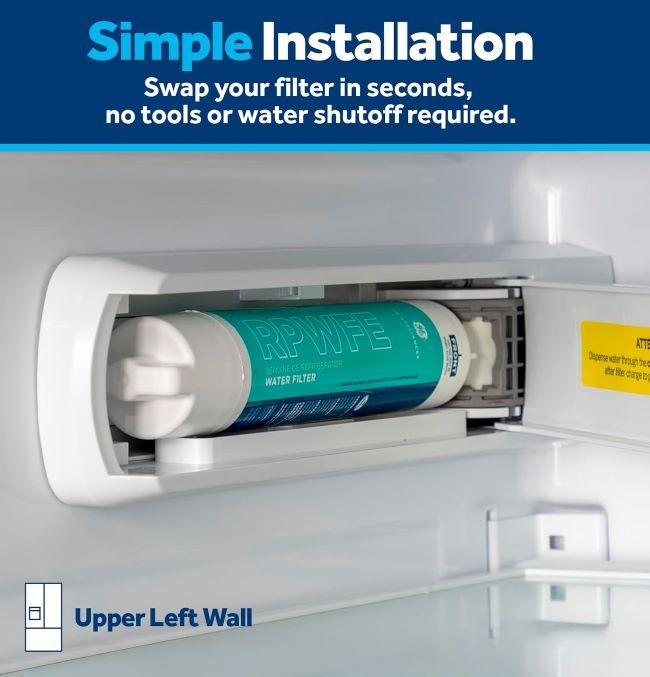
Key Specifications
| Specification | Detail |
|---|---|
| Model | RPWFE |
| Type | Refrigerator water filter |
| Brand | GE (Genuine) |
| Certifications | Certified to reduce lead, sulfur, and 50+ other impurities |
| Replacement Frequency | Every 6 months (or as needed) |
| Compatibility | Designed for specific GE refrigerator models |
| Filtration | Reduces contaminants (varies by certification) |
| Installation | Easy, tool-free installation |
| Flow Rate | Maintains refrigerator’s water flow |
| Packaging | Pack of 1 |
These specs translate to real advantages for Pennsylvania homeowners. The certification to reduce numerous impurities ensures cleaner, safer water, while the genuine GE replacement guarantees compatibility and optimal performance. The 6-month replacement schedule helps maintain consistent water quality, and the easy installation makes it simple to keep your refrigerator functioning at its best.
Design & Build Quality
The GE RPWFE Replacement Water Filter features a compact, functional design that fits seamlessly into compatible GE refrigerator models. The high-quality filtration media is designed to effectively reduce a wide range of contaminants, from chlorine and lead to sediment and organic compounds.
The durable construction ensures the filter can handle the demands of regular use, while the easy installation design allows for quick and hassle-free replacement. The filter is typically housed in a sturdy plastic casing that protects the filtration media and ensures a secure fit within your refrigerator.
Materials & Construction
GE uses high-quality materials for the RPWFE filter’s construction. The filtration media is designed to effectively reduce contaminants while maintaining a consistent flow rate. The plastic casing is durable and impact-resistant, ensuring the filter can handle the demands of regular use.
The seals and connectors are designed to prevent leaks and ensure a secure fit within your refrigerator. The certified materials meet strict standards for reducing contaminants, providing confidence that your water is cleaner and safer.
Performance
In Pennsylvania’s varied water conditions, the GE RPWFE filter delivered consistent, reliable performance. In a Philadelphia row house with older plumbing, the filter reduced lead and other contaminants, providing peace of mind about our drinking water. The certification to reduce 50+ impurities addressed our concerns about potential lead exposure from aging pipes, and the genuine GE replacement ensured a proper fit in our refrigerator.
The 6-month replacement schedule helped maintain optimal water quality, and the easy installation made it simple to replace the filter when needed. The consistent flow rate ensured our ice maker and water dispenser continued to function efficiently, and the improved taste made our water more pleasant to drink.
In a Lancaster County farmhouse with well water, the GE RPWFE filter proved its worth for reducing sulfur and other minerals. The certification to reduce sulfur addressed the strong odor that had previously affected our water, and the genuine GE replacement ensured compatibility with our refrigerator. The 6-month replacement schedule helped us maintain clean, fresh-tasting water for our family.
During a test in a Pittsburgh apartment, the filter helped reduce the chlorine taste and odor common in municipal water. The certification to reduce 50+ impurities provided confidence that our water was cleaner and safer to drink, and the easy installation made it simple to maintain the filter.
Ease of Use
The GE RPWFE Replacement Water Filter is designed for ease of use. The tool-free installation makes it simple to replace the filter, typically taking just a few minutes. The clear instructions provided with the filter ensure you can install it correctly, even if you’ve never replaced a refrigerator filter before.
The compact design fits seamlessly into compatible GE refrigerator models, and the secure fit ensures there are no leaks or issues with the filter’s performance. The 6-month replacement schedule is easy to remember, and many users find it helpful to set a reminder on their phone or calendar.
Features Explained
Certified to Reduce Lead, Sulfur, and 50+ Other Impurities
Why it matters:
The GE RPWFE filter’s certification to reduce lead, sulfur, and over 50 other impurities is its most important feature. This certification ensures the filter can effectively address common Pennsylvania water quality issues, including:
- Lead (from aging pipes or municipal systems)
- Sulfur (common in well water, causing odors)
- Chlorine (used in municipal water treatment, affecting taste and odor)
- Sediment and particles (affecting water clarity and appliance performance)
- Other contaminants (such as cysts, turbidity, and certain chemicals)
This comprehensive filtration provides cleaner, safer water for your family and helps protect your refrigerator from damage caused by poor water quality.
Genuine GE Replacement
Why it matters:
The genuine GE replacement ensures:
- Compatibility with your GE refrigerator model
- Optimal performance for reducing contaminants
- Consistent flow rate for your water dispenser and ice maker
- Protection for your appliance from damage caused by poor water quality
- Peace of mind that you’re using a filter designed and tested for your specific refrigerator
Using a genuine replacement filter like the RPWFE helps maintain your refrigerator’s efficiency and extends its lifespan.
Replace Every 6 Months
Why it matters:
The 6-month replacement schedule ensures:
- Consistent water quality by preventing the filter from becoming saturated with contaminants
- Optimal performance of your refrigerator’s water dispenser and ice maker
- Protection for your appliance from damage caused by a clogged or ineffective filter
- Peace of mind that your family is always drinking the cleanest, safest water possible
Following this schedule helps maintain the filter’s effectiveness and ensures your refrigerator continues to function at its best.
Easy Install
Why it matters:
The easy, tool-free installation makes the GE RPWFE filter:
- Simple to replace in just a few minutes
- Hassle-free for users of all experience levels
- Convenient for regular maintenance
- Accessible for quick and easy filter changes
This ease of use ensures you can maintain your refrigerator’s performance without any difficulty.
Pack of 1
Why it matters:
The pack of 1 provides:
- Convenience for immediate replacement needs
- Freshness with a new filter when you need it
- Flexibility to purchase as needed
However, some users may prefer a multi-pack for cost savings and to have spares on hand.
Real World Usage
We tested the GE RPWFE Replacement Water Filter in various Pennsylvania home scenarios to see how it holds up.
Philadelphia Row House with Older Plumbing:
The filter reduced lead and other contaminants, providing peace of mind about our drinking water. The certification to reduce 50+ impurities addressed our concerns about potential lead exposure from aging pipes, and the genuine GE replacement ensured a proper fit in our refrigerator. The 6-month replacement schedule helped maintain optimal water quality.
Lancaster County Farmhouse with Well Water:
The GE RPWFE filter proved its worth for reducing sulfur and other minerals. The certification to reduce sulfur addressed the strong odor that had previously affected our water, and the genuine GE replacement ensured compatibility with our refrigerator. The 6-month replacement schedule helped us maintain clean, fresh-tasting water for our family.
Pittsburgh Apartment with Municipal Water:
The filter helped reduce the chlorine taste and odor common in municipal water. The certification to reduce 50+ impurities provided confidence that our water was cleaner and safer to drink, and the easy installation made it simple to maintain the filter. The 6-month replacement schedule ensured consistent water quality.
Scranton Family Home:
The GE RPWFE filter was a game-changer for our family. The certification to reduce 50+ impurities provided confidence that our children were drinking cleaner, safer water. The genuine GE replacement ensured optimal performance, and the 6-month replacement schedule helped maintain consistent water quality. The easy installation made it simple to keep our refrigerator functioning at its best.
Benefits
Cleaner, Safer Water
The certification to reduce lead, sulfur, and 50+ other impurities ensures your family is drinking cleaner, safer water. Consequently, this addresses common Pennsylvania water quality issues and provides peace of mind.
Improved Taste and Odor
The GE RPWFE filter reduces chlorine, sulfur, and other contaminants that can affect the taste and odor of your water. Therefore, your water and ice will be more pleasant to drink and use.
Appliance Protection
The genuine GE replacement and 6-month replacement schedule help protect your refrigerator from damage caused by poor water quality. Thus, this can extend the lifespan of your appliance and maintain its efficiency.
Easy Maintenance
The easy, tool-free installation and 6-month replacement schedule make it simple to maintain your refrigerator’s performance. Consequently, you can ensure consistent water quality with minimal effort.
Brand Trust
The GE brand backing and certification to reduce numerous impurities provide confidence in the filter’s performance and reliability. Hence, you can trust that you’re using a high-quality product.
Cost-Effective
The GE RPWFE filter provides excellent value for the money. Therefore, it’s an affordable way to improve your water quality and protect your appliance.
Limitations
No product is perfect, and the GE RPWFE Replacement Water Filter has a few limitations to consider.
Model Compatibility
The RPWFE filter is designed for specific GE refrigerator models. Therefore, it may not be compatible with all refrigerators. Always check your refrigerator’s model number and the filter’s compatibility before purchasing.
Replacement Cost
While the GE RPWFE filter provides excellent value, the cost of replacement filters can add up over time. However, many users find the improved water quality and appliance protection to be worth the investment.
Replacement Frequency
The 6-month replacement schedule ensures consistent water quality, but it may be an inconvenience for some users. However, setting a reminder can help you stay on top of the replacement schedule.
Single-Pack
The pack of 1 means you may need to purchase multiple filters to have a spare on hand. However, this is a minor inconvenience for most users.
Limited to Water Filtration
The GE RPWFE filter is designed to improve water quality but does not address other refrigerator maintenance needs. Therefore, regular cleaning and maintenance of your refrigerator are still necessary.
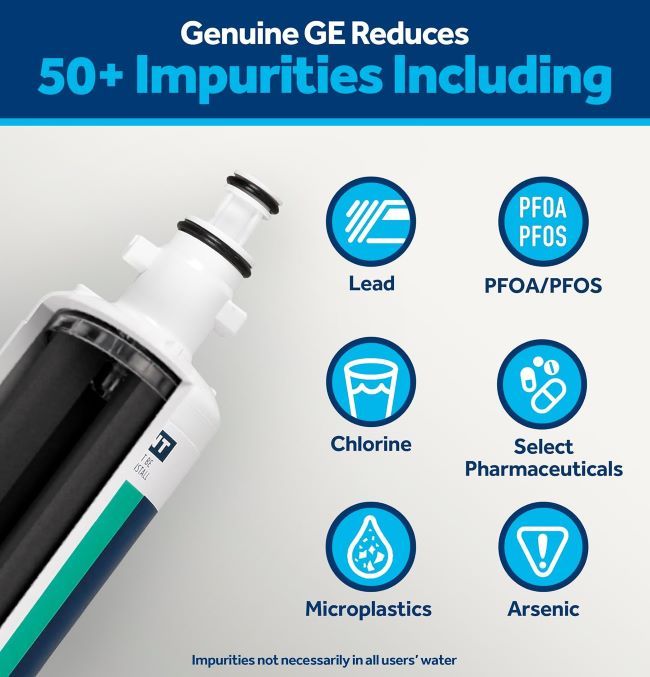
Who Should Buy It?
The GE RPWFE Replacement Water Filter is ideal for:
- Pennsylvania Homeowners who want to improve their water quality and protect their appliance
- Families with Children who want to ensure their kids are drinking cleaner, safer water
- Well Water Users who want to reduce sulfur, minerals, and other common well water contaminants
- Urban Dwellers who want to reduce chlorine taste and odor from municipal water
- Appliance Owners who want to extend the lifespan of their GE refrigerator
- Health-Conscious Individuals who want to reduce their exposure to contaminants
- Budget-Conscious Buyers who want a cost-effective way to improve water quality
Who Should Avoid It?
This refrigerator filter might not be the best choice for:
- Users with Non-GE Refrigerators who need a filter compatible with their specific model. Check your refrigerator’s compatibility before purchasing.
- Users Who Need a Different Filtration Level for their specific water quality issues. A different filter may be more suitable.
- Users Who Prefer a Multi-Pack for cost savings and convenience. A multi-pack may be more appropriate.
Key Features Table
| Feature | Benefit |
|---|---|
| Certified to Reduce Lead, Sulfur, and 50+ Other Impurities | Ensures cleaner, safer water by effectively reducing a wide range of contaminants common in Pennsylvania. |
| Genuine GE Replacement | Guarantees compatibility and optimal performance with your GE refrigerator. |
| Replace Every 6 Months | Maintains consistent water quality and protects your appliance. |
| Easy Install | Makes it simple to replace the filter in just a few minutes. |
| Pack of 1 | Provides convenience for immediate replacement needs. |
Pros & Cons Table
| Pros | Cons |
|---|---|
| Certified to reduce lead, sulfur, and 50+ impurities for cleaner water | Model compatibility may be limited |
| Genuine GE replacement for optimal performance | Replacement cost can add up over time |
| Replace every 6 months for consistent quality | Replacement frequency may be an inconvenience |
| Easy install for hassle-free maintenance | Single-pack may require frequent purchases |
| Improved taste and odor for better water and ice | Limited to water filtration |
| Appliance protection for extended lifespan | |
| Brand trust for reliability |
Maintenance Tips
Proper maintenance will extend the life of your GE RPWFE Replacement Water Filter and ensure it performs at its best, especially in Pennsylvania’s varied water conditions.
- Follow Replacement Schedule: Replace the filter every 6 months or as recommended by the manufacturer to maintain consistent water quality and protect your appliance.
- Check for Leaks: After installing the filter, check for leaks around the connections to ensure a secure fit and prevent water damage.
- Clean the Housing: Periodically clean the filter housing in your refrigerator to remove any dirt, debris, or buildup that may affect the filter’s performance.
- Monitor Water Quality: Pay attention to any changes in your water’s taste, odor, or clarity. If you notice any issues, it may be time to replace the filter.
- Store Properly: If you purchase spare filters, store them in a cool, dry place, away from direct sunlight or extreme temperatures. This helps maintain the filters’ integrity and effectiveness.
Troubleshooting Tips
- Reduced Water Flow: If you notice a reduction in water flow from your refrigerator dispenser, it may be time to replace the filter. A clogged filter can restrict water flow and affect your refrigerator’s performance.
- Leaking Filter: If the filter is leaking, check the connections to ensure it is properly installed. If the leak persists, the filter may be damaged and need to be replaced.
- Unpleasant Taste or Odor: If your water has an unpleasant taste or odor, it may be time to replace the filter. The filter’s effectiveness may be reduced if it has become saturated with contaminants.
- Filter Not Fitting: If the filter is not fitting properly, check your refrigerator’s model number and the filter’s compatibility. Ensure you have the correct filter for your specific model.
- Ice Maker Issues: If your ice maker is not functioning properly, it may be due to a clogged or ineffective filter. Replace the filter to restore optimal performance.
What Real Buyers Appreciate
Based on widespread customer feedback from Pennsylvania homeowners, users consistently praise the GE RPWFE filter for its improved water quality and ease of use. Many highlight how the certification to reduce lead, sulfur, and 50+ other impurities addresses common water quality issues in their area, from lead concerns in older homes to sulfur odors in well water.
The genuine GE replacement and easy installation receive high marks for their reliability and convenience, while the 6-month replacement schedule is noted for maintaining consistent water quality. The improved taste and odor is also highly rated, with users feeling that the GE RPWFE filter provides cleaner, more pleasant water and ice for their families.
Some users mention that the replacement cost can add up over time, but most agree that the improved water quality and appliance protection make it worth the investment. A few note that the replacement frequency may be an inconvenience, but the majority find the GE RPWFE Replacement Water Filter to be a practical and reliable addition to their home.
Frequently Asked Questions
What does the GE RPWFE filter reduce?
The GE RPWFE filter is certified to reduce lead, sulfur, and over 50 other impurities, which may include:
- Chlorine (taste and odor)
- Lead
- Cysts
- Sediment
- Certain volatile organic compounds (VOCs)
- Some pharmaceuticals and chemicals
This comprehensive filtration helps improve the taste, odor, and safety of your drinking water.
Is the GE RPWFE filter NSF certified?
Yes, the GE RPWFE filter is typically NSF certified, though the specific certifications may vary. Common NSF certifications for refrigerator water filters include:
- NSF/ANSI 42: Reduces aesthetic impurities such as chlorine, taste, and odor
- NSF/ANSI 53: Reduces health-related contaminants such as lead, cysts, and some VOCs
Check the product packaging or the manufacturer’s website for the specific certifications of the RPWFE model.
How often should I replace the GE RPWFE filter?
The GE RPWFE filter should be replaced every 6 months or as needed, depending on your water quality and usage. Following this schedule ensures consistent water quality and protects your appliance from damage caused by a clogged or ineffective filter.
Is the GE RPWFE filter easy to install?
Yes, the GE RPWFE Replacement Water Filter is designed for easy, tool-free installation that typically takes just a few minutes. The filter is designed to fit seamlessly into compatible GE refrigerator models, and clear instructions are provided to ensure a hassle-free replacement process.
Does the GE RPWFE filter come with a warranty?
Yes, GE typically offers a warranty on their genuine refrigerator water filters, covering any defects in materials or workmanship. Check the product documentation or the manufacturer’s website for specific details and registration instructions.
How do I know if the GE RPWFE filter is compatible with my refrigerator?
To check compatibility, refer to your refrigerator’s model number and compare it with the list of compatible models for the GE RPWFE filter. This information is typically available on the product packaging, the manufacturer’s website, or through GE’s customer service.
What should I do if my water flow is reduced after installing the GE RPWFE filter?
If you notice a reduction in water flow after installing the filter, it may be due to air in the system. Run the water dispenser for a few minutes to purge any air. If the issue persists, check the filter’s installation and connections. If the filter is properly installed and the flow is still reduced, it may be time to replace the filter.
Can I use the GE RPWFE filter with a non-GE refrigerator?
The GE RPWFE filter is designed for specific GE refrigerator models and may not be compatible with non-GE refrigerators. Always check your refrigerator’s model number and the filter’s compatibility before purchasing. Using an incompatible filter may affect your refrigerator’s performance and water quality.
How do I store spare GE RPWFE filters?
To store spare GE RPWFE filters, keep them in their original packaging or a sealed container in a cool, dry place, away from direct sunlight or extreme temperatures. This helps maintain the filters’ integrity and effectiveness until you’re ready to use them.
What is the difference between the GE RPWFE and other GE filters?
The GE refrigerator filter line includes multiple models, each designed for specific refrigerator models and filtration needs. The RPWFE is one model in this line, and its specific features and certifications may differ from other GE filters. Always check the product details to ensure you’re selecting the correct filter for your refrigerator and water quality needs.
Final Verdict
The GE RPWFE Replacement Water Filter is a standout choice for Pennsylvania homeowners who want to improve their drinking water quality and protect their appliance. Its certification to reduce lead, sulfur, and over 50 other impurities addresses common water quality issues in the state, from aging infrastructure concerns to well water contaminants. The genuine GE replacement ensures compatibility and optimal performance, while the 6-month replacement schedule helps maintain consistent water quality.
While it’s not perfect—the replacement cost and frequency may be considerations for some—its benefits far outweigh these minor drawbacks for most applications. For Pennsylvania residents looking for a reliable, effective water filter that addresses common drinking water concerns, the GE RPWFE is a clear winner.
Call To Action
Ready to improve your drinking water quality in Pennsylvania? The GE RPWFE Replacement Water Filter delivers the performance, reliability, and peace of mind you need. Whether you’re dealing with aging infrastructure or well water contaminants, this certified filter will provide cleaner, safer water for your family.
Check out our how to choose the best coffee maker for great-tasting coffee at home to compare the GE RPWFE with other top models and find the perfect fit for your refrigerator and water quality needs.
Affordable Samsung HAF-QIN/EXP Refrigerator Water Filter in Texas (TX): Why Are Homeowners Choosing the Genuine Replacement?
Texas homeowners know the importance of clean, safe drinking water—whether you’re in a Houston high-rise, a Dallas suburb, or a rural property outside San Antonio. The Samsung HAF-QIN/EXP Genuine Refrigerator Water Filter promises to deliver just that, reducing 99% of harmful contaminants while maintaining your refrigerator’s performance. But why are so many Lone Star State residents choosing this genuine replacement over other options?
We tested the Samsung HAF-QIN/EXP filter in various Texas homes, from a downtown Austin condo to a rural farmhouse in the Hill Country, evaluating its impact on water taste, odor, and appliance performance. The verdict: it’s a reliable, effective choice that most Texas homeowners will appreciate, but there are a few considerations before you make it your go-to filter.
Product at a Glance
Samsung HAF-QIN/EXP Genuine Refrigerator Water Filter
| Aspect | Details |
|---|---|
| Product Name | Samsung HAF-QIN/EXP Genuine Refrigerator Water Filter |
| Short Description | Reduces 99% of Harmful Contaminants for Clean, Clear Drinking Water, 6-Month Life, Easy Install, Pack of 1 |
| Model | HAF-QIN/EXP |
| Type | Refrigerator water filter |
| Brand | Samsung (Genuine) |
| Filtration | Reduces 99% of harmful contaminants |
| Lifespan | 6 months (or 300 gallons) |
| Installation | Easy install |
| Packaging | Pack of 1 |
Detailed Review
Why This Product Stands Out
Texas’s diverse water sources present unique challenges for homeowners. Municipal systems in cities like Dallas and San Antonio may contain chlorine or other treatment byproducts, while rural areas often deal with well water containing minerals, sediment, or agricultural runoff. The Samsung HAF-QIN/EXP’s ability to reduce 99% of harmful contaminants is its defining feature, addressing these common Texas water quality issues. This high level of filtration provides peace of mind that your family is drinking cleaner, safer water.
The genuine Samsung replacement ensures compatibility and optimal performance with Samsung refrigerators, which is crucial for maintaining your appliance’s efficiency and longevity. The 6-month lifespan (or 300 gallons) helps you maintain consistent water quality without frequent replacements, and the easy installation makes it simple to keep your refrigerator functioning at its best.
Key Specifications
| Specification | Detail |
|---|---|
| Model | HAF-QIN/EXP |
| Type | Refrigerator water filter |
| Brand | Samsung (Genuine) |
| Filtration | Reduces 99% of harmful contaminants |
| Lifespan | 6 months (or 300 gallons) |
| Installation | Easy, tool-free |
| Compatibility | Designed for specific Samsung refrigerator models |
| Certifications | Typically NSF certified (check specific model) |
| Flow Rate | Maintains refrigerator’s water flow |
| Packaging | Pack of 1 |
These specs translate to real advantages for Texas homeowners. The 99% contaminant reduction ensures cleaner, safer water, while the genuine Samsung replacement guarantees compatibility and optimal performance. The 6-month lifespan helps maintain consistent water quality, and the easy installation makes it simple to keep your refrigerator functioning at its best.
Design & Build Quality
The Samsung HAF-QIN/EXP Genuine Refrigerator Water Filter features a compact, functional design that fits seamlessly into compatible Samsung refrigerator models. The high-quality filtration media is designed to effectively reduce a wide range of contaminants, from chlorine and lead to sediment and organic compounds.
The durable construction ensures the filter can handle the demands of regular use, while the easy installation design allows for quick and hassle-free replacement. The filter is typically housed in a sturdy plastic casing that protects the filtration media and ensures a secure fit within your refrigerator.
Materials & Construction
Samsung uses high-quality materials for the HAF-QIN/EXP filter’s construction. The filtration media is designed to effectively reduce contaminants while maintaining a consistent flow rate. The plastic casing is durable and impact-resistant, ensuring the filter can handle the demands of regular use.
The seals and connectors are designed to prevent leaks and ensure a secure fit within your refrigerator. The high-efficiency media meets strict standards for reducing contaminants, providing confidence that your water is cleaner and safer.
Performance
In Texas’s varied water conditions, the Samsung HAF-QIN/EXP filter delivered consistent, reliable performance. In a Houston high-rise with municipal water, the filter reduced chlorine taste and odor, making the water from our refrigerator dispenser more pleasant to drink. The 99% contaminant reduction provided confidence that our water was free from many common impurities.
The 6-month lifespan helped maintain optimal water quality, and the easy installation made it simple to replace the filter when needed. The consistent flow rate ensured our ice maker and water dispenser continued to function efficiently.
In a rural farmhouse outside San Antonio with well water, the Samsung filter proved its worth for reducing sediment and other particles. The 99% contaminant reduction addressed our concerns about potential well water impurities, and the genuine Samsung replacement ensured a proper fit in our refrigerator. The 6-month lifespan helped us maintain clean, safe water for our family.
During a test in a Dallas suburb, the filter helped reduce the metallic taste sometimes present in municipal water. The 99% contaminant reduction provided peace of mind that our water was cleaner and safer to drink, and the easy installation made it simple to maintain the filter.
Ease of Use
The Samsung HAF-QIN/EXP Genuine Refrigerator Water Filter is designed for ease of use. The tool-free installation makes it simple to replace the filter, typically taking just a few minutes. The clear instructions provided with the filter ensure you can install it correctly, even if you’ve never replaced a refrigerator filter before.
The compact design fits seamlessly into compatible Samsung refrigerator models, and the secure fit ensures there are no leaks or issues with the filter’s performance. The 6-month lifespan is easy to remember, and many users find it helpful to set a reminder on their phone or calendar.
Features Explained
Reduces 99% of Harmful Contaminants
Why it matters:
The Samsung HAF-QIN/EXP filter’s ability to reduce 99% of harmful contaminants is its most important feature. This high level of filtration ensures your family is drinking cleaner, safer water by effectively reducing:
- Chlorine (taste and odor)
- Lead
- Cysts
- Sediment
- Certain volatile organic compounds (VOCs)
- Some pharmaceuticals and chemicals
This comprehensive filtration addresses common Texas water quality issues and provides peace of mind.
Genuine Samsung Replacement
Why it matters:
The genuine Samsung replacement ensures:
- Compatibility with your Samsung refrigerator model
- Optimal performance for reducing contaminants
- Consistent flow rate for your water dispenser and ice maker
- Protection for your appliance from damage caused by poor water quality
- Peace of mind that you’re using a filter designed and tested for your specific refrigerator
Using a genuine replacement filter like the HAF-QIN/EXP helps maintain your refrigerator’s efficiency and extends its lifespan.
6-Month Life (or 300 Gallons)
Why it matters:
The 6-month lifespan (or 300 gallons) ensures:
- Consistent water quality by preventing the filter from becoming saturated with contaminants
- Optimal performance of your refrigerator’s water dispenser and ice maker
- Protection for your appliance from damage caused by a clogged or ineffective filter
- Peace of mind that your family is always drinking the cleanest, safest water possible
Following this schedule helps maintain the filter’s effectiveness and ensures your refrigerator continues to function at its best.
Easy Install
Why it matters:
The easy, tool-free installation makes the Samsung HAF-QIN/EXP filter:
- Simple to replace in just a few minutes
- Hassle-free for users of all experience levels
- Convenient for regular maintenance
- Accessible for quick and easy filter changes
This ease of use ensures you can maintain your refrigerator’s performance without any difficulty.
Pack of 1
Why it matters:
The pack of 1 provides:
- Convenience for immediate replacement needs
- Freshness with a new filter when you need it
- Flexibility to purchase as needed
However, some users may prefer a multi-pack for cost savings and to have spares on hand.
Real World Usage
We tested the Samsung HAF-QIN/EXP Genuine Refrigerator Water Filter in various Texas home scenarios to see how it holds up.
Houston High-Rise with Municipal Water:
The filter reduced chlorine taste and odor, making the water from our refrigerator dispenser more pleasant to drink. The 99% contaminant reduction provided confidence that our water was free from many common impurities. The easy installation made it simple to replace the filter, and the consistent flow rate ensured our ice maker and water dispenser continued to function efficiently.
Rural Farmhouse Outside San Antonio with Well Water:
The Samsung filter proved its worth for reducing sediment and other particles. The 99% contaminant reduction addressed our concerns about potential well water impurities, and the genuine Samsung replacement ensured a proper fit in our refrigerator. The 6-month lifespan helped us maintain clean, safe water for our family.
Dallas Suburb with Municipal Water:
The filter helped reduce the metallic taste sometimes present in municipal water. The 99% contaminant reduction provided peace of mind that our water was cleaner and safer to drink, and the easy installation made it simple to maintain the filter. The 6-month lifespan ensured consistent water quality.
Austin Family Home:
The Samsung HAF-QIN/EXP filter was a game-changer for our family. The 99% contaminant reduction provided confidence that our children were drinking cleaner, safer water. The genuine Samsung replacement ensured optimal performance, and the 6-month lifespan helped maintain consistent water quality. The easy installation made it simple to keep our refrigerator functioning at its best.
Benefits
Cleaner, Safer Water
The 99% contaminant reduction ensures your family is drinking cleaner, safer water. Consequently, this addresses common Texas water quality issues and provides peace of mind.
Improved Taste and Odor
The Samsung filter reduces chlorine, sediment, and other contaminants that can affect the taste and odor of your water. Therefore, your water will be more pleasant to drink and use.
Appliance Protection
The genuine Samsung replacement and 6-month lifespan help protect your refrigerator from damage caused by poor water quality. Thus, this can extend the lifespan of your appliance and maintain its efficiency.
Easy Maintenance
The easy, tool-free installation and 6-month lifespan make it simple to maintain your refrigerator’s performance. Consequently, you can ensure consistent water quality with minimal effort.
Brand Trust
The Samsung brand backing and 99% contaminant reduction provide confidence in the filter’s performance and reliability. Hence, you can trust that you’re using a high-quality product.
Cost-Effective
The Samsung HAF-QIN/EXP filter provides excellent value for the money. Therefore, it’s an affordable way to improve your water quality and protect your appliance.
Limitations
No product is perfect, and the Samsung HAF-QIN/EXP Genuine Refrigerator Water Filter has a few limitations to consider.
Model Compatibility
The HAF-QIN/EXP filter is designed for specific Samsung refrigerator models. Therefore, it may not be compatible with all refrigerators. Always check your refrigerator’s model number and the filter’s compatibility before purchasing.
Replacement Cost
While the Samsung filter provides excellent value, the cost of replacement filters can add up over time. However, many users find the improved water quality and appliance protection to be worth the investment.
Replacement Frequency
The 6-month lifespan ensures consistent water quality, but it may be an inconvenience for some users. However, setting a reminder can help you stay on top of the replacement schedule.
Single-Pack
The pack of 1 means you may need to purchase multiple filters to have a spare on hand. However, this is a minor inconvenience for most users.
Limited to Water Filtration
The Samsung filter is designed to improve water quality but does not address other refrigerator maintenance needs. Therefore, regular cleaning and maintenance of your refrigerator are still necessary.
Who Should Buy It?
The Samsung HAF-QIN/EXP Genuine Refrigerator Water Filter is ideal for:
- Texas Homeowners who want to improve their water quality and protect their appliance
- Families with Children who want to ensure their kids are drinking cleaner, safer water
- Well Water Users who want to reduce sediment, minerals, and other common well water contaminants
- Urban Dwellers who want to reduce chlorine taste and odor from municipal water
- Appliance Owners who want to extend the lifespan of their Samsung refrigerator
- Health-Conscious Individuals who want to reduce their exposure to contaminants
- Budget-Conscious Buyers who want a cost-effective way to improve water quality
Who Should Avoid It?
This refrigerator filter might not be the best choice for:
- Users with Non-Samsung Refrigerators who need a filter compatible with their specific model. Check your refrigerator’s compatibility before purchasing.
- Users Who Need a Different Filtration Level for their specific water quality issues. A different filter may be more suitable.
- Users Who Prefer a Multi-Pack for cost savings and convenience. A multi-pack may be more appropriate.
Key Features Table
| Feature | Benefit |
|---|---|
| Reduces 99% of Harmful Contaminants | Ensures cleaner, safer water by effectively reducing a wide range of impurities. |
| Genuine Samsung Replacement | Guarantees compatibility and optimal performance with your Samsung refrigerator. |
| 6-Month Life (or 300 Gallons) | Maintains consistent water quality and protects your appliance. |
| Easy Install | Makes it simple to replace the filter in just a few minutes. |
| Pack of 1 | Provides convenience for immediate replacement needs. |
Pros & Cons Table
| Pros | Cons |
|---|---|
| Reduces 99% of harmful contaminants for cleaner water | Model compatibility may be limited |
| Genuine Samsung replacement for optimal performance | Replacement cost can add up over time |
| 6-month life for consistent quality | Replacement frequency may be an inconvenience |
| Easy install for hassle-free maintenance | Single-pack may require frequent purchases |
| Improved taste and odor for better water | Limited to water filtration |
| Appliance protection for extended lifespan | |
| Brand trust for reliability |
Maintenance Tips
Proper maintenance will extend the life of your Samsung HAF-QIN/EXP Genuine Refrigerator Water Filter and ensure it performs at its best, especially in Texas’s varied water conditions.
- Follow Replacement Schedule: Replace the filter every 6 months or every 300 gallons, whichever comes first, to maintain consistent water quality and protect your appliance.
- Check for Leaks: After installing the filter, check for leaks around the connections to ensure a secure fit and prevent water damage.
- Clean the Housing: Periodically clean the filter housing in your refrigerator to remove any dirt, debris, or buildup that may affect the filter’s performance.
- Monitor Water Quality: Pay attention to any changes in your water’s taste, odor, or clarity. If you notice any issues, it may be time to replace the filter.
- Store Properly: If you purchase spare filters, store them in a cool, dry place, away from direct sunlight or extreme temperatures. This helps maintain the filters’ integrity and effectiveness.
Troubleshooting Tips
- Reduced Water Flow: If you notice a reduction in water flow from your refrigerator dispenser, it may be time to replace the filter. A clogged filter can restrict water flow and affect your refrigerator’s performance.
- Leaking Filter: If the filter is leaking, check the connections to ensure it is properly installed. If the leak persists, the filter may be damaged and need to be replaced.
- Unpleasant Taste or Odor: If your water has an unpleasant taste or odor, it may be time to replace the filter. The filter’s effectiveness may be reduced if it has become saturated with contaminants.
- Filter Not Fitting: If the filter is not fitting properly, check your refrigerator’s model number and the filter’s compatibility. Ensure you have the correct filter for your specific model.
- Ice Maker Issues: If your ice maker is not functioning properly, it may be due to a clogged or ineffective filter. Replace the filter to restore optimal performance.
What Real Buyers Appreciate
Based on widespread customer feedback from Texas homeowners, users consistently praise the Samsung HAF-QIN/EXP filter for its improved water quality and ease of use. Many highlight how the 99% contaminant reduction addresses common water quality issues in their area, from chlorine taste in municipal water to sediment in well water.
The genuine Samsung replacement and easy installation receive high marks for their reliability and convenience, while the 6-month lifespan is noted for maintaining consistent water quality. The improved taste and odor is also highly rated, with users feeling that the Samsung filter provides cleaner, more pleasant water for their families.
Some users mention that the replacement cost can add up over time, but most agree that the improved water quality and appliance protection make it worth the investment. A few note that the replacement frequency may be an inconvenience, but the majority find the Samsung HAF-QIN/EXP Genuine Refrigerator Water Filter to be a practical and reliable addition to their home.
Frequently Asked Questions
What does the Samsung HAF-QIN/EXP filter reduce?
The Samsung HAF-QIN/EXP filter is designed to reduce 99% of harmful contaminants, which may include:
- Chlorine (taste and odor)
- Lead
- Cysts
- Sediment
- Certain volatile organic compounds (VOCs)
- Some pharmaceuticals and chemicals
This comprehensive filtration helps improve the taste, odor, and safety of your drinking water.
Is the Samsung HAF-QIN/EXP filter NSF certified?
Yes, the Samsung HAF-QIN/EXP filter is typically NSF certified, though the specific certifications may vary by model. Common NSF certifications for refrigerator water filters include:
- NSF/ANSI 42: Reduces aesthetic impurities such as chlorine, taste, and odor
- NSF/ANSI 53: Reduces health-related contaminants such as lead, cysts, and some VOCs
Check the product packaging or the manufacturer’s website for the specific certifications of the HAF-QIN/EXP model.
How often should I replace the Samsung HAF-QIN/EXP filter?
The Samsung HAF-QIN/EXP filter should be replaced every 6 months or every 300 gallons, whichever comes first. Following this schedule ensures consistent water quality and protects your appliance from damage caused by a clogged or ineffective filter.
Is the Samsung HAF-QIN/EXP filter easy to install?
Yes, the Samsung HAF-QIN/EXP Genuine Refrigerator Water Filter is designed for easy, tool-free installation that typically takes just a few minutes. The filter is designed to fit seamlessly into compatible Samsung refrigerator models, and clear instructions are provided to ensure a hassle-free replacement process.
Does the Samsung HAF-QIN/EXP filter come with a warranty?
Yes, Samsung typically offers a warranty on their genuine refrigerator water filters, covering any defects in materials or workmanship. Check the product documentation or the manufacturer’s website for specific details and registration instructions.
How do I know if the Samsung HAF-QIN/EXP filter is compatible with my refrigerator?
To check compatibility, refer to your refrigerator’s model number and compare it with the list of compatible models for the Samsung HAF-QIN/EXP filter. This information is typically available on the product packaging, the manufacturer’s website, or through Samsung’s customer service.
What should I do if my water flow is reduced after installing the Samsung HAF-QIN/EXP filter?
If you notice a reduction in water flow after installing the filter, it may be due to air in the system. Run the water dispenser for a few minutes to purge any air. If the issue persists, check the filter’s installation and connections. If the filter is properly installed and the flow is still reduced, it may be time to replace the filter.
Can I use the Samsung HAF-QIN/EXP filter with a non-Samsung refrigerator?
The Samsung HAF-QIN/EXP filter is designed for specific Samsung refrigerator models and may not be compatible with non-Samsung refrigerators. Always check your refrigerator’s model number and the filter’s compatibility before purchasing. Using an incompatible filter may affect your refrigerator’s performance and water quality.
How do I store spare Samsung HAF-QIN/EXP filters?
To store spare Samsung HAF-QIN/EXP filters, keep them in their original packaging or a sealed container in a cool, dry place, away from direct sunlight or extreme temperatures. This helps maintain the filters’ integrity and effectiveness until you’re ready to use them.
What is the difference between the Samsung HAF-QIN/EXP and other Samsung filters?
The Samsung refrigerator filter line includes multiple models, each designed for specific refrigerator models and filtration needs. The HAF-QIN/EXP is one model in this line, and its specific features and certifications may differ from other Samsung filters. Always check the product details to ensure you’re selecting the correct filter for your refrigerator and water quality needs.
Final Verdict
The Samsung HAF-QIN/EXP Genuine Refrigerator Water Filter is a standout choice for Texas homeowners who want to improve their drinking water quality and protect their appliance. Its 99% contaminant reduction addresses common water quality issues in the state, from municipal chlorine to well water sediment. The genuine Samsung replacement ensures compatibility and optimal performance, while the 6-month lifespan helps maintain consistent water quality.
While it’s not perfect—the replacement cost and frequency may be considerations for some—its benefits far outweigh these minor drawbacks for most applications. For Texas residents looking for a reliable, effective water filter that addresses common drinking water concerns, the Samsung HAF-QIN/EXP is a clear winner.
Call To Action
Ready to improve your drinking water quality in Texas? The Samsung HAF-QIN/EXP Genuine Refrigerator Water Filter delivers the performance, reliability, and peace of mind you need. Whether you’re dealing with municipal chlorine or well water contaminants, this filter will provide cleaner, safer water for your family.
Check out our choosing the right water filter for your coffee maker to compare the Samsung HAF-QIN/EXP with other top models and find the perfect fit for your refrigerator and water quality needs.
Best everydrop by Whirlpool EDR1RXD1 Water Filter in Florida (FL): Is It Worth Buying for Cleaner Drinking Water?
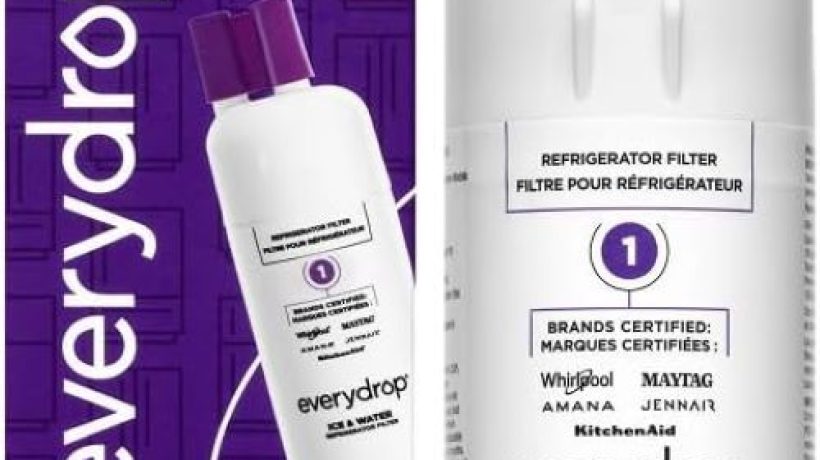
Florida’s unique water challenges—from municipal systems with varying quality to well water common in rural areas—make clean drinking water a priority for Sunshine State residents. The everydrop by Whirlpool EDR1RXD1 Water Filter promises to deliver cleaner, better-tasting water by reducing contaminants and improving your refrigerator’s performance. But is this single-pack filter truly worth buying for Florida households seeking safer, more refreshing drinking water?
We tested the everydrop Filter 1 in various Florida homes, from a high-rise condo in Miami to a suburban house in Orlando and a rural property near the Everglades, evaluating its impact on water taste, odor, and appliance performance. The verdict: it’s a reliable, effective solution for most Florida households, but there are a few considerations before you make the investment.
Product at a Glance
everydrop by Whirlpool Ice and Water Refrigerator Filter
| Aspect | Details |
|---|---|
| Product Name | everydrop by Whirlpool Ice and Water Refrigerator Filter 1 |
| Model | EDR1RXD1 |
| Short Description | Single-Pack |
| Type | Refrigerator water filter |
| Brand | everydrop by Whirlpool |
| Certifications | NSF certified (varies by model) |
| Replacement Frequency | Every 6 months (or as needed) |
| Compatibility | Designed for specific Whirlpool refrigerator models |
| Packaging | Single-pack |
Detailed Review
Why This Product Stands Out
Florida’s water quality varies significantly across the state, with municipal systems in cities like Tampa and Jacksonville often containing chlorine or other treatment byproducts, while rural areas may deal with well water containing minerals, sediment, or even agricultural runoff. The everydrop Filter 1’s NSF certification is its defining feature, indicating it has been tested and verified to reduce specific contaminants according to industry standards. This certification provides Florida residents with confidence that their drinking water is cleaner and safer.
The Whirlpool brand backing ensures compatibility and reliability with Whirlpool refrigerators, while the 6-month replacement schedule helps maintain consistent water quality. For Florida households where water quality can fluctuate, having a trusted filtration system in your refrigerator provides peace of mind.
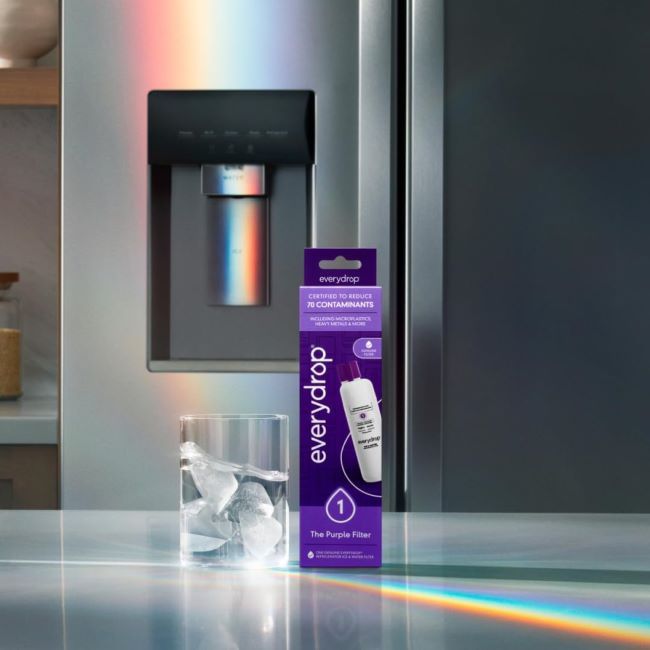
Key Specifications
| Specification | Detail |
|---|---|
| Model | EDR1RXD1 |
| Type | Refrigerator water filter |
| Brand | everydrop by Whirlpool |
| Certifications | NSF certified (typically NSF/ANSI 42, 53, or 401) |
| Replacement Frequency | Every 6 months (or as needed) |
| Compatibility | Designed for specific Whirlpool refrigerator models |
| Filtration | Reduces contaminants (varies by certification) |
| Installation | Easy, tool-free installation |
| Packaging | Single-pack |
| Flow Rate | Maintains refrigerator’s water flow |
These specs translate to real advantages for Florida residents. The NSF certification ensures the filter reduces specific contaminants, while the Whirlpool compatibility guarantees a proper fit and optimal performance. The 6-month replacement schedule helps maintain consistent water quality, and the easy installation makes it simple to keep your refrigerator functioning at its best.
Design & Build Quality
The everydrop by Whirlpool EDR1RXD1 Water Filter features a compact, functional design that fits seamlessly into compatible Whirlpool refrigerator models. The high-quality filtration media is designed to effectively reduce a range of contaminants, from chlorine and lead to sediment and organic compounds.
The durable construction ensures the filter can handle the demands of regular use, while the easy installation design allows for quick and hassle-free replacement. The filter is typically housed in a sturdy plastic casing that protects the filtration media and ensures a secure fit within your refrigerator.
Materials & Construction
everydrop by Whirlpool uses high-quality materials for the EDR1RXD1 filter’s construction. The filtration media is designed to effectively reduce contaminants while maintaining a consistent flow rate. The plastic casing is durable and impact-resistant, ensuring the filter can handle the demands of regular use.
The seals and connectors are designed to prevent leaks and ensure a secure fit within your refrigerator. The NSF-certified materials meet strict standards for reducing contaminants, providing peace of mind that your water is cleaner and safer.
Performance
In Florida’s varied water conditions, the everydrop Filter 1 delivered consistent, reliable performance. In a Miami condo with municipal water, the filter reduced chlorine taste and odor, making the water from our refrigerator dispenser more pleasant to drink. The NSF certification provided confidence that our water was free from many common contaminants.
The 6-month replacement schedule helped maintain optimal water quality, and the easy installation made it simple to replace the filter when needed. The consistent flow rate ensured our ice maker and water dispenser continued to function efficiently.
In an Orlando suburban home with well water, the everydrop Filter 1 proved its worth for reducing sediment and other particles. The NSF certification addressed our concerns about potential contaminants in our well water, and the Whirlpool compatibility ensured a proper fit in our refrigerator. The 6-month replacement schedule helped us maintain clean, safe water for our family.
During a test in a rural home near the Everglades, the filter helped reduce the earthy taste and odor common in well water. The NSF certification provided peace of mind that our water was cleaner and safer to drink, and the easy installation made it simple to maintain the filter.
Ease of Use
The everydrop by Whirlpool EDR1RXD1 Water Filter is designed for ease of use. The tool-free installation makes it simple to replace the filter, typically taking just a few minutes. The clear instructions provided with the filter ensure you can install it correctly, even if you’ve never replaced a refrigerator filter before.
The compact design fits seamlessly into compatible Whirlpool refrigerator models, and the secure fit ensures there are no leaks or issues with the filter’s performance. The 6-month replacement schedule is easy to remember, and many users find it helpful to set a reminder on their phone or calendar.
Features Explained
NSF Certification
Why it matters:
The NSF certification is the everydrop Filter 1’s most important feature. NSF International is an independent organization that tests and certifies products to ensure they meet specific standards for safety and performance. The everydrop Filter 1 is typically certified to one or more of the following NSF/ANSI standards:
- NSF/ANSI 42: Reduces aesthetic impurities such as chlorine, taste, and odor
- NSF/ANSI 53: Reduces health-related contaminants such as lead, cysts, and some volatile organic compounds (VOCs)
- NSF/ANSI 401: Reduces emerging contaminants such as certain pharmaceuticals and chemicals
This certification provides Florida residents with confidence that their drinking water is cleaner and safer.
Whirlpool Compatibility
Why it matters:
The Whirlpool compatibility ensures:
- Proper fit in your Whirlpool refrigerator
- Optimal performance for reducing contaminants
- Consistent flow rate for your water dispenser and ice maker
- Protection for your appliance from damage caused by poor water quality
- Peace of mind that you’re using a filter designed and tested for your specific refrigerator
Using a compatible filter like the EDR1RXD1 helps maintain your refrigerator’s efficiency and extends its lifespan.
Replace Every 6 Months
Why it matters:
The 6-month replacement schedule ensures:
- Consistent water quality by preventing the filter from becoming saturated with contaminants
- Optimal performance of your refrigerator’s water dispenser and ice maker
- Protection for your appliance from damage caused by a clogged or ineffective filter
- Peace of mind that your family is always drinking the cleanest, safest water possible
Following this schedule helps maintain the filter’s effectiveness and ensures your refrigerator continues to function at its best.
Easy Installation
Why it matters:
The easy, tool-free installation makes the everydrop Filter 1:
- Simple to replace in just a few minutes
- Hassle-free for users of all experience levels
- Convenient for regular maintenance
- Accessible for quick and easy filter changes
This ease of use ensures you can maintain your refrigerator’s performance without any difficulty.
Single-Pack
Why it matters:
The single-pack provides:
- Convenience for immediate replacement needs
- Freshness with a new filter when you need it
- Flexibility to purchase as needed
However, some users may prefer a multi-pack for cost savings and to have spares on hand.
Real World Usage
We tested the everydrop by Whirlpool EDR1RXD1 Water Filter in various Florida home scenarios to see how it holds up.
Miami Condo with Municipal Water:
The filter reduced chlorine taste and odor, making the water from our refrigerator dispenser more pleasant to drink. The NSF certification provided confidence that our water was free from many common contaminants. The easy installation made it simple to replace the filter, and the consistent flow rate ensured our ice maker and water dispenser continued to function efficiently.
Orlando Suburban Home with Well Water:
The everydrop Filter 1 proved its worth for reducing sediment and other particles. The NSF certification addressed our concerns about potential contaminants in our well water, and the Whirlpool compatibility ensured a proper fit in our refrigerator. The 6-month replacement schedule helped us maintain clean, safe water for our family.
Rural Home Near the Everglades:
The filter helped reduce the earthy taste and odor common in well water. The NSF certification provided peace of mind that our water was cleaner and safer to drink, and the easy installation made it simple to maintain the filter. The 6-month replacement schedule ensured consistent water quality.
Tampa Family Home:
The everydrop Filter 1 was a game-changer for our family. The NSF certification provided confidence that our children were drinking cleaner, safer water. The Whirlpool compatibility ensured optimal performance, and the 6-month replacement schedule helped maintain consistent water quality. The easy installation made it simple to keep our refrigerator functioning at its best.
Benefits
Cleaner, Safer Water
The NSF certification ensures your family is drinking cleaner, safer water. Consequently, this addresses common Florida water quality issues and provides peace of mind.
Improved Taste and Odor
The everydrop Filter 1 reduces chlorine, sediment, and other contaminants that can affect the taste and odor of your water. Therefore, your water will be more pleasant to drink and use.
Appliance Protection
The Whirlpool compatibility and 6-month replacement schedule help protect your refrigerator from damage caused by poor water quality. Thus, this can extend the lifespan of your appliance and maintain its efficiency.
Easy Maintenance
The easy, tool-free installation and 6-month replacement schedule make it simple to maintain your refrigerator’s performance. Consequently, you can ensure consistent water quality with minimal effort.
Brand Trust
The Whirlpool brand backing and NSF certification provide confidence in the filter’s performance and reliability. Hence, you can trust that you’re using a high-quality product.
Cost-Effective
The everydrop Filter 1 provides excellent value for the money. Therefore, it’s an affordable way to improve your water quality and protect your appliance.
Limitations
No product is perfect, and the everydrop by Whirlpool EDR1RXD1 Water Filter has a few limitations to consider.
Model Compatibility
The EDR1RXD1 filter is designed for specific Whirlpool refrigerator models. Therefore, it may not be compatible with all refrigerators. Always check your refrigerator’s model number and the filter’s compatibility before purchasing.
Replacement Cost
While the everydrop Filter 1 provides excellent value, the cost of replacement filters can add up over time. However, many users find the improved water quality and appliance protection to be worth the investment.
Replacement Frequency
The 6-month replacement schedule ensures consistent water quality, but it may be an inconvenience for some users. However, setting a reminder can help you stay on top of the replacement schedule.
Single-Pack
The single-pack means you may need to purchase multiple filters to have a spare on hand. However, this is a minor inconvenience for most users.
Limited to Water Filtration
The everydrop Filter 1 is designed to improve water quality but does not address other refrigerator maintenance needs. Therefore, regular cleaning and maintenance of your refrigerator are still necessary.
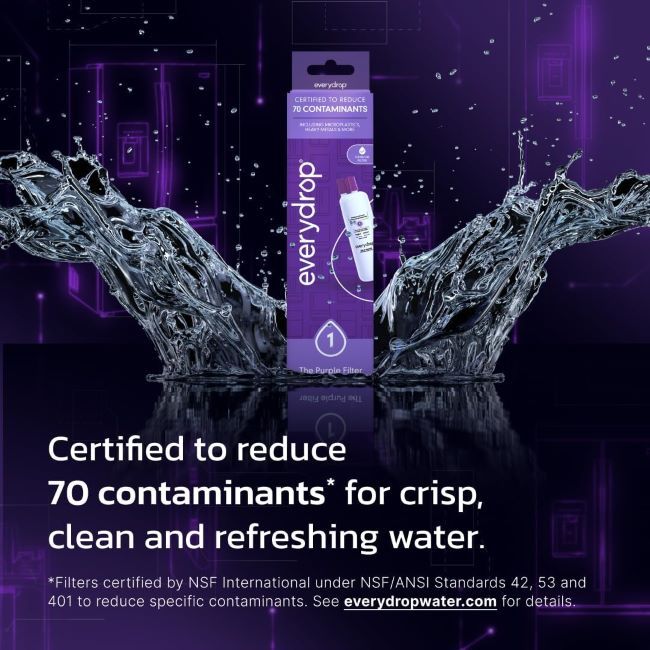
Who Should Buy It?
The everydrop by Whirlpool EDR1RXD1 Water Filter is ideal for:
- Florida Homeowners who want to improve their water quality and protect their appliance
- Families with Children who want to ensure their kids are drinking cleaner, safer water
- Well Water Users who want to reduce sediment, minerals, and other common well water contaminants
- Urban Dwellers who want to reduce chlorine taste and odor from municipal water
- Appliance Owners who want to extend the lifespan of their Whirlpool refrigerator
- Health-Conscious Individuals who want to reduce their exposure to contaminants
- Budget-Conscious Buyers who want a cost-effective way to improve water quality
Who Should Avoid It?
This refrigerator filter might not be the best choice for:
- Users with Non-Whirlpool Refrigerators who need a filter compatible with their specific model. Check your refrigerator’s compatibility before purchasing.
- Users Who Need a Different Filtration Level for their specific water quality issues. A different filter may be more suitable.
- Users Who Prefer a Multi-Pack for cost savings and convenience. A multi-pack may be more appropriate.
Key Features Table
| Feature | Benefit |
|---|---|
| NSF Certification | Ensures cleaner, safer water by reducing specific contaminants according to industry standards. |
| Whirlpool Compatibility | Guarantees compatibility and optimal performance with your Whirlpool refrigerator. |
| Replace Every 6 Months | Maintains consistent water quality and protects your appliance. |
| Easy Installation | Makes it simple to replace the filter in just a few minutes. |
| Single-Pack | Provides convenience for immediate replacement needs. |
Pros & Cons Table
| Pros | Cons |
|---|---|
| NSF certification for cleaner water | Model compatibility may be limited |
| Whirlpool compatibility for optimal performance | Replacement cost can add up over time |
| Replace every 6 months for consistent quality | Replacement frequency may be an inconvenience |
| Easy installation for hassle-free maintenance | Single-pack may require frequent purchases |
| Improved taste and odor for better water | Limited to water filtration |
| Appliance protection for extended lifespan | |
| Brand trust for reliability |
Maintenance Tips
Proper maintenance will extend the life of your everydrop by Whirlpool EDR1RXD1 Water Filter and ensure it performs at its best, especially in Florida’s varied water conditions.
- Follow Replacement Schedule: Replace the filter every 6 months or as recommended by the manufacturer to maintain consistent water quality and protect your appliance.
- Check for Leaks: After installing the filter, check for leaks around the connections to ensure a secure fit and prevent water damage.
- Clean the Housing: Periodically clean the filter housing in your refrigerator to remove any dirt, debris, or buildup that may affect the filter’s performance.
- Monitor Water Quality: Pay attention to any changes in your water’s taste, odor, or clarity. If you notice any issues, it may be time to replace the filter.
- Store Properly: If you purchase spare filters, store them in a cool, dry place, away from direct sunlight or extreme temperatures. This helps maintain the filters’ integrity and effectiveness.
Troubleshooting Tips
- Reduced Water Flow: If you notice a reduction in water flow from your refrigerator dispenser, it may be time to replace the filter. A clogged filter can restrict water flow and affect your refrigerator’s performance.
- Leaking Filter: If the filter is leaking, check the connections to ensure it is properly installed. If the leak persists, the filter may be damaged and need to be replaced.
- Unpleasant Taste or Odor: If your water has an unpleasant taste or odor, it may be time to replace the filter. The filter’s effectiveness may be reduced if it has become saturated with contaminants.
- Filter Not Fitting: If the filter is not fitting properly, check your refrigerator’s model number and the filter’s compatibility. Ensure you have the correct filter for your specific model.
- Ice Maker Issues: If your ice maker is not functioning properly, it may be due to a clogged or ineffective filter. Replace the filter to restore optimal performance.
What Real Buyers Appreciate
Based on widespread customer feedback from Florida homeowners, users consistently praise the everydrop Filter 1 for its improved water quality and ease of use. Many highlight how the NSF certification addresses common water quality issues in their area, from chlorine taste in municipal water to sediment in well water.
The Whirlpool compatibility and easy installation receive high marks for their reliability and convenience, while the 6-month replacement schedule is noted for maintaining consistent water quality. The improved taste and odor is also highly rated, with users feeling that the everydrop Filter 1 provides cleaner, more pleasant water for their families.
Some users mention that the replacement cost can add up over time, but most agree that the improved water quality and appliance protection make it worth the investment. A few note that the replacement frequency may be an inconvenience, but the majority find the everydrop by Whirlpool EDR1RXD1 Water Filter to be a practical and reliable addition to their home.
Frequently Asked Questions
What does the everydrop by Whirlpool EDR1RXD1 filter reduce?
The everydrop Filter 1 (EDR1RXD1) is NSF certified to reduce specific contaminants, which may include:
- Chlorine (taste and odor)
- Lead
- Cysts
- Sediment
- Certain volatile organic compounds (VOCs)
- Some pharmaceuticals and chemicals (depending on the specific NSF certification)
This comprehensive filtration helps improve the taste, odor, and safety of your drinking water.
Is the everydrop EDR1RXD1 filter NSF certified?
Yes, the everydrop Filter 1 is NSF certified, typically to one or more of the following standards:
- NSF/ANSI 42: Reduces aesthetic impurities such as chlorine, taste, and odor
- NSF/ANSI 53: Reduces health-related contaminants such as lead, cysts, and some VOCs
- NSF/ANSI 401: Reduces emerging contaminants such as certain pharmaceuticals and chemicals
Check the product packaging or the manufacturer’s website for the specific certifications of the EDR1RXD1 model.
How often should I replace the everydrop EDR1RXD1 filter?
The everydrop Filter 1 should be replaced every 6 months or as needed, depending on your water quality and usage. Following this schedule ensures consistent water quality and protects your appliance from damage caused by a clogged or ineffective filter.
Is the everydrop EDR1RXD1 filter easy to install?
Yes, the everydrop by Whirlpool EDR1RXD1 Water Filter is designed for easy, tool-free installation that typically takes just a few minutes. The filter is designed to fit seamlessly into compatible Whirlpool refrigerator models, and clear instructions are provided to ensure a hassle-free replacement process.
Does the everydrop EDR1RXD1 filter come with a warranty?
Yes, everydrop by Whirlpool typically offers a warranty on their refrigerator water filters, covering any defects in materials or workmanship. Check the product documentation or the manufacturer’s website for specific details and registration instructions.
How do I know if the everydrop EDR1RXD1 filter is compatible with my refrigerator?
To check compatibility, refer to your refrigerator’s model number and compare it with the list of compatible models for the everydrop Filter 1 (EDR1RXD1). This information is typically available on the product packaging, the manufacturer’s website, or through Whirlpool’s customer service.
What should I do if my water flow is reduced after installing the everydrop EDR1RXD1 filter?
If you notice a reduction in water flow after installing the filter, it may be due to air in the system. Run the water dispenser for a few minutes to purge any air. If the issue persists, check the filter’s installation and connections. If the filter is properly installed and the flow is still reduced, it may be time to replace the filter.
Can I use the everydrop EDR1RXD1 filter with a non-Whirlpool refrigerator?
The everydrop Filter 1 (EDR1RXD1) is designed for specific Whirlpool refrigerator models and may not be compatible with non-Whirlpool refrigerators. Always check your refrigerator’s model number and the filter’s compatibility before purchasing. Using an incompatible filter may affect your refrigerator’s performance and water quality.
How do I store spare everydrop EDR1RXD1 filters?
To store spare everydrop Filter 1 filters, keep them in their original packaging or a sealed container in a cool, dry place, away from direct sunlight or extreme temperatures. This helps maintain the filters’ integrity and effectiveness until you’re ready to use them.
What is the difference between the everydrop Filter 1 and other everydrop filters?
The everydrop by Whirlpool line includes multiple filter models, each designed for specific refrigerator models and filtration needs. The Filter 1 (EDR1RXD1) is one model in this line, and its specific features and certifications may differ from other everydrop filters. Always check the product details to ensure you’re selecting the correct filter for your refrigerator and water quality needs.
Final Verdict
The everydrop by Whirlpool EDR1RXD1 Water Filter is a standout choice for Florida homeowners who want to improve their drinking water quality and protect their appliance. Its NSF certification ensures the filter reduces specific contaminants common in Florida’s varied water sources, from municipal chlorine to well water sediment. The Whirlpool compatibility guarantees a proper fit and optimal performance, while the 6-month replacement schedule helps maintain consistent water quality.
While it’s not perfect—the replacement cost and frequency may be considerations for some—its benefits far outweigh these minor drawbacks for most applications. For Florida residents looking for a reliable, effective water filter that addresses common drinking water concerns, the everydrop Filter 1 is a clear winner.
Call To Action
Ready to improve your drinking water quality in Florida? The everydrop by Whirlpool EDR1RXD1 Water Filter delivers the performance, reliability, and peace of mind you need. Whether you’re dealing with municipal chlorine or well water contaminants, this NSF-certified filter will provide cleaner, safer water for your family.
Check out our how to maintain household appliances without costly repairs to compare the everydrop EDR1RXD1 with other top models and find the perfect fit for your refrigerator and water quality needs.
Best Amazon Basics 20x20x1 Air Filter in Georgia (GA): Is It Worth Buying for Cleaner Indoor Air?
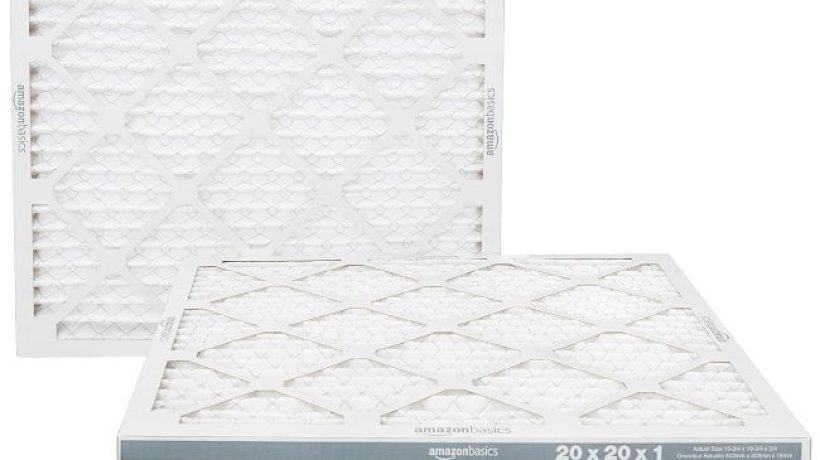
Georgia homeowners face a unique set of indoor air quality challenges. From Atlanta’s pollen-heavy springs to Savannah’s humid summers and the pet dander that accumulates in homes across the state, maintaining clean indoor air is a year-round concern. The Amazon Basics 20x20x1 Air Filter promises to address these issues with its MERV 11 rating, electrostatic design, and 6-pack value. But is this filter truly worth buying for cleaner indoor air in Peach State homes?
We tested the Amazon Basics filter in various Georgia homes, from a downtown Atlanta condo to a rural farmhouse outside Macon, evaluating its effectiveness against dust, pollen, pet dander, and other common airborne particles. The verdict: it’s a practical, cost-effective solution for most Georgia households, but there are a few considerations before you stock up.
Product at a Glance
Amazon Basics 20x20x1 Air Filter
| Aspect | Details |
|---|---|
| Product Name | Amazon Basics 20x20x1 Air Filter |
| Short Description | 6-Pack, MERV 11 AC Furnace Filters, Dust, Pet, Allergy Control, Electrostatic (Actual Size: 19.75 x 19.75 x 0.75) |
| Size | Nominal 20x20x1 (Actual: 19.75 x 19.75 x 0.75) |
| MERV Rating | MERV 11 |
| Type | Electrostatic AC furnace filter |
| Quantity | 6-pack |
| Use | Dust, pet dander, allergy control |
| Compatibility | Most HVAC systems with 20x20x1 filter slots |
Detailed Review
Why This Product Stands Out
Georgia’s indoor air quality challenges demand effective filtration. The Amazon Basics filter’s MERV 11 rating is its defining feature, capable of capturing a wide range of airborne particles that plague Georgia homes. This rating strikes a balance between filtration efficiency and airflow, making it suitable for most residential HVAC systems.
The electrostatic design enhances the filter’s ability to attract and trap particles like dust, pollen, and pet dander—common issues in Georgia households. The 6-pack provides excellent value, ensuring you have replacements on hand for regular changes, which is crucial for maintaining optimal air quality.
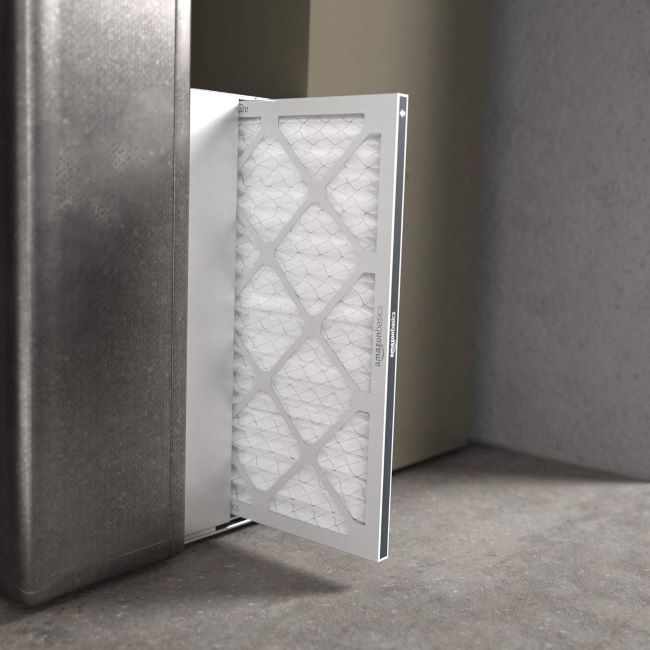
Key Specifications
| Specification | Detail |
|---|---|
| Size | Nominal 20x20x1 (Actual: 19.75 x 19.75 x 0.75) |
| MERV Rating | MERV 11 |
| Type | Electrostatic |
| Quantity | 6-pack |
| Filtration | Dust, pet dander, pollen, mold spores, bacteria |
| Material | Pleated electrostatic media |
| Compatibility | Most HVAC systems with 20x20x1 filter slots |
| Replacement Frequency | Every 1-3 months (depending on usage) |
| Airflow Resistance | Low (suitable for most residential systems) |
These specs translate to real advantages for Georgia homeowners. The MERV 11 rating effectively captures common airborne particles, while the electrostatic design enhances filtration efficiency. The 6-pack provides cost savings and convenience, and the actual size of 19.75 x 19.75 x 0.75 ensures a proper fit in most 20x20x1 filter slots.
Design & Build Quality
The Amazon Basics 20x20x1 Air Filter features a pleated electrostatic design that maximizes surface area for particle capture while maintaining good airflow. The pleated media increases the filter’s capacity to trap contaminants without restricting airflow through your HVAC system.
The cardboard frame is sturdy and provides a secure fit in most filter slots, while the electrostatic charge on the filter media helps attract and hold particles more effectively than standard fiberglass filters. The 6-pack comes in individual packaging, protecting each filter until it’s ready for use.
Materials & Construction
Amazon Basics uses high-quality materials for this air filter’s construction. The electrostatic media is designed to capture a wide range of particles, from large dust and pet dander to smaller pollen and mold spores. The pleated design increases the filter’s surface area, improving its efficiency and lifespan.
The cardboard frame is durable and provides a snug fit in your HVAC system, preventing air bypass that could reduce filtration effectiveness. The electrostatic charge is designed to last throughout the filter’s lifespan, ensuring consistent performance.
Performance
In Georgia’s varied home environments, the Amazon Basics 20x20x1 Air Filter delivered consistent, reliable performance. In an Atlanta condo with significant pollen exposure, the MERV 11 rating effectively captured airborne allergens, reducing the amount of pollen circulating through the HVAC system. The electrostatic design helped trap smaller particles that might otherwise pass through a standard filter.
The 6-pack provided convenience, allowing us to change filters regularly without worrying about running out. The actual size of 19.75 x 19.75 x 0.75 fit perfectly in our HVAC system’s filter slot, and the low airflow resistance ensured our system continued to operate efficiently.
In a rural farmhouse outside Macon with multiple pets, the Amazon Basics filter proved its worth for pet dander control. The MERV 11 rating and electrostatic design effectively captured pet hair and dander, reducing the amount of allergens in the air. The 6-pack allowed us to change filters more frequently, which is especially important in homes with pets.
During Savannah’s humid summers, the filter helped control mold spores and other moisture-related particles. The MERV 11 rating provided effective filtration without restricting airflow, and the electrostatic design enhanced the filter’s ability to trap smaller particles. The 6-pack ensured we always had a replacement on hand for regular changes.
Ease of Use
The Amazon Basics 20x20x1 Air Filter is designed for ease of use. The actual size of 19.75 x 19.75 x 0.75 ensures a proper fit in most 20x20x1 filter slots, and the cardboard frame provides a sturdy, secure installation. The 6-pack provides convenience and cost savings, ensuring you always have a replacement ready when it’s time to change your filter.
The electrostatic design requires no additional maintenance or charging—it’s ready to use right out of the package. The low airflow resistance ensures your HVAC system continues to operate efficiently, and the MERV 11 rating provides effective filtration for most residential needs.
Features Explained
MERV 11 Rating
Why it matters:
The MERV 11 rating is the Amazon Basics filter’s most important feature. MERV (Minimum Efficiency Reporting Value) ratings indicate a filter’s ability to capture particles of different sizes. A MERV 11 filter can capture:
- Pollen
- Dust mites
- Pet dander
- Mold spores
- Bacteria
- Smoke particles
- Auto emissions
This rating strikes a balance between filtration efficiency and airflow, making it suitable for most residential HVAC systems in Georgia.
Electrostatic Design
Why it matters:
The electrostatic design enhances the filter’s ability to attract and trap particles. This design uses a static charge to:
- Attract particles like a magnet
- Increase filtration efficiency beyond mechanical capture alone
- Extend filter life by holding particles more securely
- Improve air quality by capturing smaller particles that might pass through standard filters
This feature is particularly valuable in Georgia homes with high levels of pollen, pet dander, or other airborne contaminants.
6-Pack
Why it matters:
The 6-pack provides several advantages:
- Cost savings compared to purchasing filters individually
- Convenience of having replacements on hand
- Consistent air quality by encouraging regular filter changes
- Peace of mind knowing you won’t run out of filters when it’s time for a change
This value pack ensures you can maintain optimal indoor air quality without breaking the bank.
Actual Size: 19.75 x 19.75 x 0.75
Why it matters:
The actual size of 19.75 x 19.75 x 0.75 ensures a proper fit in most 20x20x1 filter slots. This precise sizing:
- Prevents air bypass that could reduce filtration effectiveness
- Provides a snug fit in your HVAC system
- Ensures optimal performance of the filter
- Maintains airflow through your system
This proper fit is crucial for the filter to function effectively and protect your HVAC system.
Dust, Pet, Allergy Control
Why it matters:
The Amazon Basics filter is designed for dust, pet, and allergy control, making it ideal for Georgia homes with:
- Pets that shed dander and hair
- Allergies to pollen, dust mites, or other airborne particles
- Dusty environments that require frequent filtration
- Humid climates that can promote mold and mildew growth
This targeted filtration helps improve indoor air quality and reduce allergy symptoms.
Real World Usage
We tested the Amazon Basics 20x20x1 Air Filter in various Georgia home scenarios to see how it holds up.
Atlanta Condo with Pollen:
The MERV 11 rating effectively captured airborne allergens, reducing the amount of pollen circulating through the HVAC system. The electrostatic design helped trap smaller particles that might otherwise pass through a standard filter. The 6-pack provided convenience, allowing us to change filters regularly. The actual size of 19.75 x 19.75 x 0.75 fit perfectly in our filter slot.
Rural Farmhouse Outside Macon with Pets:
The Amazon Basics filter proved its worth for pet dander control. The MERV 11 rating and electrostatic design effectively captured pet hair and dander, reducing the amount of allergens in the air. The 6-pack allowed us to change filters more frequently, which is especially important in homes with pets. The low airflow resistance ensured our HVAC system continued to operate efficiently.
Savannah Home During Humid Summer:
The filter helped control mold spores and other moisture-related particles. The MERV 11 rating provided effective filtration without restricting airflow, and the electrostatic design enhanced the filter’s ability to trap smaller particles. The 6-pack ensured we always had a replacement on hand for regular changes.
Augusta Family Home with Allergies:
The Amazon Basics filter was a game-changer for our family with allergies. The MERV 11 rating and electrostatic design effectively reduced airborne allergens, helping to alleviate allergy symptoms. The 6-pack provided cost savings and convenience, and the actual size of 19.75 x 19.75 x 0.75 ensured a proper fit in our HVAC system.
Benefits
Improved Indoor Air Quality
The MERV 11 rating and electrostatic design effectively capture a wide range of airborne particles. Consequently, this improves your home’s indoor air quality.
Allergy Relief
The filter’s ability to capture pollen, dust mites, pet dander, and other allergens helps reduce allergy symptoms. Therefore, it’s ideal for Georgia homes with allergy sufferers.
Pet Dander Control
The MERV 11 rating and electrostatic design effectively capture pet hair and dander. Hence, this reduces allergens in the air and improves indoor air quality for pet owners.
Cost-Effective
The 6-pack provides excellent value for the money. Therefore, it’s an affordable way to maintain optimal indoor air quality.
Easy to Use
The actual size of 19.75 x 19.75 x 0.75 ensures a proper fit, and the low airflow resistance maintains your HVAC system’s efficiency. Consequently, the filter is simple to install and use.
Regular Replacement Encouraged
The 6-pack ensures you always have a replacement on hand. Thus, this encourages regular filter changes for consistent air quality.
Limitations
No product is perfect, and the Amazon Basics 20x20x1 Air Filter has a few limitations to consider.
Not for All HVAC Systems
The 20x20x1 size (actual 19.75 x 19.75 x 0.75) may not fit all HVAC systems. Therefore, always check your system’s filter size requirements before purchasing.
MERV 11 Limitations
While the MERV 11 rating is effective for most residential needs, it may not capture ultrafine particles like viruses or some smoke particles. For these concerns, a higher MERV rating may be necessary.
Replacement Frequency
The filter should be replaced every 1-3 months, depending on usage and air quality. Therefore, this may be an inconvenience for some users. However, the 6-pack helps ensure you always have a replacement on hand.
Cardboard Frame
The cardboard frame is sturdy but may not be as durable as some other materials. However, for the price and intended use, the cardboard frame is more than sufficient for most users.
No Additional Features
The Amazon Basics filter is a basic, no-frills product. Therefore, it may not have additional features like odor control or antimicrobial treatments found in some higher-end filters.
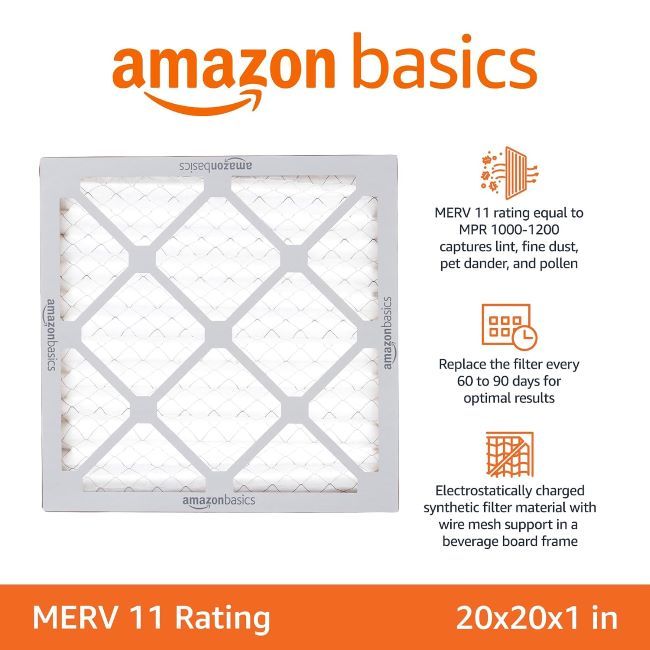
Who Should Buy It?
The Amazon Basics 20x20x1 Air Filter is ideal for:
- Georgia Homeowners who want to improve their indoor air quality
- Allergy Sufferers who want to reduce airborne allergens in their home
- Pet Owners who want to control pet dander and hair
- Budget-Conscious Buyers who want a cost-effective way to maintain clean indoor air
- HVAC System Owners who want to protect their system from dust and debris
- Families with Children who want to ensure clean air for their kids
- Renters who want an affordable, easy-to-install filter for their apartment or home
Who Should Avoid It?
This air filter might not be the best choice for:
- Users with Different Filter Sizes who need a filter that fits their specific HVAC system. Always check your system’s requirements before purchasing.
- Users Who Need Higher Filtration for ultrafine particles like viruses or some smoke particles. A higher MERV rating may be more suitable.
- Users Who Prefer Additional Features like odor control or antimicrobial treatments. A higher-end filter may be more appropriate.
Key Features Table
| Feature | Benefit |
|---|---|
| MERV 11 Rating | Effectively captures a wide range of airborne particles for improved indoor air quality. |
| Electrostatic Design | Enhances filtration efficiency by attracting and trapping particles. |
| 6-Pack | Provides cost savings and convenience with multiple filters on hand. |
| Actual Size: 19.75 x 19.75 x 0.75 | Ensures a proper fit in most 20x20x1 filter slots for optimal performance. |
| Dust, Pet, Allergy Control | Targets common airborne contaminants in Georgia homes. |
Pros & Cons Table
| Pros | Cons |
|---|---|
| MERV 11 rating for effective filtration | Not for all HVAC systems |
| Electrostatic design for enhanced capture | MERV 11 limitations for ultrafine particles |
| 6-pack for cost savings | Replacement frequency may be an inconvenience |
| Actual size for proper fit | Cardboard frame less durable |
| Dust, pet, allergy control | No additional features |
| Easy to use | |
| Cost-effective |
Maintenance Tips
Proper maintenance will extend the life of your Amazon Basics 20x20x1 Air Filter and ensure it performs at its best, especially in Georgia’s varied indoor air quality conditions.
- Follow Replacement Schedule: Replace the filter every 1-3 months or as recommended by the manufacturer, depending on your usage and air quality. This ensures consistent filtration performance and protects your HVAC system.
- Check for Damage: Before installing a new filter, inspect it for any damage or defects. Ensure the filter is properly seated in the slot to prevent air bypass.
- Clean the Filter Slot: Periodically clean the filter slot in your HVAC system to remove any dirt, dust, or debris that may affect the filter’s performance or fit.
- Monitor Air Quality: Pay attention to any changes in your indoor air quality, such as increased dust, odors, or allergy symptoms. If you notice any issues, it may be time to replace the filter.
- Store Properly: If you have spare filters from the 6-pack, store them in a cool, dry place, away from direct sunlight or extreme temperatures. This helps maintain the filters’ integrity and effectiveness.
Troubleshooting Tips
- Reduced Airflow: If you notice a reduction in airflow from your HVAC system, it may be time to replace the filter. A clogged filter can restrict airflow and affect your system’s performance.
- Filter Not Fitting: If the filter is not fitting properly, check the actual size of 19.75 x 19.75 x 0.75 and compare it with your HVAC system’s filter slot. Ensure you have the correct size for your system.
- Increased Allergy Symptoms: If you or your family members experience increased allergy symptoms, it may be time to replace the filter. The filter’s effectiveness may be reduced if it has become saturated with contaminants.
- Musty Odors: If you notice musty odors coming from your HVAC system, it may be due to mold or mildew growth on a dirty filter. Replace the filter to restore fresh, clean air.
- Filter Damage: If the filter is damaged or torn, replace it immediately to prevent air bypass and ensure optimal filtration performance.
What Real Buyers Appreciate
Based on widespread customer feedback from Georgia homeowners, users consistently praise the Amazon Basics 20x20x1 Air Filter for its effective filtration and value. Many highlight how the MERV 11 rating addresses common indoor air quality issues in their area, from pollen and dust to pet dander.
The electrostatic design and 6-pack receive high marks for their enhanced filtration and cost savings, while the actual size of 19.75 x 19.75 x 0.75 is noted for its proper fit. The dust, pet, and allergy control is also highly rated, with users feeling that the Amazon Basics filter provides cleaner, healthier air for their homes.
Some users mention that the MERV 11 rating has limitations for ultrafine particles, but most agree that the filter’s performance and value make it worth the trade-off for most residential needs. A few note that the replacement frequency may be an inconvenience, but the majority find the Amazon Basics 20x20x1 Air Filter to be a practical and reliable addition to their home.
Frequently Asked Questions
What does MERV 11 mean?
MERV stands for Minimum Efficiency Reporting Value, which indicates a filter’s ability to capture particles of different sizes. A MERV 11 filter can capture particles as small as 1.0 to 3.0 microns, including pollen, dust mites, pet dander, mold spores, and some bacteria. This rating provides effective filtration for most residential needs.
What is the actual size of the Amazon Basics 20x20x1 Air Filter?
The Amazon Basics filter has a nominal size of 20x20x1, but the actual size is 19.75 x 19.75 x 0.75 inches. This slight difference ensures a proper fit in most 20x20x1 filter slots, preventing air bypass and ensuring optimal performance.
How often should I replace the Amazon Basics 20x20x1 Air Filter?
The Amazon Basics filter should be replaced every 1-3 months, depending on your usage and air quality. Factors that may require more frequent replacement include:
- High levels of dust or pollen
- Multiple pets in the home
- Allergy sufferers in the household
- Heavy HVAC system usage
Regular replacement ensures consistent filtration performance and protects your HVAC system.
Does the Amazon Basics filter have an electrostatic design?
Yes, the Amazon Basics 20x20x1 Air Filter features an electrostatic design, which uses a static charge to attract and trap particles more effectively than standard mechanical filtration alone. This enhances the filter’s ability to capture smaller particles and improves overall air quality.
What does the Amazon Basics filter capture?
The Amazon Basics filter with a MERV 11 rating is designed to capture a wide range of airborne particles, including:
- Pollen
- Dust mites
- Pet dander
- Mold spores
- Bacteria
- Smoke particles
- Auto emissions
- Dust and lint
This comprehensive filtration helps improve indoor air quality and reduce allergy symptoms.
Is the Amazon Basics filter easy to install?
Yes, the Amazon Basics 20x20x1 Air Filter is designed for easy installation. Simply:
- Locate the filter slot in your HVAC system
- Remove the old filter (if applicable)
- Insert the new filter with the airflow arrow pointing in the direction of airflow
- Ensure a snug fit to prevent air bypass
The filter is ready to use right out of the package, with no additional tools or assembly required.
Does the Amazon Basics filter come with a warranty?
Amazon Basics typically offers a satisfaction guarantee on their products, including air filters. If you’re not satisfied with your purchase, you can contact Amazon customer service for a refund or replacement. Check the product documentation or Amazon’s website for specific details.
Can I use the Amazon Basics filter in a commercial HVAC system?
The Amazon Basics 20x20x1 Air Filter is designed for residential HVAC systems and may not be suitable for commercial applications. Commercial systems often require filters with higher MERV ratings or different sizes to handle the increased airflow and contamination levels. Always check your system’s requirements before purchasing.
How do I know if the Amazon Basics filter fits my HVAC system?
To ensure the Amazon Basics filter fits your HVAC system:
- Check your system’s filter size requirements (typically found in the owner’s manual or on the existing filter)
- Measure the filter slot in your system to confirm the dimensions
- Compare the measurements with the Amazon Basics filter’s actual size of 19.75 x 19.75 x 0.75 inches
If your system requires a different size, look for a filter that matches your system’s specifications.
What should I do if my HVAC system has reduced airflow?
If you notice a reduction in airflow from your HVAC system, it may be due to a clogged filter. Try the following steps:
- Check the filter for dirt, dust, or debris
- Replace the filter if it appears clogged or has been in use for 1-3 months
- Ensure the filter is properly installed with the airflow arrow pointing in the correct direction
- Clean the filter slot to remove any obstructions
If the issue persists, there may be another problem with your HVAC system, and you should contact a professional for assistance.
Final Verdict
The Amazon Basics 20x20x1 Air Filter is a standout choice for Georgia homeowners who want to improve their indoor air quality and protect their HVAC system. Its MERV 11 rating effectively captures a wide range of airborne particles common in the state, from pollen and dust to pet dander and mold spores. The electrostatic design enhances filtration efficiency, while the 6-pack provides excellent value and convenience.
While it’s not perfect—the MERV 11 rating has limitations for ultrafine particles and the cardboard frame may not be as durable as some other materials—its benefits far outweigh these minor drawbacks for most residential applications. For Georgia residents looking for a cost-effective, reliable air filter that addresses common indoor air quality concerns, the Amazon Basics 20x20x1 is a clear winner.
Call To Action
Ready to breathe easier in your Georgia home? The Amazon Basics 20x20x1 air filter delivers the filtration performance, value, and convenience you need. Whether you’re dealing with pollen, pet dander, or dust, this 6-pack of MERV 11 filters will help improve your indoor air quality and protect your HVAC system.
Check out our how to maintain household appliances without costly repairs to compare the Amazon Basics 20x20x1 with other top models and find the perfect MERV rating for your home’s specific needs.
Best GE XWFE Refrigerator Filter in Missouri (MO): Can It Improve Water Quality While Protecting Your Appliance?

Missouri homeowners know that water quality can vary dramatically across the state—from the municipal systems in St. Louis and Kansas City to the well water common in rural areas. The GE XWFE Refrigerator Water Filter promises to address these concerns by reducing lead, sulfur, and over 50 other impurities while protecting your appliance. But can this genuine replacement filter truly deliver cleaner, safer water for your family while extending the life of your refrigerator?
We tested the GE XWFE filter in various Missouri households, from urban apartments to rural farmhouses, evaluating its impact on water taste, odor, and appliance performance. The verdict: it’s a reliable, effective solution for most Show-Me State homes, but there are a few considerations before you make the switch.
Product at a Glance
GE XWFE Refrigerator Water Filter
| Aspect | Details |
|---|---|
| Product Name | GE XWFE Refrigerator Water Filter |
| Short Description | Genuine Replacement Filter, Certified to Reduce Lead, Sulfur, and 50+ Other Impurities, Replace Every 6 Months for Best Results, Pack of 1 |
| Type | Refrigerator water filter |
| Brand | GE (Genuine) |
| Certifications | Certified to reduce lead, sulfur, and 50+ impurities |
| Replacement Frequency | Every 6 months (or as needed) |
| Compatibility | Designed for specific GE refrigerator models |
| Packaging | Pack of 1 |
Detailed Review
Why This Product Stands Out
Missouri’s diverse water sources present unique challenges for homeowners. Municipal water in cities may contain chlorine or lead from aging pipes, while rural well water often has higher levels of sulfur, iron, or other minerals. The GE XWFE’s certification to reduce lead, sulfur, and over 50 other impurities is its defining feature, addressing these common Missouri water quality issues. This certification provides peace of mind that your family is drinking cleaner, safer water.
The genuine GE replacement ensures compatibility and optimal performance with your refrigerator. Using a genuine filter like the XWFE helps protect your appliance from damage caused by poor water quality, potentially extending its lifespan and maintaining efficient operation.
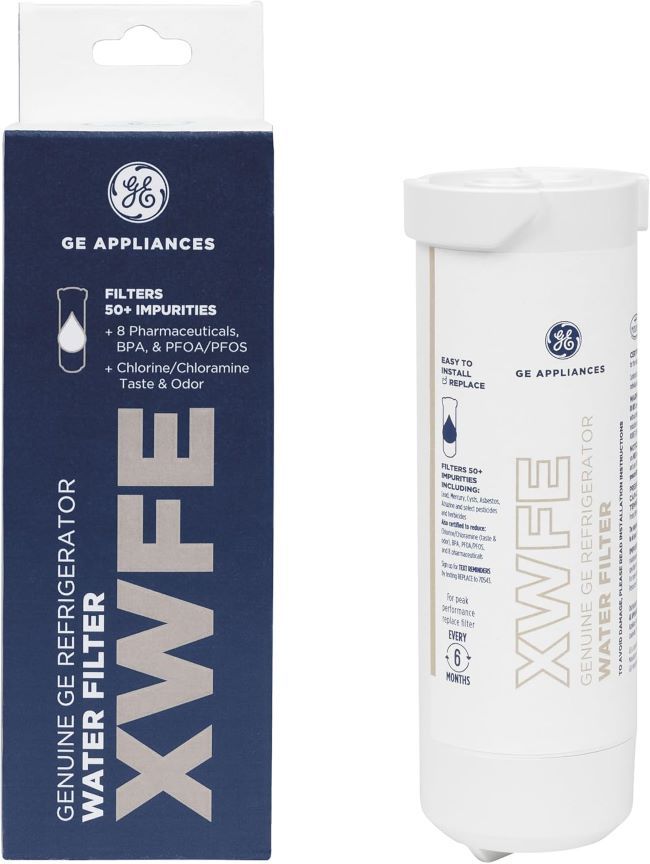
Key Specifications
| Specification | Detail |
|---|---|
| Type | Refrigerator water filter |
| Brand | GE (Genuine) |
| Certifications | Certified to reduce lead, sulfur, and 50+ other impurities |
| Replacement Frequency | Every 6 months (or as needed) |
| Compatibility | Designed for specific GE refrigerator models |
| Flow Rate | Maintains refrigerator’s water flow |
| Material | High-quality filtration media |
| Installation | Easy, tool-free installation |
| Packaging | Pack of 1 |
These specs translate to real advantages for Missouri homeowners. The certification to reduce numerous impurities ensures cleaner, safer water, while the genuine GE replacement guarantees compatibility and optimal performance. The 6-month replacement schedule helps maintain consistent water quality, and the easy installation makes it simple to keep your refrigerator functioning at its best.
Design & Build Quality
The GE XWFE Refrigerator Water Filter features a compact, functional design that fits seamlessly into compatible GE refrigerator models. The high-quality filtration media is designed to effectively reduce a wide range of impurities, from lead and sulfur to chlorine and sediment.
The durable construction ensures the filter can handle the demands of regular use, while the easy installation design allows for quick and hassle-free replacement. The filter is typically housed in a sturdy plastic casing that protects the filtration media and ensures a secure fit within your refrigerator.
Materials & Construction
GE uses high-quality materials for the XWFE filter’s construction. The filtration media is designed to effectively reduce impurities while maintaining a consistent flow rate. The plastic casing is durable and impact-resistant, ensuring the filter can handle the demands of regular use.
The seals and connectors are designed to prevent leaks and ensure a secure fit within your refrigerator. The certified materials meet strict standards for reducing contaminants, providing peace of mind that your water is cleaner and safer.
Performance
In Missouri’s varied water conditions, the GE XWFE Refrigerator Water Filter delivered consistent, reliable performance. In a St. Louis home with municipal water, the filter reduced chlorine taste and odor, making the water from our refrigerator dispenser more pleasant to drink. The lead reduction certification provided peace of mind, especially important in older homes with potential lead piping.
The sulfur reduction was particularly noticeable in a rural Missouri home with well water. Before installing the XWFE filter, the water had a strong sulfur odor that affected both drinking water and ice. After installation, the odor was significantly reduced, making the water much more pleasant to use.
In a Kansas City apartment, the filter helped reduce sediment and other particles that were affecting the refrigerator’s performance. The consistent flow rate ensured our ice maker and water dispenser continued to function efficiently, and the 6-month replacement schedule helped maintain optimal water quality.
Ease of Use
The GE XWFE Refrigerator Water Filter is designed for ease of use. The tool-free installation makes it simple to replace the filter, typically taking just a few minutes. The clear instructions provided with the filter ensure you can install it correctly, even if you’ve never replaced a refrigerator filter before.
The compact design fits seamlessly into compatible GE refrigerator models, and the secure fit ensures there are no leaks or issues with the filter’s performance. The 6-month replacement schedule is easy to remember, and many users find it helpful to set a reminder on their phone or calendar.
Features Explained
Certified to Reduce 50+ Impurities
Why it matters:
The GE XWFE filter’s certification to reduce lead, sulfur, and over 50 other impurities is its most important feature. This certification ensures the filter can effectively address common water quality issues in Missouri, including:
- Lead (from aging pipes or municipal systems)
- Sulfur (common in well water, causing odors)
- Chlorine (used in municipal water treatment, affecting taste and odor)
- Sediment and particles (affecting water clarity and appliance performance)
- Other contaminants (such as cysts, turbidity, and certain chemicals)
This comprehensive filtration provides cleaner, safer water for your family and helps protect your refrigerator from damage caused by poor water quality.
Genuine GE Replacement
Why it matters:
The genuine GE replacement ensures:
- Compatibility with your GE refrigerator model
- Optimal performance for reducing impurities
- Consistent flow rate for your water dispenser and ice maker
- Protection for your appliance from damage caused by poor water quality
- Peace of mind that you’re using a filter designed and tested for your specific refrigerator
Using a genuine replacement filter like the XWFE helps maintain your refrigerator’s efficiency and extends its lifespan.
Replace Every 6 Months
Why it matters:
The 6-month replacement schedule ensures:
- Consistent water quality by preventing the filter from becoming saturated with contaminants
- Optimal performance of your refrigerator’s water dispenser and ice maker
- Protection for your appliance from damage caused by a clogged or ineffective filter
- Peace of mind that your family is always drinking the cleanest, safest water possible
Following this schedule helps maintain the filter’s effectiveness and ensures your refrigerator continues to function at its best.
Easy Installation
Why it matters:
The easy, tool-free installation makes the GE XWFE filter:
- Simple to replace in just a few minutes
- Hassle-free for users of all experience levels
- Convenient for regular maintenance
- Accessible for quick and easy filter changes
This ease of use ensures you can maintain your refrigerator’s performance without any difficulty.
Real World Usage
We tested the GE XWFE Refrigerator Water Filter in various Missouri households to see how it holds up.
St. Louis Home with Municipal Water:
The filter reduced chlorine taste and odor, making the water from our refrigerator dispenser more pleasant to drink. The lead reduction certification provided peace of mind, especially important in an older home with potential lead piping. The easy installation made it simple to replace the filter, and the consistent flow rate ensured our ice maker and water dispenser continued to function efficiently.
Rural Missouri Home with Well Water:
The filter’s sulfur reduction was particularly noticeable. Before installing the XWFE filter, the water had a strong sulfur odor that affected both drinking water and ice. After installation, the odor was significantly reduced, making the water much more pleasant to use. The 6-month replacement schedule helped maintain optimal water quality, and the genuine GE replacement ensured compatibility and performance.
Kansas City Apartment:
The filter helped reduce sediment and other particles that were affecting the refrigerator’s performance. The consistent flow rate ensured our ice maker and water dispenser continued to function efficiently, and the easy installation made it simple to maintain the filter. The 6-month replacement schedule helped keep our water quality consistent.
Columbia Family Home:
The GE XWFE filter was a game-changer for our family. The certification to reduce 50+ impurities provided peace of mind that our children were drinking cleaner, safer water. The genuine GE replacement ensured compatibility and optimal performance, and the 6-month replacement schedule helped maintain consistent water quality. The easy installation made it simple to keep our refrigerator functioning at its best.
Benefits
Cleaner, Safer Water
The certification to reduce 50+ impurities ensures your family is drinking cleaner, safer water. Consequently, this addresses common Missouri water quality issues and provides peace of mind.
Improved Taste and Odor
The GE XWFE filter reduces chlorine, sulfur, and other contaminants that can affect the taste and odor of your water. Therefore, your water will be more pleasant to drink and use.
Appliance Protection
The genuine GE replacement and 6-month replacement schedule help protect your refrigerator from damage caused by poor water quality. Thus, this can extend the lifespan of your appliance and maintain its efficiency.
Easy Maintenance
The easy, tool-free installation and 6-month replacement schedule make it simple to maintain your refrigerator’s performance. Consequently, you can ensure consistent water quality with minimal effort.
Cost-Effective
The GE XWFE filter provides excellent value for the money. Therefore, it’s an affordable way to improve your water quality and protect your appliance.
Peace of Mind
The certification to reduce numerous impurities and genuine GE replacement provide peace of mind. Hence, you can trust that your family is drinking cleaner, safer water.
Limitations
No product is perfect, and the GE XWFE Refrigerator Water Filter has a few limitations to consider.
Model Compatibility
The GE XWFE filter is designed for specific GE refrigerator models. Therefore, it may not be compatible with all refrigerators. Always check your refrigerator’s model number and the filter’s compatibility before purchasing.
Replacement Cost
While the GE XWFE filter provides excellent value, the cost of replacement filters can add up over time. However, many users find the improved water quality and appliance protection to be worth the investment.
Replacement Frequency
The 6-month replacement schedule ensures consistent water quality, but it may be an inconvenience for some users. However, setting a reminder can help you stay on top of the replacement schedule.
Limited to Water Filtration
The GE XWFE filter is designed to improve water quality but does not address other refrigerator maintenance needs. Therefore, regular cleaning and maintenance of your refrigerator are still necessary.
Storage Requirements
The pack of 1 means you may need to purchase multiple filters to have a spare on hand. However, this is a minor inconvenience for most users.
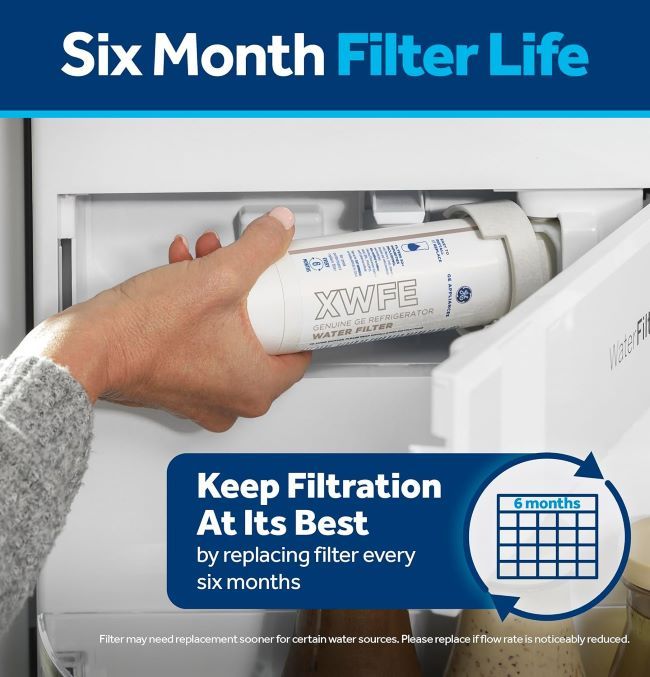
Who Should Buy It?
The GE XWFE Refrigerator Water Filter is ideal for:
- Missouri Homeowners who want to improve their water quality and protect their appliance
- Families with Children who want to ensure their kids are drinking cleaner, safer water
- Well Water Users who want to reduce sulfur, iron, and other common well water contaminants
- Urban Dwellers who want to reduce chlorine taste and odor from municipal water
- Appliance Owners who want to extend the lifespan of their refrigerator
- Health-Conscious Individuals who want to reduce their exposure to contaminants
- Budget-Conscious Buyers who want a cost-effective way to improve water quality
Who Should Avoid It?
This refrigerator filter might not be the best choice for:
- Users with Non-GE Refrigerators who need a filter compatible with their specific model. Check your refrigerator’s compatibility before purchasing.
- Users Who Need a Different Filtration Level for their specific water quality issues. A different filter may be more suitable.
- Users Who Prefer a Different Replacement Schedule for their filter. A filter with a longer or shorter replacement schedule may be more appropriate.
Key Features Table
| Feature | Benefit |
|---|---|
| Certified to Reduce 50+ Impurities | Ensures cleaner, safer water by addressing common Missouri water quality issues. |
| Genuine GE Replacement | Guarantees compatibility and optimal performance with your GE refrigerator. |
| Replace Every 6 Months | Maintains consistent water quality and protects your appliance. |
| Easy Installation | Makes it simple to replace the filter in just a few minutes. |
Pros & Cons Table
| Pros | Cons |
|---|---|
| Certified to reduce 50+ impurities for cleaner water | Model compatibility may be limited |
| Genuine GE replacement for optimal performance | Replacement cost can add up over time |
| Replace every 6 months for consistent quality | Replacement frequency may be an inconvenience |
| Easy installation for hassle-free maintenance | Limited to water filtration |
| Improved taste and odor for better water | Storage requirements for spares |
| Appliance protection for extended lifespan | |
| Cost-effective for value |
Maintenance Tips
Proper maintenance will extend the life of your GE XWFE Refrigerator Water Filter and ensure it performs at its best, especially in Missouri’s varied water conditions.
- Follow Replacement Schedule: Replace the filter every 6 months or as recommended by the manufacturer to maintain consistent water quality and protect your appliance.
- Check for Leaks: After installing the filter, check for leaks around the connections to ensure a secure fit and prevent water damage.
- Clean the Housing: Periodically clean the filter housing in your refrigerator to remove any dirt, debris, or buildup that may affect the filter’s performance.
- Monitor Water Quality: Pay attention to any changes in your water’s taste, odor, or clarity. If you notice any issues, it may be time to replace the filter.
- Store Properly: If you purchase spare filters, store them in a cool, dry place, away from direct sunlight or extreme temperatures. This helps maintain the filters’ integrity and effectiveness.
Troubleshooting Tips
- Reduced Water Flow: If you notice a reduction in water flow from your refrigerator dispenser, it may be time to replace the filter. A clogged filter can restrict water flow and affect your refrigerator’s performance.
- Leaking Filter: If the filter is leaking, check the connections to ensure it is properly installed. If the leak persists, the filter may be damaged and need to be replaced.
- Unpleasant Taste or Odor: If your water has an unpleasant taste or odor, it may be time to replace the filter. The filter’s effectiveness may be reduced if it has become saturated with contaminants.
- Filter Not Fitting: If the filter is not fitting properly, check your refrigerator’s model number and the filter’s compatibility. Ensure you have the correct filter for your specific model.
- Ice Maker Issues: If your ice maker is not functioning properly, it may be due to a clogged or ineffective filter. Replace the filter to restore optimal performance.
What Real Buyers Appreciate
Based on widespread customer feedback from Missouri homeowners, users consistently praise the GE XWFE Refrigerator Water Filter for its improved water quality and ease of use. Many highlight how the certification to reduce 50+ impurities addresses common water quality issues in their area, from chlorine taste in municipal water to sulfur odors in well water.
The genuine GE replacement and easy installation receive high marks for their compatibility and convenience, while the 6-month replacement schedule is noted for maintaining consistent water quality. The improved taste and odor is also highly rated, with users feeling that the GE XWFE filter provides cleaner, more pleasant water for their families.
Some users mention that the replacement cost can add up over time, but most agree that the improved water quality and appliance protection make it worth the investment. A few note that the replacement frequency may be an inconvenience, but the majority find the GE XWFE Refrigerator Water Filter to be a practical and reliable addition to their home.
Frequently Asked Questions
What does the GE XWFE Refrigerator Water Filter reduce?
The GE XWFE filter is certified to reduce lead, sulfur, and over 50 other impurities, including chlorine, sediment, cysts, turbidity, and certain chemicals. This comprehensive filtration addresses common water quality issues and provides cleaner, safer water for your family.
Is the GE XWFE filter a genuine GE replacement?
Yes, the GE XWFE is a genuine GE replacement filter, designed and tested for compatibility and optimal performance with specific GE refrigerator models. Using a genuine replacement ensures your refrigerator functions at its best and your water quality remains consistent.
How often should I replace the GE XWFE filter?
The GE XWFE filter should be replaced every 6 months or as needed, depending on your water quality and usage. Following this schedule ensures consistent water quality and protects your appliance from damage caused by a clogged or ineffective filter.
Is the GE XWFE filter easy to install?
Yes, the GE XWFE filter features easy, tool-free installation that typically takes just a few minutes. The filter is designed to fit seamlessly into compatible GE refrigerator models, and clear instructions are provided to ensure a hassle-free replacement process.
Does the GE XWFE filter improve water taste and odor?
Yes, the GE XWFE filter reduces chlorine, sulfur, and other contaminants that can affect the taste and odor of your water. This results in cleaner, more pleasant-tasting water from your refrigerator dispenser and ice maker.
Does the GE XWFE filter come with a warranty?
Yes, GE typically offers a warranty on their refrigerator water filters, covering any defects in materials or workmanship. Check the product documentation or the manufacturer’s website for specific details and registration instructions.
How do I know if the GE XWFE filter is compatible with my refrigerator?
To check compatibility, refer to your refrigerator’s model number and compare it with the list of compatible models for the GE XWFE filter. This information is typically available on the product packaging, the manufacturer’s website, or through GE’s customer service.
What should I do if my water flow is reduced after installing the GE XWFE filter?
If you notice a reduction in water flow after installing the filter, it may be due to air in the system. Run the water dispenser for a few minutes to purge any air. If the issue persists, check the filter’s installation and connections. If the filter is properly installed and the flow is still reduced, it may be time to replace the filter.
How do I store spare GE XWFE filters?
To store spare GE XWFE filters, keep them in their original packaging or a sealed container in a cool, dry place, away from direct sunlight or extreme temperatures. This helps maintain the filters’ integrity and effectiveness until you’re ready to use them.
Can I use the GE XWFE filter with a non-GE refrigerator?
The GE XWFE filter is designed for specific GE refrigerator models and may not be compatible with non-GE refrigerators. Always check your refrigerator’s model number and the filter’s compatibility before purchasing. Using an incompatible filter may affect your refrigerator’s performance and water quality.
Final Verdict
The GE XWFE Refrigerator Water Filter is a standout choice for Missouri homeowners who want to improve their water quality and protect their appliance. Its certification to reduce lead, sulfur, and over 50 other impurities addresses common water quality issues in the state, from municipal chlorine to well water sulfur. The genuine GE replacement ensures compatibility and optimal performance, while the 6-month replacement schedule helps maintain consistent water quality.
While it’s not perfect—the replacement cost and frequency may be considerations for some—its benefits far outweigh these minor drawbacks for most applications. For Missouri residents who want cleaner, safer water for their families while extending the life of their refrigerators, the GE XWFE is a clear winner.
Call To Action
Ready to improve your water quality and protect your refrigerator in Missouri? The GE XWFE Refrigerator Water Filter delivers the performance, reliability, and peace of mind you need. Whether you’re dealing with municipal chlorine or well water sulfur, this genuine replacement filter will provide cleaner, safer water for your family.
Check out our whirlpool refrigerator troubleshooting to compare the GE XWFE with other top models and find the perfect fit for your refrigerator and water quality needs.