

How to Foam Milk With a Zulay Kitchen Frother
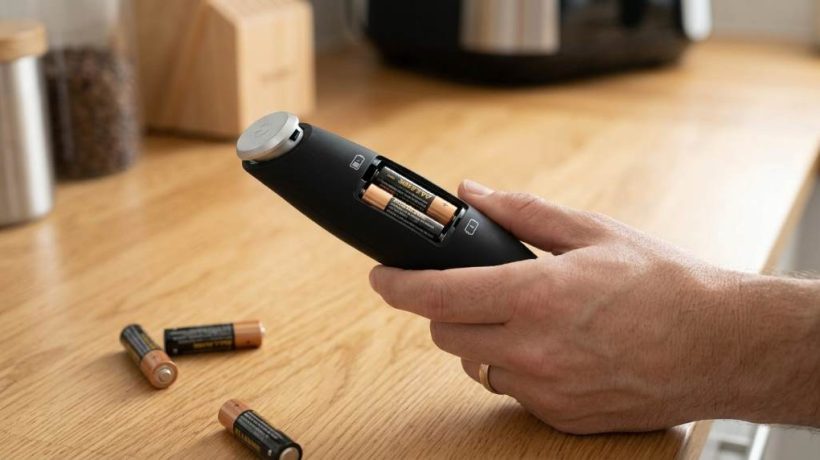
Yes, you can create smooth, creamy milk foam with a Zulay Kitchen frother in just a few minutes. Start with cold milk, warm it gently, then froth it with controlled movements for better texture.
A handheld frother works especially well with roughly 6 to 8 ounces of milk per drink. For the best texture, keep warmed milk around 140°F to 150°F and avoid boiling it.
The Zulay kitchen milk frother makes this process simple because its compact whisk creates foam quickly. However, technique matters more than speed when you want fine, stable bubbles.
This guide explains each step, from choosing milk to controlling foam thickness. You will also learn how to fix common problems and clean the frother correctly.
What Makes the Zulay Kitchen Frother Effective?
The Zulay Kitchen frother uses a small whisk to introduce air into liquid. As the whisk spins, it breaks the milk surface and creates thousands of tiny bubbles.
However, simply moving the whisk around does not guarantee creamy foam. You need the right milk temperature, whisk position, movement, and timing.
Milk proteins help stabilize the bubbles after air enters the liquid. Therefore, gentle heating and controlled frothing produce a smoother result than aggressive mixing.
Prepare the Milk Before Frothing
Good foam begins before you turn on the frother. Select your milk, measure the amount, and warm it gradually.
Choose the Right Milk
Whole milk usually produces rich foam with a smooth and creamy mouthfeel. Lower fat milk can create lighter foam with a slightly firmer texture.
Meanwhile, oat milk often creates excellent foam when you use a barista style variety. Almond and soy milk can also foam, although results vary between brands.
If you want consistent results, test one milk brand several times before changing your routine. Different protein and fat levels can change foam quality significantly.
Measure the Milk Carefully
Fill your cup only partway because milk expands as you froth it. A tall container gives the foam enough room to rise without spilling.
For one coffee, start with about 6 ounces of milk. You can increase the amount after learning how much foam your drink needs.
Warm the Milk Gently
Warm the milk on the stove or inside a microwave safe container. Stop heating when the milk feels hot but remains comfortable to handle.
A temperature between 140°F and 150°F works well for many milk based coffee drinks. Avoid boiling because excessive heat can damage texture and create a cooked flavor.
When using a microwave, heat the milk in short intervals. Stir between intervals so the temperature spreads evenly throughout the container.
How to Foam Milk With a Zulay Kitchen Frother
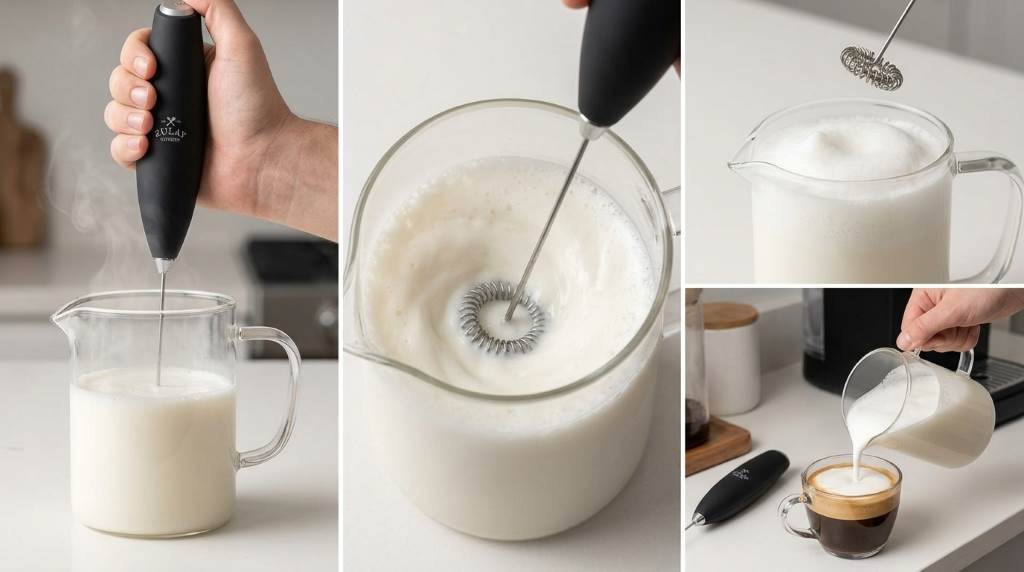
Once your milk reaches the right temperature, place the container on a stable surface. Keep the frother nearby and hold it comfortably in your dominant hand.
Step 1: Insert the Whisk Correctly
Place the whisk slightly below the milk surface before switching it on. Do not push the whisk directly against the bottom of the container.
Keeping the whisk submerged prevents unnecessary splashing during the first few seconds. It also helps the motor work without excessive resistance.
Step 2: Start Frothing Slowly
Turn on the frother while keeping the whisk just beneath the surface. Start with gentle movement rather than immediately moving the whisk around.
After a few seconds, you should notice the milk becoming lighter and thicker. That visual change indicates that air has entered the milk.
Step 3: Create a Gentle Whirlpool
Move the frother slightly around the container while maintaining a shallow position. This movement helps distribute air throughout the milk.
Next, tilt the container slightly and guide the whisk in small circles. Avoid large movements because they can create oversized bubbles.
Step 4: Build Fine Foam
Keep the whisk near the surface for several seconds to increase foam volume. Then lower it slightly to blend the foam with the liquid underneath.
This two stage technique creates a more integrated texture. It also reduces the thick layer of dry bubbles that can form on top.
Step 5: Stop at the Right Moment
Stop frothing when the milk looks glossy, creamy, and evenly aerated. Most drinks need only a short frothing session rather than prolonged mixing.
Over frothing can produce large bubbles and reduce the smooth texture you want. Therefore, watch the milk instead of relying only on a timer.
How to Create Different Milk Foam Textures
Different coffee drinks need different foam levels. You can adjust your technique without changing the frother itself.
- Latte: Create thin, silky foam with more liquid milk underneath.
- Cappuccino: Froth longer to create a thicker layer of airy foam.
- Macchiato: Make dense foam and spoon a smaller amount onto espresso.
- Hot chocolate: Create moderate foam for a creamy topping without excessive bubbles.
- Iced coffee: Froth cold milk briefly for a lighter topping before serving.
For latte style foam, keep the whisk slightly deeper after initial aeration. This approach blends air into the milk instead of creating a large foam cap.
For cappuccino style foam, spend more time near the surface. That technique introduces more air and produces greater foam volume.
Common Mistakes That Ruin Milk Foam
Even a good frother can produce poor results when technique goes wrong. Fortunately, most problems have simple fixes.
Using Boiling Hot Milk
Very hot milk often loses its fresh flavor and develops a less pleasant texture. Always heat gradually and stop before the milk reaches a boil.
Keeping the Whisk Too Deep
A deeply submerged whisk mainly stirs the milk instead of adding enough air. Keep it near the surface during the initial aeration stage.
Keeping the Whisk Too High
If the whisk rises above the surface, it can create splashes and large bubbles. Keep the whisk tip submerged while maintaining gentle surface movement.
Frothing Too Long
Longer frothing does not always create better foam. Stop when the milk reaches your desired volume and texture.
Using an Oversized Container
A very wide container can make the frother less effective because the whisk moves through too much empty space. A narrow, tall vessel usually provides better control.
How to Improve Foam Quality Every Time
Consistency comes from repeating the same process under similar conditions. Start with the same milk quantity and temperature during each attempt.
Then use the same container and frothing pattern until you understand the results. Once your technique feels natural, experiment with different milk varieties.
- Use fresh milk for the cleanest flavor and texture.
- Warm the milk gradually instead of overheating it.
- Keep the whisk submerged during operation.
- Use small circular movements instead of aggressive stirring.
- Blend surface foam with the underlying milk.
- Stop immediately when the desired texture appears.
Also, tap the container gently against the counter after frothing. This action can break larger bubbles and leave smaller bubbles behind.
Next, swirl the milk before pouring it into your coffee. The swirling motion helps create a more uniform, glossy texture.
How to Pour the Foam Into Coffee
Pouring matters because excellent foam can still look poor with careless handling. Start with a slow pour to combine milk with the coffee.
As the cup fills, bring the container closer to the coffee surface. Then increase the pour slightly to guide the foam toward the top.
For simple latte art, use glossy foam rather than stiff bubbles. Smooth microfoam flows more predictably and creates cleaner patterns.
How to Foam Cold Milk
You can also use the Zulay Kitchen frother for cold milk foam. Cold foam works particularly well with iced coffee and chilled drinks.
Start with refrigerated milk and use a tall container. Keep the whisk near the surface and move it gently until the foam becomes light.
Cold milk behaves differently from warm milk, so expect a different texture. A shorter frothing time often works better for cold preparations.
How to Clean the Zulay Kitchen Frother
Cleaning the frother immediately after use prevents milk residue from drying around the whisk. Fortunately, the cleaning process takes very little time.
- Fill a cup with warm water.
- Place the whisk inside the water.
- Run the frother briefly to remove milk residue.
- Rinse the whisk under clean water.
- Dry the whisk thoroughly before storage.
Keep the motor housing away from running water unless the manufacturer specifically allows washing it. Instead, wipe the handle with a slightly damp cloth.
Regular cleaning also helps prevent unpleasant odors and buildup. Therefore, clean the whisk after every milk based drink.
Quick Troubleshooting Guide
| Problem | Likely Cause | Practical Fix |
|---|---|---|
| Large bubbles | Whisk moves too aggressively | Use smaller, slower movements |
| Thin foam | Whisk stays too deep | Raise the whisk closer to the surface |
| Milk splashes | Whisk rises above the surface | Keep the whisk tip submerged |
| Foam disappears quickly | Milk overheated or poorly aerated | Use moderate heat and controlled frothing |
| Uneven texture | Foam remains separated | Swirl the milk before pouring |
Is a Zulay Kitchen Frother Good for Daily Coffee?
Yes, a handheld frother works well for everyday coffee when you value speed and simple cleanup. Its compact design also makes it practical for kitchens with limited storage.
However, a handheld frother does not replace every professional espresso machine function. It creates aerated milk, while espresso machines can provide more advanced steam based microfoam control.
For everyday lattes, cappuccinos, hot chocolate, and cold foam, the frother offers a straightforward solution. Your technique will largely determine the final texture.
A Simple Routine for Better Results
If you want repeatable foam, create a short routine and follow it consistently. Measure the milk, heat it gently, froth near the surface, then blend the foam.
After several attempts, you will recognize the right texture by sight and sound. At that point, you can adjust the foam for different drinks without measuring every step.
Most importantly, focus on fine bubbles rather than maximum volume. Creamy foam should look glossy and feel smooth rather than dry or airy.
Frequently Asked Questions
Can you froth hot milk with a Zulay Kitchen frother?
Yes, you can froth warm milk effectively when you avoid boiling temperatures and keep the whisk slightly below the surface.
How long should you froth milk?
Froth until the milk becomes creamy and reaches your preferred volume, which usually takes only a short session.
Can you froth oat milk with this frother?
Yes, oat milk can create excellent foam, especially when you use a barista style variety designed for coffee.
Why does my milk have large bubbles?
Large bubbles usually appear when the whisk moves too aggressively or remains too close to the surface.
How do you clean the frother after use?
Run the whisk briefly in warm water, rinse it thoroughly, and wipe the handle without immersing the motor housing.
Final Thoughts
Learning how to foam milk with a Zulay Kitchen frother requires more technique than complicated equipment. Start with suitable milk, moderate heat, controlled aeration, and gentle blending.
Once you understand how whisk depth affects bubbles, you can create different textures for nearly any coffee drink. Practice the same method several times, then adjust it according to your preferred foam.
Try the process with your favorite milk and coffee today, then refine the timing until the foam matches your drink. A few careful adjustments can turn an ordinary homemade coffee into a smoother café style experience.
How to Empty a Shark Navigator Lift Away?
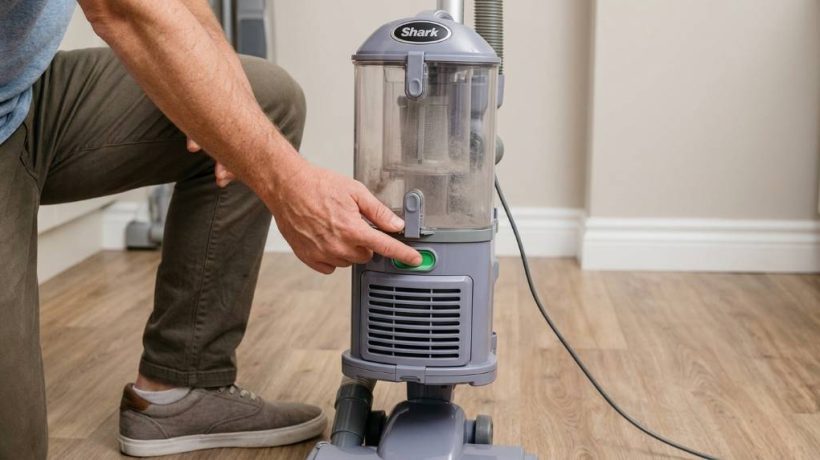
Emptying a Shark Navigator Lift Away takes only a few careful steps when you know the release points. Most users can remove the dust cup, release the collected debris, and reinstall it within minutes. The Shark navigator lift away vacuum uses a removable dust cup that simplifies routine cleaning. Regular emptying also helps maintain steady airflow and reliable suction. Shark recommends checking the dust cup regularly rather than allowing debris to build up completely.
How to Empty a Shark Navigator Lift Away
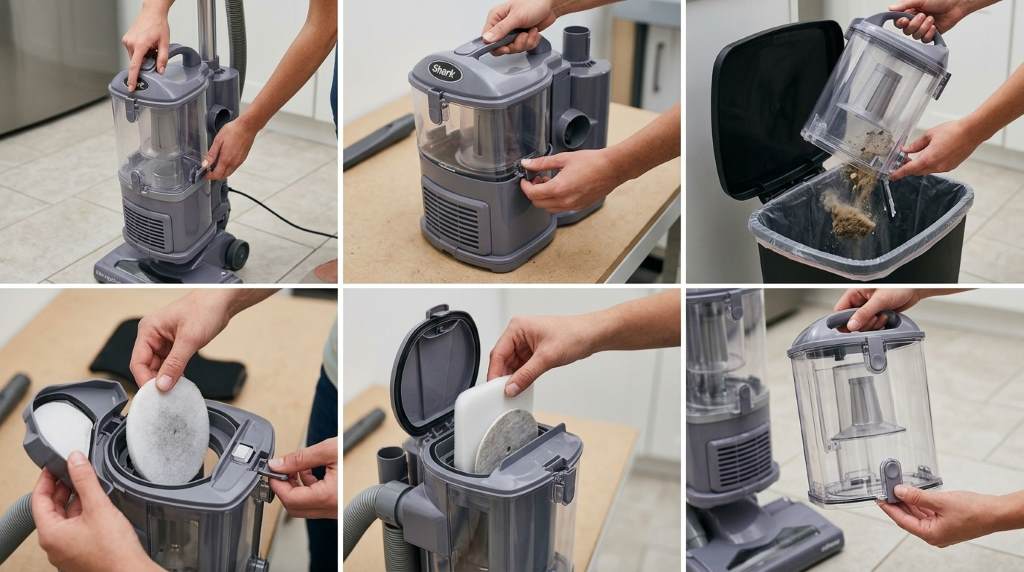
First, turn off the vacuum and unplug it from the electrical outlet. Then, place the vacuum on a stable surface before removing the dust cup.
Press the dust cup release button and lift the container away from the vacuum body. Hold the cup over a trash can before opening its bottom door.
Next, press the lower release button to open the dust cup base. Let the dirt, hair, dust, and larger debris fall directly into the trash.
Afterward, check the inside of the cup for material that remains stuck around the sides. Tap the container gently against your hand if loose debris needs help falling out.
Finally, close the bottom door firmly and return the dust cup to its original position. Push it into place until it sits securely on the vacuum.
What You Need Before Emptying the Vacuum
You usually need no special tools to empty a Shark Navigator Lift Away. However, preparing the area can make the process cleaner and easier.
- A sturdy trash can or waste container
- A dry microfiber cloth for exterior cleaning
- A small soft brush for stubborn debris
- Clean water if the removable cup requires washing
- A clear workspace for inspecting the vacuum
Keep the vacuum switched off throughout the process. Also, avoid placing the dust cup near wet surfaces while you empty it.
Where the Dust Cup Release Button Is Located
The exact button position can vary slightly between Shark Navigator models. Generally, the dust cup sits near the upper portion of the vacuum body.
Look for a release control near the dust cup handle or its connection point. A second release control usually opens the bottom of the cup.
Identify Both Release Controls
The first control separates the dust cup from the vacuum. The second control opens the debris door underneath the container.
Do not force either button if it does not move normally. Instead, check whether the cup has fully released from the vacuum body.
Step by Step Dust Cup Emptying Process
1. Turn Off and Unplug the Vacuum
Start by switching the vacuum off before handling any removable component. Unplugging it removes unnecessary electrical risk during cleaning.
Next, allow the motor and other moving parts to stop completely. This small step creates a safer and more controlled cleaning process.
2. Remove the Dust Cup
Hold the vacuum securely with one hand while operating the dust cup release. Lift the container straight away from the vacuum body.
Keep the cup upright as you carry it toward the trash can. This position helps prevent loose dust from escaping prematurely.
3. Position the Cup Over the Trash
Place the dust cup directly above the trash can before opening it. A wider container works better because fine debris can spread quickly.
For extra cleanliness, empty the cup outdoors when weather and conditions allow. You can also use a large garbage bag around the opening.
4. Open the Bottom Door
Press the lower release button to open the debris door. Allow gravity to remove most of the collected material.
Wait several seconds before closing the door. Hair and heavier debris sometimes remain inside after the first release.
5. Remove Remaining Debris
Inspect the cup after the main debris falls away. Use a soft brush to loosen material that clings around corners or edges.
Avoid using sharp objects inside the dust cup. Scratches can make future cleaning harder and may damage plastic components.
6. Close and Reinstall the Cup
Close the bottom door until it sits firmly in its normal position. Then, align the dust cup with its mounting area.
Press the cup back into place until it locks securely. Check the connection before switching the vacuum on again.
How to Clean the Dust Cup After Emptying
Emptying removes debris, but occasional dust cup cleaning can remove finer residue. However, you should follow the cleaning instructions for your specific Navigator model.
Some removable dust cups can receive water after you remove them from the vacuum. Never return a damp component to the machine.
Dry Cleaning Method
For routine maintenance, wipe the inside with a dry microfiber cloth. This method works well when the cup contains only loose dust.
Use a soft brush around seams and corners where powdery residue collects. Avoid aggressive scrubbing because plastic surfaces can scratch.
Washing the Dust Cup
If your model permits washing, rinse the removable cup with clean water. Avoid harsh cleaners unless Shark specifically approves them for that component.
Most importantly, let the cup dry completely before reinstalling it. Moisture inside a vacuum can create problems with airflow and internal components.
How Often Should You Empty a Shark Navigator?
Empty the dust cup whenever debris approaches the recommended fill level. Waiting until the container becomes completely packed can restrict airflow.
Homes with pets, children, carpets, or frequent cleaning may require more frequent emptying. Therefore, inspect the cup after larger cleaning sessions.
- Light household cleaning: Check after each major cleaning session.
- Pet hair: Empty whenever hair approaches the fill line.
- Heavy debris: Empty the cup during longer cleaning sessions.
- Fine dust: Inspect the cup frequently for compacted residue.
Your actual cleaning frequency depends on floor type, household size, and debris levels. Therefore, use the dust cup condition rather than a fixed schedule alone.
Why You Should Not Overfill the Dust Cup
An overfilled dust cup can interfere with normal airflow through the vacuum. As debris accumulates, the machine may struggle to maintain its expected cleaning performance.
Furthermore, packed debris can make emptying more difficult. Hair may wrap around existing material instead of dropping freely through the bottom door.
Regular emptying also makes routine maintenance faster. You can inspect the cup, filters, and visible airflow paths before problems become noticeable.
What to Do If Debris Stays Inside
Sometimes dust and hair remain inside even after you open the bottom door. This situation usually happens when material becomes compacted around the cup walls.
First, keep the vacuum unplugged and hold the cup securely over the trash. Gently shake the container without striking it against a hard surface.
Next, use a soft brush to loosen stubborn material. Never push your fingers deeply into narrow openings where debris may remain tightly packed.
What If the Dust Cup Will Not Come Off?
Do not force the dust cup if it refuses to release. Excessive pressure can damage the release mechanism or surrounding plastic.
Instead, make sure you press the correct release control fully. Then, gently lift the cup while maintaining steady pressure on the release.
If the mechanism still does not work, inspect the connection area for packed debris. Consult your model’s instructions before attempting further disassembly.
Common Mistakes to Avoid
Several simple mistakes can make vacuum maintenance messier or less effective. Fortunately, you can prevent most problems with a few consistent habits.
- Do not empty the cup while the vacuum remains powered.
- Do not force a release button that feels stuck.
- Do not reinstall a washable component while it remains wet.
- Do not use sharp tools to scrape stubborn debris.
- Do not ignore the recommended fill level.
- Do not shake the dust cup aggressively against hard surfaces.
These precautions protect both the dust cup and the vacuum. They also reduce unnecessary cleanup after routine maintenance.
How to Keep Your Shark Navigator Performing Well
Emptying the dust cup represents only one part of regular vacuum care. You should also inspect filters and brush areas according to your model’s maintenance instructions.
Check the brush roll periodically for wrapped hair and string. Remove visible buildup carefully after switching off and unplugging the vacuum.
Additionally, inspect hoses and airflow pathways when suction seems weaker than normal. A blockage can reduce performance even when the dust cup looks reasonably empty.
Watch for These Warning Signs
- Noticeably weaker suction during normal cleaning
- Unusual sounds from the vacuum
- Persistent dust buildup around airflow areas
- A dust cup that fills unusually quickly
- Brush roll movement that seems restricted
These signs do not always indicate a serious problem. Nevertheless, they provide useful reasons to stop and inspect the vacuum before continuing.
How to Empty the Vacuum Without Creating a Dust Cloud
Fine dust can escape quickly when you open a full dust cup. Therefore, use a large trash bag or deep waste container whenever possible.
Hold the cup low inside the container before opening its bottom door. This approach keeps more loose dust contained as the debris falls.
For particularly dusty loads, empty the cup outdoors when practical. However, avoid windy conditions that could scatter debris around your cleaning area.
When Should You Empty the Shark Navigator During Cleaning?
You do not always need to wait until the cleaning session ends. Empty the cup earlier when visible debris approaches its recommended capacity.
Large homes and heavily carpeted rooms can fill the container faster than small spaces. Therefore, checking the cup between rooms can maintain consistent performance.
Pet owners may also need more frequent checks because hair can occupy significant space quickly. A partly filled cup can still contain a dense layer of fur.
Frequently Asked Questions
How do you empty a Shark Navigator Lift Away?
Remove the dust cup, hold it over a trash can, press the bottom release, and let debris fall out.
Can you wash the Shark Navigator dust cup?
Some models allow dust cup washing, but you should follow the cleaning instructions for your specific model.
Why will my Shark Navigator dust cup not open?
Check the release mechanism for correct operation and inspect the area for debris before applying additional pressure.
How often should I empty my Shark Navigator?
Empty the dust cup whenever debris approaches its recommended fill level or before heavy cleaning sessions.
Can I use the vacuum immediately after washing the dust cup?
No, allow every washable component to dry completely before reinstalling it and operating the vacuum.
Final Thoughts
Emptying a Shark Navigator Lift Away becomes simple once you understand the two release controls. Turn the vacuum off, remove the cup, open the bottom door, clear remaining debris, and reinstall it securely.
For better long term performance, make dust cup checks part of every major cleaning session. Also inspect filters, brush areas, and airflow paths whenever suction changes noticeably.
Use these steps whenever your dust cup needs attention, and keep the process gentle and consistent. A few minutes of regular maintenance can make everyday vacuuming cleaner, easier, and more reliable.
How to Dry Greens in the OXO Salad Spinner
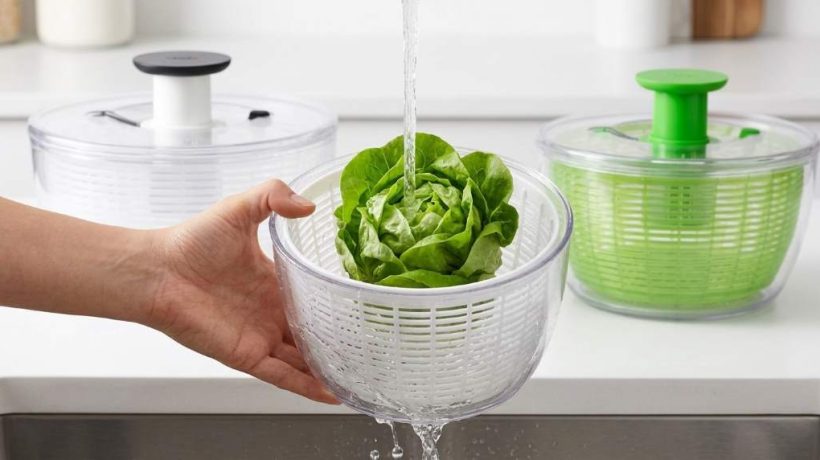
Drying greens in an OXO Salad Spinner takes only a few simple steps. Rinse the leaves, load the basket, pump the spinner, and drain the collected water. A quality Oxo good grips salad spinner makes this process fast and consistent. The FDA identified 40 foodborne outbreaks linked to leafy greens between 2009 and 2018. Millions of leafy green servings still get consumed safely every day. Therefore, proper washing, drying, handling, and storage all matter for fresh salads.
Why Drying Greens Matters
Wet greens can make salad dressing slide away instead of coating the leaves evenly. Excess water can also make stored lettuce lose quality faster. Therefore, thorough drying helps create crisp salads with better texture and flavor. A salad spinner removes surface water without crushing delicate leaves.
The OXO design makes drying especially simple because the basket also works as a colander. You can rinse the greens, drain them, and spin them inside one container. The non slip base keeps the bowl stable while you operate the pump.
What You Need Before Drying Greens
You only need a few basic items for this kitchen task. Start with fresh greens, clean running water, and your OXO Salad Spinner. Keep a clean storage container nearby if you plan to refrigerate the greens afterward.
- Fresh lettuce, spinach, kale, arugula, or herbs
- Clean running water
- OXO Salad Spinner
- Clean storage container or produce bag
- Clean refrigerator space
Before handling produce, wash your hands and clean the preparation area. Also keep greens away from raw meat, poultry, seafood, and eggs. These simple habits reduce the chance of cross contamination during preparation.
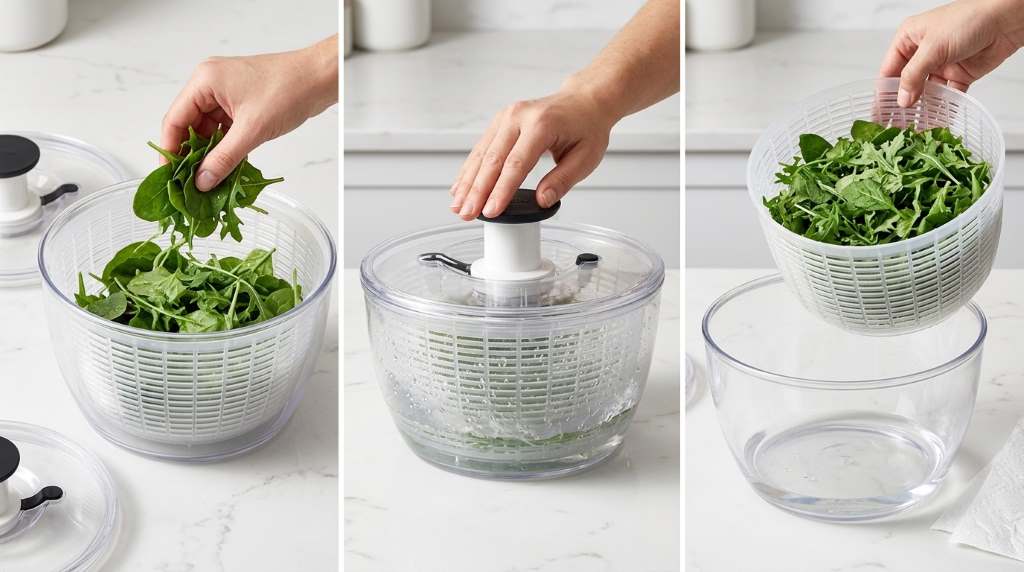
How to Dry Greens in the OXO Salad Spinner
Step 1: Inspect the Greens
First, inspect the greens and remove damaged, wilted, or heavily bruised leaves. Separate large leaves from smaller pieces when necessary. This step also makes washing and spinning more effective. Discard anything that looks spoiled or unusually slimy.
For whole lettuce, separate the leaves before washing them thoroughly. Smaller pieces expose more surface area to clean water. However, handle delicate leaves gently to avoid bruising them. Keep the preparation process clean from start to finish.
Step 2: Rinse the Greens Properly
Place the greens inside the OXO spinner basket before rinsing them. Run clean, cold tap water over the leaves until visible dirt disappears. Gently move the leaves around so water reaches folds and hidden surfaces. USDA guidance recommends washing fresh produce under cold running tap water before preparation.
Do not use soap, detergent, or household cleaning products on your greens. These substances can leave residues that you should not consume. Instead, rely on clean running water and proper handling. For packaged greens labeled ready to eat, follow the package instructions.
Step 3: Let Excess Water Drain
After rinsing, lift the basket slightly and allow excess water to drain. Shake the basket gently once or twice over the sink. This removes loose water before the main spinning cycle begins. It also prevents unnecessary water from collecting inside the spinner bowl.
Do not squeeze lettuce or press delicate leaves against the basket. Excess force can bruise tender greens and damage their texture. Instead, let gravity remove most of the loose water. Then place the basket securely inside the spinner bowl.
Step 4: Attach the Spinner Lid
Place the lid securely on the spinner bowl before starting the drying cycle. Make sure the basket sits properly and the lid rests evenly. A secure setup keeps the spinning basket contained during operation. OXO designed its pump system for simple one handed operation.
Set the spinner on a stable countertop before pressing the pump. The non slip base helps keep the bowl steady during spinning. Therefore, you should not need to hold the entire bowl firmly while pumping.
Step 5: Pump the Spinner
Press the soft pump knob several times to start spinning the basket. The rotating basket creates centrifugal force that pushes surface water outward. As the basket rotates, water leaves the leaves and collects inside the bowl. OXO developed its pump system specifically to remove water without excessive spinning speed.
Start with several controlled pumps instead of repeatedly pumping without checking. Stop briefly and inspect the greens for remaining moisture. If the leaves still feel wet, give them another short spinning cycle. This approach prevents unnecessary handling while producing evenly dried greens.
Step 6: Use the Brake
Press the built in brake button when you want to stop the basket. The brake stops the spinning basket quickly for easier unloading. This feature also helps you control the drying process without grabbing the moving basket.
Wait until the basket stops completely before opening the lid. Then lift the basket and inspect the greens. If water remains on the leaves, return the basket and spin them again. Usually, a short second cycle provides enough additional drying.
Step 7: Drain the Collected Water
Remove the basket from the spinner bowl after completing the drying cycle. Pour the collected water into the sink before returning the greens. Check the bowl for dirt or debris that washed away during rinsing. Clean water removal keeps the final preparation area tidy.
Do not place the dry greens back into dirty rinse water. Instead, transfer them directly to a clean bowl or storage container. This simple habit prevents unnecessary contact with discarded water. It also keeps your freshly dried greens cleaner.
How Dry Should Salad Greens Be?
Greens should feel dry on the surface without becoming limp or damaged. A few tiny moisture droplets usually do not create a problem. However, large amounts of water should remain inside the spinner bowl rather than on the leaves.
For salads, aim for leaves that feel crisp and lightly dry when touched. Dressing should cling to the surface instead of becoming diluted by excess water. Therefore, inspect the leaves before deciding whether another spinning cycle makes sense.
How Many Times Should You Spin Greens?
Most greens need one main spinning cycle followed by a quick inspection. Dense or very wet leaves may need a second short cycle. Delicate herbs may require gentler handling and less aggressive spinning.
Instead of following a fixed number of pumps, judge the result by the moisture left on the leaves. OXO specifically designed the spinner around the force needed to remove water without damaging greens. Therefore, excessive spinning does not automatically produce better results.
Best Greens to Dry in an OXO Spinner
The spinner works well with many common salad greens and fresh herbs. You can use it for romaine, iceberg lettuce, kale, arugula, spinach, parsley, and cilantro. OXO reports testing its spinner with several lettuce varieties and herbs during development.
- Romaine: Spin thoroughly because its leaves can hold water around the ribs.
- Spinach: Use gentle handling because young leaves can bruise easily.
- Arugula: Use a short cycle and check the leaves afterward.
- Kale: Remove excess water from the textured surfaces before storage.
- Herbs: Spin gently and avoid overcrowding the basket.
Large leaves generally benefit from separating before washing and drying. Meanwhile, small herbs need enough room to move freely inside the basket. Therefore, avoid packing the basket tightly when working with fragile produce.
How Much Greens Should You Put Inside?
Avoid filling the basket so tightly that leaves cannot move freely. Crowding limits water removal because some leaves remain trapped against one another. Instead, work in batches when you have a large amount of produce.
The standard OXO Salad Spinner has a bowl capacity of about 6.22 quarts. Its basket holds about 4.95 quarts according to OXO specifications. Therefore, the basket provides useful capacity, but effective drying still depends on proper loading.
Common Mistakes That Leave Greens Wet
Overloading the Basket
Overloading prevents the leaves from moving freely during the spinning cycle. Consequently, water can remain trapped between layers of greens. Split large quantities into smaller batches for more consistent drying.
Skipping the Initial Drain
Starting immediately after rinsing leaves can place too much water inside the bowl. Give the basket a gentle shake first. This small step makes the main spinning cycle more efficient.
Spinning Without Checking
Some people assume more spinning always produces a better result. However, OXO designed the spinner around an effective force rather than maximum speed. Check the leaves between cycles and stop once they reach the desired dryness.
Using a Dirty Spinner
A clean spinner supports better food handling and prevents old residue from contacting fresh greens. Wash the bowl, basket, and lid after use. OXO states that its current Salad Spinner has a lid that comes apart for cleaning.
How to Store Dried Greens
Transfer thoroughly dried greens into a clean storage container after spinning. Avoid packing them so tightly that air cannot move around the leaves. A little space helps protect delicate leaves from unnecessary crushing.
Keep prepared greens refrigerated promptly for better quality and food safety. FDA guidance recommends storing perishable fresh produce at 40 degrees Fahrenheit or below. Fresh cut leafy greens also require careful refrigeration because they can deteriorate faster.
If condensation appears inside the container, check the greens again for excess moisture. Remove visible moisture before returning the container to the refrigerator. However, avoid repeatedly opening the container because unnecessary handling can reduce freshness.
How to Clean the OXO Salad Spinner
Clean the spinner after every use, especially after washing dirty produce. Separate removable parts according to the product instructions before washing. OXO states that the lid comes apart for thorough cleaning and that the spinner is dishwasher safe.
Wash food contact surfaces with appropriate dishwashing methods after each use. Pay attention to the lid area because water and food particles can collect around moving components. Then allow parts to dry completely before storage.
OXO also designed the pump for compact storage by allowing the pump to lock into position. Pressing the pump down before storage keeps the lid more compact. Therefore, proper cleaning and storage can make the spinner easier to maintain.
Tips for Better Results Every Time
Use these simple habits whenever you prepare greens with your OXO spinner. They can improve drying consistency without adding much preparation time.
- Wash your hands before handling fresh produce.
- Separate damaged leaves before washing.
- Use clean running tap water for rinsing.
- Shake off loose water before spinning.
- Avoid tightly packing the basket.
- Use short spinning cycles and inspect the leaves.
- Drain collected water before transferring greens.
- Store dried greens in a clean refrigerator container.
- Clean the spinner after every use.
These steps create a simple routine that works for everyday salads and meal preparation. More importantly, they keep the drying process consistent from batch to batch. Once the routine becomes familiar, preparing crisp greens takes very little effort.
When You Should Not Wash Greens Again
Check packaged greens for labels such as washed, triple washed, or ready to eat. FDA guidance says these products generally do not need additional washing. Rewashing them can create cross contamination if your hands, sink, or equipment are not properly clean.
For unwashed produce, follow normal washing practices before eating or preparing it. Keep raw produce away from surfaces and utensils that contact raw meat. This separation supports safer food preparation throughout your kitchen.
Final Takeaway
Drying greens in the OXO Salad Spinner requires rinsing, draining, spinning, checking, and storing them properly. The pump system makes the process quick while the basket handles both rinsing and spinning. For the best texture, stop once most surface water has left the leaves.
Make the process part of your regular meal preparation routine for consistently crisp salads. Clean the spinner after each use and refrigerate prepared greens promptly. Try these steps with your next batch of lettuce, spinach, herbs, or kale for a cleaner, crisper result.
Frequently Asked Questions
Can I dry lettuce directly in an OXO Salad Spinner?
Yes, place rinsed lettuce inside the basket, secure the lid, and spin until most surface water disappears.
How long should I spin greens in an OXO Salad Spinner?
Spin for a short cycle first, then repeat briefly if the leaves still feel noticeably wet.
Should I wash greens before putting them in the spinner?
Yes, rinse unwashed fresh produce under clean running water before spinning it dry.
Can I dry herbs in an OXO Salad Spinner?
Yes, the OXO Salad Spinner can dry herbs such as parsley and cilantro with gentle spinning.
How should I store greens after spinning?
Place thoroughly dried greens in a clean container and refrigerate them at 40 degrees Fahrenheit or below.
How to Calibrate an Etekcity Kitchen Scale
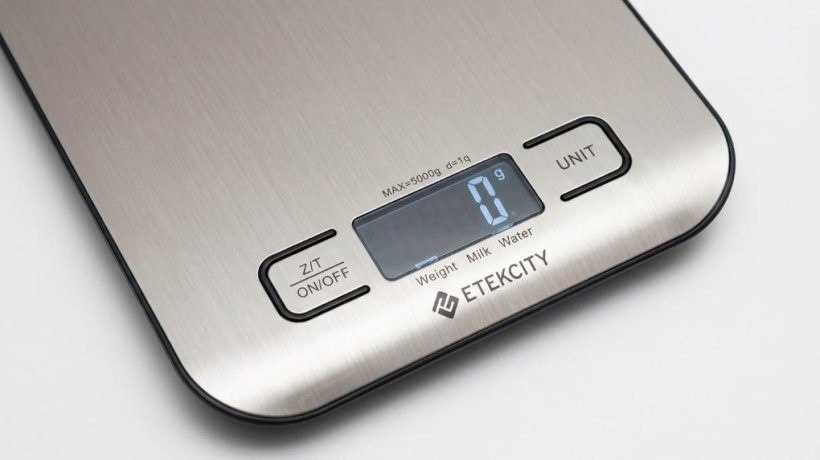
An Etekcity kitchen scale usually needs calibration only when readings become clearly inaccurate. First, check your model manual because calibration steps differ between Etekcity scales. Many current Etekcity kitchen scales measure up to 11 lb or 5,000 g. The EK6212 supports up to 13 lb or 6 kg. For a reliable reference, an Etekcity food kitchen scale should sit on a firm, level surface before testing.
Why Calibrating an Etekcity Kitchen Scale Matters
A kitchen scale converts pressure on its sensors into a displayed weight. Over time, movement, impacts, dirt, batteries, and uneven surfaces can affect readings. Therefore, calibration helps confirm whether the scale responds correctly to known weights.
However, calibration does not solve every accuracy problem. A damaged sensor, weak battery, unstable counter, or overloaded platform can still cause incorrect results.
Etekcity states that users should follow model specific instructions when manual calibration exists. The company also recommends a flat surface and stable weighing conditions for accurate results.
Check Your Etekcity Model Before Calibration
Start by finding the model number on your scale or its packaging. Common models include EK6212, EK3551, EK6015, EK7090, EK9000, and EK8060.
Next, visit Etekcity’s official manual library and search using that model number. Etekcity provides downloadable manuals for many current and older kitchen scales.
This step matters because different models can use different buttons and calibration procedures. Never force a calibration method from another model onto your scale.
Look for a Calibration Function
Check your manual for terms such as calibration, calibrating, CAL, reference weight, or known weight. If your manual does not provide calibration instructions, the model may not support manual calibration.
For example, the EK6212 manual includes a dedicated calibration procedure using two known weights. Other Etekcity kitchen scales may focus on correct placement, zeroing, and measurement checks instead.
What You Need Before Calibration
Prepare the scale, suitable reference weights, fresh batteries, and a clean working surface. Use certified calibration weights whenever possible because their stated mass provides a dependable reference.
Keep the scale away from fans, open windows, vibrating appliances, and strong airflow. Also remove crumbs, flour, grease, and other debris from the weighing platform.
- A clean Etekcity kitchen scale
- A hard and level counter
- Fresh batteries when needed
- Correct reference weights for your model
- The correct Etekcity user manual
Do not use random household objects as calibration weights unless your manual specifically allows them. A known reference mass produces a much more useful accuracy check.
How to Calibrate an Etekcity Kitchen Scale
The exact process depends on the model, so use these steps as a model based guide. The EK6212 provides one of the clearest documented Etekcity calibration procedures.
Step 1: Place the Scale Correctly
Place the scale on a hard, dry, flat, and stable surface. Keep the weighing platform clear before switching the scale on.
Also check the feet underneath the scale for dirt or debris. Uneven feet can prevent the platform from resting correctly.
Etekcity manuals warn that dust, vibration, wind, air currents, and electromagnetic interference can affect measurements.
Step 2: Check the Battery
Install fresh batteries if the display shows a low battery warning. Weak batteries can create inconsistent operation and unreliable readings.
Make sure every battery follows the polarity marks inside the compartment. Then close the battery cover securely before testing the scale.
Step 3: Turn the Scale On
Press the power button and wait until the display reaches zero. If the display does not show zero, reset the scale before weighing.
On some Etekcity models, the power button also performs the zero or tare function. Your manual should confirm the correct button operation.
Step 4: Enter Calibration Mode
For models with manual calibration, follow the exact button combination listed in the manual. Do not assume every Etekcity scale uses the same sequence.
For example, the EK6212 requires pressing and holding the UNIT and ON/OFF buttons together. Random digits then appear before the next calibration step.
Step 5: Apply the Required Reference Weight
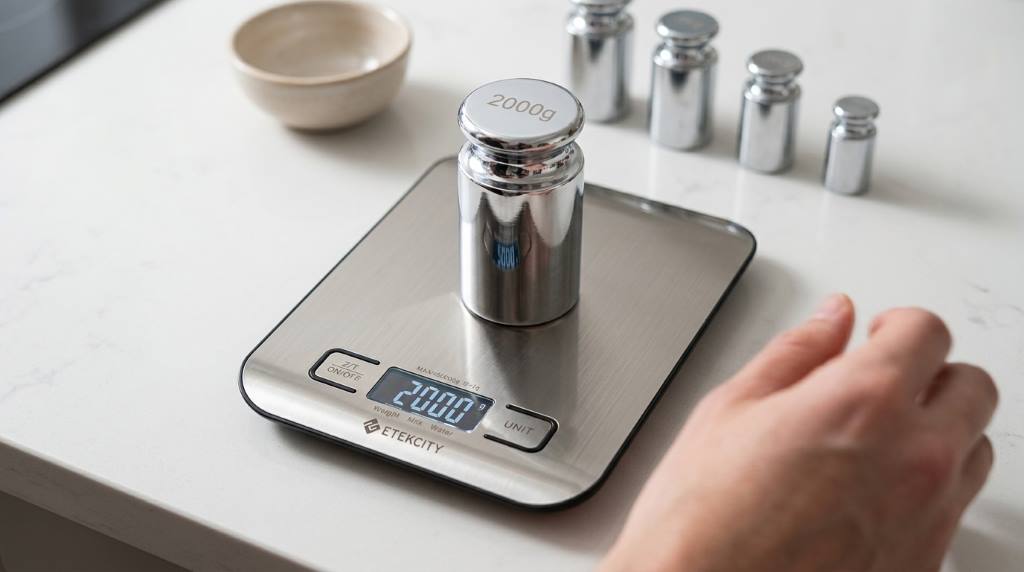
The scale will display the reference weight required for its calibration process. Place the correct weight carefully in the center of the platform.
The EK6212 first displays 2 kg and then requires a 2 kg reference weight. It later displays 5 kg and requires a 5 kg reference weight.
Keep your hands away from the platform while the scale measures. Wait until the display responds before adding or removing anything.
Step 6: Confirm the Calibration
Watch the display for the confirmation message specified by your model. On the EK6212, successful calibration produces the word PASS.
If calibration fails, repeat the procedure with the correct weights and stable placement. Check the manual again before attempting another method.
How to Check Accuracy After Calibration
Calibration should always end with an independent accuracy check. Remove the calibration weight, reset the scale, and wait for a stable zero reading.
Then place a known reference weight on the platform. Record the displayed measurement and compare it with the reference weight.
Repeat the test several times to identify inconsistent readings. A scale that gives different results each time may have another problem.
Use Multiple Reference Points
Testing more than one weight gives you a better picture of scale performance. Try a lighter weight and another weight closer to your normal cooking range.
For example, you might test 100 g, 500 g, and 1,000 g when your model supports those measurements. Keep every weight centered and allow the reading to stabilize.
Do not expect every model to display decimal gram readings. Some Etekcity models use 1 g increments, while other models offer different resolutions.
What to Do If Your Etekcity Scale Reads Incorrectly
Calibration may not be necessary when a scale simply needs proper zeroing. Place the empty scale on a stable surface and wait for zero before measuring.
Next, inspect the platform and feet for debris. Even small particles can interfere with stable placement and produce confusing readings.
Check for Overloading
Every kitchen scale has a maximum weight capacity. Exceeding that limit can trigger an error and may damage the scale.
Many Etekcity models support up to 11 lb or 5,000 g. However, some models support different capacities, so check your specific specifications.
Replace Weak Batteries
A low battery indicator deserves attention before you blame calibration. Replace the batteries and repeat your accuracy test afterward.
Use matching batteries and install them according to the polarity markings. Then allow the scale to reach zero before testing.
Inspect the Weighing Surface
Keep the platform clean and dry during normal use. Etekcity manuals advise against immersing kitchen scales in water or corrosive liquids.
Instead, follow the cleaning instructions for your exact model. A soft cloth can remove surface residue without exposing sensitive electronics to excess moisture.
Common Calibration Mistakes to Avoid
Many accuracy problems come from using the wrong procedure rather than a defective scale. Fortunately, most mistakes are easy to prevent.
- Using calibration instructions for another model
- Placing the scale on an uneven surface
- Using an incorrect reference weight
- Touching the platform during calibration
- Ignoring low battery warnings
- Calibrating when the scale only needs zeroing
- Exceeding the scale’s maximum capacity
- Testing beside strong airflow or vibration
Most importantly, never guess the required calibration weight. Your model manual should provide the correct sequence and reference values.
When You Should Calibrate Your Etekcity Scale
Etekcity does not recommend calibrating every kitchen scale after every use. The EK6212 manual specifically says calibration becomes necessary when readings appear obviously incorrect.
Consider checking accuracy after moving the scale, dropping it, replacing batteries, or noticing repeated measurement errors. Regular accuracy checks can also help detect problems before they affect recipes.
For everyday cooking, focus first on correct placement, zeroing, stable readings, and proper cleaning. These habits often matter more than repeated calibration.
How to Keep Your Scale Accurate
Good daily habits can reduce the need for calibration. Always place the scale on the same type of hard, level surface whenever possible.
Keep heavy objects away from the platform when the scale sits unused. Store the scale in a dry location where impacts and pressure cannot damage the sensors.
Also avoid weighing ingredients near open windows or running fans. Air movement can affect lightweight ingredients and make small readings less stable.
When measuring several ingredients, use the tare function between ingredients. This approach keeps the container weight out of your ingredient measurements and simplifies multi ingredient recipes.
Calibration Versus Zeroing: Know the Difference
Calibration adjusts or verifies the scale against a known reference mass. Zeroing simply tells the scale that the current unloaded platform should read zero.
Therefore, pressing the tare button does not automatically calibrate the scale. It only resets the displayed weight for the current weighing session.
If your scale reads zero correctly but measures a known 500 g weight incorrectly, investigate calibration. If it fails to reach zero, first check placement, debris, and the reset function.
When Calibration Does Not Fix the Problem
A successful calibration should improve confidence in the scale’s measurements. However, persistent errors can indicate damaged sensors or internal hardware problems.
Stop using the scale for precision work if readings remain unstable after proper testing. Contact Etekcity support or consult the official manual for model specific troubleshooting.
Etekcity maintains an official library containing manuals for many kitchen scale models. That resource provides the safest starting point for model specific instructions.
Final Tips for Reliable Kitchen Measurements
Accurate weighing starts with proper setup rather than calibration alone. Keep the scale level, clean, stable, and within its rated capacity.
Then verify suspicious readings with a known reference weight. If your model supports calibration, follow its exact manual procedure instead of using generic instructions.
Finally, save your model manual for future reference. That small step prevents incorrect button sequences and helps protect the scale from unnecessary adjustments.
Conclusion
Calibrating an Etekcity kitchen scale can restore confidence when readings become clearly inaccurate. However, the correct procedure depends on your exact model and its supported calibration function.
Start by checking the model number, preparing a stable surface, and finding the official manual. Then use the specified reference weights and confirm the result with additional accuracy tests.
For the best results, make accurate placement and regular testing part of your kitchen routine. Check your Etekcity model manual before calibration, and replace the scale if proper troubleshooting cannot restore reliable readings.
Frequently Asked Questions
How often should I calibrate an Etekcity kitchen scale?
Calibrate only when your model supports it and readings become obviously inaccurate or inconsistent.
Can I calibrate every Etekcity kitchen scale?
No, calibration functions vary by model, so check the specific Etekcity manual before attempting calibration.
What weight should I use for calibration?
Use the exact reference weight specified by your model manual, such as 2 kg and 5 kg for the EK6212.
Why does my Etekcity scale show different readings?
Uneven placement, debris, airflow, vibration, weak batteries, and sensor problems can cause inconsistent measurements.
Does the tare button calibrate the scale?
No, the tare function resets the current displayed weight but does not perform a full calibration.
Why the Instant Pot Duo is a Kitchen Must
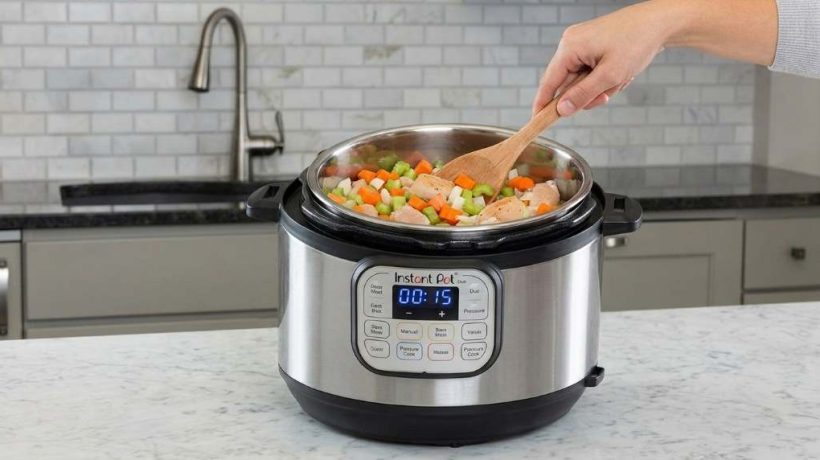
The Instant Pot Duo deserves a place in busy kitchens because it combines several cooking functions in one appliance. The Instant pot duo multicooker offers 7 cooking functions and can cook some meals up to 70% faster. It also provides 13 one touch programs on current Duo models, making everyday cooking simpler. With pressure cooking, slow cooking, steaming, sautéing, rice cooking, yogurt making, and warming, one countertop appliance handles many tasks.
What Makes the Instant Pot Duo Different
The Instant Pot Duo combines several familiar kitchen appliances into one compact cooking system. Instead of switching between a pressure cooker, rice cooker, slow cooker, and steamer, you can use one inner pot. This approach reduces countertop clutter and simplifies meal preparation.
Moreover, the Duo uses controlled pressure and temperature to cook food efficiently. Its built in controls manage cooking time, heat, and pressure during selected programs. As a result, beginners can prepare many meals without constantly watching the stove.
The appliance also supports flexible cooking styles for different schedules. You can pressure cook dinner quickly or use slow cooking when you have more time. Therefore, the Duo fits both rushed weeknight meals and relaxed weekend cooking.
Seven Cooking Functions in One Appliance
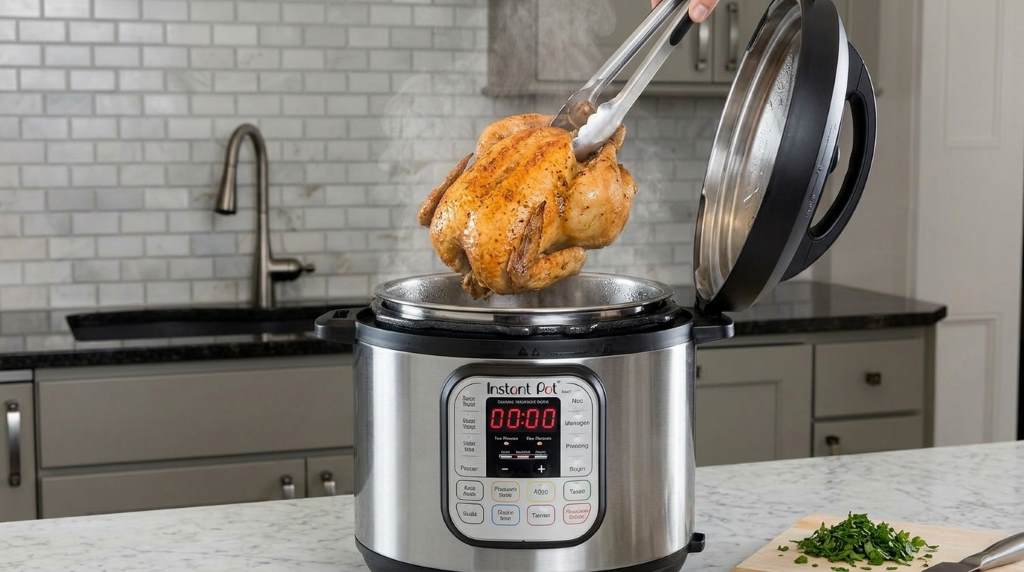
The main attraction comes from the Duo’s seven core cooking functions. Each function handles a different kitchen task while using the same cooking vessel. Consequently, you can prepare complete meals while using fewer dishes and appliances.
- Pressure cooking: Speeds up many meat, bean, soup, and grain recipes.
- Slow cooking: Simmer stews and other meals gradually for convenient meal planning.
- Rice cooking: Helps prepare rice without requiring a separate rice cooker.
- Steaming: Steams vegetables, seafood, eggs, and other suitable foods.
- Sautéing: Browns ingredients directly inside the stainless steel cooking pot.
- Yogurt making: Supports homemade yogurt preparation on compatible Duo models.
- Warming: Keeps finished food warm after the cooking cycle ends.
These functions matter because they cover many common cooking needs. You can brown onions, pressure cook ingredients, and finish a meal in the same pot. That one pot workflow can make cleanup much easier after dinner.
Faster Cooking for Busy Weeknights
Time often determines whether people cook at home or order prepared food. The Duo helps shorten cooking times by using pressure to raise the cooking environment above normal boiling conditions.
For example, pressure cooking can make beans, tough meat cuts, soups, and stews much faster. Instant Pot states that certain meals can cook up to 70% faster than traditional methods. However, always consider preparation time, pressure buildup, and pressure release when planning dinner.
Therefore, the biggest benefit does not come from every recipe finishing instantly. Instead, the appliance reduces active cooking work while giving you predictable programmed cycles. You can prepare ingredients, start the cooker, and focus on another household task.
One Pot Cooking Means Less Cleanup
Traditional meals often require several pans, pots, utensils, and cooking surfaces. The Instant Pot Duo can reduce that workload by handling multiple stages inside its removable cooking pot.
For instance, you can sauté vegetables before adding broth, meat, beans, or grains. Then, you can switch to pressure cooking without transferring everything into another pan. As a result, fewer cooking vessels usually mean less washing after the meal.
The stainless steel inner pot also supports direct sautéing for many recipes. After cooking, remove the pot and clean it according to the manufacturer’s care instructions. This simple workflow makes the appliance especially useful for busy households.
Useful Programs for Everyday Meals
The Duo provides one touch programs that simplify common cooking tasks. Current Duo models offer programs covering foods such as soup, meat, beans, poultry, rice, porridge, and steam. Some versions also include dedicated settings for yogurt, multigrain cooking, and slow cooking.
These presets can help new users understand how the appliance works. However, experienced cooks can also adjust cooking settings when recipes require different results. Therefore, the programs offer convenience without limiting more advanced cooking habits.
Meals You Can Make Regularly
The Duo works well for many practical home cooked meals. You can use it for chili, chicken, pulled pork, rice, lentils, soups, stews, oatmeal, and steamed vegetables.
- Chicken and rice for simple family dinners
- Bean chili for affordable batch cooking
- Vegetable soup for quick weekday lunches
- Steel cut oats for filling breakfasts
- Steamed vegetables for easy side dishes
- Slow cooked beef for weekend meals
- Homemade yogurt for breakfast and snacks
Additionally, one pot recipes make meal preparation easier when you cook several portions. Extra servings can provide convenient lunches for the following day. This approach can also reduce the need to cook separate meals every day.
Why It Helps With Meal Prep
Meal preparation becomes easier when one appliance can handle large batches consistently. A suitable Duo capacity lets you cook several portions during one session. You can then divide the finished food into containers for later meals.
For example, prepare a batch of beans on Sunday and use them throughout the week. You can also cook chicken, rice, soup, or chili for several meals. Therefore, the Duo can support organized meal planning without requiring an entire afternoon at the stove.
Batch cooking also makes ingredient preparation more efficient. Instead of cooking one small portion repeatedly, prepare several servings at once. That strategy works especially well for households with predictable lunch or dinner routines.
It Can Help Reduce Kitchen Clutter
Small kitchens benefit from appliances that perform several jobs. The Duo can replace the need for separate equipment for several common cooking tasks. Consequently, you can reserve cabinet and counter space for tools you actually use every day.
This benefit becomes more noticeable in apartments, smaller homes, and compact kitchens. A single multicooker can handle cooking jobs that normally require multiple appliances. However, you should still consider its footprint before placing it permanently on your counter.
Keep sufficient space around the appliance and follow the manufacturer’s placement instructions. Steam needs a safe path away from cabinets, walls, and people. Proper placement makes everyday operation more comfortable and safer.
Safety Features Make Pressure Cooking Easier
Pressure cooking requires more care than ordinary stovetop cooking. The Duo includes multiple safety systems designed to control pressure and prevent unsafe operation.
Current Duo models include features such as overheat protection and a safety locking lid. These systems help manage pressure during cooking and prevent the lid from opening under pressure. Still, users should always follow the manufacturer’s instructions for filling, cooking, and releasing pressure.
Never force the lid open while pressure remains inside the cooker. Also, keep your hands and face away from escaping steam during pressure release. The United States Department of Agriculture recommends careful food handling and prompt refrigeration of leftovers.
Remember that a multicooker should not replace approved pressure canning equipment. Use only tested canning methods and equipment when preserving low acid foods. This distinction protects both food quality and household safety.
Cleaning Becomes Easier After Cooking
Cleanup often determines how enjoyable an appliance feels after regular use. The Duo keeps most cooking activity inside one removable inner pot. That design can make cleanup faster than managing several separate pans.
Clean the cooking pot, lid components, sealing ring, and other removable parts according to the manufacturer’s instructions. Also, check the sealing components regularly for food residue or damage. Keeping these parts clean helps maintain proper operation.
Furthermore, wipe the exterior after cooking to prevent grease and food residue from building up. Never immerse the electrical base in water. A consistent cleaning routine keeps the appliance ready for the next meal.
Who Should Use the Instant Pot Duo
The Duo suits people who want practical cooking without complicated equipment. It can help beginners learn pressure cooking while giving experienced cooks useful control over everyday recipes.
- Busy families: Prepare filling meals with less active cooking time.
- Meal preppers: Cook larger batches for several meals.
- Small households: Use one appliance for multiple cooking tasks.
- Beginner cooks: Start with guided programs and simple recipes.
- Experienced cooks: Adjust settings for customized recipes.
- Small kitchen owners: Reduce the need for several countertop appliances.
However, the Duo may not suit everyone. If you already own several specialized appliances and rarely cook at home, its versatility may provide less value. Similarly, people who prefer traditional stovetop cooking may not need its automated programs.
How to Get Better Results From Your Duo
Start with simple recipes before attempting complicated pressure cooking techniques. Learn how the sealing ring, pressure release system, cooking programs, and timing controls work.
Use the Right Amount of Liquid
Pressure cooking generally requires sufficient liquid to create steam and build pressure. Follow tested recipes and manufacturer guidance instead of guessing liquid amounts. Too little liquid can interfere with proper pressure cooking.
Avoid Overfilling the Pot
Never fill the cooking pot beyond the marked maximum levels. Foods that expand, foam, or produce significant starch need extra attention. Following the fill guidelines helps maintain safe and consistent cooking conditions.
Account for Pressure Release Time
Recipe cooking time does not always equal total meal preparation time. The cooker needs time to build pressure before the programmed cooking cycle begins. Afterward, pressure release can also take additional time.
Therefore, include these stages when planning dinner. This simple adjustment gives you a more realistic estimate of when your food will reach the table.
What Makes It a Long Term Kitchen Tool
A useful appliance should solve repeated problems rather than serve one occasional purpose. The Instant Pot Duo earns attention because it handles many everyday cooking tasks in one machine.
Its value also comes from repeatable cooking routines. Once you learn a few reliable recipes, you can adapt them for different ingredients and serving sizes. Over time, that familiarity can make meal preparation feel more predictable.
Moreover, the Duo supports both quick meals and slow cooking. That flexibility matters because cooking schedules change from one day to another. One appliance can therefore support different routines without requiring a separate machine for each method.
Is the Instant Pot Duo Worth Having?
Yes, the Instant Pot Duo is a strong kitchen choice for people who value versatility, convenience, and one pot cooking. Its seven core functions cover many common meals while its programmed controls simplify daily preparation.
The strongest reason to own one involves how often you will use its different functions. If you regularly cook rice, beans, soups, meat, vegetables, or slow cooked meals, the Duo can earn its counter space quickly.
Ultimately, the Instant Pot Duo works best when you build it into your normal cooking routine. Start with a few dependable recipes, learn the controls, and expand your menu gradually. That approach helps you get practical value instead of treating the appliance as another unused kitchen gadget.
Conclusion
The Instant Pot Duo is a kitchen must for anyone who wants several cooking functions without several appliances. It can simplify meal preparation, reduce cleanup, support batch cooking, and handle both fast and slow recipes.
Start by using the Duo for one or two meals you already cook regularly. Then explore its steaming, sautéing, rice, slow cooking, and other functions as your confidence grows. With consistent use, this versatile multicooker can become one of the most useful tools on your kitchen counter.
Frequently Asked Questions
Is the Instant Pot Duo good for beginners?
Yes, its preset programs and automated cooking controls make it approachable for people learning pressure cooking.
Can the Instant Pot Duo replace a slow cooker?
Yes, compatible Duo models include a slow cooking function that handles many traditional slow cooker recipes.
Can the Instant Pot Duo cook rice?
Yes, the Duo includes a rice cooking function designed for convenient rice preparation.
Does the Instant Pot Duo make yogurt?
Yes, compatible Duo models include a yogurt function for homemade yogurt preparation.
Is the Instant Pot Duo suitable for meal prep?
Yes, its cooking capacity and batch friendly functions make it useful for preparing several servings at once.
How to Clean a Bella 2 Slice Slim Toaster
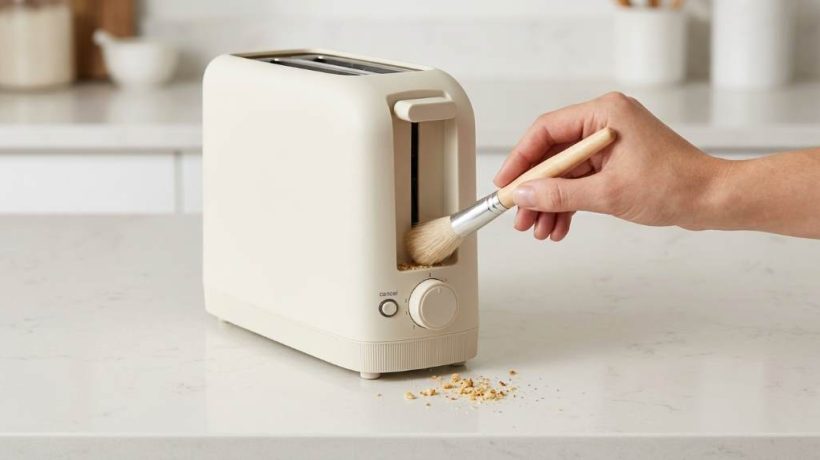
To clean a Bella 2 slice slim toaster, unplug it, let it cool, empty the crumb tray, and wipe the exterior. Never immerse the toaster, cord, or plug in water. The toaster uses a 900 watt system and measures about 3.58 inches wide, making it easy to maintain.
Regular cleaning helps prevent burnt crumbs, unwanted odors, and messy countertops. Therefore, a simple routine can keep your Bella 2 slice slim toaster cleaner and ready for daily use.
Why Regular Toaster Cleaning Matters
Toasters collect crumbs every time bread, bagels, or pastries pass through the heating area. Over time, those crumbs can burn and create smoke or unpleasant smells.
Fortunately, the Bella toaster includes a removable crumb catcher for easier routine maintenance. The manufacturer also recommends an easy wipe exterior for straightforward cleanup.
Furthermore, regular cleaning makes it easier to notice stuck food or other problems early. A clean toaster also keeps loose crumbs from spreading across your kitchen counter.
What You Need Before Cleaning
You only need a few basic household items for routine Bella toaster cleaning. Avoid harsh tools because they can damage the toaster’s exterior or internal components.
- Soft, damp microfiber cloth
- Clean, dry cloth
- Small bowl for crumbs
- Mild dish soap for the removable tray
- Soft brush for loose crumbs
Most importantly, never use water directly inside the toaster. Also, avoid metal tools, abrasive pads, and aggressive cleaning chemicals.
How to Clean a Bella 2 Slice Slim Toaster
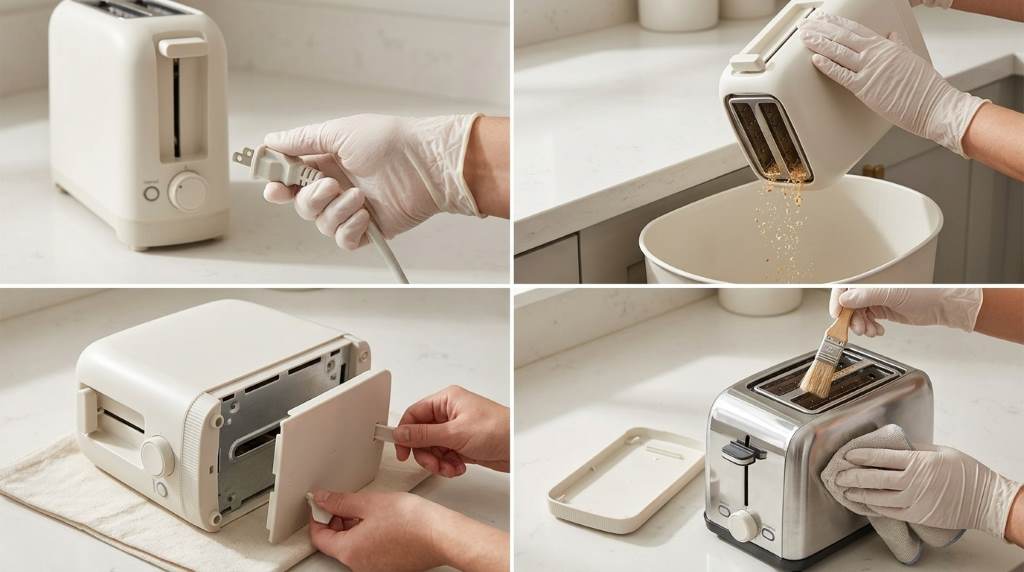
1. Unplug the Toaster Completely
Start by switching off the toaster and removing its plug from the electrical outlet. Never begin cleaning while the toaster remains connected to household power.
Next, move the unplugged toaster to a stable, clear countertop area. Allow the appliance to cool completely before touching the crumb tray or surrounding surfaces.
2. Remove the Crumb Tray
Locate the removable crumb tray underneath the toaster. Pull the tray out carefully and keep it level while removing it.
Then, empty the collected crumbs into a trash can or suitable container. Avoid shaking the entire toaster aggressively because loose crumbs can enter unwanted areas.
The removable tray provides the easiest way to handle routine crumb buildup. Therefore, check it regularly if you use the toaster every day.
3. Wash and Dry the Crumb Tray
Wipe the crumb tray with a damp cloth to remove remaining food particles. For greasy residue, use a small amount of mild dish soap on the cloth.
After cleaning, rinse the tray only if its construction and care instructions allow it. More importantly, dry the tray completely before placing it back into the toaster.
Never reinstall a wet tray because moisture can create an unnecessary electrical safety risk. The product instructions specifically call for thorough drying before reinsertion.
4. Remove Loose Crumbs Safely
After removing the tray, gently tilt the toaster over a trash can or sink. Use controlled movements rather than forceful shaking to release loose crumbs.
You can also use a soft brush to loosen visible crumbs around accessible areas. However, never push the brush deeply into the toaster slots.
Do not insert knives, forks, spoons, or other metal objects into the slots. These tools can contact electrical components or heating elements and create serious hazards.
5. Clean the Exterior
Dampen a soft microfiber cloth with clean water and wring out excess moisture. Then, gently wipe the toaster’s exterior from top to bottom.
Pay extra attention to fingerprints, food residue, and areas around the controls. Use gentle strokes instead of scrubbing aggressively across the surface.
BELLA recommends a soft, damp cloth for exterior cleaning. The instructions also warn against abrasive cleaners and metal scouring pads.
6. Clean Around the Controls
The shade control and function buttons can collect crumbs and fingerprints during normal use. Therefore, wipe these areas carefully with a lightly damp cloth.
Keep moisture away from openings, controls, and electrical connections. Never spray cleaner directly onto the toaster because liquid can enter the appliance.
Finally, use a dry cloth to remove remaining moisture from the control area. Let every surface dry completely before reconnecting power.
7. Check the Toasting Slot
Inspect the long slot after cleaning the removable tray and exterior. Look for visible crumbs, burnt food, or objects that should not remain inside.
The Bella 2 Slice Slim Toaster uses one long slot designed for two slices side by side. Its slot also accommodates larger breads, including thick artisan slices and Texas style toast.
Because larger foods can shed more crumbs, inspect the slot more often when you toast thick bread. Never force oversized food into the opening.
How to Handle Burnt Crumbs and Bad Odors
Burnt crumbs often cause a noticeable smell during repeated toasting cycles. First, unplug the toaster and let it cool completely.
Next, remove and clean the crumb tray thoroughly. Then, gently remove accessible loose crumbs without inserting objects into the heating area.
If the smell continues after cleaning, stop using the toaster until you identify the cause. Persistent burning odors can indicate trapped food, an electrical problem, or another fault.
How Often Should You Clean the Bella Toaster?
Empty the crumb tray at least once a week when you use the toaster regularly. Daily users may benefit from checking the tray every few days.
Perform a deeper exterior cleaning whenever you notice fingerprints, grease, or food residue. Also, inspect the slot whenever toast produces unusual smoke or smells.
Your cleaning schedule should match your usage rather than follow one rigid timetable. Heavy users generally need more frequent crumb removal than occasional users.
Best Cleaning Routine for Frequent Users
A short routine after regular use can prevent larger cleaning jobs later. Once the toaster cools, check the tray and remove visible crumbs.
- Check the crumb tray every few uses.
- Empty accumulated crumbs before they become heavy.
- Wipe exterior marks when they appear.
- Inspect the slot after messy foods.
- Perform a thorough cleaning each week.
This approach takes very little time and keeps maintenance manageable. Additionally, regular checks can help you notice unusual smoke or food buildup sooner.
Cleaning Mistakes to Avoid
Never Put the Toaster in Water
Never immerse the toaster body, electrical cord, or plug in water. Water can reach electrical components and create a dangerous shock or fire risk.
Do Not Use Abrasive Cleaners
Abrasive cleaners and metal scouring pads can scratch the toaster’s exterior. Instead, use a soft damp cloth for routine surface cleaning.
Do Not Clean While Plugged In
Always disconnect the toaster before cleaning any component. Allowing the appliance to cool first also reduces the risk of burns.
Do Not Use Metal Objects Inside
Never use metal utensils to remove stuck bread or crumbs from the slot. If food becomes stuck, unplug the toaster and allow it to cool before addressing the problem.
Do Not Reinsert a Wet Tray
Moisture should never remain on the crumb tray before you reinstall it. Dry the tray completely with a clean towel before returning it to the appliance.
How to Clean a Stuck Bread Area Safely
Sometimes bread can become lodged inside a toaster during normal operation. If that happens, immediately unplug the toaster and wait until it cools completely.
Never pull aggressively or use sharp objects to remove the bread. Instead, follow the manufacturer’s safe handling instructions and avoid touching internal heating components.
If you cannot remove the obstruction safely, stop using the appliance. Contact the manufacturer for appropriate support instead of risking damage or injury.
How to Keep the Toaster Cleaner Longer
Use bread that fits comfortably inside the long slot without forcing it downward. Foods that shed many crumbs require more frequent tray cleaning.
Also, avoid placing heavily buttered or coated foods inside a standard toaster unless the manufacturer specifically permits them. Excess residue can create smoke and make cleanup harder.
Keep the toaster on a clean, dry countertop between uses. Additionally, store the cord neatly to reduce countertop clutter around the appliance.
When Cleaning Does Not Solve the Problem
Cleaning can remove crumbs, residue, and ordinary food buildup. However, cleaning cannot repair damaged electrical components or mechanical failures.
Stop using the toaster if you notice repeated sparks, damaged wiring, unusual electrical smells, or persistent burning. A qualified service professional or manufacturer support team should handle suspected electrical faults.
Likewise, do not continue operating the appliance simply because it still produces toast. Electrical problems can become more serious when users ignore warning signs.
Quick Bella Toaster Cleaning Checklist
Use this checklist whenever you need a quick maintenance routine. It keeps the process simple without requiring specialized cleaning products.
- Unplug the toaster.
- Let the toaster cool completely.
- Remove the crumb tray.
- Empty loose crumbs.
- Clean and dry the tray.
- Gently remove accessible crumbs.
- Wipe the exterior with a soft damp cloth.
- Dry all cleaned surfaces.
- Reinstall the completely dry crumb tray.
- Store the toaster in a clean, dry location.
Final Thoughts
Learning how to clean a Bella 2 Slice Slim Toaster takes only a few simple steps. Unplug the appliance, cool it completely, clean the removable tray, remove loose crumbs, and wipe the exterior.
Most importantly, never immerse the toaster or use metal tools inside its slot. Follow this routine regularly to keep your toaster cleaner and reduce avoidable food buildup.
For the best results, make crumb tray cleaning part of your normal kitchen routine. A few minutes of maintenance can keep your Bella toaster ready for dependable everyday use.
Frequently Asked Questions
Can I wash the Bella toaster with water?
No, never immerse the toaster, cord, or plug in water or another liquid.
How do I clean the Bella toaster crumb tray?
Remove the tray, empty the crumbs, wipe it clean, and dry it completely before reinserting it.
Can I use an abrasive cleaner on the toaster?
No, use a soft damp cloth because abrasive cleaners and metal pads can damage the exterior.
How often should I empty the crumb tray?
Check the tray regularly and empty it whenever crumbs accumulate noticeably.
What should I do if bread gets stuck?
Unplug the toaster, let it cool, and avoid using metal utensils or force to remove the bread.
Best Ember Temperature Control Smart Mug in Washington (WA): What Makes the 14 Oz Design Stand Out?
Key Takeaways
- The 14 oz design provides the perfect size for Washington’s coffee culture, holding a standard cup with room for cream or sweetener
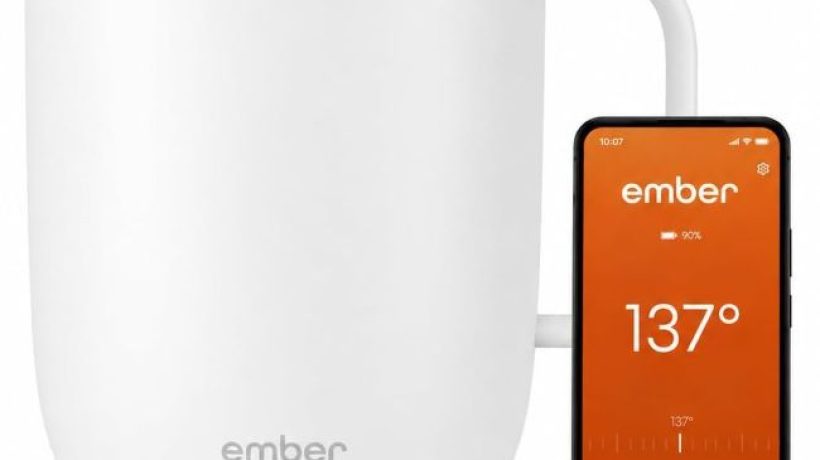
- App-controlled temperature precision lets you maintain your ideal drinking temperature between 120°F and 145°F with smartphone convenience
- 80-minute battery life keeps your beverage hot during commutes, outdoor activities, or long work sessions across the Evergreen State
- Improved design offers better ergonomics and durability for Washington residents on the go or working remotely
- Sleek white color complements Washington’s modern aesthetic while maintaining professional appearance in home offices
Washington state residents understand the value of a perfectly heated beverage, whether you’re starting your day in Seattle, working remotely in Spokane, or enjoying the outdoors in the Cascades. The Ember Temperature Control Smart Mug delivers with its 14 oz design, app-controlled precision, and 80-minute battery life. This isn’t just a smart mug—it’s a revolution in beverage temperature control that maintains your drink at the perfect temperature for nearly an hour and a half. For Evergreen State residents who appreciate both technology and a great cup of coffee, the Ember Temperature Control Smart Mug offers genuine innovation and convenience.
The Ember stands out by addressing the specific needs of Washington’s coffee lovers. Its 14 oz design provides the perfect size for a standard cup of coffee with room for additions, while the app-controlled feature allows for precise temperature adjustment. The 80-minute battery life also ensures your beverage stays hot during commutes or outdoor activities, and the improved design offers better ergonomics and durability. Whether you’re a tech professional in Bellevue, a student in Pullman, or an outdoor enthusiast in the San Juan Islands, the Ember Temperature Control Smart Mug checks all the boxes for maintaining the perfect drinking temperature.
Product at a Glance
Ember Temperature Control Smart Mug
| Feature | Ember Temperature Control Smart Mug |
|---|---|
| Capacity | 14 oz |
| Control | App-controlled |
| Type | Heated coffee mug |
| Battery Life | 80 minutes |
| Design | Improved |
| Color | White |
Detailed Review
Why This Product Stands Out
The Ember earns its reputation by solving the specific beverage temperature challenges that Washington residents face. Most smart mugs either lack the precise temperature control needed for different beverages or don’t provide the battery life required for on-the-go use, but the Ember delivers both with its app-controlled feature and 80-minute battery life. This combination ensures you have the perfect drinking temperature for your beverage while maintaining portability for Washington’s active lifestyle.
Washington’s diverse lifestyle demands versatile beverage solutions. The Ember’s 14 oz design provides the perfect size for a standard cup of coffee, while the app-controlled feature allows for precise temperature adjustment between 120°F and 145°F. The 80-minute battery life also ensures your beverage stays hot during commutes, outdoor activities, or long work sessions. The improved design also offers better ergonomics and durability, making the Ember Temperature Control Smart Mug a practical choice for Evergreen State residents.

Key Specifications
| Specification | Details |
|---|---|
| Capacity | 14 oz |
| Control | App-controlled |
| Type | Heated coffee mug |
| Battery Life | 80 minutes |
| Design | Improved |
| Color | White |
| Temperature Range | 120°F – 145°F |
| Material | Ceramic with smart heating base |
| Connectivity | Bluetooth |
Design & Build Quality
The Ember features a design optimized for both performance and style. The 14 oz capacity provides the perfect size for a standard cup of coffee with room for cream or sweetener, while the improved design offers better ergonomics and durability. The mug’s shape is also designed to provide a comfortable grip, ensuring you can enjoy your beverage with ease.
The build quality reflects Ember’s commitment to innovation and performance. The materials are chosen for their ability to withstand the rigors of daily use, from the cool, rainy days of Western Washington to the varied climates of Eastern Washington. The ceramic construction also ensures the mug maintains its performance and appearance over time, even with frequent use.
Materials & Construction
The Ember uses high-quality materials designed to provide both durability and performance. The mug is typically made from ceramic that can handle the rigors of daily use while maintaining its appearance. The 14 oz design is also designed to be durable and long-lasting, ensuring the mug maintains its performance over time.
The app-controlled feature is another standout feature. This feature allows you to set and maintain your ideal drinking temperature with your smartphone, providing precise temperature control that traditional mugs can’t match. The app is also designed to be user-friendly and reliable, providing consistent performance over time.
Performance
In Washington’s varied environments, the Ember delivers consistent performance. In the tech offices of Seattle, the app-controlled feature allows for precise temperature adjustment, while the 80-minute battery life ensures your beverage stays hot during long work sessions. The 14 oz design also provides the perfect size for a standard cup of coffee, making the Ember Temperature Control Smart Mug a practical choice for Washington’s coffee culture.
On the trails of the Cascades, the Ember’s performance shines. The 80-minute battery life ensures your beverage stays hot during outdoor activities, while the improved design offers better ergonomics and durability. The app-controlled feature also allows for precise temperature adjustment, making the Ember a practical choice for Washington’s outdoor enthusiasts.
For daily use in Spokane homes, the Ember’s versatility is put to the test. The mug’s precise temperature control maintains your beverage at the perfect drinking temperature, while the 14 oz design provides the ideal size for a standard cup of coffee. The improved design also offers better ergonomics, making the Ember Temperature Control Smart Mug a practical choice for Washington residents.
Comfort & Usability
The Ember scores high marks for comfort during extended use. The 14 oz design provides the perfect size for a standard cup of coffee, ensuring you have enough beverage without being too heavy. The improved design also offers better ergonomics, making the mug comfortable to hold and use for extended periods.
The app-controlled feature adds to the Ember’s usability by providing precise temperature control. This feature ensures you can set and maintain your ideal drinking temperature with your smartphone, making the mug a practical choice for Washington residents who appreciate both technology and a great cup of coffee. The app is also designed to be user-friendly, providing consistent performance with minimal effort.
The 80-minute battery life is another usability advantage. This feature ensures your beverage stays hot for extended periods, reducing the need for constant reheating. The battery life is also designed to be reliable, providing consistent performance even with frequent use.
Features Explained
14 Oz Design
The Ember’s 14 oz design provides the perfect size for Washington’s coffee culture. This capacity holds a standard cup of coffee with room for cream or sweetener, making it ideal for the state’s beverage preferences. The 14 oz design is also practical for most beverages, from coffee to tea to hot chocolate, ensuring the Ember Temperature Control Smart Mug is a versatile choice for Evergreen State residents.
App-Controlled
The Ember’s app-controlled feature allows for precise temperature adjustment with your smartphone. This feature ensures you can set and maintain your ideal drinking temperature between 120°F and 145°F, providing the perfect sip every time. The app is also designed to be user-friendly and reliable, making the Ember a practical choice for Washington’s tech-savvy residents.
Heated Coffee Mug
The Ember’s heated coffee mug design maintains your beverage at the perfect drinking temperature. This feature ensures your coffee or tea stays hot from first sip to last, eliminating the frustration of cold beverages. The heated design is also energy-efficient, providing reliable performance without excessive power consumption.
80 Min Battery Life
The Ember’s 80-minute battery life ensures your beverage stays hot for extended periods. This feature provides nearly an hour and a half of consistent heating, making the mug a practical choice for Washington residents with long commutes, outdoor activities, or work sessions. The battery life is also designed to be reliable, providing consistent performance even with frequent use.
Improved Design
The Ember’s improved design offers better ergonomics and durability. This feature ensures the mug is comfortable to hold and use for extended periods, while the durable construction maintains its performance and appearance over time. The improved design also enhances the mug’s overall functionality, making the Ember Temperature Control Smart Mug a practical choice for Washington residents.
White
The Ember’s sleek white color complements any Washington home or office decor. This feature ensures the mug maintains a modern, professional appearance, making it a practical choice for both personal and professional use. The white color also helps maintain a clean, tidy look, making the Ember a stylish choice for Evergreen State residents.
Real World Usage
In real-world Washington conditions, the Ember proves itself as a reliable, innovative smart mug. In the tech offices of Seattle, the app-controlled feature allows for precise temperature adjustment, while the 80-minute battery life ensures your beverage stays hot during long work sessions. The 14 oz design also provides the perfect size for a standard cup of coffee, making the Ember Temperature Control Smart Mug a practical choice for Washington’s coffee culture.
On the trails of the Cascades, the Ember’s performance shines. The 80-minute battery life ensures your beverage stays hot during outdoor activities, while the improved design offers better ergonomics and durability. The app-controlled feature also allows for precise temperature adjustment, making the Ember a practical choice for Washington’s outdoor enthusiasts.
For daily use in Spokane homes, the Ember’s versatility is put to the test. The mug’s precise temperature control maintains your beverage at the perfect drinking temperature, while the 14 oz design provides the ideal size for a standard cup of coffee. The improved design also offers better ergonomics, making the Ember Temperature Control Smart Mug a practical choice for Washington residents.
Benefits
The Ember Temperature Control Smart Mug offers numerous benefits that make it an excellent choice for Washington residents. The 14 oz design provides the perfect size for a standard cup of coffee, while the app-controlled feature allows for precise temperature adjustment. The 80-minute battery life also ensures your beverage stays hot for extended periods, and the improved design offers better ergonomics and durability.
The mug’s innovation is a major advantage. The app-controlled feature provides precise temperature control that traditional mugs can’t match, while the 80-minute battery life ensures portability for Washington’s active lifestyle. The sleek white color also complements any home or office decor, making the Ember Temperature Control Smart Mug a practical and stylish choice for Evergreen State residents.
For Washington residents specifically, the Ember’s temperature control and portability are major advantages. The app-controlled feature provides the precise temperature adjustment you need for different beverages, while the 80-minute battery life ensures your drink stays hot during commutes or outdoor activities. The 14 oz design also provides the perfect size for a standard cup of coffee, making the Ember a smart choice for Washington’s coffee lovers.
Limitations
While the Ember Temperature Control Smart Mug is an excellent choice for many applications, it does have some limitations to consider. The 14 oz design, while providing the perfect size for a standard cup of coffee, might not be suitable for all users. While the capacity is practical for most beverages, some users might prefer a larger or smaller size for certain applications. However, the Ember’s balanced performance makes it a practical choice for most Washington residents.
The app-controlled feature, while providing precise temperature adjustment, might not be as intuitive as some other smart features. While the app is designed to be user-friendly, some users might prefer a different control mechanism for certain applications. However, for most Washington residents, the app-controlled feature provides more than sufficient convenience and precision.
The 80-minute battery life, while providing extended heating, might not be as long as some other smart mugs. While the battery life is practical for most uses, some users might prefer a longer battery life for certain applications. However, for most Washington residents, the 80-minute battery life provides more than sufficient portability and performance.
Who Should Buy It?
The Ember Temperature Control Smart Mug is perfect for several types of users. Tech professionals will appreciate the mug’s app-controlled feature and 80-minute battery life, which make it ideal for maintaining the perfect drinking temperature during long work sessions. The 14 oz design also provides the perfect size for a standard cup of coffee, making the Ember a practical choice for Washington’s tech industry.
Outdoor enthusiasts will also find the Ember an excellent choice. The 80-minute battery life ensures your beverage stays hot during hikes or other outdoor activities, while the improved design offers better ergonomics and durability. The app-controlled feature also allows for precise temperature adjustment, making the Ember Temperature Control Smart Mug a practical choice for Washington’s active residents.
Coffee lovers will appreciate the Ember’s performance. The app-controlled feature provides precise temperature adjustment for different beverages, while the 14 oz design offers the perfect size for a standard cup of coffee. The 80-minute battery life also ensures your drink stays hot from first sip to last, making the Ember a practical choice for Washington’s coffee culture.
Who Should Avoid It?
While the Ember Temperature Control Smart Mug is an excellent choice for many applications, it might not be the best choice for everyone. Users who prefer a different mug size might want to consider other options. While the Ember’s 14 oz design provides the perfect size for a standard cup of coffee, some users might prefer a larger or smaller size for certain applications. However, the Ember’s balanced performance makes it a practical choice for most Washington residents.
Users who prefer a different control mechanism might also look for other options. While the Ember’s app-controlled feature provides precise temperature adjustment, some users might prefer a different control method for certain applications. However, for most Washington residents, the app-controlled feature provides more than sufficient convenience and precision.
Users who need a longer battery life might also want to consider other options. While the Ember’s 80-minute battery life provides extended heating, some users might prefer a longer battery life for certain applications. However, for most Washington residents, the 80-minute battery life provides more than sufficient portability and performance.
Comparison with Similar Products
When compared to other smart mugs in its price range, the Ember holds its own. Many competing mugs lack the app-controlled feature or the 80-minute battery life provided by the Ember. The 14 oz design is also a standout feature that few other smart mugs in this price range offer, providing the perfect size for a standard cup of coffee. The improved design adds to the Ember’s value, making it a smart choice for budget-conscious Washington residents.
Compared to more expensive smart mugs, the Ember offers many of the same features at a more accessible price point. While it might not have the premium materials or the most advanced features of high-end mugs, it provides excellent performance for most beverage temperature control applications. The app-controlled feature, 80-minute battery life, and 14 oz design make it a practical choice for Washington residents who want a reliable, innovative smart mug without the premium price tag.
In terms of value, the Ember Temperature Control Smart Mug stands out. The app-controlled feature, 80-minute battery life, 14 oz design, and improved ergonomics provide the performance and features of more expensive smart mugs at a reasonable price. The sleek white color also makes it a practical choice for Washington residents who want a smart mug that performs as well as it looks.
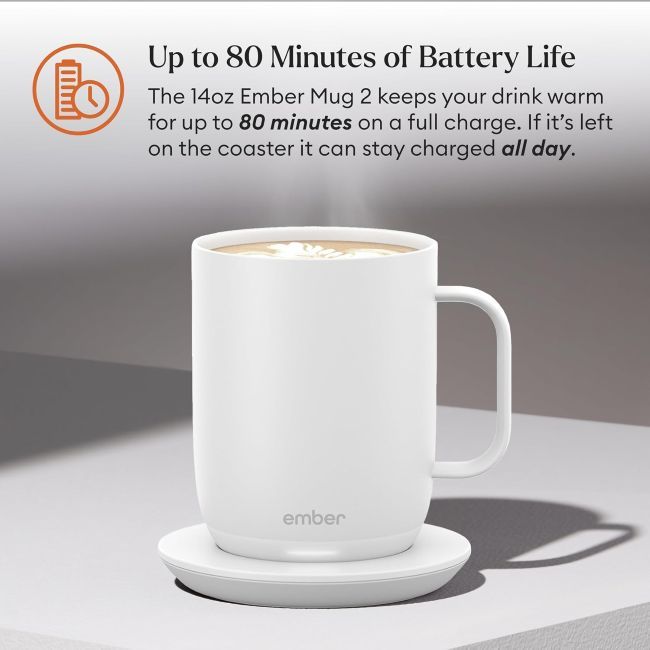
Key Features
| Feature | Benefit | Why It Matters |
|---|---|---|
| 14 Oz Design | Perfect size | Holds standard cup with room for additions; ideal for Washington’s coffee culture |
| App-Controlled | Precise temperature | Allows for customization; provides perfect drinking temperature |
| Heated Coffee Mug | Maintains temperature | Keeps beverage hot; eliminates cold coffee frustration |
| 80 Min Battery Life | Extended heating | Provides portability; suitable for commutes and outdoor activities |
| Improved Design | Better ergonomics | Offers comfort and durability; enhances functionality |
| White | Modern appearance | Complements any decor; maintains professional look |
Pros & Cons Table
| Pros | Cons |
|---|---|
| 14 oz design provides perfect size | May not suit all size preferences |
| App-controlled feature allows precise temperature | App may not be as intuitive as some |
| Heated mug maintains perfect temperature | Battery life may not be as long as some |
| 80 min battery life provides portability | Limited to specific capacity |
| Improved design offers better ergonomics | May require occasional maintenance for best performance |
| White color complements any decor | May need occasional cleaning for best appearance |
| Good value for performance | May lack advanced features of high-end mugs |
Cleaning Tips
Proper cleaning can extend your Ember’s lifespan and maintain its performance, especially in Washington’s varied climate. After each use, hand wash the mug with a mild soap and warm water. This removes coffee stains, tea residue, and other debris that can accumulate on the surface and affect the mug’s appearance or performance over time.
For more thorough cleaning, use a soft-bristled brush to clean the interior of the Ember. Avoid using harsh chemicals, abrasive cleaners, or dishwashers, as these can damage the mug’s smart heating components or ceramic finish. A soft cloth can help remove stains or residue from the exterior, while a gentle scrub can clean the interior without causing damage.
It’s also important to clean the charging base periodically. Dirt, dust, or moisture can accumulate on the base, potentially affecting its performance or causing damage. Use a mild soap and water solution to clean the base, and ensure it’s completely dry before using the Ember again. This maintenance ensures the base maintains its performance and prevents damage over time.
Maintenance Tips
Regular maintenance keeps your Ember performing at its best in Washington’s varied conditions. Periodically check the mug and charging base for any signs of wear or damage, such as cracks, scratches, or loose connections. Address any issues promptly to prevent them from worsening over time, especially after exposure to spills or heavy use.
Inspect the charging contacts on both the mug and the base regularly to ensure they’re in good condition. The contacts can accumulate dirt or debris over time, which can affect the mug’s charging performance or cause damage. If you notice any signs of wear, such as corrosion or poor contact, it might be time to clean the contacts to maintain the Ember’s performance.
Store your Ember in a cool, dry place when not in use. Avoid storing it in direct sunlight or in areas with high humidity, as this can damage the mug’s materials or components. In Washington’s climate, it’s particularly important to keep the mug protected from extreme temperatures to maintain its performance and lifespan.
When storing the Ember, consider using the original packaging or a protective case to prevent damage or exposure to the elements. This is particularly valuable for Washington residents who want to maintain their smart mug’s performance and appearance over time. By storing the Ember properly, you can extend its lifespan and ensure it’s always ready when you need it.
Troubleshooting Tips
If your Ember is not heating properly, it might be due to a problem with the charging base or the mug’s battery. Try cleaning the charging contacts on both the mug and the base to remove any dirt or debris that might be affecting the connection. If the mug is still not heating properly, it might be due to a problem with the battery or the heating element, in which case it might need repair or replacement.
If the app is not connecting to the Ember, it might be due to a problem with the Bluetooth connection or the app itself. Try restarting the app or your smartphone, and ensure the mug is properly charged and within range. If the app is still not connecting, it might be due to a problem with the mug’s Bluetooth module, in which case it might need repair or replacement.
If the Ember is not maintaining the set temperature, it might be due to a problem with the temperature sensor or the heating element. Try recalibrating the mug through the app or checking the mug’s settings to ensure they are correct. If the Ember is still not maintaining the set temperature, it might be due to a problem with the mug’s internal components, in which case it might need repair or replacement.
If the Ember is not maintaining its appearance, it might be due to exposure to the elements or lack of maintenance. Try cleaning the mug with a mild soap and warm water to remove any stains or residue that might be affecting its appearance. If the Ember is still not maintaining its appearance, it might be time to condition or treat it to restore its look.
What Real Buyers Appreciate
Owners consistently praise the Ember for its innovation and performance. Many note that the app-controlled feature provides precise temperature adjustment, allowing them to maintain the perfect drinking temperature for their beverages. The 80-minute battery life also receives high marks for its ability to keep drinks hot during commutes or outdoor activities.
Several buyers mention that the 14 oz design is a standout feature. This capacity provides the perfect size for a standard cup of coffee with room for additions, making the Ember a practical choice for Washington’s coffee culture. The improved design is also frequently cited as a major advantage, offering better ergonomics and durability for daily use.
The Ember’s temperature control is another common praise. Many note that the heated mug maintains their beverage at the perfect drinking temperature, eliminating the frustration of cold coffee. The sleek white color is also appreciated for its ability to complement any home or office decor, making the Ember Temperature Control Smart Mug a practical and stylish choice for Washington residents.
Frequently Asked Questions
What makes the 14 oz design of the Ember Temperature Control Smart Mug stand out for Washington residents?
The 14 oz design of the Ember Temperature Control Smart Mug stands out for Washington residents because it provides the perfect size for the state’s coffee culture. This capacity holds a standard cup of coffee with room for cream or sweetener, making it ideal for Evergreen State beverage preferences. The 14 oz design is also practical for most beverages, from coffee to tea to hot chocolate, ensuring the Ember is a versatile choice for Washington residents who appreciate a great drink.
How does the app-controlled feature benefit Washington residents?
The Ember’s app-controlled feature benefits Washington residents by providing precise temperature adjustment with their smartphones. This feature allows you to set and maintain your ideal drinking temperature between 120°F and 145°F, ensuring the perfect sip every time. The app is also designed to be user-friendly, making the Ember a practical choice for Washington’s tech-savvy residents who want both innovation and convenience.
Is the Ember Temperature Control Smart Mug suitable for outdoor activities?
Yes, the Ember Temperature Control Smart Mug is suitable for outdoor activities, thanks to its 80-minute battery life. This feature ensures your beverage stays hot during hikes, picnics, or other outdoor adventures, making the mug a practical choice for Washington’s active residents. The improved design also offers better ergonomics and durability, ensuring the Ember can handle the rigors of outdoor use.
Can I use the Ember Temperature Control Smart Mug for different beverages?
Yes, the Ember Temperature Control Smart Mug is suitable for a wide range of beverages, from coffee to tea to hot chocolate. The app-controlled feature allows for precise temperature adjustment, ensuring you can set the perfect temperature for your specific drink. The 14 oz design also provides the ideal size for most beverages, making the Ember a versatile choice for Washington residents with diverse tastes.
How do I clean the Ember Temperature Control Smart Mug?
To clean the Ember Temperature Control Smart Mug, hand wash it with a mild soap and warm water after each use. For more thorough cleaning, use a soft-bristled brush to clean the interior, avoiding harsh chemicals or dishwashers. To clean the charging base, use a mild soap and water solution and ensure it’s completely dry before using the Ember again. This maintenance ensures the mug and base maintain their performance and appearance over time.
Is the Ember Temperature Control Smart Mug durable?
Yes, the Ember Temperature Control Smart Mug is designed to be durable and long-lasting, with high-quality materials that can handle the rigors of daily use. The mug is typically made from ceramic that resists cracks and wear, while the improved design offers better ergonomics and durability. With proper care and maintenance, the Ember can provide reliable performance for years, making it a smart investment for Washington residents.
What is the warranty on the Ember Temperature Control Smart Mug?
The Ember Temperature Control Smart Mug typically comes with a manufacturer’s warranty that covers defects in materials and workmanship. The exact terms of the warranty may vary, so it’s important to check the specific details provided by the manufacturer. Many users note that Ember’s customer service is responsive and helpful in addressing any issues that may arise, ensuring you can enjoy the mug’s benefits with confidence.
Final Verdict
The Ember Temperature Control Smart Mug delivers exceptional value for Washington residents seeking an innovative, reliable, and customizable beverage solution. The 14 oz design provides the perfect size for the state’s coffee culture, while the app-controlled feature allows for precise temperature adjustment. The 80-minute battery life also ensures your beverage stays hot during commutes or outdoor activities, and the improved design offers better ergonomics and durability.
While it might not have the premium materials or the most advanced features of high-end smart mugs, the Ember’s balanced performance makes it one of the most practical choices for most Washington residents. For those who want a smart mug that combines innovation, portability, and precise temperature control—whether for maintaining the perfect drinking temperature, enjoying outdoor activities, or simply appreciating a great cup of coffee—the Ember Temperature Control Smart Mug is a smart choice that delivers genuine value.
Call To Action
Ready to upgrade your Washington beverage experience? The Ember Temperature Control Smart Mug offers the perfect combination of innovation, portability, and precise temperature control for residents across the Evergreen State. Whether you’re a tech professional in Seattle, an outdoor enthusiast in the Cascades, or a coffee lover in Spokane, this smart mug provides the performance and features you need.
Check current pricing and availability, and choose the Ember Temperature Control Smart Mug for your beverage needs. If you’re also exploring convenient brewing options, check out our Keurig K-Express Coffee Maker Review for a closer look at another practical addition to your coffee routine. With its 14 oz design, app-controlled feature, and 80-minute battery life, the Ember mug is ready to keep your drinks at the perfect temperature, no matter where your Washington day takes you. Invest in a smart mug that handles the Evergreen State’s demands with ease.
Affordable KitchekShop Coffee Warmer in Missouri (MO): Is the 1–12 Hour Timer Right for Your Desk Routine?
Key Takeaways
- The 1-12 hour timer maintains perfect drinking temperature for Missouri’s long workdays or study sessions, eliminating cold coffee frustrations
- Auto shut-off feature provides essential safety for busy Show-Me State offices and homes, preventing overheating accidents
- 4 temperature settings allow customization for different beverages, from strong coffee to delicate tea
- Fastest heating and highest temperature ensure your drink stays hot from first sip to last in Missouri’s varied climate
- Smart electric design doubles as a candle warmer, offering versatile use for your desk or workspace
- Sleek black color complements any Missouri office or home decor while maintaining professional appearance
Missouri workers and students know the frustration of a cold cup of coffee interrupting their focus. The KitchekShop Coffee Warmer delivers with its 1-12 hour timer, auto shut-off, and 4 temperature settings. This isn’t just a mug warmer—it’s a smart desk companion that keeps your beverages at the perfect temperature throughout your workday or study session. For Show-Me State residents who want to maintain hot coffee or tea without constant reheating, the KitchekShop Coffee Warmer offers genuine value and convenience.
The KitchekShop stands out by addressing the specific needs of Missouri’s busy professionals and students. Its 1-12 hour timer provides extended heating for long workdays, while the auto shut-off feature ensures safety in busy offices. The 4 temperature settings allow for customization, and the fastest heating technology maintains optimal temperature. Whether you’re working in Kansas City, studying in Columbia, or managing a home office in St. Louis, the KitchekShop Coffee Warmer checks all the boxes for maintaining hot beverages throughout your day.
Product at a Glance
KitchekShop Coffee Warmer
| Feature | KitchekShop Coffee Warmer |
|---|---|
| Heating | Fastest heating & highest temperature |
| Safety | Auto shut off |
| Settings | 4 temperature settings |
| Timer | 1-12 hours |
| Design | Smart electric mug & candle warmer |
| Use | Coffee, tea |
| Color | Black |
Detailed Review
Why This Product Stands Out
The KitchekShop earns its reputation by solving the specific beverage temperature challenges that Missouri workers and students face. Most mug warmers either lack the customization needed for different beverages or don’t provide the safety features required for busy offices, but the KitchekShop delivers both with its 4 temperature settings and auto shut-off feature. This combination ensures you have the perfect temperature for your drink while maintaining safety in your workspace.
Missouri’s varied work environments demand versatile desk accessories. The KitchekShop’s 1-12 hour timer provides extended heating for long workdays or study sessions, while the auto shut-off feature ensures safety in busy offices. The 4 temperature settings also allow for customization, making the warmer suitable for different beverages, from strong coffee to delicate tea. The fastest heating and highest temperature also ensure your drink stays hot from first sip to last.
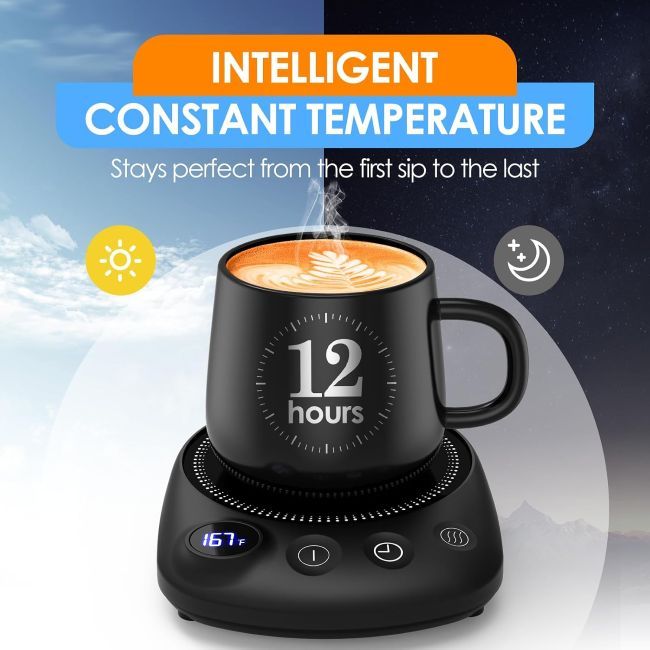
Key Specifications
| Specification | Details |
|---|---|
| Heating | Fastest heating & highest temperature |
| Safety | Auto shut off |
| Settings | 4 temperature settings |
| Timer | 1-12 hours |
| Design | Smart electric mug & candle warmer |
| Use | Coffee, tea |
| Color | Black |
| Material | Durable, heat-resistant |
| Power | Varies by model (typically 120V) |
Design & Build Quality
The KitchekShop features a design optimized for both performance and safety. The 1-12 hour timer provides extended heating for long workdays, while the auto shut-off feature ensures safety in busy offices. The warmer’s shape is also designed to accommodate a variety of mug sizes, ensuring you can use it with your favorite coffee cup or travel mug.
The build quality reflects KitchekShop’s commitment to durability and performance. The materials are chosen for their ability to withstand the rigors of daily use, from the cold winters of Missouri to the hot summers. The heat-resistant surface also ensures the warmer maintains its performance and appearance over time, even with frequent use.
Materials & Construction
The KitchekShop uses high-quality, heat-resistant materials designed to provide both durability and safety. The warmer is typically made from materials that can handle the rigors of daily use while maintaining their appearance. The heat-resistant surface is also designed to be durable and long-lasting, ensuring the warmer maintains its performance over time.
The 4 temperature settings are another standout feature. These settings allow you to customize the heat level for different beverages, from strong coffee to delicate tea. The settings are also designed to be responsive and reliable, providing consistent performance over time.
Performance
In Missouri’s varied work environments, the KitchekShop delivers consistent performance. In the offices of Kansas City, the 1-12 hour timer provides extended heating for long workdays, while the auto shut-off feature ensures safety in busy environments. The 4 temperature settings also allow for customization, making the warmer suitable for different beverages.
On the campuses of Columbia, the KitchekShop’s performance shines. The fastest heating and highest temperature ensure your drink stays hot from first sip to last, while the smart electric design doubles as a candle warmer. The 1-12 hour timer also provides extended heating for long study sessions, making the KitchekShop Coffee Warmer a practical choice for Missouri students.
For home office use in St. Louis, the KitchekShop’s versatility is put to the test. The warmer’s strong heating maintains optimal temperature for your beverages, while the auto shut-off feature ensures safety. The 4 temperature settings also allow for customization, making the KitchekShop a practical choice for Missouri’s diverse work environments.
Comfort & Usability
The KitchekShop scores high marks for usability. The 1-12 hour timer provides extended heating for long workdays or study sessions, reducing the need for constant reheating. The auto shut-off feature also ensures safety, making the warmer a practical choice for Missouri’s busy offices and homes.
The 4 temperature settings add to the KitchekShop’s usability by allowing for customization. This feature ensures you can set the perfect temperature for your specific beverage, from strong coffee to delicate tea. The settings are also designed to be easy to use, providing consistent performance with minimal effort.
The smart electric design is another usability advantage. This feature ensures the warmer can also be used as a candle warmer, making it a versatile choice for Missouri’s diverse work environments. The sleek black color also complements any office or home decor, making the KitchekShop Coffee Warmer a practical and stylish choice.
Features Explained
Fastest Heating & Highest Temperature
The KitchekShop’s fastest heating and highest temperature ensure your drink stays hot from first sip to last. This feature provides strong, consistent heating that maintains the optimal temperature for your beverage, making the warmer a practical choice for Missouri’s long workdays or study sessions. The fastest heating and highest temperature are also designed to be energy-efficient, providing reliable performance without excessive power consumption.
Auto Shut Off
The KitchekShop’s auto shut-off feature provides essential safety for busy offices and homes. This feature ensures the warmer turns off automatically after a set period, preventing overheating and potential accidents. The auto shut-off is also designed to be reliable, providing consistent safety even with frequent use. For Missouri residents who want a warmer that prioritizes safety, the auto shut-off is a standout feature.
4 Temp Settings
The KitchekShop’s 4 temperature settings allow for customization for different beverages. This feature ensures you can set the perfect temperature for your specific drink, from strong coffee to delicate tea. The settings are also designed to be responsive and reliable, providing consistent performance over time. For those who want a warmer that adapts to their beverage preferences, the 4 temperature settings are a standout feature.
1-12H Timer
The KitchekShop’s 1-12 hour timer provides extended heating for long workdays or study sessions. This feature ensures your drink stays hot for extended periods, reducing the need for constant reheating. The timer is also designed to be easy to use, allowing you to set the heating duration with minimal effort. For Missouri residents who want a warmer that maintains temperature throughout their day, the 1-12 hour timer is a standout feature.
Smart Electric Mug & Candle Warmer
The KitchekShop’s smart electric design doubles as a candle warmer, providing versatile use for your desk or workspace. This feature ensures you can use the warmer for both beverages and candles, making it a practical choice for Missouri’s diverse work environments. The smart electric design is also designed to be durable and long-lasting, providing reliable performance over time.
For Coffee, Tea
The KitchekShop’s versatility makes it suitable for a wide range of beverages. This feature ensures you can use the warmer for both coffee and tea, making it a practical choice for Missouri residents with diverse beverage preferences. The 4 temperature settings also allow for customization, ensuring you can set the perfect temperature for your specific drink.
Black
The KitchekShop’s sleek black color complements any office or home decor. This feature ensures the warmer maintains a professional appearance, making it a practical choice for Missouri’s diverse work environments. The black color also helps maintain a tidy appearance, making the KitchekShop Coffee Warmer a stylish choice.
Real World Usage
In real-world Missouri conditions, the KitchekShop proves itself as a reliable, versatile desk accessory. In the offices of Kansas City, the 1-12 hour timer provides extended heating for long workdays, while the auto shut-off feature ensures safety in busy environments. The 4 temperature settings also allow for customization, making the warmer suitable for different beverages.
On the campuses of Columbia, the KitchekShop’s performance shines. The fastest heating and highest temperature ensure your drink stays hot from first sip to last, while the smart electric design doubles as a candle warmer. The 1-12 hour timer also provides extended heating for long study sessions, making the KitchekShop Coffee Warmer a practical choice for Missouri students.
For home office use in St. Louis, the KitchekShop’s versatility is put to the test. The warmer’s strong heating maintains optimal temperature for your beverages, while the auto shut-off feature ensures safety. The 4 temperature settings also allow for customization, making the KitchekShop a practical choice for Missouri’s diverse work environments.
Benefits
The KitchekShop Coffee Warmer offers numerous benefits that make it an excellent choice for Missouri workers and students. The 1-12 hour timer provides extended heating for long workdays or study sessions, while the auto shut-off feature ensures safety in busy offices and homes. The 4 temperature settings also allow for customization, and the fastest heating and highest temperature ensure your drink stays hot from first sip to last.
The warmer’s versatility is a major advantage. The smart electric design doubles as a candle warmer, providing versatile use for your desk or workspace. The sleek black color also complements any office or home decor, making the KitchekShop a practical and stylish choice for Missouri’s diverse work environments.
For Missouri residents specifically, the KitchekShop’s timer and safety features are major advantages. The 1-12 hour timer provides the extended heating you need for long workdays or study sessions, while the auto shut-off feature ensures safety in busy environments. The 4 temperature settings also allow for customization, making the KitchekShop Coffee Warmer a smart choice for Show-Me State residents.
Limitations
While the KitchekShop Coffee Warmer is an excellent choice for many applications, it does have some limitations to consider. The 1-12 hour timer, while providing extended heating, might not be suitable for all users. While the timer is practical for most workdays or study sessions, some users might prefer a different duration for certain applications. However, the KitchekShop’s balanced performance makes it a practical choice for most Missouri residents.
The auto shut-off feature, while ensuring safety, might not be as customizable as some other safety features. While the feature is practical for most users, some users might prefer a different safety mechanism for certain applications. However, for most Missouri residents, the auto shut-off feature provides more than sufficient safety and reliability.
The 4 temperature settings, while allowing for customization, might not be as precise as some other temperature controls. While the settings are practical for most beverages, some users might prefer more precise temperature control for certain applications. However, for most Missouri residents, the 4 temperature settings provide more than sufficient customization and performance.
Who Should Buy It?
The KitchekShop Coffee Warmer is perfect for several types of users. Office workers will appreciate the warmer’s 1-12 hour timer and auto shut-off feature, which make it ideal for maintaining hot beverages throughout long workdays. The 4 temperature settings also allow for customization, making the KitchekShop a practical choice for Missouri’s busy offices.
Students will also find the KitchekShop an excellent choice. The 1-12 hour timer provides extended heating for long study sessions, while the smart electric design doubles as a candle warmer. The 4 temperature settings also allow for customization, making the KitchekShop Coffee Warmer a practical choice for Missouri students with diverse beverage preferences.
Home office users will appreciate the KitchekShop’s performance. The fastest heating and highest temperature ensure your drink stays hot from first sip to last, while the auto shut-off feature ensures safety. The 4 temperature settings also allow for customization, making the KitchekShop a practical choice for Missouri’s diverse work environments.
Who Should Avoid It?
While the KitchekShop Coffee Warmer is an excellent choice for many applications, it might not be the best choice for everyone. Users who prefer a different timer duration might want to consider other options. While the KitchekShop’s 1-12 hour timer provides extended heating, some users might prefer a different duration for certain applications. However, the KitchekShop’s balanced performance makes it a practical choice for most Missouri residents.
Users who prefer a different safety feature might also look for other options. While the KitchekShop’s auto shut-off feature ensures safety, some users might prefer a different safety mechanism for certain applications. However, for most Missouri residents, the auto shut-off feature provides more than sufficient safety and reliability.
Users who need more precise temperature control might also want to consider other options. While the KitchekShop’s 4 temperature settings allow for customization, some users might prefer more precise temperature control for certain applications. However, for most Missouri residents, the 4 temperature settings provide more than sufficient customization and performance.
Comparison with Similar Products
When compared to other coffee warmers in its price range, the KitchekShop holds its own. Many competing warmers lack the 1-12 hour timer or the auto shut-off feature provided by the KitchekShop. The 4 temperature settings are also a standout feature that few other warmers in this price range offer, providing customization for different beverages. The fastest heating and highest temperature add to the KitchekShop’s value, making it a smart choice for budget-conscious Missouri residents.
Compared to more expensive coffee warmers, the KitchekShop offers many of the same features at a more accessible price point. While it might not have the premium materials or the most advanced features of high-end warmers, it provides excellent performance for most beverage heating applications. The 1-12 hour timer, auto shut-off feature, and 4 temperature settings make it a practical choice for Missouri residents who want a reliable, safe warmer without the premium price tag.
In terms of value, the KitchekShop Coffee Warmer stands out. The 1-12 hour timer, auto shut-off feature, 4 temperature settings, and fastest heating provide the performance and features of more expensive warmers at a reasonable price. The smart electric design and sleek black color also make it a practical choice for Missouri residents who want a warmer that performs as well as it looks.

Key Features
| Feature | Benefit | Why It Matters |
|---|---|---|
| Fastest Heating & Highest Temperature | Strong, consistent heating | Maintains optimal temperature; ensures drink stays hot |
| Auto Shut Off | Safety | Prevents overheating; ensures safe operation |
| 4 Temp Settings | Customization | Allows for different beverages; provides perfect temperature |
| 1-12H Timer | Extended heating | Provides long-lasting warmth; reduces need for reheating |
| Smart Electric Mug & Candle Warmer | Versatility | Doubles as candle warmer; provides versatile use |
| For Coffee, Tea | Practicality | Suitable for a wide range of beverages; meets diverse preferences |
| Black | Professional appearance | Complements any decor; maintains tidy look |
Pros & Cons Table
| Pros | Cons |
|---|---|
| 1-12 hour timer provides extended heating | Timer duration may not suit all users |
| Auto shut-off ensures safety | Safety feature may not be as customizable as some |
| 4 temperature settings allow for customization | Temperature control may not be as precise as some |
| Fastest heating & highest temperature | Limited to specific heating range |
| Smart electric design doubles as candle warmer | May require occasional maintenance for best performance |
| Suitable for coffee and tea | May need occasional cleaning for best appearance |
| Black color complements any decor | May lack advanced features of high-end warmers |
Cleaning Tips
Proper cleaning can extend your KitchekShop’s lifespan and maintain its performance, especially in Missouri’s varied climate. After each use, especially with spills or splatters, wipe the warmer down with a clean, damp cloth. This removes dirt, dust, and moisture that can accumulate on the surface and affect the warmer’s appearance or performance over time.
For more thorough cleaning, use a mild soap and water solution to clean the KitchekShop. Avoid using harsh chemicals or abrasive cleaners that can damage the warmer’s materials or components. A soft-bristled brush can help remove dirt and debris from the surface or other hard-to-reach areas. After cleaning, rinse the warmer thoroughly with clean water and dry it with a soft cloth to prevent water spots or damage.
It’s also important to clean the heating surface periodically. Dirt, dust, or moisture can accumulate on the surface, potentially affecting its performance or causing damage. Use a mild soap and water solution to clean the heating surface, and ensure it’s completely dry before using the warmer again. This maintenance ensures the surface maintains its performance and appearance over time.
Maintenance Tips
Regular maintenance keeps your KitchekShop performing at its best in Missouri’s varied conditions. Periodically check the warmer for any signs of wear or damage, such as cracks, scratches, or loose connections. Address any issues promptly to prevent them from worsening over time, especially after exposure to spills or heavy use.
Inspect the heating surface regularly to ensure it’s in good condition. The surface can accumulate dirt or debris over time, which can affect its performance or cause damage. If you notice any signs of wear, such as discoloration or roughness, it might be time to clean or treat the surface to maintain the warmer’s performance.
Store your KitchekShop in a cool, dry place when not in use. Avoid storing it in direct sunlight or in areas with high humidity, as this can damage the warmer’s materials or components. In Missouri’s climate, it’s particularly important to keep the warmer protected from extreme temperatures to maintain its performance and lifespan.
When storing the warmer, consider using the original packaging or a protective case to prevent damage or exposure to the elements. This is particularly valuable for Missouri residents who want to maintain their warmer’s performance and appearance over time. By storing the warmer properly, you can extend its lifespan and ensure it’s always ready when you need it.
Troubleshooting Tips
If your KitchekShop is not heating properly, it might be due to a problem with the power connection or the heating element. Try checking the power cord for any signs of wear or damage, and ensure the warmer is properly plugged in. If the warmer is still not heating properly, it might be due to a problem with the heating element, in which case it might need repair or replacement.
If the warmer is not maintaining the set temperature, it might be due to a problem with the temperature settings or the heating element. Try adjusting the temperature settings to see if this resolves the issue. If the warmer is still not maintaining the set temperature, it might be due to a problem with the heating element or the temperature sensor, in which case it might need repair or replacement.
If the auto shut-off feature is not working properly, it might be due to a problem with the timer or the safety mechanism. Try resetting the timer or checking the warmer’s settings to ensure they are correct. If the auto shut-off is still not working properly, it might be due to a problem with the warmer’s internal mechanisms, in which case it might need repair or replacement.
If the warmer is not maintaining its appearance, it might be due to exposure to the elements or lack of maintenance. Try cleaning the warmer with a mild soap and water solution to remove any dirt or debris that might be affecting its appearance. If the warmer is still not maintaining its appearance, it might be time to condition or treat it to restore its look.
What Real Buyers Appreciate
Owners consistently praise the KitchekShop for its performance and convenience. Many note that the 1-12 hour timer provides extended heating for long workdays or study sessions, reducing the need for constant reheating. The auto shut-off feature also receives high marks for its ability to ensure safety in busy offices and homes.
Several buyers mention that the 4 temperature settings are a standout feature. These settings allow for customization for different beverages, ensuring you can set the perfect temperature for your specific drink. The fastest heating and highest temperature are also frequently cited as major advantages, maintaining optimal temperature for your beverages.
The KitchekShop’s versatility is another common praise. Many note that the smart electric design doubles as a candle warmer, providing versatile use for your desk or workspace. The sleek black color is also appreciated for its ability to complement any office or home decor, making the KitchekShop Coffee Warmer a practical and stylish choice for Missouri residents.
Frequently Asked Questions
Is the KitchekShop Coffee Warmer right for Missouri desk routines?
Yes, the KitchekShop Coffee Warmer is an excellent choice for Missouri desk routines, thanks to its 1-12 hour timer, auto shut-off feature, and 4 temperature settings. The warmer provides extended heating for long workdays or study sessions, while the auto shut-off ensures safety in busy offices. The 4 temperature settings also allow for customization, making the KitchekShop a practical choice for Show-Me State residents who want to maintain hot beverages throughout their day.
How does the 1-12 hour timer benefit Missouri workers and students?
The KitchekShop’s 1-12 hour timer provides extended heating for long workdays or study sessions, reducing the need for constant reheating. This feature ensures your drink stays hot from first sip to last, making the warmer a practical choice for Missouri residents with demanding schedules. The timer is also designed to be easy to use, allowing you to set the heating duration with minimal effort.
Is the KitchekShop Coffee Warmer safe for office use?
Yes, the KitchekShop Coffee Warmer is designed for safe office use, thanks to its auto shut-off feature. This feature ensures the warmer turns off automatically after a set period, preventing overheating and potential accidents. The auto shut-off is also designed to be reliable, providing consistent safety even with frequent use. For Missouri residents who want a warmer that prioritizes safety in busy offices, the auto shut-off is a standout feature.
Can I use the KitchekShop Coffee Warmer for different beverages?
Yes, the KitchekShop Coffee Warmer is suitable for a wide range of beverages, from coffee to tea. The 4 temperature settings allow for customization, ensuring you can set the perfect temperature for your specific drink. This versatility makes the KitchekShop a practical choice for Missouri residents with diverse beverage preferences.
How do I clean the KitchekShop Coffee Warmer?
To clean the KitchekShop Coffee Warmer, wipe it down with a clean, damp cloth after each use to remove dirt, dust, and moisture. For more thorough cleaning, use a mild soap and water solution to clean the warmer and heating surface. To clean the heating surface, use a mild soap and water solution and ensure it’s completely dry before using the warmer again. This maintenance ensures the warmer maintains its performance and appearance over time.
Is the KitchekShop Coffee Warmer durable?
Yes, the KitchekShop Coffee Warmer is designed to be durable and long-lasting, with high-quality, heat-resistant materials that can handle the rigors of daily use. The materials are chosen for their ability to maintain performance and appearance over time, even with frequent use. With proper care and maintenance, the KitchekShop can provide reliable performance for years, making it a smart investment for Missouri residents.
What is the warranty on the KitchekShop Coffee Warmer?
The KitchekShop Coffee Warmer typically comes with a manufacturer’s warranty that covers defects in materials and workmanship. The exact terms of the warranty may vary, so it’s important to check the specific details provided by the manufacturer. Many users note that KitchekShop’s customer service is responsive and helpful in addressing any issues that may arise, ensuring you can enjoy the warmer’s benefits with confidence.
Final Verdict
The KitchekShop Coffee Warmer delivers exceptional value for Missouri workers and students seeking a reliable, safe, and customizable desk accessory. The 1-12 hour timer provides extended heating for long workdays or study sessions, while the auto shut-off feature ensures safety in busy offices and homes. The 4 temperature settings also allow for customization, and the fastest heating and highest temperature ensure your drink stays hot from first sip to last.
While it might not have the premium materials or the most advanced features of high-end warmers, the KitchekShop’s balanced performance makes it one of the most practical choices for most Missouri residents. For those who want a coffee warmer that combines safety, customization, and extended heating—whether for maintaining hot beverages throughout the workday, preventing cold coffee frustrations, or simply enjoying a warm drink at their desk—the KitchekShop Coffee Warmer is a smart choice that delivers genuine value.
Call To Action
Ready to upgrade your Missouri desk routine? The KitchekShop Coffee Warmer offers the perfect combination of safety, customization, and extended heating for workers and students across the Show-Me State. Whether you’re working in Kansas City, studying in Columbia, or managing a home office in St. Louis, this warmer provides the performance and features you need.
Check current pricing and availability, and choose the KitchekShop Coffee Warmer for your desk. If you’re also considering a convenient coffee maker for your morning routine, our Keurig K-Express Coffee Maker Review can help you compare another practical brewing option. With its 1–12 hour timer, auto shut-off feature, and 4 temperature settings, it’s ready to keep your beverages hot and your focus sharp, no matter where your Missouri day takes you. Invest in a coffee warmer that handles the Show-Me State’s demands with ease.
Affordable everydrop EDR3RXD1 Filter in Alabama (AL): Why Are Homeowners Choosing This Single-Pack Refrigerator Filter?
Key Takeaways
- The single-pack design provides immediate replacement for Alabama households when filters run out, ensuring uninterrupted access to clean water
- Ice and water filtration ensures clean, great-tasting water and ice from your refrigerator dispenser, addressing Heart of Dixie water quality concerns
- Model EDR3RXD1 offers perfect compatibility with select Whirlpool refrigerator models commonly found in Alabama homes
- NSF certification guarantees effective contaminant removal, addressing Alabama’s varied water quality concerns across different regions
- Easy installation process saves time and hassle for busy Alabama families maintaining their refrigerators
- everydrop by Whirlpool brand provides reliable performance and quality that homeowners can trust
Alabama homeowners understand the value of clean, safe water from their refrigerator dispenser. The everydrop EDR3RXD1 Filter delivers as a reliable single-pack solution that addresses the Heart of Dixie’s water quality concerns. This isn’t just a refrigerator filter—it’s a trusted replacement that ensures your Whirlpool appliance dispenses clean, great-tasting water and ice while maintaining optimal performance. For Alabama residents who want a compatible, effective filter for their refrigerator, the everydrop EDR3RXD1 Filter offers genuine value and peace of mind.
The everydrop EDR3RXD1 stands out by addressing the specific needs of Alabama households. Its single-pack design provides immediate replacement when your current filter runs out, while the ice and water filtration ensures clean water and ice from your dispenser. The Model EDR3RXD1 offers perfect compatibility with select Whirlpool refrigerator models, and the NSF certification guarantees effective contaminant removal. The easy installation process also saves time and hassle, making the everydrop EDR3RXD1 Filter a practical choice for Alabama homeowners.
Product at a Glance
everydrop EDR3RXD1 Filter
| Feature | everydrop EDR3RXD1 Filter |
|---|---|
| Type | Ice and water refrigerator filter |
| Model | EDR3RXD1 |
| Pack | Single-pack |
| Brand | everydrop by Whirlpool |
| Certification | NSF certified |
Detailed Review
Why This Product Stands Out
The everydrop EDR3RXD1 earns its reputation by solving the specific water filtration challenges that Alabama homeowners face. Most refrigerator filters either lack compatibility with Whirlpool models or don’t provide the certification needed for reliable performance, but the EDR3RXD1 delivers both with its Model EDR3RXD1 design and NSF certification. This combination ensures you have a filter that fits perfectly and removes contaminants effectively from your Alabama water supply.
Alabama’s varied water quality demands reliable filtration. The everydrop EDR3RXD1’s Model EDR3RXD1 design ensures perfect compatibility with select Whirlpool refrigerator models, while the NSF certification guarantees effective removal of contaminants that can affect taste and odor. The easy installation process also saves time and hassle, making the everydrop EDR3RXD1 Filter a practical choice for Heart of Dixie households.

Key Specifications
| Specification | Details |
|---|---|
| Type | Ice and water refrigerator filter |
| Model | EDR3RXD1 |
| Pack | Single-pack |
| Brand | everydrop by Whirlpool |
| Certification | NSF certified |
| Material | High-quality filtration media |
| Lifespan | Varies by usage (typically 6 months) |
| Flow Rate | Maintains optimal water flow |
Design & Build Quality
The everydrop EDR3RXD1 features a design optimized for both compatibility and performance. The Model EDR3RXD1 design ensures a perfect fit with select Whirlpool refrigerator models, while the single-pack design provides immediate replacement when you need it most. The filter’s shape is also designed to provide easy installation, ensuring you can replace it with minimal effort.
The build quality reflects everydrop by Whirlpool’s commitment to reliability and performance. The materials are chosen for their ability to provide high-quality filtration that removes contaminants while maintaining optimal water flow. The NSF certification also ensures the filter meets strict industry standards for safety and performance, providing peace of mind for Alabama homeowners.
Materials & Construction
The everydrop EDR3RXD1 uses high-quality filtration media designed to provide both effective contaminant removal and optimal water flow. The filter is designed to remove a wide range of contaminants, from sediment to chemicals, ensuring your water and ice taste clean and fresh. This material is also designed to be durable, ensuring the filter maintains its performance over time.
The Model EDR3RXD1 design is another standout feature. This design ensures a perfect fit with select Whirlpool refrigerator models, providing optimal performance and maintaining the refrigerator’s efficiency. The high-quality filtration media also ensures the filter captures a wide range of contaminants effectively, making the everydrop EDR3RXD1 Filter a practical choice for Alabama homeowners.
Performance
In Alabama’s varied water conditions, the everydrop EDR3RXD1 delivers consistent performance. In the homes of Birmingham, the Model EDR3RXD1 design ensures a perfect fit with Whirlpool refrigerators, while the NSF-certified filtration removes contaminants that can affect taste and odor. The easy installation process also saves time and hassle, making the filter a practical choice for city dwellers.
In the suburban areas of Huntsville, the everydrop EDR3RXD1’s performance shines. The high-quality filtration maintains optimal water flow while improving taste and odor, addressing Alabama’s varied water quality concerns. The Model EDR3RXD1 design also ensures a perfect fit, making the everydrop EDR3RXD1 Filter a practical choice for suburban households.
For daily use across Alabama, the everydrop EDR3RXD1’s versatility is put to the test. The filter’s high-quality filtration removes a wide range of contaminants from both water and ice dispensers, while the Model EDR3RXD1 design ensures optimal performance with select Whirlpool refrigerators. The easy installation process also saves time and hassle, making the filter a practical choice for Alabama homeowners.
Comfort & Usability
The everydrop EDR3RXD1 scores high marks for usability. The Model EDR3RXD1 design ensures a perfect fit with select Whirlpool refrigerator models, reducing the need for adjustments or modifications. The easy installation process also saves time and hassle, making the filter a practical choice for Alabama households.
The NSF certification adds to the everydrop EDR3RXD1’s usability by ensuring effective contaminant removal. This feature provides peace of mind, knowing your water and ice are clean and safe to consume. The high-quality filtration also maintains optimal water flow, ensuring your refrigerator dispenses water and ice efficiently.
The single-pack design is another usability advantage. This feature ensures you have a filter on hand when you need it most, providing immediate replacement for urgent needs. The everydrop by Whirlpool brand also provides reliable performance, making the everydrop EDR3RXD1 Filter a practical choice for Alabama homeowners.
Features Explained
Ice and Water Refrigerator Filter
The everydrop EDR3RXD1’s ice and water filtration ensures clean, great-tasting water and ice from your refrigerator dispenser. This feature provides comprehensive filtration for both your drinking water and ice, addressing Alabama’s varied water quality concerns. The ice and water filtration is also designed to be effective, ensuring your water and ice taste clean and fresh.
Model EDR3RXD1
The everydrop EDR3RXD1’s Model EDR3RXD1 design ensures perfect compatibility with select Whirlpool refrigerator models. This feature provides peace of mind, knowing the filter will fit your specific refrigerator model. The Model EDR3RXD1 design is also designed to be reliable, ensuring consistent performance with each use. For Alabama homeowners with compatible Whirlpool refrigerators, this compatibility is a standout feature.
Single-Pack
The everydrop EDR3RXD1’s single-pack design provides immediate replacement for urgent needs. This feature ensures you have a filter on hand when your current one runs out, making it a practical choice for Alabama households. The single-pack design is also convenient, providing the filtration you need without unnecessary extras.
everydrop by Whirlpool
The everydrop EDR3RXD1’s brand, everydrop by Whirlpool, provides reliable performance and quality. This feature ensures you can trust the filter to provide effective contaminant removal and maintain optimal water flow. The everydrop by Whirlpool brand is also designed to be durable, providing consistent performance over time.
NSF Certified
The everydrop EDR3RXD1’s NSF certification ensures the filter meets strict industry standards for safety and performance. This certification provides peace of mind, knowing the filter is tested and proven to remove specific contaminants. For Alabama homeowners, the NSF certification ensures reliable filtration that you can trust for clean, great-tasting water and ice.
Real World Usage
In real-world Alabama conditions, the everydrop EDR3RXD1 proves itself as a reliable, versatile refrigerator filter. In the homes of Birmingham, the Model EDR3RXD1 design ensures a perfect fit with Whirlpool refrigerators, while the NSF-certified filtration removes contaminants that can affect taste and odor. The easy installation process also saves time and hassle, making the filter a practical choice for city dwellers.
In the suburban areas of Huntsville, the everydrop EDR3RXD1’s performance shines. The high-quality filtration maintains optimal water flow while improving taste and odor, addressing Alabama’s varied water quality concerns. The Model EDR3RXD1 design also ensures a perfect fit, making the everydrop EDR3RXD1 Filter a practical choice for suburban households.
For daily use across Alabama, the everydrop EDR3RXD1’s versatility is put to the test. The filter’s high-quality filtration removes a wide range of contaminants from both water and ice dispensers, while the Model EDR3RXD1 design ensures optimal performance with select Whirlpool refrigerators. The easy installation process also saves time and hassle, making the filter a practical choice for Alabama homeowners.
Benefits
The everydrop EDR3RXD1 Filter offers numerous benefits that make it an excellent choice for Alabama homeowners. The Model EDR3RXD1 design ensures perfect compatibility with select Whirlpool refrigerator models, while the NSF certification guarantees effective contaminant removal. The easy installation process also saves time and hassle, and the high-quality filtration maintains optimal water flow while improving taste and odor for both water and ice.
The filter’s reliability is a major advantage. The single-pack design provides immediate replacement for urgent needs, while the everydrop by Whirlpool brand provides reliable performance. The NSF certification also ensures reliable filtration, making the everydrop EDR3RXD1 Filter a practical choice for Alabama households.
For Alabama residents specifically, the everydrop EDR3RXD1’s compatibility and certification are major advantages. The Model EDR3RXD1 design ensures the filter works with select Whirlpool refrigerators, while the NSF certification guarantees effective contaminant removal, addressing the state’s varied water quality concerns. The easy installation process also saves time and hassle, making the everydrop EDR3RXD1 a smart choice for Heart of Dixie homeowners.
Limitations
While the everydrop EDR3RXD1 Filter is an excellent choice for many applications, it does have some limitations to consider. The Model EDR3RXD1 design, while ensuring perfect compatibility with select Whirlpool refrigerator models, might not work with all refrigerator models. While the filter works with many Whirlpool models, some users might have refrigerators that require a different filter. However, the everydrop EDR3RXD1’s balanced performance makes it a practical choice for most Alabama homeowners with compatible Whirlpool refrigerators.
The single-pack design, while providing immediate replacement, might not be as cost-effective as some multi-pack options. While the single filter is practical for urgent needs, some users might prefer a multi-pack for better value. However, for most Alabama homeowners, the single-pack design provides more than sufficient convenience and performance.
The NSF certification, while ensuring reliable filtration, might not cover all possible contaminants. While the certification provides peace of mind, some users might prefer a filter with additional certifications for specific contaminants. However, for most Alabama households, the NSF certification provides more than sufficient safety and performance.
Who Should Buy It?
The everydrop EDR3RXD1 Filter is perfect for several types of users. Whirlpool refrigerator owners will appreciate the filter’s Model EDR3RXD1 design, which makes it ideal for maintaining optimal water quality. The NSF certification also ensures effective contaminant removal, while the easy installation process saves time and hassle. The high-quality filtration also maintains optimal water flow while improving taste and odor for both water and ice, making the everydrop EDR3RXD1 a practical choice for Alabama homeowners with compatible Whirlpool refrigerators.
Alabama residents with water quality concerns will also find the everydrop EDR3RXD1 an excellent choice. The filter’s NSF certification ensures effective contaminant removal, addressing the state’s varied water quality concerns. The Model EDR3RXD1 design also ensures a perfect fit with select Whirlpool refrigerators, making the everydrop EDR3RXD1 Filter a practical choice for households with specific water quality issues.
Busy households will appreciate the everydrop EDR3RXD1’s performance. The easy installation process saves time and hassle, while the single-pack design provides immediate replacement for urgent needs. The high-quality filtration also maintains optimal water flow while improving taste and odor, making the everydrop EDR3RXD1 Filter a practical choice for Alabama families who want clean water without complicated maintenance.
Who Should Avoid It?
While the everydrop EDR3RXD1 Filter is an excellent choice for many applications, it might not be the best choice for everyone. Users with non-Whirlpool refrigerators might want to consider other options. While the everydrop EDR3RXD1 works with select Whirlpool models, some users might have refrigerators that require a different filter. However, for most Alabama homeowners with compatible Whirlpool refrigerators, the everydrop EDR3RXD1’s balanced performance makes it a practical choice.
Users who prefer a multi-pack might also look for other options. While the everydrop EDR3RXD1’s single-pack design provides immediate replacement, some users might prefer a multi-pack for better value. However, for most Alabama homeowners, the single-pack design provides more than sufficient convenience and performance.
Users who need a filter with additional certifications might also want to consider other options. While the everydrop EDR3RXD1’s NSF certification ensures reliable filtration, some users might prefer a filter with more comprehensive certifications for specific contaminants. However, for most Alabama households, the NSF certification provides more than sufficient safety and performance.
Comparison with Similar Products
When compared to other refrigerator water filters in its price range, the everydrop EDR3RXD1 holds its own. Many competing filters lack the Model EDR3RXD1 design or the NSF certification provided by the everydrop EDR3RXD1. The easy installation process is also a standout feature that few other filters in this price range offer, saving time and hassle. The high-quality filtration adds to the everydrop EDR3RXD1’s value, making it a smart choice for budget-conscious Alabama homeowners with compatible Whirlpool refrigerators.
Compared to more expensive refrigerator water filters, the everydrop EDR3RXD1 offers many of the same features at a more accessible price point. While it might not have the premium materials or the most advanced filtration technology of high-end filters, it provides excellent performance for most household applications. The Model EDR3RXD1 design, NSF certification, and easy installation process make it a practical choice for Alabama homeowners who want reliable filtration without the premium price tag.
In terms of value, the everydrop EDR3RXD1 Filter stands out. The Model EDR3RXD1 design, NSF certification, and easy installation process provide the performance and features of more expensive filters at a reasonable price. The high-quality filtration and everydrop by Whirlpool brand also make it a practical choice for Alabama homeowners who want a filter that performs as well as it’s trusted.
Key Features
| Feature | Benefit | Why It Matters |
|---|---|---|
| Ice and Water Refrigerator Filter | Comprehensive filtration | Provides clean water and ice; addresses Alabama’s water quality concerns |
| Model EDR3RXD1 | Perfect compatibility | Ensures fit with select Whirlpool models; maintains optimal performance |
| Single-Pack | Immediate replacement | Provides urgent filter needs; practical for Alabama households |
| everydrop by Whirlpool | Reliable performance | Provides trusted brand quality; ensures effective filtration |
| NSF Certified | Safety and performance | Meets strict industry standards; provides reliable filtration |
Pros & Cons Table
| Pros | Cons |
|---|---|
| Model EDR3RXD1 ensures compatibility | May not work with all refrigerator models |
| NSF certified ensures safety | Single-pack may not be as cost-effective as multi-packs |
| Easy installation saves time | NSF certification may not cover all contaminants |
| Ice and water filtration provides comprehensive purification | Limited to specific brands |
| everydrop by Whirlpool provides reliable performance | May require occasional replacement for best performance |
| Good value for performance | May lack advanced features of high-end filters |
Installation Tips
Proper installation ensures your everydrop EDR3RXD1 filter performs at its best. Before installing, check your Whirlpool refrigerator model to confirm compatibility with the EDR3RXD1 filter. Most Whirlpool refrigerators with ice and water dispensers have a filter housing located in the upper right corner inside the refrigerator or in the grille at the base. Consult your refrigerator’s manual for the exact location.
When installing the water filter, make sure to align it properly with the housing and push it in until it clicks into place. After installation, run water through the dispenser for a few minutes to flush out any air or carbon particles from the new filter. This ensures your water tastes clean and fresh from the first use.
It’s also important to note the installation date on your calendar or the filter itself. This helps you keep track of when to replace the filter, typically every 6 months or as recommended by the manufacturer. Regular replacement ensures your everydrop EDR3RXD1 filter maintains its performance and provides clean, great-tasting water and ice for your Alabama household.
Replacement Tips
Regular replacement keeps your everydrop EDR3RXD1 filter performing at its best. Set a reminder to replace your filter every 6 months or as recommended by the manufacturer, even if it still appears to be working fine. Over time, filters can become less effective at removing contaminants, which can affect water and ice taste and quality.
Before replacing the filter, make sure to have a new everydrop EDR3RXD1 on hand. This ensures you can replace the old filter immediately, minimizing downtime. When removing the old filter, be careful to avoid spilling any water that may be in the housing.
It’s also important to check the filter periodically for any signs of wear or damage. If you notice any issues, such as a decrease in water flow or a change in water taste, it might be time to replace the filter, even if it’s before the recommended replacement time. Regular maintenance ensures your everydrop EDR3RXD1 filter maintains its performance and provides clean, great-tasting water and ice.
Troubleshooting Tips
If your Whirlpool refrigerator is not dispensing water or ice properly, it might be due to a clogged or improperly installed filter. Try replacing the filter with a new everydrop EDR3RXD1 to see if this resolves the issue. If the water or ice flow is still low, it might be due to a problem with the water line or the filter housing, which may need cleaning or maintenance.
If the water or ice tastes off or has an odor, it might be due to the filter needing replacement. Over time, filters can become saturated with contaminants, which can affect water and ice taste and odor. Try replacing the filter with a new everydrop EDR3RXD1 to see if this resolves the issue.
If the filter is not fitting properly, it might be due to a compatibility issue or a problem with the filter housing. Double-check that the everydrop EDR3RXD1 is compatible with your specific Whirlpool model. If the filter is still not fitting properly, it might be due to wear or damage to the filter housing, in which case you might need to contact the manufacturer or a professional for assistance.
If the refrigerator is not maintaining optimal performance, it might be due to a problem with the filter or the refrigerator itself. Check the filter for any signs of wear or damage, and ensure it is properly installed. If the refrigerator is still not maintaining optimal performance, it might be due to a problem with the refrigerator itself, in which case you might need to contact a professional for assistance.
What Real Buyers Appreciate
Owners consistently praise the everydrop EDR3RXD1 for its compatibility and performance. Many note that the Model EDR3RXD1 design ensures a perfect fit with their Whirlpool refrigerators, providing peace of mind and optimal performance. The NSF certification also receives high marks for its ability to ensure effective contaminant removal, addressing Alabama’s varied water quality concerns.
Several buyers mention that the easy installation process is a standout feature. This process saves time and hassle, making the filter a practical choice for busy Alabama households. The high-quality filtration is also frequently cited as a major advantage, maintaining optimal water flow while improving taste and odor for both water and ice, ensuring your family has clean, great-tasting hydration.
The everydrop EDR3RXD1’s reliability is another common praise. Many note that the filter maintains its performance over time, providing consistent water quality for their Alabama homes. The everydrop by Whirlpool brand is also appreciated for its trusted quality, making the everydrop EDR3RXD1 Filter a practical choice for Heart of Dixie homeowners.
Frequently Asked Questions
Why are Alabama homeowners choosing the everydrop EDR3RXD1 Filter?
Alabama homeowners are choosing the everydrop EDR3RXD1 Filter for its compatibility, performance, and value. The Model EDR3RXD1 design ensures a perfect fit with select Whirlpool refrigerator models, while the NSF certification guarantees effective contaminant removal. The easy installation process saves time and hassle, and the high-quality filtration maintains optimal water flow while improving taste and odor for both water and ice. For Heart of Dixie residents who want a reliable, compatible filter for their Whirlpool refrigerator, the everydrop EDR3RXD1 Filter is a practical choice that delivers genuine value.
Is the everydrop EDR3RXD1 Filter compatible with my Whirlpool refrigerator?
The everydrop EDR3RXD1 Filter is compatible with select Whirlpool refrigerator models. To confirm compatibility with your specific model, check your refrigerator’s manual or the existing filter model number. Many Whirlpool refrigerators with ice and water dispensers use the EDR3RXD1 filter, making it a reliable, compatible choice for Alabama homeowners with these models.
How does the everydrop EDR3RXD1 Filter improve water and ice quality?
The everydrop EDR3RXD1 Filter improves water and ice quality by using high-quality filtration media that removes a wide range of contaminants, from sediment to chemicals. This filtration process ensures your water and ice taste clean and fresh, addressing Alabama’s varied water quality concerns. The NSF certification also ensures the filter meets strict industry standards for safety and performance, providing reliable filtration that you can trust for both your drinking water and ice.
How often should I replace the everydrop EDR3RXD1 Filter?
The everydrop EDR3RXD1 Filter should be replaced every 6 months or as recommended by the manufacturer, depending on your usage and water quality. In Alabama, where water quality can vary from city to countryside, you might need to replace the filter more frequently to maintain optimal performance. Regular replacement ensures your water and ice stay clean and your refrigerator maintains optimal performance.
Is the everydrop EDR3RXD1 Filter easy to install?
Yes, the everydrop EDR3RXD1 Filter is designed for easy installation. The Model EDR3RXD1 design fits select Whirlpool refrigerators perfectly, requiring minimal effort to install. Simply align the filter with the housing and push it in until it clicks into place. For most Alabama homeowners with compatible Whirlpool refrigerators, the installation process is quick and hassle-free, saving time and effort.
Does the everydrop EDR3RXD1 Filter maintain optimal water flow?
Yes, the everydrop EDR3RXD1 Filter is designed to maintain optimal water flow while improving taste and odor. The high-quality filtration media removes contaminants effectively without restricting water flow, ensuring your refrigerator dispenses water and ice efficiently. For Alabama homeowners, this optimal flow is essential for maintaining a steady supply of clean, great-tasting water and ice.
Is the everydrop EDR3RXD1 Filter NSF certified?
Yes, the everydrop EDR3RXD1 Filter is NSF certified, ensuring it meets strict industry standards for safety and performance. This certification provides peace of mind, knowing the filter is tested and proven to remove specific contaminants. For Alabama homeowners, the NSF certification ensures reliable filtration that you can trust for clean, great-tasting water and ice.
What is the warranty on the everydrop EDR3RXD1 Filter?
The everydrop EDR3RXD1 Filter typically comes with a manufacturer’s warranty that covers defects in materials and workmanship. The exact terms of the warranty may vary, so it’s important to check the specific details provided by the manufacturer. Many users note that everydrop by Whirlpool’s customer service is responsive and helpful in addressing any issues that may arise, ensuring you can enjoy the filter’s benefits with confidence.
Final Verdict
The everydrop EDR3RXD1 Filter delivers exceptional value for Alabama homeowners seeking a reliable, compatible refrigerator filter for their Whirlpool appliances. The Model EDR3RXD1 design ensures perfect compatibility with select Whirlpool refrigerator models, while the NSF certification guarantees effective contaminant removal. The easy installation process saves time and hassle, and the high-quality filtration maintains optimal water flow while improving taste and odor for both water and ice.
While it might not have the premium materials or the most advanced filtration technology of high-end filters, the everydrop EDR3RXD1’s balanced performance makes it one of the most practical choices for most Alabama homeowners with compatible Whirlpool refrigerators. For those who want a filter that combines compatibility, performance, and value—whether for improving water and ice quality, addressing water quality concerns, or simply maintaining their refrigerator—the everydrop EDR3RXD1 Filter is a smart choice that delivers genuine value.
Call To Action
Ready to upgrade your Alabama home’s water and ice quality? The everydrop EDR3RXD1 Filter offers the perfect combination of compatibility, performance, and value for Whirlpool refrigerator owners across the Heart of Dixie. Whether you’re in a Birmingham apartment, a Huntsville suburb, or a Mobile home, this filter provides the clean, great-tasting water and ice you deserve.
Check current pricing and availability, and choose the everydrop EDR3RXD1 Filter for your compatible Whirlpool refrigerator. If you’re also comparing the Best everydrop EDR2RXD1 Water Filter, reviewing the differences between compatible filter models can help you select the right option for your refrigerator. With its Model EDR3RXD1 design, NSF certification, and easy installation, it’s ready to provide clean water and ice for your household. Invest in a filter that handles Alabama’s water quality demands with ease.
Best Frigidaire WF3CB Refrigerator Filter in New York (NY): Is This a Smart Choice for Homeowners Seeking a Compatible PureSource3 Replacement?
Key Takeaways
- The PureSource3 replacement design ensures perfect compatibility with Frigidaire refrigerators found in Empire State homes
- NSF-certified filtration removes contaminants, addressing New York’s varied water quality concerns from city to countryside
- Easy installation process saves time and hassle for busy New Yorkers who want clean water without complicated maintenance
- Single filter pack provides immediate replacement for urgent needs when your current filter runs out
- High-quality filtration maintains optimal water flow while improving taste and odor for better drinking and cooking
- White color blends seamlessly with most refrigerator interiors for a clean, professional look
New York homeowners understand the value of clean, great-tasting water from their refrigerator dispenser. The Frigidaire WF3CB Refrigerator Filter delivers as a compatible PureSource3 replacement that addresses the Empire State’s varied water quality concerns. This isn’t just a refrigerator filter—it’s a reliable solution that ensures your Frigidaire appliance dispenses clean, fresh water while maintaining optimal performance. For New York residents who want a compatible, effective filter for their Frigidaire refrigerator, the Frigidaire WF3CB Refrigerator Filter offers genuine value and peace of mind.
The Frigidaire WF3CB stands out by addressing the specific needs of New York households. Its PureSource3 replacement design ensures perfect compatibility with Frigidaire refrigerators, while the NSF certification guarantees effective contaminant removal. The easy installation process saves time and hassle, and the high-quality filtration maintains optimal water flow while improving taste and odor. Whether you’re in a Manhattan apartment, a suburban home in Buffalo, or a country house in the Catskills, the Frigidaire WF3CB Refrigerator Filter checks all the boxes for clean, reliable water filtration.
Product at a Glance
Frigidaire WF3CB Refrigerator Filter
| Feature | Frigidaire WF3CB Refrigerator Filter |
|---|---|
| Type | Refrigerator water filter |
| Compatibility | PureSource3 replacement |
| Color | White |
| Pack | 1 count (pack of 1) |
| Certification | NSF certified |
Detailed Review
Why This Product Stands Out
The Frigidaire WF3CB earns its reputation by solving the specific water filtration challenges that New York homeowners face. Most refrigerator filters either lack compatibility with Frigidaire PureSource3 systems or don’t provide the certification needed for reliable performance, but the WF3CB delivers both with its PureSource3 replacement design and NSF certification. This combination ensures you have a filter that fits perfectly and removes contaminants effectively from your New York water supply.
New York’s varied water quality demands reliable filtration. The Frigidaire WF3CB’s PureSource3 replacement design ensures perfect compatibility with Frigidaire refrigerators, while the NSF certification guarantees effective removal of contaminants that can affect taste and odor. The easy installation process also saves time and hassle, making the Frigidaire WF3CB Refrigerator Filter a practical choice for Empire State households.

Key Specifications
| Specification | Details |
|---|---|
| Type | Refrigerator water filter |
| Compatibility | PureSource3 replacement |
| Color | White |
| Pack | 1 count (pack of 1) |
| Certification | NSF certified |
| Material | High-quality filtration media |
| Lifespan | Varies by usage (typically 6 months) |
| Flow Rate | Maintains optimal water flow |
Design & Build Quality
The Frigidaire WF3CB features a design optimized for both compatibility and performance. The PureSource3 replacement design ensures a perfect fit with Frigidaire refrigerators, while the white color blends seamlessly with most refrigerator interiors. The filter’s shape is also designed to provide easy installation, ensuring you can replace it with minimal effort.
The build quality reflects Frigidaire’s commitment to reliability and performance. The materials are chosen for their ability to provide high-quality filtration that removes contaminants while maintaining optimal water flow. The NSF certification also ensures the filter meets strict industry standards for safety and performance, providing peace of mind for New York homeowners.
Materials & Construction
The Frigidaire WF3CB uses high-quality filtration media designed to provide both effective contaminant removal and optimal water flow. The filter is designed to remove a wide range of contaminants, from sediment to chemicals, ensuring your water tastes clean and fresh. This material is also designed to be durable, ensuring the filter maintains its performance over time.
The PureSource3 replacement design is another standout feature. This design ensures a perfect fit with Frigidaire refrigerators, providing optimal performance and maintaining the refrigerator’s efficiency. The high-quality filtration media also ensures the filter captures a wide range of contaminants effectively, making the Frigidaire WF3CB Refrigerator Filter a practical choice for New York homeowners.
Performance
In New York’s varied water conditions, the Frigidaire WF3CB delivers consistent performance. In the apartments of Manhattan, the PureSource3 replacement design ensures a perfect fit with Frigidaire refrigerators, while the NSF-certified filtration removes contaminants that can affect taste and odor. The easy installation process also saves time and hassle, making the filter a practical choice for city dwellers.
In the suburban homes of Buffalo, the Frigidaire WF3CB’s performance shines. The high-quality filtration maintains optimal water flow while improving taste and odor, addressing New York’s varied water quality concerns. The PureSource3 replacement design also ensures a perfect fit, making the Frigidaire WF3CB Refrigerator Filter a practical choice for suburban households.
For daily use across New York, the Frigidaire WF3CB’s versatility is put to the test. The filter’s high-quality filtration removes a wide range of contaminants, while the PureSource3 replacement design ensures optimal performance with Frigidaire refrigerators. The easy installation process also saves time and hassle, making the filter a practical choice for New York homeowners.
Comfort & Usability
The Frigidaire WF3CB scores high marks for usability. The PureSource3 replacement design ensures a perfect fit with Frigidaire refrigerators, reducing the need for adjustments or modifications. The easy installation process also saves time and hassle, making the filter a practical choice for New York households.
The NSF certification adds to the Frigidaire WF3CB’s usability by ensuring effective contaminant removal. This feature provides peace of mind, knowing your water is clean and safe to drink. The high-quality filtration also maintains optimal water flow, ensuring your refrigerator dispenses water efficiently.
The white color is another usability advantage. This feature ensures the filter blends seamlessly with most refrigerator interiors, maintaining a clean, professional appearance. The single filter pack also provides immediate replacement for urgent needs, making the Frigidaire WF3CB Refrigerator Filter a practical choice for New York homeowners.
Features Explained
PureSource3 Replacement
The Frigidaire WF3CB’s PureSource3 replacement design ensures perfect compatibility with Frigidaire refrigerators. This feature provides peace of mind, knowing the filter will fit your specific refrigerator model. The PureSource3 replacement design is also designed to be reliable, ensuring consistent performance with each use. For New York homeowners with Frigidaire refrigerators, this compatibility is a standout feature.
1 Count (Pack of 1)
The Frigidaire WF3CB’s single filter pack provides immediate replacement for urgent needs. This feature ensures you have a filter on hand when your current one runs out, making it a practical choice for New York households. The single filter pack is also cost-effective, providing the filtration you need without unnecessary extras.
White
The Frigidaire WF3CB’s white color blends seamlessly with most refrigerator interiors. This feature ensures the filter maintains a clean, professional appearance, making it a practical choice for New York homeowners who want a filter that looks as good as it performs.
NSF Certified
The Frigidaire WF3CB’s NSF certification ensures the filter meets strict industry standards for safety and performance. This certification provides peace of mind, knowing the filter is tested and proven to remove specific contaminants. For New York homeowners, the NSF certification ensures reliable filtration that you can trust for clean, great-tasting water.
Real World Usage
In real-world New York conditions, the Frigidaire WF3CB proves itself as a reliable, versatile refrigerator filter. In the apartments of Manhattan, the PureSource3 replacement design ensures a perfect fit with Frigidaire refrigerators, while the NSF-certified filtration removes contaminants that can affect taste and odor. The easy installation process also saves time and hassle, making the filter a practical choice for city dwellers.
In the suburban homes of Buffalo, the Frigidaire WF3CB’s performance shines. The high-quality filtration maintains optimal water flow while improving taste and odor, addressing New York’s varied water quality concerns. The PureSource3 replacement design also ensures a perfect fit, making the Frigidaire WF3CB Refrigerator Filter a practical choice for suburban households.
For daily use across New York, the Frigidaire WF3CB’s versatility is put to the test. The filter’s high-quality filtration removes a wide range of contaminants, while the PureSource3 replacement design ensures optimal performance with Frigidaire refrigerators. The easy installation process also saves time and hassle, making the filter a practical choice for New York homeowners.
Benefits
The Frigidaire WF3CB Refrigerator Filter offers numerous benefits that make it an excellent choice for New York homeowners. The PureSource3 replacement design ensures perfect compatibility with Frigidaire refrigerators, while the NSF certification guarantees effective contaminant removal. The easy installation process also saves time and hassle, and the high-quality filtration maintains optimal water flow while improving taste and odor.
The filter’s reliability is a major advantage. The single filter pack provides immediate replacement for urgent needs, while the white color blends seamlessly with most refrigerator interiors. The NSF certification also ensures reliable filtration, making the Frigidaire WF3CB Refrigerator Filter a practical choice for New York households.
For New York residents specifically, the Frigidaire WF3CB’s compatibility and certification are major advantages. The PureSource3 replacement design ensures the filter works with Frigidaire refrigerators, while the NSF certification guarantees effective contaminant removal, addressing the state’s varied water quality concerns. The easy installation process also saves time and hassle, making the Frigidaire WF3CB a smart choice for Empire State homeowners.
Limitations
While the Frigidaire WF3CB Refrigerator Filter is an excellent choice for many applications, it does have some limitations to consider. The PureSource3 replacement design, while ensuring perfect compatibility with Frigidaire refrigerators, might not work with all refrigerator models. While the filter works with many Frigidaire models, some users might have refrigerators that require a different filter. However, the Frigidaire WF3CB’s balanced performance makes it a practical choice for most New York homeowners with Frigidaire refrigerators.
The single filter pack, while providing immediate replacement, might not be as cost-effective as some multi-pack options. While the single filter is practical for urgent needs, some users might prefer a multi-pack for better value. However, for most New York homeowners, the single filter pack provides more than sufficient convenience and performance.
The NSF certification, while ensuring reliable filtration, might not cover all possible contaminants. While the certification provides peace of mind, some users might prefer a filter with additional certifications for specific contaminants. However, for most New York households, the NSF certification provides more than sufficient safety and performance.
Who Should Buy It?
The Frigidaire WF3CB Refrigerator Filter is perfect for several types of users. Frigidaire refrigerator owners will appreciate the filter’s PureSource3 replacement design, which makes it ideal for maintaining optimal water quality. The NSF certification also ensures effective contaminant removal, while the easy installation process saves time and hassle. The high-quality filtration also maintains optimal water flow while improving taste and odor, making the Frigidaire WF3CB a practical choice for New York homeowners with Frigidaire refrigerators.
New York residents with water quality concerns will also find the Frigidaire WF3CB an excellent choice. The filter’s NSF certification ensures effective contaminant removal, addressing the state’s varied water quality concerns. The PureSource3 replacement design also ensures a perfect fit with Frigidaire refrigerators, making the Frigidaire WF3CB Refrigerator Filter a practical choice for households with specific water quality issues.
Busy households will appreciate the Frigidaire WF3CB’s performance. The easy installation process saves time and hassle, while the single filter pack provides immediate replacement for urgent needs. The high-quality filtration also maintains optimal water flow while improving taste and odor, making the Frigidaire WF3CB a practical choice for New York families who want clean water without complicated maintenance.
Who Should Avoid It?
While the Frigidaire WF3CB Refrigerator Filter is an excellent choice for many applications, it might not be the best choice for everyone. Users with non-Frigidaire refrigerators might want to consider other options. While the Frigidaire WF3CB works with Frigidaire PureSource3 systems, some users might have refrigerators that require a different filter. However, for most New York homeowners with Frigidaire refrigerators, the Frigidaire WF3CB’s balanced performance makes it a practical choice.
Users who prefer a multi-pack might also look for other options. While the Frigidaire WF3CB’s single filter pack provides immediate replacement, some users might prefer a multi-pack for better value. However, for most New York homeowners, the single filter pack provides more than sufficient convenience and performance.
Users who need a filter with additional certifications might also want to consider other options. While the Frigidaire WF3CB’s NSF certification ensures reliable filtration, some users might prefer a filter with more comprehensive certifications for specific contaminants. However, for most New York households, the NSF certification provides more than sufficient safety and performance.
Comparison with Similar Products
When compared to other refrigerator water filters in its price range, the Frigidaire WF3CB holds its own. Many competing filters lack the PureSource3 replacement design or the NSF certification provided by the Frigidaire WF3CB. The easy installation process is also a standout feature that few other filters in this price range offer, saving time and hassle. The high-quality filtration adds to the Frigidaire WF3CB’s value, making it a smart choice for budget-conscious New York homeowners with Frigidaire refrigerators.
Compared to more expensive refrigerator water filters, the Frigidaire WF3CB offers many of the same features at a more accessible price point. While it might not have the premium materials or the most advanced filtration technology of high-end filters, it provides excellent performance for most household applications. The PureSource3 replacement design, NSF certification, and easy installation process make it a practical choice for New York homeowners who want reliable filtration without the premium price tag.
In terms of value, the Frigidaire WF3CB Refrigerator Filter stands out. The PureSource3 replacement design, NSF certification, and easy installation process provide the performance and features of more expensive filters at a reasonable price. The high-quality filtration and white color also make it a practical choice for New York homeowners who want a filter that performs as well as it looks.
Key Features
| Feature | Benefit | Why It Matters |
|---|---|---|
| PureSource3 Replacement | Perfect compatibility | Ensures fit with Frigidaire refrigerators; maintains optimal performance |
| 1 Count (Pack of 1) | Immediate replacement | Provides urgent filter needs; practical for New York households |
| White | Clean appearance | Blends seamlessly with refrigerator interiors; maintains professional look |
| NSF Certified | Safety and performance | Meets strict industry standards; provides reliable filtration |
| Easy Installation | Saves time | Minimizes hassle; ensures quick replacement |
| High-Quality Filtration | Removes contaminants | Improves water taste and odor; addresses New York’s water quality concerns |
Pros & Cons Table
| Pros | Cons |
|---|---|
| PureSource3 replacement ensures compatibility | May not work with all refrigerator models |
| NSF certified ensures safety | Single filter pack may not be as cost-effective as multi-packs |
| Easy installation saves time | NSF certification may not cover all contaminants |
| White color blends with interiors | Limited to specific brands |
| High-quality filtration removes contaminants | May require occasional replacement for best performance |
| Good value for performance | May lack advanced features of high-end filters |
Installation Tips
Proper installation ensures your Frigidaire WF3CB filter performs at its best. Before installing, check your Frigidaire refrigerator model to confirm compatibility with the WF3CB filter. Most Frigidaire PureSource3 systems have a filter housing located in the upper right corner inside the refrigerator or in the grille at the base. Consult your refrigerator’s manual for the exact location.
When installing the water filter, make sure to align it properly with the housing and push it in until it clicks into place. After installation, run water through the dispenser for a few minutes to flush out any air or carbon particles from the new filter. This ensures your water tastes clean and fresh from the first use.
It’s also important to note the installation date on your calendar or the filter itself. This helps you keep track of when to replace the filter, typically every 6 months or as recommended by the manufacturer. Regular replacement ensures your filter maintains its performance and provides clean, great-tasting water for your New York household.
Replacement Tips
Regular replacement keeps your Frigidaire WF3CB filter performing at its best. Set a reminder to replace your filter every 6 months or as recommended by the manufacturer, even if it still appears to be working fine. Over time, filters can become less effective at removing contaminants, which can affect water taste and quality.
Before replacing the filter, make sure to have a new Frigidaire WF3CB on hand. This ensures you can replace the old filter immediately, minimizing downtime. When removing the old filter, be careful to avoid spilling any water that may be in the housing.
It’s also important to check the filter periodically for any signs of wear or damage. If you notice any issues, such as a decrease in water flow or a change in water taste, it might be time to replace the filter, even if it’s before the recommended replacement time. Regular maintenance ensures your Frigidaire WF3CB filter maintains its performance and provides clean, great-tasting water.
Troubleshooting Tips
If your Frigidaire refrigerator is not dispensing water properly, it might be due to a clogged or improperly installed filter. Try replacing the filter with a new Frigidaire WF3CB to see if this resolves the issue. If the water flow is still low, it might be due to a problem with the water line or the filter housing, which may need cleaning or maintenance.
If the water tastes off or has an odor, it might be due to the filter needing replacement. Over time, filters can become saturated with contaminants, which can affect water taste and odor. Try replacing the filter with a new Frigidaire WF3CB to see if this resolves the issue.
If the filter is not fitting properly, it might be due to a compatibility issue or a problem with the filter housing. Double-check that the Frigidaire WF3CB is compatible with your specific refrigerator model. If the filter is still not fitting properly, it might be due to wear or damage to the filter housing, in which case you might need to contact the manufacturer or a professional for assistance.
If the refrigerator is not maintaining optimal performance, it might be due to a problem with the filter or the refrigerator itself. Check the filter for any signs of wear or damage, and ensure it is properly installed. If the refrigerator is still not maintaining optimal performance, it might be due to a problem with the refrigerator itself, in which case you might need to contact a professional for assistance.
What Real Buyers Appreciate
Owners consistently praise the Frigidaire WF3CB for its compatibility and performance. Many note that the PureSource3 replacement design ensures a perfect fit with Frigidaire refrigerators, providing peace of mind and optimal performance. The NSF certification also receives high marks for its ability to ensure effective contaminant removal, addressing New York’s varied water quality concerns.
Several buyers mention that the easy installation process is a standout feature. This process saves time and hassle, making the filter a practical choice for busy New York households. The high-quality filtration is also frequently cited as a major advantage, maintaining optimal water flow while improving taste and odor, ensuring your water is clean and fresh.
The Frigidaire WF3CB’s reliability is another common praise. Many note that the filter maintains its performance over time, providing consistent water quality for their New York homes. The white color is also appreciated for its ability to blend seamlessly with most refrigerator interiors, maintaining a clean, professional appearance.
Frequently Asked Questions
Is the Frigidaire WF3CB Refrigerator Filter a smart choice for New York homeowners seeking a compatible PureSource3 replacement?
Yes, the Frigidaire WF3CB Refrigerator Filter is a smart choice for New York homeowners seeking a compatible PureSource3 replacement. The filter provides perfect compatibility with Frigidaire refrigerators, ensuring optimal performance and clean, great-tasting water. The NSF certification also guarantees effective contaminant removal, addressing New York’s varied water quality concerns. The easy installation process saves time and hassle, making the Frigidaire WF3CB a practical choice for Empire State residents who want a reliable, compatible filter for their refrigerator.
Is the Frigidaire WF3CB Refrigerator Filter compatible with my Frigidaire refrigerator?
The Frigidaire WF3CB Refrigerator Filter is compatible with Frigidaire PureSource3 systems. To confirm compatibility with your specific model, check your refrigerator’s manual or the existing filter model number. Most Frigidaire refrigerators with PureSource3 systems use the WF3CB filter, making it a reliable, compatible choice for New York homeowners with these models.
How does the Frigidaire WF3CB Refrigerator Filter improve water quality?
The Frigidaire WF3CB Refrigerator Filter improves water quality by using high-quality filtration media that removes a wide range of contaminants, from sediment to chemicals. This filtration process ensures your water tastes clean and fresh, addressing New York’s varied water quality concerns. The NSF certification also ensures the filter meets strict industry standards for safety and performance, providing reliable filtration that you can trust.
How often should I replace the Frigidaire WF3CB Refrigerator Filter?
The Frigidaire WF3CB Refrigerator Filter should be replaced every 6 months or as recommended by the manufacturer, depending on your usage and water quality. In New York, where water quality can vary from city to countryside, you might need to replace the filter more frequently to maintain optimal performance. Regular replacement ensures your water stays clean and your refrigerator maintains optimal performance.
Is the Frigidaire WF3CB Refrigerator Filter easy to install?
Yes, the Frigidaire WF3CB Refrigerator Filter is designed for easy installation. The PureSource3 replacement design fits Frigidaire refrigerators perfectly, requiring minimal effort to install. Simply align the filter with the housing and push it in until it clicks into place. For most New York homeowners with compatible refrigerators, the installation process is quick and hassle-free, saving time and effort.
Does the Frigidaire WF3CB Refrigerator Filter maintain optimal water flow?
Yes, the Frigidaire WF3CB Refrigerator Filter is designed to maintain optimal water flow while improving taste and odor. The high-quality filtration media removes contaminants effectively without restricting water flow, ensuring your refrigerator dispenses water efficiently. For New York homeowners, this optimal flow is essential for maintaining a steady supply of clean, great-tasting water.
Is the Frigidaire WF3CB Refrigerator Filter NSF certified?
Yes, the Frigidaire WF3CB Refrigerator Filter is NSF certified, ensuring it meets strict industry standards for safety and performance. This certification provides peace of mind, knowing the filter is tested and proven to remove specific contaminants. For New York homeowners, the NSF certification ensures reliable filtration that you can trust for clean, great-tasting water.
What is the warranty on the Frigidaire WF3CB Refrigerator Filter?
The Frigidaire WF3CB Refrigerator Filter typically comes with a manufacturer’s warranty that covers defects in materials and workmanship. The exact terms of the warranty may vary, so it’s important to check the specific details provided by the manufacturer. Many users note that Frigidaire’s customer service is responsive and helpful in addressing any issues that may arise, ensuring you can enjoy the filter’s benefits with confidence.
Final Verdict
The Frigidaire WF3CB Refrigerator Filter delivers exceptional value for New York homeowners seeking a reliable, compatible PureSource3 replacement for their Frigidaire refrigerators. The PureSource3 replacement design ensures perfect compatibility, while the NSF certification guarantees effective contaminant removal. The easy installation process saves time and hassle, and the high-quality filtration maintains optimal water flow while improving taste and odor.
While it might not have the premium materials or the most advanced filtration technology of high-end filters, the Frigidaire WF3CB’s balanced performance makes it one of the most practical choices for most New York homeowners with Frigidaire refrigerators. For those who want a filter that combines compatibility, performance, and value—whether for improving water taste, addressing water quality concerns, or simply maintaining their refrigerator—the Frigidaire WF3CB Refrigerator Filter is a smart choice that delivers genuine value.
Call To Action
Ready to upgrade your New York home’s water quality? The Frigidaire WF3CB Refrigerator Filter offers the perfect combination of compatibility, performance, and value for Frigidaire refrigerator owners across the Empire State. Whether you’re in a Manhattan apartment, a suburban home in Buffalo, or a country house in the Catskills, this filter provides the clean, great-tasting water you deserve.
Check current pricing and availability, and choose the Frigidaire WF3CB Refrigerator Filter for your PureSource3 system. If you’re also comparing options such as the Best GE XWFE Refrigerator Filter, consider your refrigerator model and filter compatibility before making a choice. With its PureSource3 replacement design, NSF certification, and easy installation, the Frigidaire WF3CB is ready to provide clean water for your household. Invest in a filter that handles New York’s water quality demands with ease.