How to Clean a Bella 2 Slice Slim Toaster

Best Ember Temperature Control Smart Mug in Washington (WA): What Makes the 14 Oz Design Stand Out?
August 8, 2026
Why the Instant Pot Duo is a Kitchen Must
August 9, 2026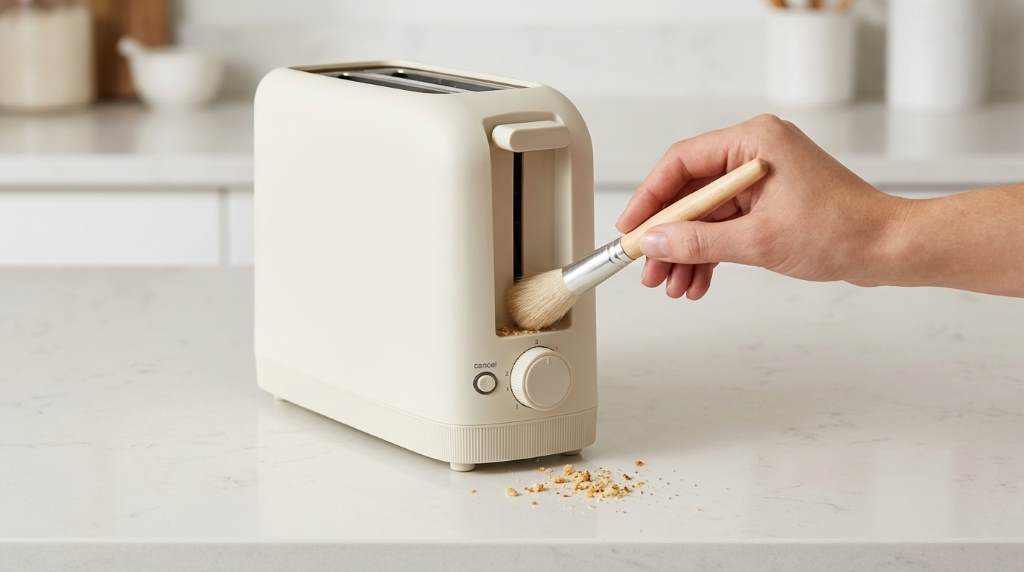
To clean a Bella 2 slice slim toaster, unplug it, let it cool, empty the crumb tray, and wipe the exterior. Never immerse the toaster, cord, or plug in water. The toaster uses a 900 watt system and measures about 3.58 inches wide, making it easy to maintain.
Regular cleaning helps prevent burnt crumbs, unwanted odors, and messy countertops. Therefore, a simple routine can keep your Bella 2 slice slim toaster cleaner and ready for daily use.
Why Regular Toaster Cleaning Matters
Toasters collect crumbs every time bread, bagels, or pastries pass through the heating area. Over time, those crumbs can burn and create smoke or unpleasant smells.
Fortunately, the Bella toaster includes a removable crumb catcher for easier routine maintenance. The manufacturer also recommends an easy wipe exterior for straightforward cleanup.
Furthermore, regular cleaning makes it easier to notice stuck food or other problems early. A clean toaster also keeps loose crumbs from spreading across your kitchen counter.
What You Need Before Cleaning
You only need a few basic household items for routine Bella toaster cleaning. Avoid harsh tools because they can damage the toaster’s exterior or internal components.
- Soft, damp microfiber cloth
- Clean, dry cloth
- Small bowl for crumbs
- Mild dish soap for the removable tray
- Soft brush for loose crumbs
Most importantly, never use water directly inside the toaster. Also, avoid metal tools, abrasive pads, and aggressive cleaning chemicals.
How to Clean a Bella 2 Slice Slim Toaster
1. Unplug the Toaster Completely
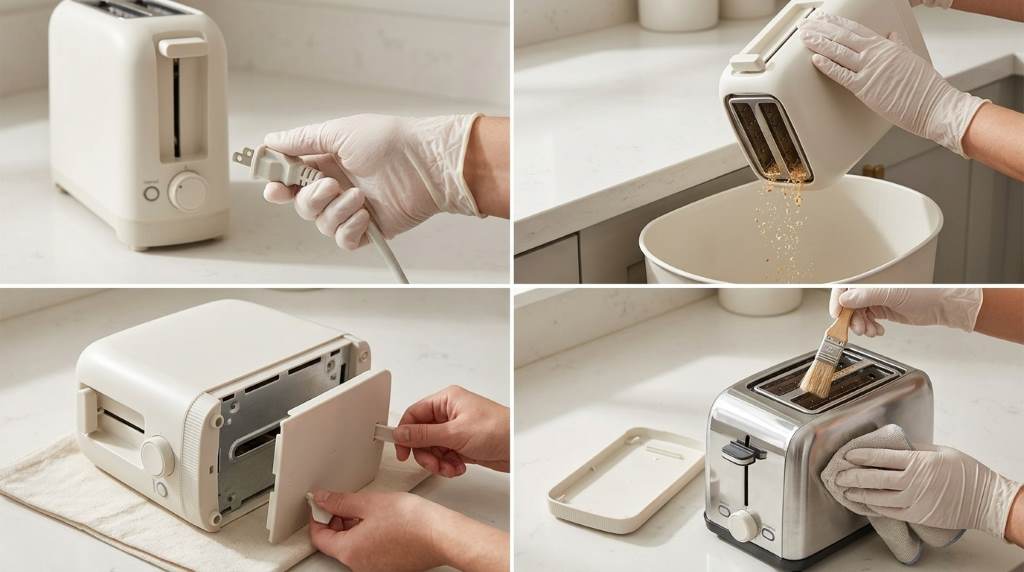
Start by switching off the toaster and removing its plug from the electrical outlet. Never begin cleaning while the toaster remains connected to household power.
Next, move the unplugged toaster to a stable, clear countertop area. Allow the appliance to cool completely before touching the crumb tray or surrounding surfaces.
2. Remove the Crumb Tray
Locate the removable crumb tray underneath the toaster. Pull the tray out carefully and keep it level while removing it.
Then, empty the collected crumbs into a trash can or suitable container. Avoid shaking the entire toaster aggressively because loose crumbs can enter unwanted areas.
The removable tray provides the easiest way to handle routine crumb buildup. Therefore, check it regularly if you use the toaster every day.
3. Wash and Dry the Crumb Tray
Wipe the crumb tray with a damp cloth to remove remaining food particles. For greasy residue, use a small amount of mild dish soap on the cloth.
After cleaning, rinse the tray only if its construction and care instructions allow it. More importantly, dry the tray completely before placing it back into the toaster.
Never reinstall a wet tray because moisture can create an unnecessary electrical safety risk. The product instructions specifically call for thorough drying before reinsertion.
4. Remove Loose Crumbs Safely
After removing the tray, gently tilt the toaster over a trash can or sink. Use controlled movements rather than forceful shaking to release loose crumbs.
You can also use a soft brush to loosen visible crumbs around accessible areas. However, never push the brush deeply into the toaster slots.
Do not insert knives, forks, spoons, or other metal objects into the slots. These tools can contact electrical components or heating elements and create serious hazards.
5. Clean the Exterior
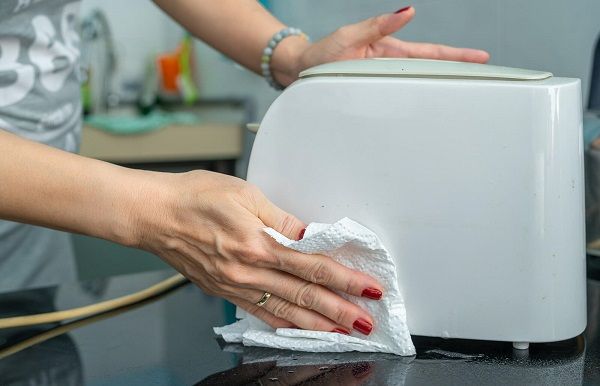
Dampen a soft microfiber cloth with clean water and wring out excess moisture. Then, gently wipe the toaster’s exterior from top to bottom.
Pay extra attention to fingerprints, food residue, and areas around the controls. Use gentle strokes instead of scrubbing aggressively across the surface.
BELLA recommends a soft, damp cloth for exterior cleaning. The instructions also warn against abrasive cleaners and metal scouring pads.
6. Clean Around the Controls
The shade control and function buttons can collect crumbs and fingerprints during normal use. Therefore, wipe these areas carefully with a lightly damp cloth.
Keep moisture away from openings, controls, and electrical connections. Never spray cleaner directly onto the toaster because liquid can enter the appliance.
Finally, use a dry cloth to remove remaining moisture from the control area. Let every surface dry completely before reconnecting power.
7. Check the Toasting Slot
Inspect the long slot after cleaning the removable tray and exterior. Look for visible crumbs, burnt food, or objects that should not remain inside.
The Bella 2 Slice Slim Toaster uses one long slot designed for two slices side by side. Its slot also accommodates larger breads, including thick artisan slices and Texas style toast.
Because larger foods can shed more crumbs, inspect the slot more often when you toast thick bread. Never force oversized food into the opening.
How to Handle Burnt Crumbs and Bad Odors
Burnt crumbs often cause a noticeable smell during repeated toasting cycles. First, unplug the toaster and let it cool completely.
Next, remove and clean the crumb tray thoroughly. Then, gently remove accessible loose crumbs without inserting objects into the heating area.
If the smell continues after cleaning, stop using the toaster until you identify the cause. Persistent burning odors can indicate trapped food, an electrical problem, or another fault.
How Often Should You Clean the Bella Toaster?
Empty the crumb tray at least once a week when you use the toaster regularly. Daily users may benefit from checking the tray every few days.
Perform a deeper exterior cleaning whenever you notice fingerprints, grease, or food residue. Also, inspect the slot whenever toast produces unusual smoke or smells.
Your cleaning schedule should match your usage rather than follow one rigid timetable. Heavy users generally need more frequent crumb removal than occasional users.
Best Cleaning Routine for Frequent Users
A short routine after regular use can prevent larger cleaning jobs later. Once the toaster cools, check the tray and remove visible crumbs.
- Check the crumb tray every few uses.
- Empty accumulated crumbs before they become heavy.
- Wipe exterior marks when they appear.
- Inspect the slot after messy foods.
- Perform a thorough cleaning each week.
This approach takes very little time and keeps maintenance manageable. Additionally, regular checks can help you notice unusual smoke or food buildup sooner.
Cleaning Mistakes to Avoid
Never Put the Toaster in Water
Never immerse the toaster body, electrical cord, or plug in water. Water can reach electrical components and create a dangerous shock or fire risk.
Do Not Use Abrasive Cleaners
Abrasive cleaners and metal scouring pads can scratch the toaster’s exterior. Instead, use a soft damp cloth for routine surface cleaning.
Do Not Clean While Plugged In
Always disconnect the toaster before cleaning any component. Allowing the appliance to cool first also reduces the risk of burns.
Do Not Use Metal Objects Inside
Never use metal utensils to remove stuck bread or crumbs from the slot. If food becomes stuck, unplug the toaster and allow it to cool before addressing the problem.
Do Not Reinsert a Wet Tray
Moisture should never remain on the crumb tray before you reinstall it. Dry the tray completely with a clean towel before returning it to the appliance.
How to Clean a Stuck Bread Area Safely
Sometimes bread can become lodged inside a toaster during normal operation. If that happens, immediately unplug the toaster and wait until it cools completely.
Never pull aggressively or use sharp objects to remove the bread. Instead, follow the manufacturer’s safe handling instructions and avoid touching internal heating components.
If you cannot remove the obstruction safely, stop using the appliance. Contact the manufacturer for appropriate support instead of risking damage or injury.
How to Keep the Toaster Cleaner Longer
Use bread that fits comfortably inside the long slot without forcing it downward. Foods that shed many crumbs require more frequent tray cleaning.
Also, avoid placing heavily buttered or coated foods inside a standard toaster unless the manufacturer specifically permits them. Excess residue can create smoke and make cleanup harder.
Keep the toaster on a clean, dry countertop between uses. Additionally, store the cord neatly to reduce countertop clutter around the appliance.
When Cleaning Does Not Solve the Problem
Cleaning can remove crumbs, residue, and ordinary food buildup. However, cleaning cannot repair damaged electrical components or mechanical failures.
Stop using the toaster if you notice repeated sparks, damaged wiring, unusual electrical smells, or persistent burning. A qualified service professional or manufacturer support team should handle suspected electrical faults.
Likewise, do not continue operating the appliance simply because it still produces toast. Electrical problems can become more serious when users ignore warning signs.
Quick Bella Toaster Cleaning Checklist
Use this checklist whenever you need a quick maintenance routine. It keeps the process simple without requiring specialized cleaning products.
- Unplug the toaster.
- Let the toaster cool completely.
- Remove the crumb tray.
- Empty loose crumbs.
- Clean and dry the tray.
- Gently remove accessible crumbs.
- Wipe the exterior with a soft damp cloth.
- Dry all cleaned surfaces.
- Reinstall the completely dry crumb tray.
- Store the toaster in a clean, dry location.
Final Thoughts
Learning how to clean a Bella 2 Slice Slim Toaster takes only a few simple steps. Unplug the appliance, cool it completely, clean the removable tray, remove loose crumbs, and wipe the exterior.
Most importantly, never immerse the toaster or use metal tools inside its slot. Follow this routine regularly to keep your toaster cleaner and reduce avoidable food buildup.
For the best results, make crumb tray cleaning part of your normal kitchen routine. A few minutes of maintenance can keep your Bella toaster ready for dependable everyday use.
Frequently Asked Questions
Can I wash the Bella toaster with water?
No, never immerse the toaster, cord, or plug in water or another liquid.
How do I clean the Bella toaster crumb tray?
Remove the tray, empty the crumbs, wipe it clean, and dry it completely before reinserting it.
Can I use an abrasive cleaner on the toaster?
No, use a soft damp cloth because abrasive cleaners and metal pads can damage the exterior.
How often should I empty the crumb tray?
Check the tray regularly and empty it whenever crumbs accumulate noticeably.
What should I do if bread gets stuck?
Unplug the toaster, let it cool, and avoid using metal utensils or force to remove the bread.