
Keurig K-Express Single Serve K-Cup Pod Coffee Maker in Pennsylvania (PA): Is It Right for Your Kitchen?
Pennsylvania mornings deserve a perfect cup of coffee to start the day right. A reliable single-serve coffee maker delivers convenience and quality in one compact package. It transforms your kitchen routine from a chore to a pleasure.
The Keurig K-Express Single Serve K-Cup Pod Coffee Maker in Pennsylvania (PA) offers a streamlined coffee experience for busy households. Its compact design fits perfectly in Pennsylvania kitchens of all sizes. This machine combines speed, simplicity, and versatility for coffee lovers. It provides the perfect balance of convenience and quality for your daily brew.
Product at a Glance
Product List:
Keurig K-Express Single Serve K-Cup Pod Coffee Maker: Detailed Review
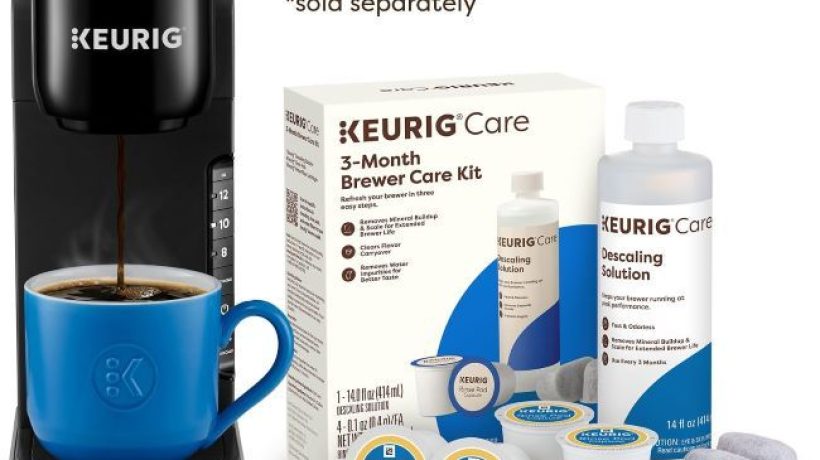
Keurig K-Express Single Serve K-Cup Pod Coffee Maker, 3 Brew Sizes, Strong Button Feature, 42oz Removable Reservoir, Black
Why Best: Compact single-serve coffee maker with multiple brew sizes.
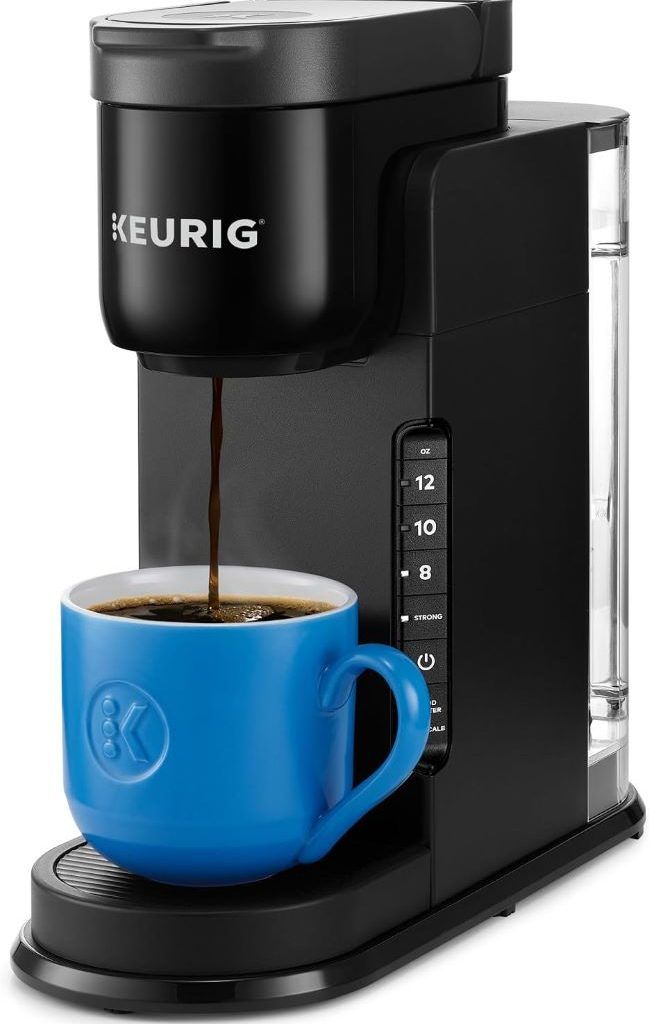
The Keurig K-Express Single Serve K-Cup Pod Coffee Maker delivers a perfect cup of coffee in minutes. Its 3 brew sizes accommodate different cup sizes and strength preferences. The strong button feature allows for a bolder brew when you need extra caffeine. The 42-ounce removable reservoir reduces the need for frequent refills. This black coffee maker combines style with functionality for Pennsylvania kitchens.
The machine’s compact design fits on most countertops without taking up much space. Its single-serve K-Cup system provides convenience and variety with minimal cleanup. The K-Express heats water quickly and brews a fresh cup at the touch of a button. It works with a wide range of K-Cup pods for endless coffee options. The removable drip tray accommodates travel mugs for on-the-go Pennsylvania lifestyles.
Key Features Table
| Feature | Description |
|---|---|
| Brew Sizes | 3 |
| Strong Button | Yes |
| Reservoir | 42oz removable |
| Color | Black |
| Pod Type | K-Cup |
| Heating | Quick |
| Design | Compact |
| Cleanup | Minimal |
Pros & Cons Table
| Pros | Cons |
|---|---|
| Quick brewing | K-Cup only |
| 3 brew sizes | Limited to single-serve |
| Strong button | Requires pod purchases |
| 42oz reservoir | Plastic construction |
| Compact design | Higher price point |
| Easy cleanup | Standard features |
| Versatile | Limited color options |
Common Cleaning Tips
Regular cleaning maintains your Keurig K-Express’s performance and longevity. Start by removing and rinsing the water reservoir weekly. Wipe down the exterior with a damp cloth to remove coffee splatters and dust. Use a soft brush to clean the K-Cup holder and remove any coffee grounds or residue.
For deeper cleaning, run a water-only cycle to flush out the internal components. Use a descaling solution every 3-6 months to remove mineral buildup from Pennsylvania’s hard water. Always ensure the machine is completely dry before using it again. Regular cleaning not only extends the machine’s life but also ensures the best tasting coffee.
Maintenance or Troubleshooting Tips
If your Keurig K-Express stops brewing, check that the water reservoir is properly seated and has sufficient water. For machines that won’t turn on, ensure it’s properly plugged in and the outlet is functioning. If the coffee tastes weak, try using the strong button or check that you’re using fresh K-Cup pods.
If the machine makes unusual noises, check for mineral buildup in the internal components. Run a descaling cycle to remove deposits. If the brew size seems incorrect, ensure the K-Cup is properly inserted and the reservoir has enough water. For machines that leak, check the reservoir and K-Cup holder for proper seating. Regular maintenance prevents most common issues and keeps your Keurig running smoothly.
What Real People Say — Voices from the Community
Pennsylvania coffee lovers praise the Keurig K-Express for its convenience and speed. Many highlight the 3 brew sizes for customizing their coffee strength. Others love the strong button feature for those mornings when they need extra caffeine. The 42-ounce reservoir receives compliments for reducing the need for frequent refills.
Some users note the importance of regular descaling for optimal performance. Others appreciate the compact design that fits well in their Pennsylvania kitchens. The overall consensus is that the K-Express provides a reliable, convenient coffee experience for daily use.
Relevant FAQs
1. How many brew sizes does the Keurig K-Express offer?
The K-Express offers 3 brew sizes to accommodate different cup sizes and strength preferences. This allows you to customize your coffee to your exact taste. The sizes typically range from 6 to 12 ounces.
2. What does the strong button do?
The strong button feature brews a bolder, more concentrated cup of coffee. It’s perfect for those mornings when you need extra caffeine. This feature increases the coffee-to-water ratio for a stronger brew.
3. How often should I descale my Keurig K-Express?
Descale your machine every 3-6 months, or more frequently if you have hard water. Pennsylvania’s water quality may require more frequent descaling. Regular descaling prevents mineral buildup and ensures optimal performance.
4. Can I use my own coffee grounds with the K-Express?
The K-Express is designed for K-Cup pods only. For using your own coffee grounds, you would need a reusable K-Cup pod. This allows you to use your favorite coffee while maintaining the machine’s convenience.
5. How do I clean the K-Cup holder?
Remove the K-Cup holder and rinse it with warm water. Use a soft brush to remove any coffee grounds or residue. Ensure it’s completely dry before reinserting. Regular cleaning prevents clogs and ensures proper brewing.
6. How long does it take to brew a cup of coffee?
The K-Express heats water and brews a fresh cup in about a minute. The exact time may vary slightly depending on the brew size. This quick brewing time makes it perfect for busy Pennsylvania mornings.
Final Thought
The Keurig K-Express Single Serve K-Cup Pod Coffee Maker in Pennsylvania (PA) offers a convenient and reliable coffee experience for busy households. Its compact design, multiple brew sizes, and strong button feature provide customization and speed. This machine fits perfectly in Pennsylvania kitchens and lifestyles.
Invest in the Keurig K-Express to simplify your morning routine and enjoy quality coffee at home. Consider your specific needs for brew sizes, reservoir capacity, and available space. Choose a coffee maker that provides the convenience and quality your Pennsylvania kitchen deserves. Start each day with the perfect cup of coffee tailored to your taste.
Food Africa Live Cooking Show 2026: Dates, Celebrity Chefs & Must-See Culinary Events

Africa’s food scene is evolving fast. Flavors that once stayed within village kitchens are now drawing global attention. The Food Africa Live Cooking Show 2026 arrives at exactly the right moment to celebrate this exciting shift. Scheduled for December 7 to 10, 2026, this four-day culinary celebration promises to be one of the most talked-about food events on the continent.
Best Propane Torch Burners in California (CA) for BBQ, Campfires & Outdoor Cooking
Unleash the power of precision flame control with the best propane torch burners designed for California’s outdoor cooking scene. These versatile tools transform your BBQ, campfire, and grilling experiences with intense, adjustable heat. Whether searing steaks or igniting charcoal, the right torch makes all the difference.
California’s outdoor lifestyle demands tools that are both powerful and reliable. The best propane torch burners in California for BBQ, campfires and outdoor cooking offer exceptional heat output, durability, and ease of use. They handle everything from delicate culinary tasks to heavy-duty outdoor projects with equal finesse.
Product at a Glance
Product List:
- Sondiko Powerful Grill & Cooking Propane Torch L8010
- Sondiko Powerful Cooking Propane Torch Gun
- RUBDARK Propane Torch Burner Weed Torch
- MEIRUBY Powerful Propane Torch
- KOACKL Propane Torch Head
- Urgrette Torch Lighters 5 Pack
- ARTFLAMM Powerful Grill Torch Gun
- Wagner Electro-Torch C900085 Fire Starter
Best Propane Torch Burners in California: Detailed Reviews
1. Sondiko Powerful Grill & Cooking Propane Torch L8010
Why Best: Versatile tool for cooking, sous vide, and even light welding tasks.
The Sondiko Powerful Grill & Cooking Propane Torch L8010 stands out for its multi-functional design. It delivers a powerful, adjustable flame suitable for searing steaks, starting campfires, or even light welding. The ergonomic handle ensures comfortable use during extended cooking sessions. Its durable construction withstands high temperatures and frequent use. This torch connects easily to standard propane tanks for consistent performance.
Key Features Table
| Feature | Description |
|---|---|
| Flame Type | Adjustable |
| Use Cases | Grilling, sous vide, welding |
| Handle | Ergonomic design |
| Tank Compatibility | Standard propane |
| Material | Heavy-duty metal |
| Color | Black, Grey |
Pros & Cons Table
| Pros | Cons |
|---|---|
| Multi-purpose functionality | Propane tank not included |
| Adjustable flame control | Requires separate propane purchase |
| Durable metal construction | Slightly heavier than basic models |
| Ergonomic handle | Not ideal for precision tasks |
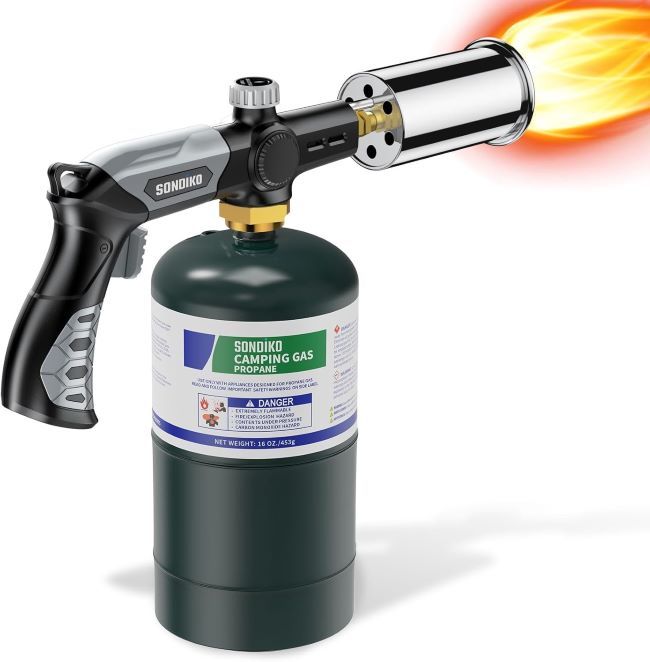
2. Sondiko Powerful Cooking Propane Torch Gun
Why Best: Ideal for culinary enthusiasts and campfire starters.
The Sondiko Powerful Cooking Propane Torch Gun offers a focused, adjustable flame perfect for culinary applications. It excels at searing meats, caramelizing sugars, and quickly starting campfires. The compact design makes it easy to maneuver in tight spaces. This torch provides consistent heat output for professional-quality results. Its simple operation allows both beginners and experts to achieve great results.

Key Features Table
| Feature | Description |
|---|---|
| Primary Use | Culinary, campfire |
| Flame Control | Adjustable |
| Design | Compact, handheld |
| Fuel Type | Propane |
| Ignition | Manual |
| Tank Compatibility | Standard propane |
Pros & Cons Table
| Pros | Cons |
|---|---|
| Excellent for cooking tasks | Propane tank sold separately |
| Compact and portable | Limited to propane fuel |
| Adjustable flame intensity | Requires careful handling |
| Easy to use | Not for heavy-duty tasks |
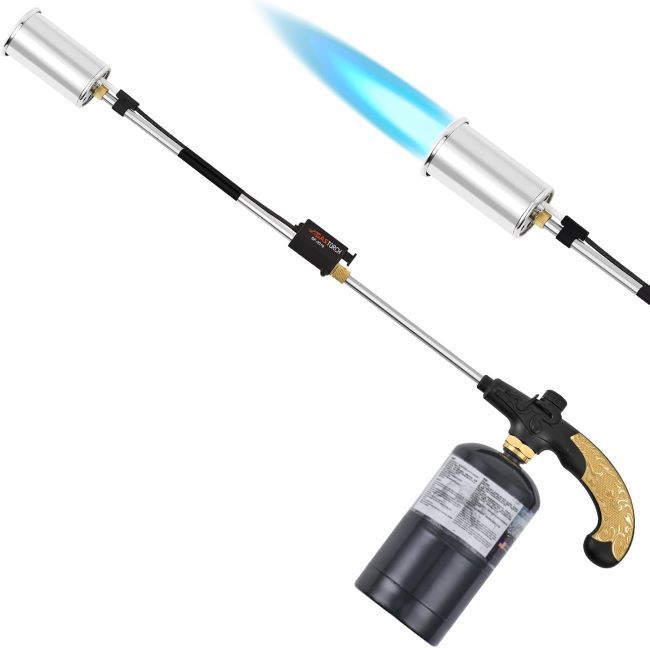
3. RUBDARK Propane Torch Burner Weed Torch
Why Best: Heavy-duty torch for outdoor maintenance and large-scale projects.
The RUBDARK Propane Torch Burner features a 30-inch detachable long arm for extended reach. This makes it perfect for weed control, melting ice, or roofing projects. The high-output flame handles tough outdoor tasks with ease. The detachable design allows for easy storage and transportation. Its heavy-duty construction ensures longevity even with frequent use. The flame control valve provides precise adjustment for different applications.
Key Features Table
| Feature | Description |
|---|---|
| Arm Length | 30″ detachable |
| Output | High |
| Primary Use | Weed burning, ice melting |
| Flame Control | Adjustable valve |
| Material | Heavy-duty metal |
| Use Cases | Garden, stumps, wood, roofing |
Pros & Cons Table
| Pros | Cons |
|---|---|
| Extended reach for safety | Bulky design |
| High output for tough jobs | Requires propane tank |
| Detachable for storage | Not ideal for cooking |
| Durable construction | Higher price point |
4. MEIRUBY Powerful Propane Torch
Why Best: Perfect gift for grilling enthusiasts and outdoor cooks.
The MEIRUBY Powerful Propane Torch delivers intense heat ideal for searing steaks on a Blackstone griddle. Its high-temperature flame creates a perfect crust on meats. The ergonomic design ensures comfortable handling during extended use. This torch makes an excellent gift for men who love outdoor cooking. The adjustable flame allows for precision control over cooking temperatures. Its durable construction handles the demands of frequent outdoor use.

Key Features Table
| Feature | Description |
|---|---|
| Primary Use | Steak searing, griddle cooking |
| Heat Output | High |
| Design | Ergonomic handle |
| Fuel Type | Propane |
| Ideal For | Blackstone griddle accessories |
| Gift Suitable | Yes |
Pros & Cons Table
| Pros | Cons |
|---|---|
| Excellent for griddle cooking | Propane tank not included |
| High heat output | Limited to propane fuel |
| Ergonomic design | Requires careful handling |
| Great gift option | Not for precision tasks |
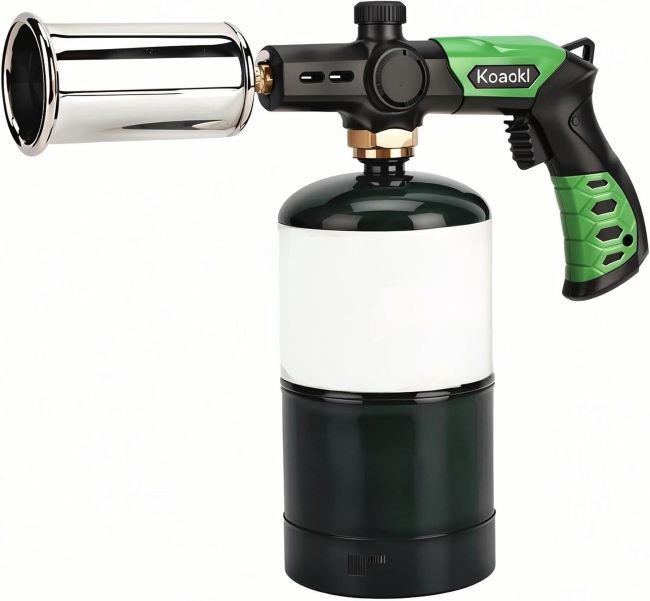
5. KOACKL Propane Torch Head
Why Best: Compact and versatile for cooking and light soldering.
The KOACKL Propane Torch Head features a built-in igniter for convenient one-handed operation. Its adjustable flame makes it suitable for cooking tasks and light soldering work. The compact design fits easily in toolboxes or kitchen drawers. This torch connects to standard propane tanks for reliable performance. The lightweight construction allows for easy maneuverability during various tasks.
Key Features Table
| Feature | Description |
|---|---|
| Ignition | Built-in |
| Flame Control | Adjustable |
| Primary Use | Cooking, soldering |
| Design | Compact, handheld |
| Fuel Type | Propane |
| Tank Compatibility | Standard propane |
Pros & Cons Table
| Pros | Cons |
|---|---|
| Built-in igniter | Propane tank not included |
| Adjustable flame | Limited to propane fuel |
| Compact and portable | Not for heavy-duty tasks |
| Lightweight | Requires careful handling |
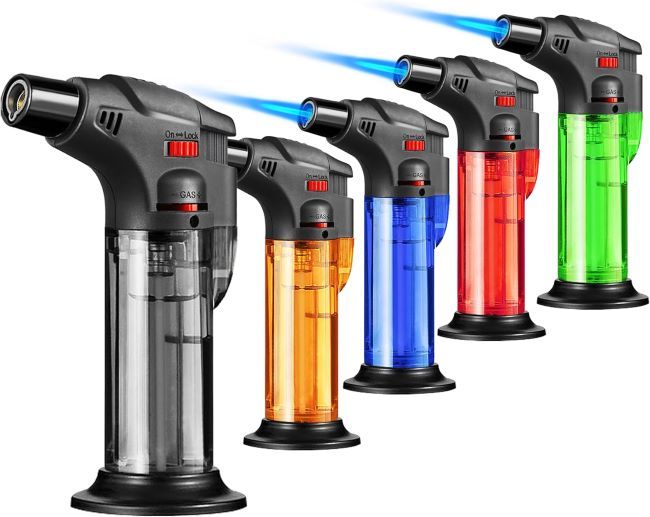
6. Urgrette Torch Lighters 5 Pack
Why Best: Portable solution for camping, grilling, and emergency use.
The Urgrette Torch Lighters 5 Pack offers butane-powered, refillable jet flame lighters. These windproof torches are perfect for camping trips, grill lighting, or candle ignition. The compact size makes them easy to carry in pockets or backpacks. Each lighter produces a strong, focused flame suitable for various outdoor tasks. The refillable design makes them cost-effective for frequent use. The set of five ensures you always have a backup available.
Key Features Table
| Feature | Description |
|---|---|
| Fuel Type | Butane |
| Design | Refillable |
| Flame Type | Jet flame |
| Windproof | Yes |
| Quantity | 5 pack |
| Use Cases | Camping, grill, candle, fireplace |
Pros & Cons Table
| Pros | Cons |
|---|---|
| Portable and compact | Fuel not included |
| Windproof design | Butane fuel required |
| Refillable | Smaller flame than propane |
| Set of 5 | Limited to handheld use |
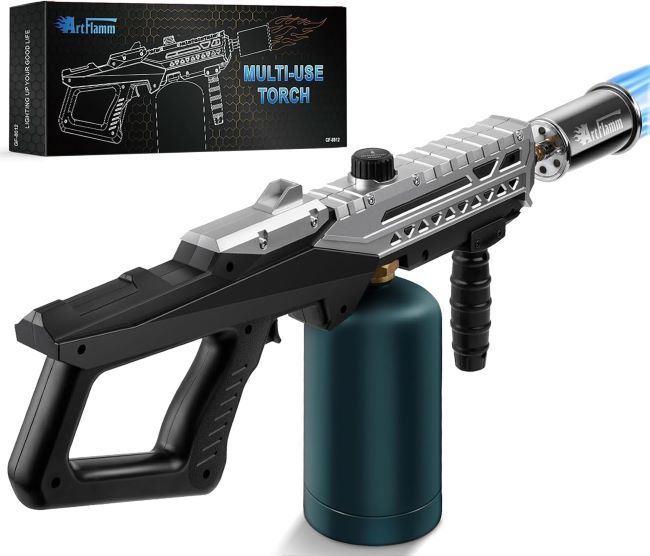
7. ARTFLAMM Powerful Grill Torch Gun
Why Best: Adjustable flamethrower for serious outdoor cooking.
The ARTFLAMM Powerful Grill Torch Gun features an adjustable flame that transforms it into a versatile outdoor tool. It excels at starting charcoal, searing meats, and other BBQ tasks. The durable construction withstands high temperatures and frequent use. The ergonomic handle provides comfortable grip during extended use. This torch connects to standard propane tanks for reliable performance. Its powerful flame output handles demanding outdoor cooking tasks with ease.
Key Features Table
| Feature | Description |
|---|---|
| Flame Type | Adjustable flamethrower |
| Primary Use | BBQ, camping, charcoal lighter |
| Design | Handheld torch gun |
| Fuel Type | Propane |
| Construction | Durable metal |
| Tank Compatibility | Standard propane |
Pros & Cons Table
| Pros | Cons |
|---|---|
| Powerful adjustable flame | Propane tank not included |
| Versatile outdoor use | Requires careful handling |
| Durable construction | Not for precision tasks |
| Ergonomic handle | Higher heat output |
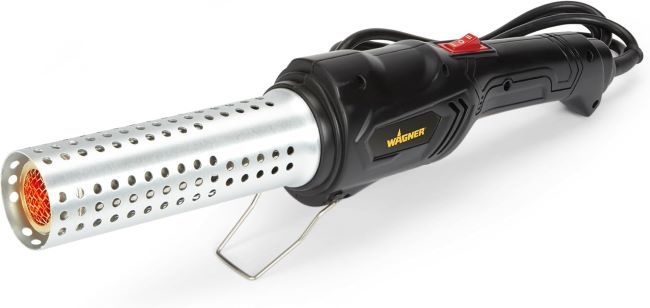
8. Wagner Electro-Torch C900085 Fire Starter
Why Best: Chemical-free solution for starting fires and charcoal.
The Wagner Electro-Torch C900085 uses heated air and a built-in blower to start fires without chemicals. This makes it ideal for BBQ smokers, grills, and campfires. The chemical-free operation is safer for food preparation areas. The built-in blower provides consistent airflow for reliable ignition. This torch works with various fuel types beyond just propane. Its unique design offers a cleaner alternative to traditional flame torches.
Key Features Table
| Feature | Description |
|---|---|
| Technology | Heated air with blower |
| Chemical-Free | Yes |
| Primary Use | Charcoal starter, fire starter |
| Fuel Compatibility | Multiple types |
| Design | Handheld with blower |
| Ideal For | BBQ smoker, grill |
Pros & Cons Table
| Pros | Cons |
|---|---|
| Chemical-free operation | Requires power source |
| Works with multiple fuels | Different operation than flame torches |
| Built-in blower | Higher initial cost |
| Safer for food areas | Bulkier design |
Common Cleaning Tips
Regular maintenance keeps your propane torch burners performing at their best. After each use, allow the torch to cool completely before cleaning. Use a soft cloth to wipe down the exterior and remove any residue or debris. For stubborn buildup, a mild soap solution helps restore the surface. Always ensure the torch is completely dry before storage to prevent rust.
Pay special attention to the nozzle and flame area where carbon buildup can occur. Use a small brush or compressed air to clear any blockages. For torches with detachable parts, clean each component separately. Regular cleaning not only extends the life of your torch but also ensures consistent performance and safety.
Maintenance or Troubleshooting Tips
If your torch produces a weak or uneven flame, check the propane connection first. Ensure the tank has sufficient fuel and the connection is secure. Clean the nozzle if you notice sputtering or irregular flame patterns. For torches with adjustable flames, verify the control valve moves freely without obstruction.
If the torch fails to ignite, check the igniter for proper function and replace batteries if needed. For butane lighters, ensure the fuel level is adequate and the refill valve is properly closed. If the flame is too large or uncontrolled, check for damage to the control valve. Always test your torch in a safe, open area before use.
What Real People Say — Voices from the Community
California outdoor cooking enthusiasts praise these propane torches for their versatility and power. Many users highlight the Sondiko models for their multi-purpose functionality in both cooking and outdoor projects. Grill masters love the MEIRUBY torch for achieving perfect sear marks on steaks. The RUBDARK weed torch receives high marks for its extended reach and durability during yard maintenance.
Some users note the importance of using quality propane tanks for consistent performance. Others appreciate the chemical-free operation of the Wagner Electro-Torch for food safety. The overall consensus is that these torches offer excellent value and performance for California’s outdoor lifestyle.
Relevant FAQs
1. Are propane torch burners safe for cooking?
Yes, propane torch burners designed for culinary use are safe when used according to manufacturer instructions. Always use them in well-ventilated areas and keep flammable materials away.
2. Can I use these torches for indoor cooking?
Most propane torches are designed for outdoor use due to the open flame and heat output. However, some culinary torches like the Sondiko models can be used indoors with proper ventilation.
3. What safety precautions should I take when using propane torches?
Always wear protective gear, use in well-ventilated areas, keep a fire extinguisher nearby, and never point the torch at people or flammable objects. Ensure the propane tank is securely connected and in good condition.
4. Can I use these torches with different fuel types?
Most of these torches are designed specifically for propane. The Wagner Electro-Torch works with multiple fuel types. Always check the manufacturer’s specifications before using alternative fuels.
Final Thought
The best propane torch burners in California for BBQ, campfires and outdoor cooking combine power, versatility, and durability. Whether you need a precision tool for culinary tasks or a heavy-duty torch for outdoor projects, there is a perfect option available. These torches elevate your outdoor cooking game and tackle various tasks with ease. For even greater cooking versatility, consider pairing them with Countertop Electric Burners, which provide a convenient indoor or portable cooking solution for preparing side dishes, sauces, or meals when extra cooking space is needed.
Invest in a quality propane torch to enhance your California outdoor cooking experiences. Consider your specific needs, whether it is searing steaks, starting campfires, or maintaining your property. Choose a torch that offers the right balance of power, control, and safety. Upgrade your outdoor toolkit today and discover the difference a professional-grade torch can make.
Smart Home Tech Show 2026, Suntec Singapore Convention & Exhibition Centre

Imagine walking into a home that adjusts the lighting before you enter, prepares your favorite coffee automatically, and protects your property with intelligent security systems. That vision is becoming reality faster than ever. According to the International Energy Agency, smart technologies can significantly improve residential energy efficiency and lower electricity consumption. Meanwhile, research from Statista estimates that the global smart home market will continue expanding rapidly throughout this decade as more households adopt connected devices.
The Smart Home Tech Show 2026, taking place from October 1 to October 4, 2026, at the Suntec Singapore Convention & Exhibition Centre, brings together the latest innovations in connected living. The event serves as a major destination for homeowners, technology enthusiasts, designers, and industry professionals who want to explore the next generation of smart home solutions.
What Is Smart Home Tech Show 2026?
Smart Home Tech Show 2026 is one of Asia’s leading exhibitions dedicated to intelligent living technologies and connected home solutions. The event showcases innovative products that improve comfort, security, entertainment, and energy management inside modern homes.
Unlike traditional electronics exhibitions, this event focuses specifically on practical applications that consumers can integrate into everyday life. Attendees can experience technologies firsthand and understand how various systems work together.
The exhibition also creates a meeting point for:
- Homeowners planning renovations
- Interior designers
- Smart technology installers
- Property developers
- Retail buyers
- Technology startups
- Industry professionals
As a result, the event has become an important platform for learning, networking, and discovering emerging trends.
Event Details at a Glance
Date
October 1 to October 4, 2026
Venue
Suntec Singapore Convention & Exhibition Centre, Singapore
Event Focus
- DIY smart home solutions
- Home automation systems
- Smart appliances
- Security technologies
- Energy management systems
- Connected entertainment devices
- Artificial intelligence applications for homes

Why Smart Homes Are Growing So Fast
Consumer interest in smart homes continues to increase because people want greater convenience and better control over their living spaces.
Several factors drive this growth.
Energy Efficiency
Smart thermostats, lighting systems, and appliances help reduce unnecessary energy consumption. Many homeowners use automation to lower utility costs and improve sustainability.
Security Concerns
Modern families prioritize home security. Smart cameras, sensors, and remote monitoring applications provide peace of mind.
Remote Work Lifestyle
More people now work from home. Consequently, demand for intelligent home offices and connected devices has risen substantially.
Aging Population
Smart technologies also support older adults who wish to live independently. Automated lighting, voice assistants, and health monitoring devices can make daily living safer and easier.
What Visitors Can Expect at Smart Home Tech Show 2026
The exhibition floor promises an immersive experience where technology meets practical living.
Attendees can expect:
- Live product demonstrations.
- Interactive smart home displays.
- Industry seminars and workshops.
- Networking opportunities.
- Expert discussions on future trends.
- Hands-on experiences with new devices.
These activities help visitors understand how technology can transform everyday life.
DIY Smart Spaces Take Center Stage
One of the biggest themes of Smart Home Tech Show 2026 is the rise of DIY smart spaces.
Consumers no longer need complex installations to enjoy smart technology. Manufacturers increasingly offer devices that require minimal setup and can connect through wireless networks.
Popular DIY categories include:
- Smart lighting
- Smart plugs
- Video doorbells
- Home sensors
- Wireless cameras
- Voice assistants
- Automated blinds
DIY products appeal to homeowners because they offer flexibility and affordability while reducing installation challenges.
Latest Smart Home Technologies Expected at the Event
Artificial Intelligence Powered Assistants
Artificial intelligence continues to redefine home automation.
AI systems can:
- Learn user preferences
- Adjust lighting automatically
- Manage entertainment settings
- Predict energy usage
- Improve household security
Future smart assistants may become even more personalized by understanding routines and behavioral patterns.
Matter Compatible Devices
The Matter standard has become increasingly important in the smart home industry.
Consumers often struggle when devices from different brands fail to communicate. Matter addresses this issue by improving compatibility across ecosystems.
Visitors can expect to see numerous products supporting this universal standard.
Advanced Home Security Systems
Security technology remains one of the strongest segments in the smart home market.
Expected innovations include:
- AI-powered surveillance cameras
- Facial recognition systems
- Smart locks
- Remote monitoring platforms
- Motion sensors
- Integrated emergency alerts
These technologies help homeowners monitor their properties from virtually anywhere.
Intelligent Energy Management
Energy efficiency has become a global priority.
Smart energy solutions expected at the event include:
- Smart meters
- Automated lighting systems
- Energy monitoring dashboards
- Solar integration technologies
- Intelligent climate control systems
Such innovations can contribute to more sustainable and environmentally friendly homes.
Smart Appliances That Could Define the Future
Home appliances have become smarter and more connected than ever before.
Smart Refrigerators
Modern refrigerators can:
- Track food inventory
- Suggest recipes
- Send maintenance alerts
- Integrate with shopping applications
Intelligent Washing Machines
New models use sensors and artificial intelligence to optimize water and electricity usage.
Connected Kitchen Systems
Smart kitchens now include:
- Voice-controlled ovens
- Connected coffee machines
- Smart air fryers
- Automated cooking assistants
These technologies simplify everyday routines while improving efficiency.
Benefits of Attending Smart Home Tech Show 2026
Discover Emerging Trends
Technology evolves rapidly. Therefore, attending the event allows visitors to stay ahead of market developments.
Experience Products Firsthand
Online research is helpful, but nothing compares to seeing products in action.
Learn From Industry Experts
Educational sessions often provide valuable insights into:
- Home automation planning
- Device compatibility
- Security considerations
- Future technologies
Build Professional Connections
Networking opportunities can create new partnerships and business relationships.
Find Inspiration for Home Projects
Homeowners often leave exhibitions with new ideas for improving their living spaces.
Who Should Attend the Event?
Smart Home Tech Show 2026 attracts a diverse audience.
Homeowners
People planning home upgrades can explore products that improve convenience and security.
Interior Designers
Design professionals can discover technologies that blend seamlessly with modern interiors.
Property Developers
Developers increasingly integrate smart technologies into residential projects.
Technology Enthusiasts
Early adopters enjoy experiencing cutting-edge innovations before they reach mainstream markets.
Business Owners
Retailers and distributors can identify emerging products and potential partnerships.
Smart Home Trends Shaping 2026 and Beyond
Voice First Living
Voice assistants continue becoming central hubs for connected homes.
Wellness Focused Homes
Technology increasingly supports physical and mental well-being through:
- Air quality monitoring
- Sleep tracking
- Circadian lighting
- Environmental sensors
Predictive Automation
Future systems will anticipate needs rather than simply respond to commands.
Sustainable Living
Consumers increasingly demand products that reduce environmental impact.
Integrated Ecosystems
Consumers prefer connected experiences where devices communicate seamlessly across platforms.
How to Prepare for Smart Home Tech Show 2026
Planning helps maximize the exhibition experience.
Make a Technology Wish List
Identify the products or categories you want to explore.
Research Exhibitors
Learning about participating companies can help prioritize your time.
Attend Educational Sessions
Seminars often provide practical knowledge that extends beyond product demonstrations.
Ask Detailed Questions
Questions about compatibility, installation, and future updates can provide valuable insights.
Take Notes and Photos
Documenting discoveries makes it easier to evaluate products later.
The Role of Singapore in Smart Technology Innovation
Singapore has emerged as one of Asia’s leading smart city pioneers.
The country invests heavily in digital transformation, urban innovation, and intelligent infrastructure. Consequently, hosting Smart Home Tech Show 2026 at the Suntec Singapore Convention & Exhibition Centre makes strategic sense.
Singapore’s commitment to technology adoption creates an ideal environment for showcasing the future of connected living.
What This Event Means for the Future of Homes
Smart homes are moving beyond convenience and becoming essential parts of modern lifestyles.
Future homes will likely:
- Consume less energy
- Provide better security
- Improve accessibility
- Support healthier living
- Deliver personalized experiences
Events like Smart Home Tech Show 2026 accelerate innovation by bringing together technology creators, industry experts, and consumers under one roof.
Conclusion
Smart Home Tech Show 2026 promises to be one of the most exciting events for anyone interested in connected living and intelligent home technologies. From DIY smart spaces and advanced security systems to energy-efficient appliances and artificial intelligence, the exhibition highlights the innovations shaping the homes of tomorrow.
Whether you are a homeowner, designer, developer, or technology enthusiast, attending this event can provide valuable insights and practical inspiration. Start planning your visit and explore how smart technologies can transform the way you live, work, and interact with your home.
Frequently Asked Questions
Where is Smart Home Tech Show 2026 being held?
The event will take place at the Suntec Singapore Convention & Exhibition Centre in Singapore from October 1 to October 4, 2026.
Who should attend Smart Home Tech Show 2026?
The exhibition is suitable for homeowners, technology enthusiasts, interior designers, property developers, retailers, and industry professionals.
What types of products will be showcased?
Visitors can expect smart appliances, home automation systems, security technologies, energy management solutions, and connected entertainment devices.
Why are DIY smart home solutions becoming popular?
DIY products are easier to install, require less technical expertise, and allow homeowners to customize their living spaces with greater flexibility.
What is the biggest trend in smart home technology for 2026?
Artificial intelligence-driven automation and device interoperability through universal standards are among the most significant trends shaping the industry.
References
- https://www.iea.org
- https://www.statista.com
- https://www.energy.gov
- https://www.smartcitiesworld.net
Location Map
How to Organize Storage With the Best Pantry Cabinets
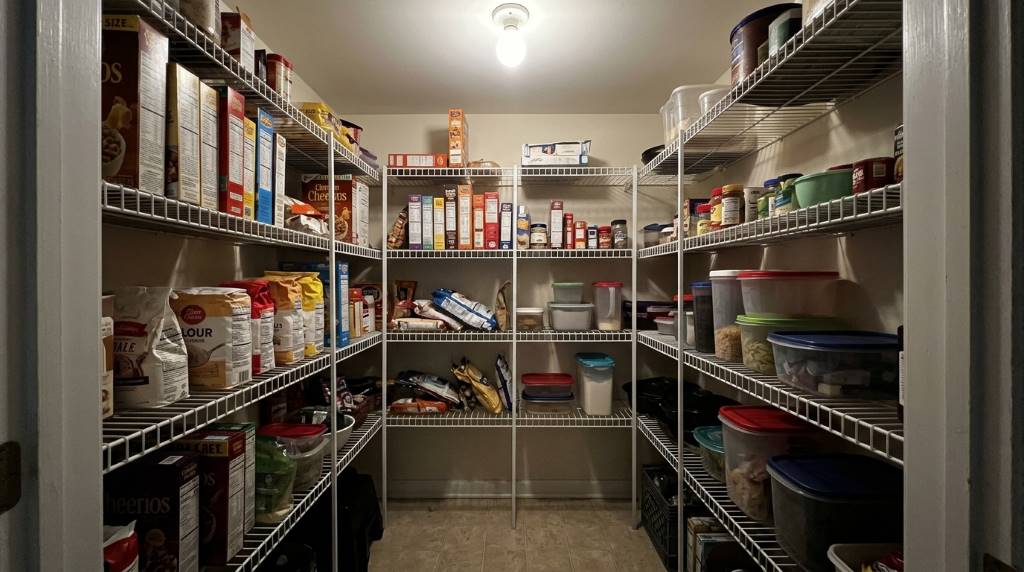
An organized pantry saves time, reduces food waste, and improves kitchen efficiency. According to home organization studies, households can reduce food waste by up to 30% through proper pantry organization and storage systems. Moreover, well-designed storage solutions increase kitchen functionality and improve daily routines. When selecting best kitchen pantry cabinets, homeowners across the USA can create practical, attractive, and highly organized spaces. This guide explains proven methods for organizing storage using the best pantry cabinets while maximizing available space and improving accessibility.
Why Pantry Organization Matters
A well-organized pantry improves meal preparation and reduces unnecessary purchases. Furthermore, organized storage helps families maintain inventory control.
Proper pantry systems also protect food quality and extend shelf life. Consequently, households save money and reduce waste over time.
Modern pantry cabinets provide customized storage solutions for kitchens of all sizes. Therefore, homeowners can optimize even limited spaces effectively.
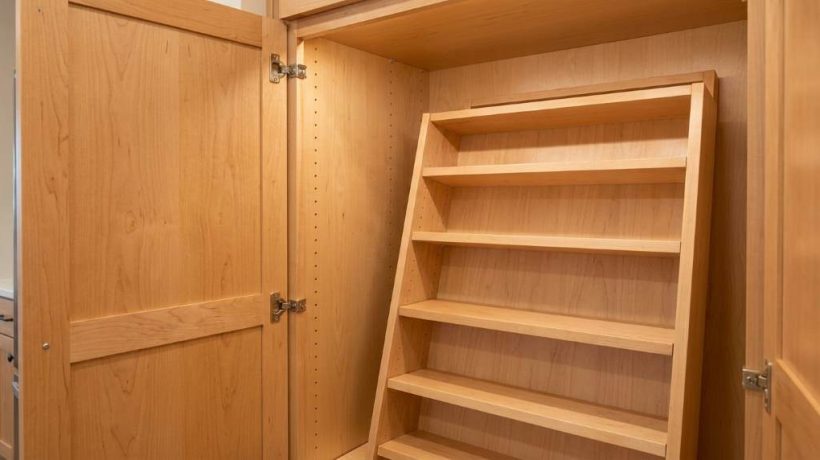
Understanding Different Types of Pantry Cabinets
Freestanding Pantry Cabinets
Freestanding pantry cabinets offer flexibility and easy installation. Additionally, they work well in both large and compact kitchens.
These cabinets come in various heights and widths. As a result, homeowners can select options that match their storage needs.
Built-In Pantry Cabinets
Built-in pantry cabinets maximize available wall space efficiently. Moreover, they create a seamless and professional kitchen appearance.
These cabinets often provide greater storage capacity. Therefore, they remain popular in modern American homes.
Pull-Out Pantry Cabinets
Pull-out pantry cabinets improve accessibility and visibility. Furthermore, they eliminate the need to search through crowded shelves.
Many homeowners prefer pull-out systems for narrow spaces. Consequently, every inch of storage becomes useful.
Assess Your Storage Needs First
Before organizing your pantry, evaluate your household’s storage requirements. Additionally, consider shopping habits and family size.
Begin by removing all pantry items completely. Then, categorize foods, appliances, and kitchen supplies carefully.
Common pantry categories include:
- Dry foods
- Canned goods
- Baking supplies
- Snack items
- Breakfast products
- Cooking oils and spices
- Small kitchen appliances
- Paper products
This assessment helps determine the ideal cabinet configuration. As a result, storage becomes more practical and efficient.
Choose the Right Pantry Cabinet Features
Adjustable Shelving
Adjustable shelves provide maximum flexibility for changing storage needs. Moreover, they accommodate products of varying sizes.
Homeowners can easily modify shelf heights when necessary. Therefore, pantry organization remains adaptable over time.
Deep Storage Drawers
Deep drawers simplify access to heavy and bulky items. Additionally, they reduce bending and reaching.
These drawers work especially well for cookware and large containers. Consequently, kitchen workflows become more efficient.
Door Storage Racks
Door racks create valuable additional storage space. Furthermore, they keep frequently used items within easy reach.
Spices, condiments, and snacks fit perfectly in door organizers. Therefore, cabinet interiors remain less crowded.
Create Pantry Zones for Better Organization
Dividing pantry space into designated zones improves efficiency significantly. Moreover, it simplifies daily kitchen tasks.
Assign specific sections based on item categories and usage frequency. Consequently, every family member can locate products quickly.
Daily Use Zone
Store frequently used items at eye level for easy access. Additionally, keep breakfast foods and snacks nearby.
This placement reduces unnecessary movement during meal preparation. Therefore, kitchen routines become faster.
Cooking Zone
Place spices, oils, pasta, and cooking ingredients together. Furthermore, organize items according to cooking frequency.
This approach improves workflow and meal preparation speed. As a result, cooking becomes more enjoyable.
Bulk Storage Zone
Reserve lower shelves for heavy and bulk items. Additionally, store extra supplies in clearly labeled containers.
This strategy improves safety and accessibility. Consequently, pantry management becomes easier.
Use Storage Containers Effectively
Clear storage containers improve visibility and preserve freshness. Moreover, they create a cleaner pantry appearance.
Transfer dry goods into airtight containers whenever possible. Therefore, ingredients remain protected from moisture and pests.
Recommended storage containers include:
- Stackable plastic containers
- Glass jars
- Airtight food canisters
- Label organizers
- Storage baskets
- Rotating lazy susans
Consistent container styles also improve visual organization. As a result, pantries look more professional and organized.
Maximize Vertical Storage Space
Vertical space often remains underutilized in many kitchens. However, proper planning can dramatically increase storage capacity.
Install additional shelving units when possible. Furthermore, use stackable organizers to create extra layers.
Cabinet risers help separate dishes and canned goods effectively. Consequently, every shelf provides maximum storage value.
Label Everything Clearly
Labels eliminate confusion and simplify pantry maintenance. Additionally, they help family members return items correctly.
Use durable and easy-to-read labels consistently. Therefore, pantry organization remains effective long term.
Popular labeling methods include:
- Printed labels
- Chalkboard labels
- Waterproof stickers
- Digital label makers
Clear labeling also helps track inventory levels efficiently. As a result, unnecessary purchases decrease.
Maintain Pantry Organization Regularly
Even the best pantry systems require ongoing maintenance. Therefore, schedule regular inspections and cleaning.
Review expiration dates monthly and remove outdated products. Additionally, reorganize shelves when needed.
Establishing a maintenance routine prevents clutter accumulation. Consequently, the pantry remains functional throughout the year.
Common Pantry Organization Mistakes to Avoid
Many homeowners overcrowd shelves excessively. However, this practice reduces accessibility and visibility.
Avoid storing unrelated household items in pantry cabinets. Furthermore, resist purchasing unnecessary organizers.
Other common mistakes include:
- Ignoring vertical storage
- Failing to label containers
- Overbuying food supplies
- Neglecting expiration dates
- Using inconsistent storage methods
Avoiding these mistakes improves pantry efficiency significantly. Therefore, organization efforts produce lasting results.
Smart Storage Trends for Modern American Homes
Modern pantry cabinets increasingly include smart storage solutions. Additionally, homeowners prioritize accessibility and efficiency.
Features such as pull-out shelving, integrated lighting, and modular storage continue gaining popularity. Consequently, pantry organization becomes more convenient.
Sustainable storage products also attract growing interest across the USA. Therefore, environmentally conscious pantry designs continue expanding.
Conclusion
Organizing storage with the best pantry cabinets requires planning, proper categorization, and consistent maintenance. Moreover, selecting functional cabinet features significantly improves long-term organization.
By implementing these practical strategies, homeowners throughout the USA can maximize kitchen storage and simplify daily routines. Start organizing your pantry today and create a more efficient, attractive, and functional kitchen space.
Frequently Asked Questions
What type of pantry cabinet saves the most space?
Pull-out pantry cabinets typically maximize storage while improving accessibility.
How often should I reorganize my pantry?
You should inspect and reorganize your pantry at least once every month.
Are clear containers better for pantry storage?
Yes, clear containers improve visibility and help maintain food freshness.
What items belong on eye-level pantry shelves?
Store frequently used foods and everyday cooking ingredients at eye level.
How can small kitchens benefit from pantry cabinets?
Proper pantry cabinets maximize vertical storage and improve organization efficiency.
How to Clean Wood Surfaces With the Best Cleaner
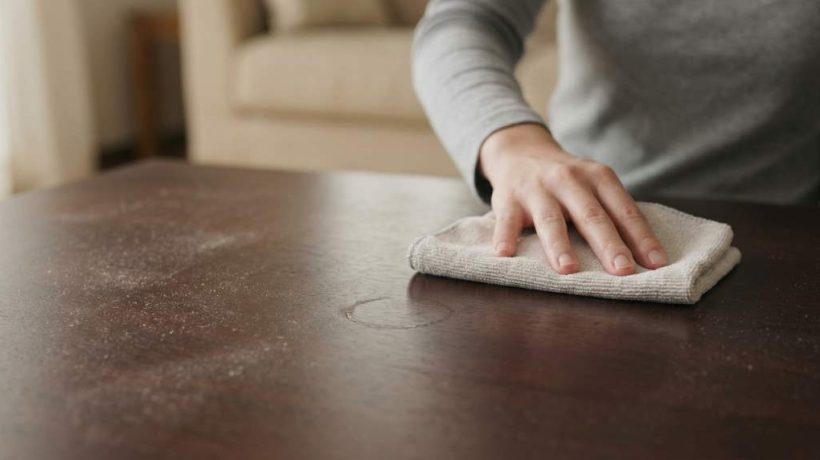
Wood surfaces add warmth, beauty, and value to homes across the USA. However, maintaining their appearance requires proper cleaning methods and suitable products. According to industry studies, nearly 68% of homeowners prefer natural wood finishes in kitchens and living spaces. Additionally, improper cleaning products contribute to thousands of dollars in avoidable furniture damage annually.
Understanding how to clean wood surfaces correctly helps preserve their finish, extend their lifespan, and maintain their natural beauty. While selecting products, many homeowners research the best kitchen wood cleaner to ensure safe and effective cleaning. This guide explains professional cleaning techniques, product selection, and maintenance strategies for various wood surfaces.
Why Proper Wood Cleaning Matters
Wood remains a living material even after processing. Therefore, temperature, humidity, and cleaning methods directly affect its appearance and durability. Using incorrect products may strip finishes, discolor surfaces, or create permanent damage.
Regular cleaning also prevents dust accumulation, grease buildup, and microbial growth. Consequently, proper maintenance protects both the wood and your indoor environment. Consistent care reduces expensive restoration costs over time.
Understanding Different Types of Wood Surfaces
Before selecting a cleaner, identify the type of wood surface you need to clean. Different finishes require different care methods. Applying the wrong cleaner often causes irreversible damage.
Finished Wood Surfaces
Finished wood includes polyurethane-coated furniture, cabinets, flooring, and tables. These surfaces have protective layers that resist moisture and stains. Therefore, they generally tolerate gentle commercial cleaners.
Unfinished Wood Surfaces
Unfinished wood absorbs moisture quickly and requires extra caution. Harsh cleaners can penetrate the fibers and create stains. Consequently, minimal moisture cleaning methods work best.
Oiled and Waxed Wood
Oiled and waxed surfaces require specialized maintenance products. Traditional household cleaners often remove protective coatings. Therefore, manufacturers recommend dedicated wood care formulas.
Characteristics of the Best Wood Cleaners
The best wood cleaner should remove dirt without damaging finishes. Additionally, it should protect the wood’s natural appearance. Professional cleaners often prioritize balance over aggressive cleaning.
Look for products that contain gentle surfactants and protective conditioning agents. Avoid formulas containing bleach, ammonia, or abrasive particles. These ingredients frequently damage wood finishes.
Features to Prioritize
- pH-balanced formulation
- Non-abrasive ingredients
- Low moisture application
- Protective conditioning properties
- Safe for finished surfaces
- Minimal chemical residue
Tools Needed for Cleaning Wood Surfaces
Professional-quality results depend on using proper tools. Fortunately, most supplies remain affordable and widely available. High-quality materials also reduce the risk of scratches.
- Microfiber cloths
- Soft-bristle brushes
- Spray bottles
- Cotton towels
- Wood-safe cleaning solution
- Vacuum with brush attachment
- Protective gloves
How to Clean Finished Wood Surfaces
Finished wood surfaces require a systematic cleaning approach. Following proper steps ensures effective cleaning without damaging protective coatings. Consistency remains essential for long-term preservation.
Step 1: Remove Loose Dust
Begin by removing dust and debris using a microfiber cloth. Alternatively, use a vacuum with a soft brush attachment. This step prevents scratching during wet cleaning.
Step 2: Apply the Cleaner Properly
Spray the cleaner onto a cloth rather than directly onto the wood. Excess moisture can seep into seams and joints. Therefore, controlled application protects the surface.
Step 3: Wipe Using Gentle Pressure
Clean the surface using circular motions and light pressure. Avoid aggressive scrubbing that could damage the finish. Continue until all visible dirt disappears.
Step 4: Dry Immediately
After cleaning, dry the surface using a clean microfiber towel. Moisture left behind may damage wood over time. Thorough drying also reduces streaking.
How to Clean Kitchen Wood Cabinets
Kitchen cabinets accumulate grease, fingerprints, and cooking residue. Therefore, they require more frequent cleaning than other wood surfaces. However, excessive cleaning can also cause damage.
Mix a wood-safe cleaner with warm water according to instructions. Then, wipe cabinets gently using a damp microfiber cloth. Finally, remove remaining moisture with a dry towel.
Common Kitchen Cabinet Cleaning Mistakes
- Using excessive water
- Applying abrasive scrubbers
- Using bleach-based cleaners
- Ignoring grease buildup
- Skipping the drying step
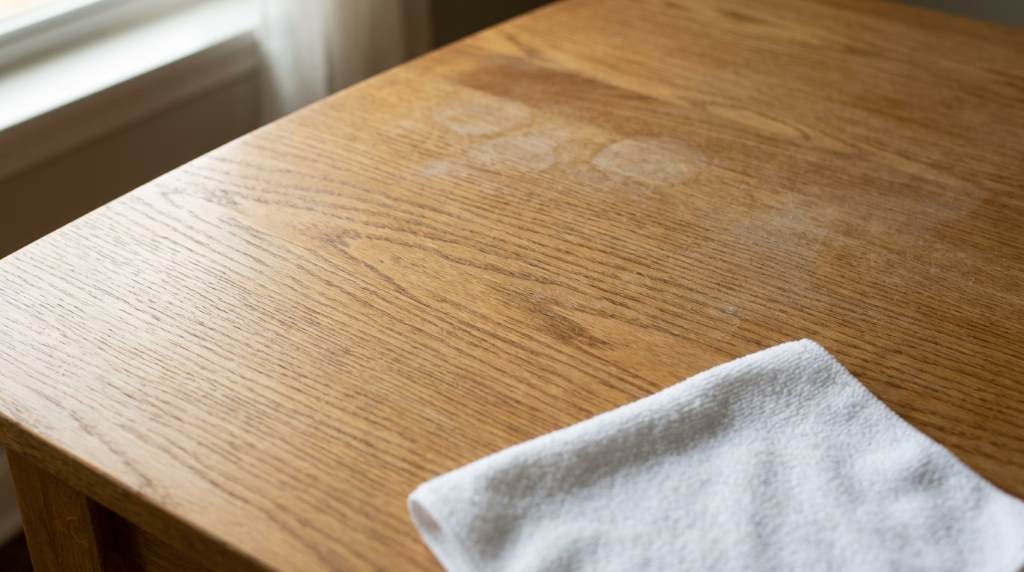
How to Clean Wood Furniture Safely
Wood furniture requires regular maintenance to preserve its appearance. Dust accumulation can scratch finishes over time. Therefore, weekly cleaning helps prevent long-term damage.
Use gentle cleaners specifically designed for furniture finishes. Additionally, avoid placing wet cloths directly on surfaces. Immediate drying remains essential after every cleaning session.
How to Clean Hardwood Floors
Hardwood floors experience significant daily wear. Dirt particles often function like sandpaper under foot traffic. Consequently, frequent cleaning protects the finish.
Start by sweeping or vacuuming thoroughly. Then, use a damp microfiber mop with an approved hardwood cleaner. Never saturate hardwood flooring with water.
Recommended Hardwood Floor Cleaning Schedule
- Daily: Remove visible debris
- Weekly: Damp mop with wood cleaner
- Monthly: Deep clean high-traffic areas
- Annually: Professional inspection
Natural Alternatives for Cleaning Wood
Many homeowners prefer natural cleaning solutions for environmental reasons. However, not all homemade cleaners are safe for wood. Careful ingredient selection remains important.
Small amounts of diluted vinegar may work on certain sealed surfaces. However, experts generally recommend caution because acidity can damage finishes. Commercial wood cleaners often provide safer results.
Olive oil and lemon mixtures remain popular alternatives. Nevertheless, they may attract dust or create residue buildup. Therefore, test any natural solution on hidden areas first.
Wood Cleaning Mistakes to Avoid
Many homeowners unintentionally damage wood during routine cleaning. Understanding common mistakes prevents costly repairs. Prevention remains easier than restoration.
- Using steam cleaners on hardwood
- Applying excessive water
- Using all-purpose cleaners
- Ignoring manufacturer instructions
- Using rough cleaning pads
- Skipping routine maintenance
Long-Term Maintenance Tips
Regular maintenance extends the life of wood surfaces significantly. Small preventive actions often prevent major restoration projects. Consistency creates the best results.
Protect wood from direct sunlight whenever possible. Additionally, maintain indoor humidity between 35% and 55%. Stable environmental conditions reduce cracking and warping.
Use protective pads under furniture and decorative objects. Furthermore, clean spills immediately to prevent staining. Preventive care always costs less than repair.
How Professionals Maintain Wood Surfaces
Professional cleaners prioritize gentle methods and consistent maintenance schedules. They rarely use aggressive chemicals or excessive moisture. Instead, they focus on preserving protective finishes.
Many professionals also inspect surfaces for early signs of wear. Early intervention often prevents extensive damage. Consequently, professional methods maximize wood longevity.
Conclusion
Learning how to clean wood surfaces with the best cleaner protects your investment and preserves natural beauty. Proper products, gentle techniques, and consistent maintenance deliver the best results. Whether maintaining cabinets, furniture, or hardwood floors, careful cleaning prevents costly damage.
Start implementing these professional cleaning methods today to keep your wood surfaces looking beautiful for years. Consistent maintenance will reward you with lasting durability and timeless appearance.
Frequently Asked Questions
What is the safest cleaner for wood surfaces?
A pH-balanced wood cleaner designed specifically for finished wood surfaces is the safest option.
Can vinegar damage wood surfaces?
Yes, excessive vinegar use can damage certain wood finishes due to its acidity.
How often should wood furniture be cleaned?
Dust weekly and perform deeper cleaning every one to three months.
Can I use all-purpose cleaners on wood?
No, many all-purpose cleaners contain chemicals that may damage wood finishes.
Should wood surfaces be dried after cleaning?
Yes, immediate drying helps prevent moisture damage and streak formation.
How to Clean Counters Using the Best Cleaner Spray
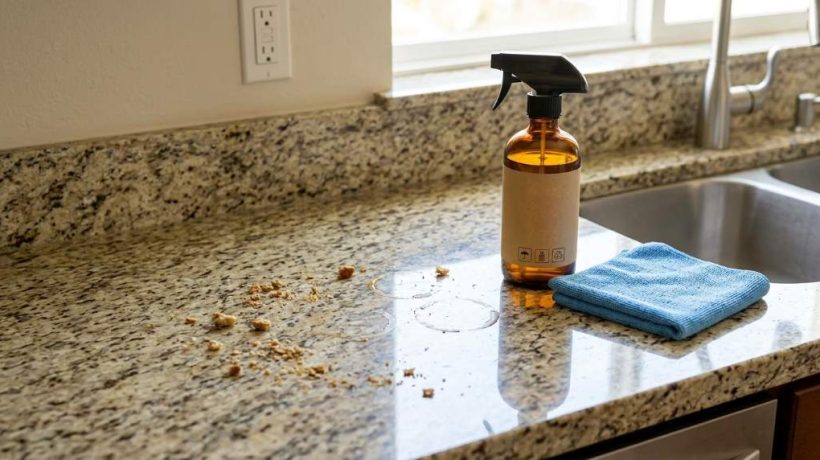
Clean countertops improve both kitchen hygiene and visual appeal. According to studies by the National Sanitation Foundation, kitchen surfaces often contain more bacteria than many household areas. Therefore, using the right cleaning method matters for every household in the USA. When searching for the best kitchen countertop cleaner spray, understanding proper cleaning techniques helps maximize results while protecting countertop materials.
Many homeowners clean countertops daily, yet improper techniques can leave behind bacteria, streaks, and surface damage. Fortunately, using the best cleaner spray correctly can deliver spotless and sanitary surfaces. This guide explains proven methods, material-specific techniques, and expert tips for maintaining beautiful kitchen counters.
Why Proper Countertop Cleaning Matters
Kitchen countertops serve as one of the busiest surfaces in any home. They regularly contact food, cooking utensils, and household items.
As a result, improper cleaning may allow bacteria, grease, and stains to accumulate. Regular maintenance preserves appearance and extends countertop lifespan.
Additionally, clean counters improve indoor hygiene and create a healthier cooking environment. Proper cleaning routines also reduce costly repairs and replacements.
Choosing the Best Cleaner Spray for Your Countertops
Not every cleaner spray works safely on every surface. Different countertop materials require specific formulations.
Before purchasing a cleaner spray, always verify compatibility with your countertop material. Manufacturer recommendations provide the safest guidance.
Features to Look for in a Quality Cleaner Spray
- Non-abrasive ingredients
- Fast-drying formula
- Food-safe certification
- Residue-free cleaning action
- Surface-specific compatibility
- Low odor formulation
- Antibacterial protection when needed
Identify Your Countertop Material First
Different surfaces react differently to cleaning products. Therefore, identification remains the first step before cleaning.
Granite Countertops
Granite requires pH-balanced cleaners that protect the stone sealant. Acidic products can damage the protective coating.
Quartz Countertops
Quartz surfaces tolerate many cleaner sprays but require non-abrasive formulations. Harsh chemicals may dull the finish.
Marble Countertops
Marble remains highly sensitive to acidic substances. Specialized stone cleaners provide the safest cleaning option.
Laminate Countertops
Laminate surfaces respond well to gentle multipurpose cleaner sprays. However, excessive moisture can damage seams.
Solid Surface Countertops
Solid surfaces generally tolerate standard countertop sprays. Nevertheless, avoiding abrasive pads remains essential.
Tools You Need Before Cleaning
Preparing the proper cleaning tools improves efficiency and protects countertop surfaces. Fortunately, most supplies remain inexpensive.
- Microfiber cloths
- Soft cleaning sponge
- Countertop cleaner spray
- Warm water
- Dry polishing cloth
- Paper towels for spills
- Soft-bristle brush for corners
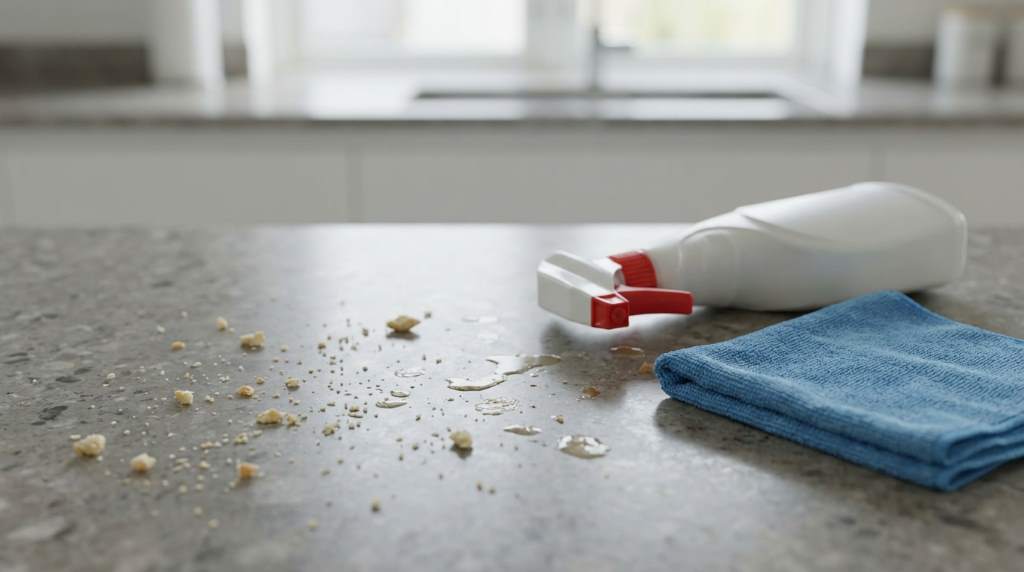
How to Clean Counters Using the Best Cleaner Spray
Step 1: Remove Loose Debris
Begin by removing crumbs, dust, and food particles. This step prevents scratching during cleaning.
Use a dry microfiber cloth or soft brush. Additionally, clear all appliances and accessories from the countertop.
Step 2: Apply the Cleaner Spray Evenly
Spray the cleaner directly onto the countertop surface. Apply a light, even coating rather than oversaturating.
Most quality sprays require brief dwell time. Therefore, allow the cleaner to sit according to product instructions.
Step 3: Wipe Using Circular Motions
Use a clean microfiber cloth to wipe the surface gently. Circular motions help lift grease and residue effectively.
Continue wiping until all visible dirt disappears. Replace dirty cloths when necessary.
Step 4: Address Stubborn Spots
For dried spills, apply additional cleaner spray directly onto the affected area. Allow several minutes for penetration.
Then gently scrub using a soft sponge or brush. Avoid using metal scrubbers or abrasive pads.
Step 5: Dry and Polish the Surface
After cleaning, use a dry microfiber cloth to remove remaining moisture. This step prevents streaks and water spots.
Polishing also restores the countertop’s natural shine. Consequently, the surface appears professionally cleaned.
Common Countertop Cleaning Mistakes to Avoid
Many homeowners accidentally damage countertops through improper cleaning habits. Fortunately, these mistakes remain preventable.
- Using bleach excessively
- Applying abrasive scrubbers
- Ignoring manufacturer guidelines
- Leaving spills untreated
- Using acidic cleaners on stone
- Over-saturating laminate surfaces
- Skipping regular maintenance
How Often Should You Clean Kitchen Counters?
Daily cleaning removes bacteria and food residue effectively. Therefore, light cleaning should occur after meal preparation.
Deep cleaning should occur weekly for most households. High-use kitchens may require additional sanitizing.
Furthermore, immediate spill cleanup prevents staining and long-term surface damage. Consistency produces the best results.
Natural vs Commercial Countertop Cleaner Sprays
Many homeowners compare natural cleaners with commercial products. Both options offer unique advantages.
Natural Cleaner Benefits
- Fewer synthetic chemicals
- Lower environmental impact
- Gentle cleaning performance
- Reduced strong odors
Commercial Cleaner Benefits
- Stronger grease removal
- Antibacterial formulations
- Surface-specific options
- Faster cleaning performance
The ideal choice depends on countertop material, cleaning frequency, and personal preferences.
Professional Tips for Long Lasting Countertops
Experts recommend using cutting boards consistently. Direct cutting damages many countertop surfaces over time.
Additionally, use trivets under hot cookware whenever possible. Heat exposure may weaken protective finishes.
Sealing natural stone countertops according to manufacturer recommendations also improves durability. Preventive care saves significant costs.
Finally, maintain a regular cleaning schedule using appropriate cleaner sprays. Consistency remains the key to preserving countertop beauty.
Conclusion
Learning how to clean counters using the best cleaner spray helps protect your investment while maintaining a healthier kitchen environment. Selecting the proper cleaner, using correct techniques, and following material-specific guidelines deliver professional-quality results.
Start implementing these cleaning practices today to keep your kitchen countertops spotless, sanitary, and beautiful for years to come.
FAQs
Can I use the same cleaner spray on all countertops?
No, different countertop materials require compatible cleaning formulations.
How often should I disinfect kitchen countertops?
Most kitchen countertops should be disinfected daily after food preparation.
Do cleaner sprays damage granite countertops?
Only improper or acidic cleaners may damage granite surfaces.
Are microfiber cloths better than paper towels?
Yes, microfiber cloths clean more effectively and reduce streaking.
Should countertops be dried after cleaning?
Yes, drying prevents water spots and improves surface appearance.
Warsaw Home Kitchen 2026 Trade Fair: Innovation, Style and Smart Living

Are you searching for the latest trends in kitchen design and smart home technology? The Warsaw Home Kitchen 2026 trade fair is one of the most anticipated events for the interior design industry in Central and Eastern Europe. This guide walks you through everything you need to know, from dates and location to exhibits and key highlights.
BBC Good Food Show Winter 2026: Dates, Tickets, Celebrity Chefs and Festive Highlights

Christmas is coming early to Birmingham this year. The BBC Good Food Show Winter 2026 takes place from November 26 to 29 at the NEC Birmingham. It is one of the UK’s biggest Christmas food events, bringing together celebrity chefs, hundreds of artisan producers, and festive shopping under one roof.
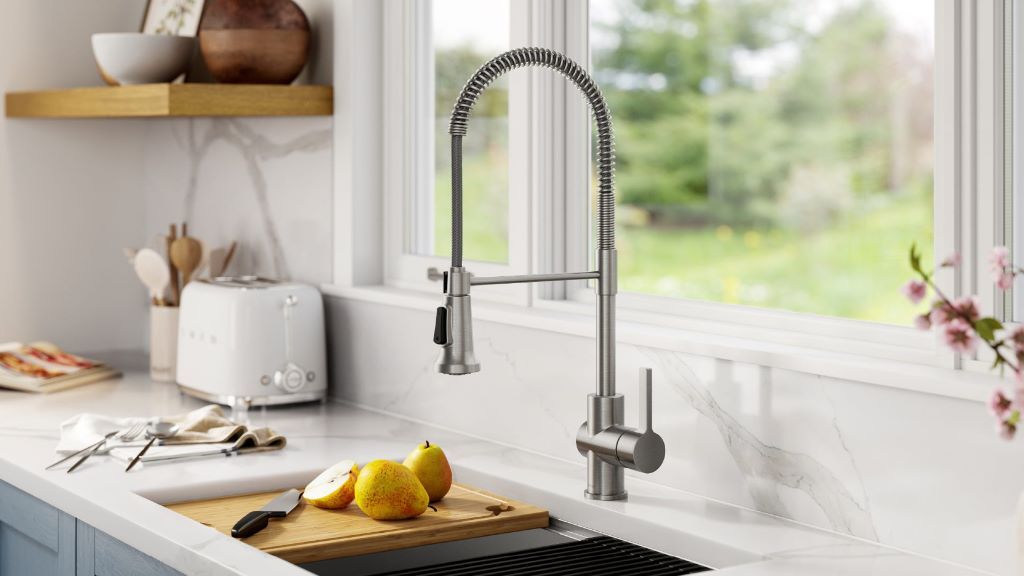
How To Choose the Best Kitchen Faucet for Modern Home Use

The kitchen faucet is one of the most used fixtures in any home, yet it’s often overlooked when it comes to upgrades or renovations. A high-quality faucet can transform your kitchen experience, making daily tasks like washing dishes, filling pots, and cleaning produce easier and more efficient. According to a survey by Houzz, over 70% of homeowners consider the kitchen faucet a key element in their kitchen’s functionality and style.
I remember the frustration of dealing with a leaky, outdated faucet in my first home. The constant dripping, the limited water flow, and the awkward design made even simple tasks feel like a chore. Upgrading to a modern, high-performance faucet changed everything. Suddenly, washing dishes became effortless, and the sleek design elevated the look of my entire kitchen. That experience taught me the importance of choosing the right faucet for both form and function.
Why Choosing the Right Kitchen Faucet Matters
A kitchen faucet is more than just a functional fixture—it’s a centerpiece of your kitchen’s design and usability. The right faucet can enhance your workflow, save water, and even add a touch of luxury to your space. According to the Environmental Protection Agency (EPA), a WaterSense-certified faucet can reduce water usage by up to 30% without sacrificing performance, making it an eco-friendly choice for modern homes.
For those looking to upgrade, a kitchen faucet guide can help you navigate the many options available. A well-chosen faucet can also improve the resale value of your home. Potential buyers often notice high-quality fixtures, and a stylish, functional faucet can be a selling point that sets your kitchen apart.
Additionally, the right faucet can make your kitchen more accessible and user-friendly. Features like touchless operation, pull-down sprayers, and adjustable water flow can make tasks easier for people of all ages and abilities. Whether you’re washing large pots or filling a glass of water, a good faucet should make these tasks smoother and more efficient.
Types of Kitchen Faucets to Consider
When it comes to choosing a kitchen faucet, there are several types to consider, each with its own advantages and ideal uses. The most common types include single-handle, double-handle, pull-down, pull-out, and touchless faucets.
Single-handle faucets are popular for their simplicity and ease of use. They allow you to control both the water temperature and flow with one hand, making them a convenient choice for busy kitchens. These faucets are also easier to clean and maintain, as they have fewer parts and crevices where grime can build up.
Double-handle faucets offer a classic look and precise control over water temperature and flow. Each handle controls either the hot or cold water, allowing for more accurate adjustments. However, they can be less convenient for quick tasks, as you need to use both hands to operate them.
Pull-down faucets feature a spray head that can be pulled down into the sink, providing greater flexibility and reach. These faucets are ideal for filling large pots, washing big dishes, or cleaning the sink itself. Pull-out faucets are similar but have a spray head that pulls out toward you, offering a different range of motion.
Touchless faucets are a modern and hygienic option, using motion sensors to turn the water on and off. These faucets are perfect for kitchens where cleanliness is a priority, as they reduce the need to touch the faucet with dirty hands. However, they can be more expensive and may require batteries or electrical connections.
Key Features to Look for in a Kitchen Faucet
Choosing the right kitchen faucet involves considering several key features to ensure it meets your needs and preferences. First, think about the faucet’s finish. Popular finishes include chrome, stainless steel, brushed nickel, and oil-rubbed bronze. Each finish has its own aesthetic appeal and level of durability. Chrome and stainless steel are highly durable and easy to clean, while brushed nickel and oil-rubbed bronze offer a more rustic or vintage look.
The spout height and reach are also important considerations. A higher spout can make it easier to fill large pots and wash big dishes, but it may also create more splashing. The reach of the spout determines how far the water stream extends into the sink. A longer reach can be useful for larger sinks or for washing items that require more space.
Another key feature is the faucet’s flow rate, measured in gallons per minute (GPM). A higher flow rate can fill pots and pans more quickly, but it may also use more water. Look for faucets with a flow rate of around 1.5 to 2.2 GPM, which balances performance and water efficiency. Additionally, consider the faucet’s spray options. Many modern faucets offer multiple spray settings, such as a powerful stream for filling pots and a gentle spray for rinsing dishes.
How to Match Your Faucet to Your Sink and Kitchen Style
Your kitchen faucet should complement both your sink and the overall style of your kitchen. Start by considering the size and configuration of your sink. If you have a large, deep sink, a pull-down or pull-out faucet with a high spout can provide the reach and flexibility you need. For smaller sinks, a single-handle or double-handle faucet with a lower spout may be more appropriate.
Next, think about the style of your kitchen. For a modern or contemporary kitchen, sleek, minimalist faucets with clean lines and finishes like chrome or stainless steel can create a cohesive look. For a traditional or rustic kitchen, consider faucets with more ornate designs and finishes like oil-rubbed bronze or brushed nickel.
Additionally, consider the number of holes in your sink. Most sinks come with one to four pre-drilled holes for faucets and accessories like soap dispensers or air gaps. If your sink has fewer holes than your faucet requires, you may need to use a deck plate to cover the extra holes. Conversely, if your sink has more holes than your faucet needs, you can use accessory kits to fill the extra spaces.
The Importance of Durability and Ease of Maintenance
Durability and ease of maintenance are critical factors when choosing a kitchen faucet. A high-quality faucet should be made from durable materials that can withstand daily use and resist corrosion, tarnishing, and scratches. Look for faucets with solid brass or stainless steel construction, as these materials are known for their longevity and resistance to wear and tear.
Additionally, consider the faucet’s finish. Some finishes, like chrome and stainless steel, are highly resistant to tarnishing and easy to clean. Others, like brushed nickel or oil-rubbed bronze, may require more maintenance to keep them looking their best. Regular cleaning with mild soap and water can help extend the life of your faucet and keep it looking like new.
Ease of maintenance is also important for the faucet’s internal components. Look for faucets with ceramic disc cartridges, as these are more durable and less prone to leaks than traditional washers. Additionally, consider faucets with easy-to-replace parts, such as aerators and O-rings, which can wear out over time.
Common Mistakes to Avoid When Choosing a Kitchen Faucet
When selecting a kitchen faucet, there are some common mistakes that homeowners often make. One of the biggest mistakes is choosing a faucet based solely on looks without considering its functionality. While a beautiful faucet can enhance your kitchen’s aesthetic, it’s important to ensure it also meets your practical needs.
Another mistake is not considering the faucet’s compatibility with your sink and plumbing. Before purchasing a faucet, make sure it fits the number of holes in your sink and is compatible with your plumbing setup. Additionally, avoid choosing a faucet with a spout height or reach that doesn’t match your sink’s size and configuration.
Lastly, some homeowners overlook the importance of water efficiency. A faucet with a high flow rate may provide strong water pressure, but it can also waste water and increase your utility bills. Look for faucets with a balanced flow rate and WaterSense certification to ensure they are both efficient and effective.
Personal Experience: Finding the Perfect Kitchen Faucet
When I renovated my kitchen a few years ago, I knew I wanted a faucet that was both stylish and functional. After much research, I decided on a pull-down faucet with a sleek chrome finish and a high spout. The faucet’s design complemented my modern kitchen, and its flexibility made washing dishes and filling pots a breeze.
However, I quickly realized that the high spout, while great for filling large pots, created more splashing than I anticipated. That experience taught me the importance of balancing aesthetics with practicality. I eventually found a faucet with a slightly lower spout and a more controlled water flow, which solved the splashing issue while still providing the functionality I needed.
Conclusion
Choosing the best kitchen faucet for your home involves considering a variety of factors, from functionality and durability to style and water efficiency. By understanding the different types of faucets, key features, and common mistakes to avoid, you can find a faucet that enhances both the look and usability of your kitchen.
A high-quality faucet is an investment in your home’s functionality and aesthetic appeal. Whether you prefer a sleek, modern design or a classic, traditional look, the right faucet can transform your kitchen experience. So, take the time to research and choose the best faucet for your needs and style.
Have you recently upgraded your kitchen faucet? Share your experiences or tips in the comments below! And if you found this article helpful, don’t forget to share it with your friends and family.
FAQs
What is the best type of kitchen faucet for a modern home?
The best type of kitchen faucet depends on your needs and preferences. Pull-down and pull-out faucets are popular for their flexibility and ease of use, while touchless faucets offer a hygienic and modern option. Single-handle faucets are also a great choice for their simplicity and convenience.
How do I choose the right finish for my kitchen faucet?
Consider the overall style of your kitchen and the durability of the finish. Chrome and stainless steel are highly durable and easy to clean, while brushed nickel and oil-rubbed bronze offer a more rustic or vintage look. Choose a finish that complements your kitchen’s design and meets your maintenance preferences.
What is the ideal flow rate for a kitchen faucet?
The ideal flow rate for a kitchen faucet is around 1.5 to 2.2 gallons per minute (GPM). This balances performance and water efficiency, providing strong water pressure while conserving water. Look for faucets with WaterSense certification for added efficiency.
How do I maintain my kitchen faucet?
Regularly clean your faucet with mild soap and water to remove grime and prevent tarnishing. Avoid using abrasive cleaners or scrubbers, as they can scratch the finish. Additionally, check and replace parts like aerators and O-rings as needed to prevent leaks and maintain performance.
Can I install a new kitchen faucet myself?
Yes, many homeowners can install a new kitchen faucet themselves with basic tools and some DIY experience. However, if you’re unsure about the process or your plumbing setup, it’s always a good idea to consult a professional plumber to ensure a proper and leak-free installation.