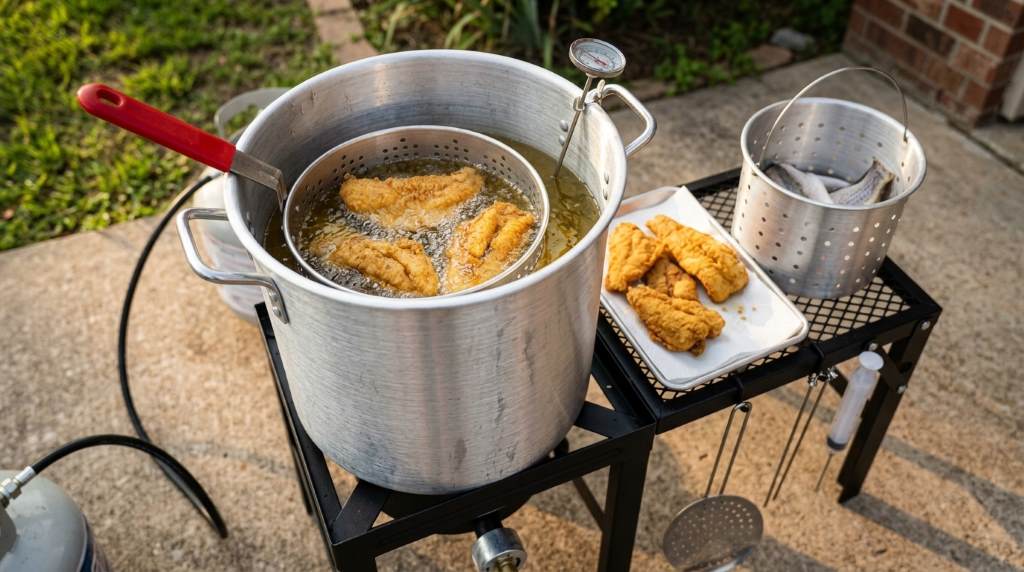
Why Is My Gas One Propane Fryer Thermometer Inaccurate?

How to Light a GasOne 30qt Turkey Fryer Set Safely
August 12, 2026
How to Bypass GE RPWFE Replacement Water Filter RFID Chip
August 12, 2026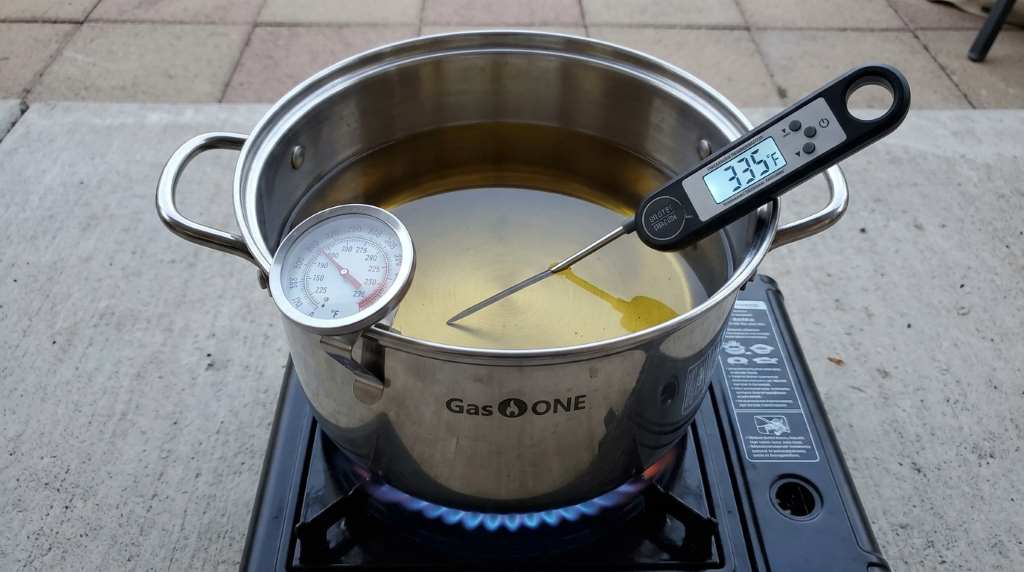
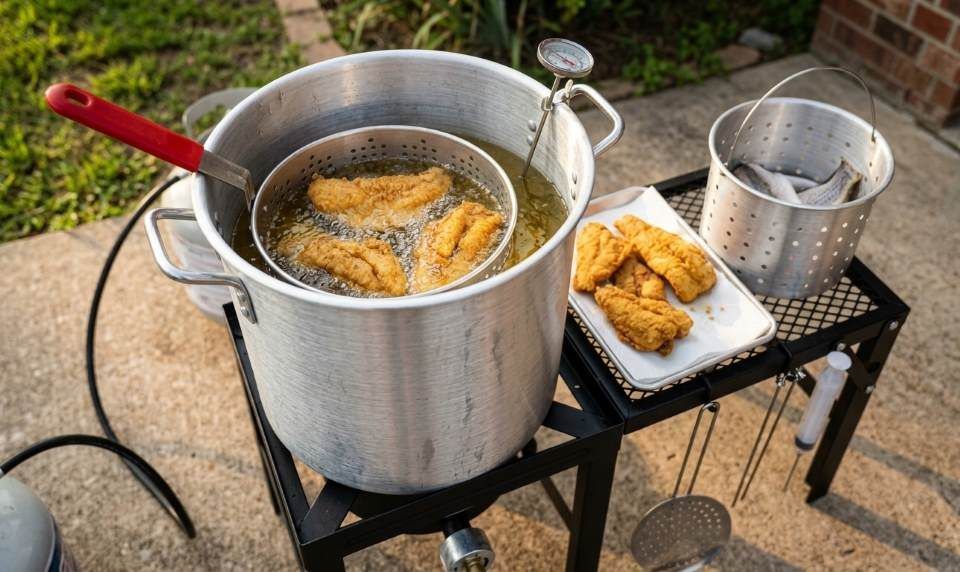
Your Gas One propane fryer thermometer can read incorrectly because of poor placement, calibration drift, residue, or thermometer damage. Fortunately, you can usually identify the problem by comparing its reading with a reliable cooking thermometer and checking its position.
A typical frying range falls between 325°F and 375°F, so even a 20°F error can change cooking results. The Gas One propane fryer with thermometer makes temperature monitoring easier, but the built in gauge still needs proper use.
Why Your Gas One Fryer Thermometer May Read Incorrectly
The thermometer measures temperature at one specific point inside the fryer. Therefore, its reading may differ from the oil temperature elsewhere in the pot.
Several issues can create inaccurate readings. Some involve simple positioning, while others indicate calibration problems or physical damage.
- Incorrect thermometer placement
- Thermometer touching the pot
- Oil temperature layering
- Residue around the sensing area
- Calibration drift
- Mechanical damage
- Rapid temperature changes
- Strong outdoor temperature effects
1. The Thermometer Position May Be Wrong
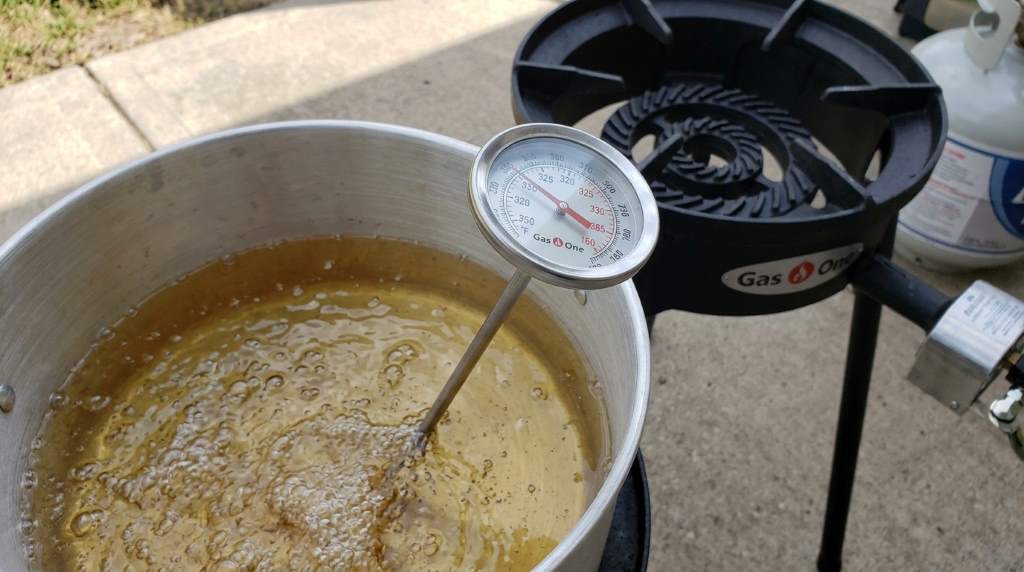
Placement remains one of the easiest problems to overlook. If the thermometer sits too close to the pot wall, it can sense metal temperature.
Likewise, contact with the bottom can produce a reading that does not represent the surrounding oil. Instead, keep the sensing portion immersed without touching the fryer surfaces.
Keep the Sensor in the Oil
First, check whether the sensing section sits at a consistent depth. Then compare that position during every cooking session.
Consistency matters because moving the thermometer changes the temperature zone being measured. A reading can therefore change even when the burner setting remains identical.
2. Your Oil May Have Different Temperature Zones
Hot oil does not always maintain one perfectly uniform temperature. The burner heats the lower area first, while cooler oil can remain elsewhere.
As a result, your thermometer may show one temperature while another section reads differently. Stirring the oil carefully can help distribute heat more evenly.
However, never stir hot oil carelessly or place wet utensils into it. Hot oil can splash and cause severe burns.
3. The Thermometer May Need Calibration
A mechanical dial thermometer can gradually drift from its original calibration. Repeated heating and cooling cycles can also affect its accuracy.
Fortunately, you can test the gauge before assuming the fryer itself has a problem. Use a reliable digital cooking thermometer as your comparison instrument.
How to Compare Both Thermometers
- Heat the fryer oil to a stable temperature.
- Place the comparison thermometer into the oil.
- Keep both sensing points at similar depths.
- Ensure neither thermometer touches the pot.
- Wait for both readings to stabilize.
- Record the temperature difference.
For example, your Gas One gauge might show 350°F while another thermometer shows 330°F. That 20°F difference deserves attention before your next frying session.
4. Rapid Heating Can Create False Confidence
Your thermometer may appear inaccurate when the oil simply has not stabilized. Propane burners can heat the fryer quickly, especially when the pot contains less oil.
Therefore, avoid judging accuracy immediately after changing the flame. Allow the oil temperature to settle before comparing readings.
Watch how the reading behaves over several minutes. A stable temperature provides a much better basis for an accuracy test.
5. Cold or Windy Weather Can Affect Outdoor Cooking
Outdoor propane frying exposes the fryer to changing weather conditions. Strong wind can remove heat from the pot and alter burner performance.
Cold air can also increase heat loss around the fryer. Consequently, the oil may recover more slowly after you add cold food.
Still, weather alone should not create a large permanent thermometer error. If the gauge remains consistently wrong, investigate the thermometer itself.
6. Food Can Cause Temporary Temperature Drops
Adding food to hot oil can produce a noticeable temperature drop. Larger or colder batches usually create a greater temporary decrease.
This change does not automatically mean your thermometer has failed. Instead, observe how quickly the oil returns toward the target temperature.
For better results, avoid overcrowding the fryer. Smaller batches usually allow the oil to recover more consistently.
7. Grease and Residue Can Affect the Thermometer
Cooking residue can collect around the thermometer and make cleaning more difficult. Built up grease may also interfere with smooth mechanical movement.
After the fryer cools completely, clean the thermometer according to its care instructions. Never attempt cleaning while the thermometer remains dangerously hot.
Also inspect the dial for cloudiness, cracks, bent components, or a needle that sticks. Physical damage can make calibration unreliable.
How to Test Your Gas One Thermometer at Home
A controlled comparison gives you more useful information than guessing from cooking results. You can perform the test whenever the fryer remains completely safe to operate.
Use a Reliable Digital Thermometer
Start with a digital thermometer that you trust. Ideally, use one designed for high temperature cooking and hot oil.
Heat the oil gradually and monitor both instruments. Compare readings at several temperatures rather than checking only once.
Record the Difference
| Gas One Reading | Comparison Reading | Difference | What It Suggests |
|---|---|---|---|
| 300°F | 300°F | 0°F | Likely accurate |
| 325°F | 315°F | 10°F | Check calibration |
| 350°F | 330°F | 20°F | Investigate further |
| 375°F | 345°F | 30°F | Possible thermometer problem |
These examples illustrate the testing method rather than guaranteed acceptable error limits. Your specific thermometer model may have different accuracy specifications.
What To Do If the Thermometer Is Consistently Wrong
First, repeat the test after repositioning the thermometer. This step eliminates many false accuracy concerns caused by measurement location.
Next, clean the thermometer and repeat the comparison. If the difference remains consistent, inspect the gauge for calibration or replacement options.
- Recheck thermometer placement.
- Compare readings with a trusted thermometer.
- Clean cooled components carefully.
- Check for visible damage.
- Review the model specific instructions.
- Replace a damaged thermometer when necessary.
Do not rely on an obviously inaccurate gauge simply because the fryer still produces heat. Temperature accuracy matters when frying food safely and consistently.
Why a 20°F Difference Matters
A small temperature error can change how quickly food cooks and how much oil it absorbs. Lower oil temperatures can produce greasy, pale, or unevenly cooked food.
Conversely, excessive temperatures can darken the exterior before the center cooks properly. Therefore, accurate temperature monitoring improves both texture and cooking control.
This becomes especially important when preparing different foods in the same fryer. Chicken, seafood, vegetables, and other foods can respond differently to temperature changes.
Common Mistakes That Make Thermometers Seem Inaccurate
Checking the Reading Too Quickly
Mechanical thermometers often respond more slowly than digital probes. Give the gauge enough time to respond before comparing it with another instrument.
Comparing Different Oil Locations
Two thermometers can show different readings when their sensors sit in different temperature zones. Keep their sensing points close together without allowing contact.
Using an Unreliable Comparison Thermometer
Your second thermometer might also contain an accuracy problem. Therefore, use a trusted instrument when testing the Gas One gauge.
Ignoring the Burner Setup
An unstable flame can create inconsistent heating across the pot. Keep the fryer on a stable, suitable surface and follow the operating instructions.
When You Should Replace the Thermometer
Replacement makes sense when the gauge remains inaccurate after careful testing. It also makes sense when the needle sticks, the dial cracks, or the casing becomes damaged.
Do not repair a damaged temperature gauge with improvised parts. A dependable replacement provides better confidence than repeated guesswork.
If the replacement thermometer produces normal readings, the original gauge likely caused the problem. However, persistent temperature problems may require inspection of the fryer setup itself.
How to Keep the Thermometer Accurate
Good maintenance can reduce avoidable measurement problems. Treat the thermometer as a working cooking instrument rather than a permanent accessory.
- Keep the sensing area clean.
- Avoid impacts and drops.
- Prevent contact with fryer surfaces.
- Store the thermometer carefully after cooling.
- Check accuracy periodically.
- Use consistent thermometer placement.
Additionally, avoid exposing the thermometer to conditions outside its intended operating range. Follow the instructions supplied with your exact Gas One fryer model.
Should You Trust the Gas One Thermometer?
Yes, you can use the included thermometer when it produces consistent readings. However, every mechanical thermometer deserves occasional verification.
A simple comparison test can tell you whether the gauge remains dependable. That approach works better than replacing a functioning thermometer without identifying the actual problem.
If accuracy matters for your cooking, keep a reliable digital thermometer available as a secondary check. This gives you an independent temperature reference whenever the dial seems questionable.
Final Takeaway
Your Gas One propane fryer thermometer may seem inaccurate because of placement, uneven oil temperature, calibration drift, residue, or damage. Start by comparing it with a reliable thermometer while keeping both sensors at similar depths.
Then check the gauge at several stable temperatures and record the differences. If the readings remain significantly different, inspect the thermometer and consider replacement.
Before your next frying session, take a few minutes to verify the gauge rather than guessing. Accurate temperature control can produce more consistent food and make outdoor frying much easier.
Frequently Asked Questions
Why does my Gas One fryer thermometer read too high?
The gauge may sit too close to the heated pot wall or require calibration.
Why does my fryer thermometer read too low?
The sensor may sit in a cooler oil zone or respond slowly during temperature changes.
How can I check whether my fryer thermometer works?
Compare its reading with a trusted high temperature digital thermometer at the same oil depth.
Can I calibrate a Gas One fryer thermometer?
Calibration depends on the specific thermometer design, so follow your model’s instructions before adjusting anything.
Should I replace an inaccurate fryer thermometer?
Replace it when repeated testing confirms a persistent error or visible mechanical damage.