How to Refill and Fix a Sputtering Sondiko Butane Torch

Why Won’t My Propane Torch Burner Stay Lit?
August 11, 2026
How to Fix Toshiba EM131A5C-SS Microwave Not Heating
August 11, 2026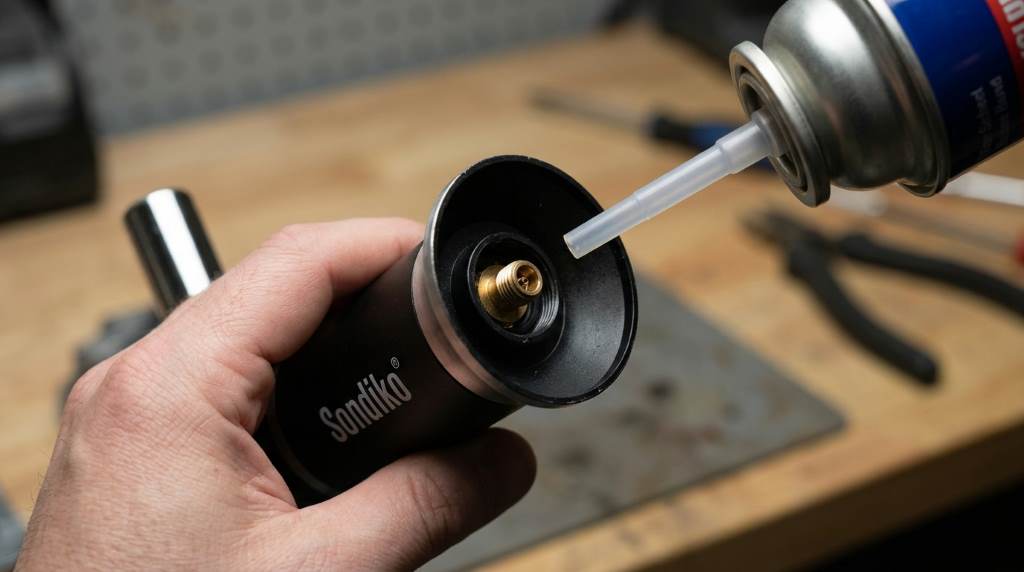
A sputtering torch usually needs proper refilling, air purging, clean fuel, or flame adjustment. A typical refill takes about 10 seconds, while a three minute wait helps fuel stabilize before ignition. A Sondiko butane torch can often recover without replacement when you troubleshoot it carefully. First, extinguish the flame and let the torch cool completely. Then refill it with suitable butane and purge trapped air if needed. Finally, test the flame outdoors or in a properly ventilated area away from ignition hazards.
Why a Sondiko Butane Torch Starts Sputtering
Sputtering usually means the torch receives an inconsistent mixture of butane and air. However, several conditions can create that imbalance during normal use.
Low fuel, trapped air, poor quality butane, clogged openings, and incorrect flame settings remain common causes. Therefore, identify the simplest cause before attempting any deeper troubleshooting.
- Low or depleted butane inside the tank
- Air trapped inside after refilling
- Impure or contaminated butane fuel
- A partially blocked burner opening
- A flame adjustment setting that sits too low
- A cold torch or cold fuel supply
- Damage around the fuel valve or burner assembly
Fortunately, most simple fuel and airflow problems require only basic maintenance. Still, never operate a torch that leaks, smells strongly of gas, or shows physical damage.
Safety Checks Before Refilling the Torch
Butane remains highly flammable, so refilling requires more care than ordinary lighter maintenance. Always work away from flames, sparks, cigarettes, hot surfaces, and other ignition sources.
Before touching the refill valve, extinguish the torch and allow it to reach room temperature. Also, refill only in a well ventilated location where escaping fuel cannot accumulate.
- Turn the torch completely off.
- Let the torch cool to room temperature.
- Move away from flames and ignition sources.
- Keep children and other people away during refilling.
- Use compatible butane intended for refillable torches.
- Never test suspected leaks with an open flame.
If you notice continuous hissing, visible damage, or a strong gas odor, stop immediately. Do not attempt to repair the fuel system yourself when the torch appears unsafe.
How to Refill a Sondiko Butane Torch
Correct refilling starts with removing the old air and positioning the torch properly. Follow the specific instructions supplied with your Sondiko model whenever they differ from general refill practices.
1. Turn Off and Cool the Torch
First, extinguish the torch completely and place it somewhere stable. Allow enough time for the body, burner, and fuel tank to cool before refilling.
Never refill a warm torch because residual heat can increase the risk from escaping butane. Instead, wait until the entire torch feels cool to the touch.
2. Locate the Refill Valve
Look underneath the torch for the small refill valve designed to accept the butane nozzle. Keep the valve accessible and position the torch securely.
If your model includes a fuel level window, inspect it before adding fuel. Avoid repeatedly forcing fuel into a tank that already appears full.
3. Purge Excess Air When Necessary
Air inside the fuel tank can cause weak ignition, uneven flames, or sputtering after refilling. Therefore, purging can restore a more consistent fuel flow.
Only purge a completely cool torch in a well ventilated area away from every ignition source. Follow your model instructions for the correct purge method and never improvise with tools.
4. Refill With the Torch Inverted
Hold the torch so its refill valve faces upward, unless your model instructions specify another position. Turn the butane container upside down during filling.
Press the refill nozzle firmly against the valve and allow fuel to enter steadily. A typical refill takes roughly 10 seconds, but tank size varies by model.
Stop when the tank reaches its recommended capacity or fuel begins escaping around the valve. Avoid repeatedly topping off a full tank because excess fuel can create handling risks.
5. Let the Fuel Stabilize
After refilling, remove the fuel canister and place the torch somewhere safe. Wait about three minutes before attempting ignition.
This short pause allows pressure and fuel conditions to stabilize inside the tank. Starting immediately can produce inconsistent ignition or an unstable flame.
How to Fix Sputtering After Refilling
If the torch sputters after a correct refill, avoid immediately adding more fuel. Instead, work through the following checks from simplest to more involved.
Check the Flame Adjustment
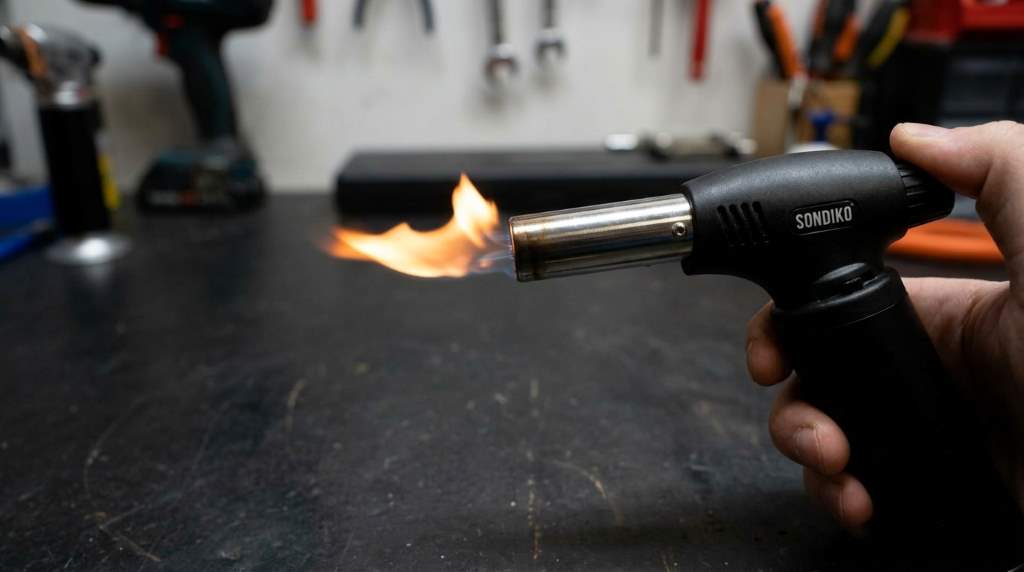
A flame control set too low can create a weak, unstable flame. Turn the adjustment gradually toward a moderate setting rather than opening it fully.
Then ignite the torch and observe the flame carefully. A steady blue flame generally indicates more consistent combustion than a yellow, flickering flame.
Check for Trapped Air
Repeated sputtering after refilling can indicate air remaining inside the tank. If your model supports purging, follow its instructions before attempting another refill.
After purging, refill the torch correctly and allow the fuel to stabilize. Then test the flame again using the same adjustment setting.
Inspect the Burner Opening
Dust, debris, or residue around the burner can interfere with gas flow and flame stability. Inspect the visible burner area under good lighting before cleaning anything.
Use only the cleaning method recommended for your model. Never insert needles, wires, pins, or other objects into gas passages.
Consider Butane Quality
Fuel quality can affect ignition and flame consistency, especially when contaminated fuel enters a small torch system. Use clean, suitable butane from a reputable manufacturer.
If problems began immediately after using a different fuel, fuel quality deserves attention. Avoid mixing questionable fuel with repeated refills because contamination can remain inside the tank.
Let a Cold Torch Reach Room Temperature
Cold conditions can reduce fuel pressure and make the flame appear weak or inconsistent. Bring the torch indoors and let it naturally reach room temperature.
Do not heat the torch with a heater, flame, hot water, or another artificial heat source. Excessive heat can create dangerous pressure inside the fuel tank.
What Different Flame Problems Can Tell You
The flame itself provides useful clues when diagnosing a sputtering torch. However, treat these signs as troubleshooting clues rather than reasons to dismantle the torch.
| Problem | Likely Cause | First Action |
|---|---|---|
| Weak blue flame | Low fuel or low setting | Check fuel level and adjust gradually |
| Sputtering flame | Air, fuel flow, or contamination | Purge and refill correctly |
| Yellow flame | Dirty burner or poor combustion | Inspect visible burner area |
| Flame will not stay lit | Low fuel or unstable flow | Check refill and adjustment |
| Gas odor without ignition | Possible leak | Stop using the torch immediately |
How to Clean a Sondiko Torch Without Damaging It
Routine cleaning should focus on accessible surfaces rather than internal gas components. Excessive cleaning can damage small parts or disturb factory settings.
First, make sure the torch remains completely cool and empty of active flame. Then inspect the exterior and visible burner area for dust, residue, or debris.
- Use a soft, dry cloth for exterior surfaces.
- Keep the burner opening free from visible debris.
- Follow the model manual for specialized cleaning.
- Never disassemble the fuel valve without manufacturer guidance.
- Never use solvents that the manufacturer does not recommend.
After cleaning, allow the torch to remain completely dry before use. A clean exterior also makes cracks, damage, and unusual residue easier to spot.
When You Should Stop Troubleshooting
Not every sputtering torch deserves another refill or adjustment. Continuing to use a damaged fuel appliance can turn a minor fault into a serious safety problem.
Stop using the torch if you notice a fuel leak, damaged tank, cracked housing, persistent gas odor, or abnormal heating. You should also stop when the torch repeatedly malfunctions after proper refilling and cleaning.
Do not modify internal components or attempt to repair sealed gas mechanisms without qualified technical support. Replacement usually makes more sense than experimenting with a pressurized fuel system.
How to Prevent Future Sputtering
Good storage and consistent fuel handling can prevent many recurring flame problems. Therefore, treat maintenance as part of normal torch use rather than emergency repair.
- Store the torch in a cool, dry, ventilated location.
- Keep the torch away from prolonged sunlight and excessive heat.
- Use compatible, clean butane fuel.
- Allow the torch to cool before every refill.
- Avoid dropping or striking the torch.
- Inspect the torch before each use.
- Keep the burner area visibly clean.
Also, avoid storing the torch near heaters, stoves, radiators, or other heat producing equipment. Proper storage protects both the fuel system and the torch housing.
A Simple Troubleshooting Sequence
When time matters, use a consistent diagnostic sequence instead of changing several variables simultaneously. This approach helps you identify the actual cause faster.
- Extinguish the torch and let it cool completely.
- Inspect the body, refill valve, and burner area.
- Check the fuel level.
- Purge air only when the model supports that procedure.
- Refill with compatible butane.
- Wait about three minutes after refilling.
- Set the flame control to a moderate level.
- Test the flame in a safe, ventilated location.
If the torch still sputters after these steps, stop using it rather than forcing another repair. Persistent problems can indicate a faulty valve, regulator, ignition component, or internal fuel passage.
Common Refill Mistakes to Avoid
Many refill problems happen because users rush the process or treat every torch like the same appliance. A careful refill takes little time but requires consistent technique.
- Refilling while the torch remains warm
- Refilling near an ignition source
- Using an incompatible fuel container
- Overfilling the fuel tank
- Ignoring a persistent gas smell
- Testing leaks with a flame
- Forcing objects into the burner opening
- Adjusting internal factory components
Most importantly, never continue operating a torch simply because it still produces a flame. A flame does not prove that the fuel system operates safely.
Final Takeaway
You can often fix a sputtering Sondiko butane torch by cooling it, purging trapped air, refilling it correctly, and adjusting the flame. Clean fuel and careful burner inspection can also restore stable performance when contamination or debris causes trouble.
Start with the safest, simplest checks before considering any repair. If the torch leaks, remains unstable, or shows physical damage, stop using it and replace or professionally service the unit.
Use this troubleshooting sequence during your next refill, and keep the manufacturer’s instructions nearby for model specific requirements. A careful refill routine can help your torch deliver a steadier flame while reducing unnecessary wear.
Frequently Asked Questions
Why is my Sondiko torch sputtering after refilling?
Trapped air, inconsistent fuel flow, poor fuel quality, or an incorrect flame setting can cause sputtering after refilling.
How long should I wait after refilling a butane torch?
Wait about three minutes after refilling so the fuel and internal pressure can stabilize before ignition.
Can I use any butane fuel in a Sondiko torch?
Use only butane that matches your specific Sondiko model’s fuel requirements and refill valve design.
Why does my torch produce a yellow flame?
A yellow flame can indicate incomplete combustion, contamination, restricted airflow, or another burner related problem.
Should I repair a leaking Sondiko torch?
No, stop using a leaking torch and seek appropriate manufacturer support or replace the damaged unit.