How to Use Cuisinart 14 Inch Charcoal Grill

How to Choose Core Mini Replacement Filter
September 20, 2026
How to Use Ember Temperature Control Smart Mug
September 20, 2026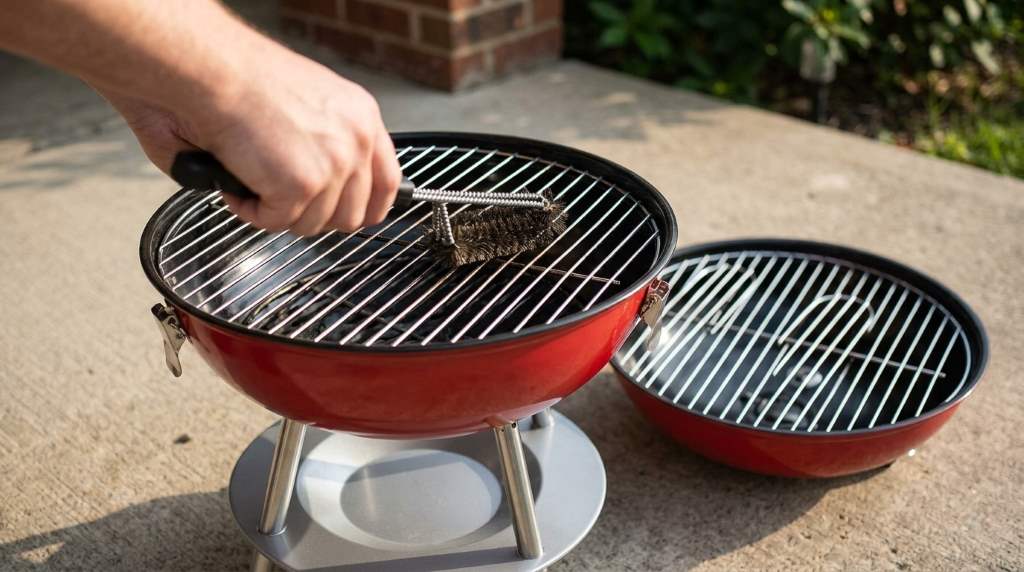
To use this grill, assemble it correctly, light charcoal safely, control airflow, and preheat before cooking. The Cuisinart 14 Inch Charcoal Grill provides 196 square inches of cooking space and weighs about 4.2 pounds. Its compact design suits tailgating, camping, small patios, and quick backyard meals. This guide explains each step, including charcoal setup, temperature control, cooking, cleaning, storage, and common mistakes.
Key Takeaways
- Set the grill on a level, outdoor surface before lighting charcoal.
- Keep combustible materials at least 10 feet away from the grill.
- Use a charcoal chimney for more predictable and cleaner lighting.
- Open both vents to build heat, then adjust airflow gradually.
- Keep the lid closed when you need steadier cooking temperatures.
- Clean the grate and ash area after every completely cooled session.
Know the Grill Before You Start
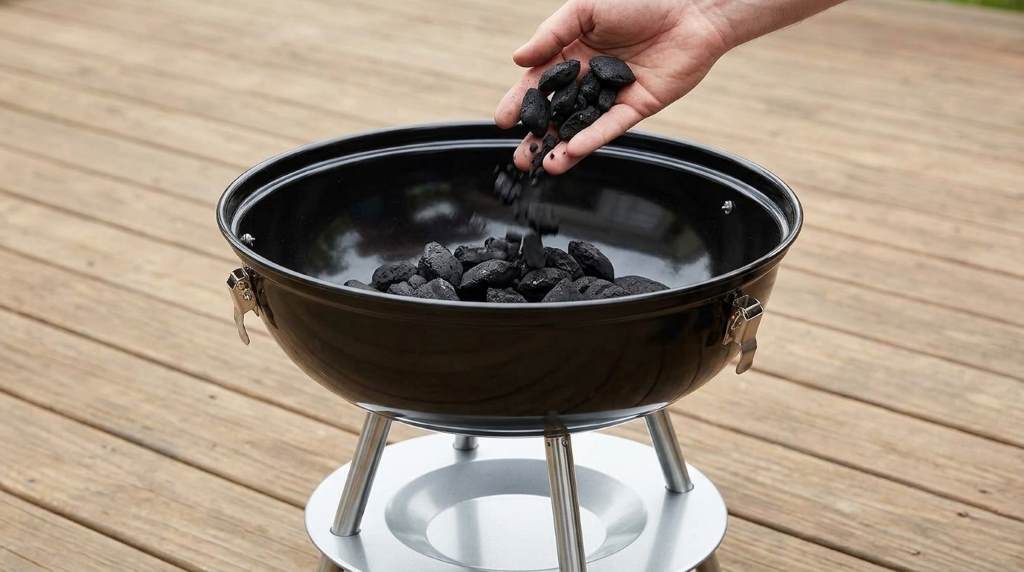
The Cuisinart 14 inch portable charcoal grill uses a compact kettle style design. Its cooking grate provides 196 square inches, while dual vents regulate airflow and temperature.
Because the cooking area stays relatively compact, charcoal placement matters. Therefore, arrange the coals deliberately instead of spreading them randomly across the entire grate.
Understand the Two Air Vents
The lower vent supplies combustion air beneath the charcoal. Meanwhile, the upper lid vent lets hot air and smoke escape.
Opening the vents increases oxygen flow and raises the fire temperature. Closing them partially reduces airflow and lowers the cooking temperature.
Prepare the Grill Safely
First, place the grill outdoors on a hard, level, stable surface. Keep it away from buildings, overhangs, dry vegetation, and other combustible materials.
The manufacturer instructions call for at least 10 feet of separation from combustible materials. Also, never use this charcoal grill inside a garage, enclosed patio, shed, tent, or other enclosed space.
Before lighting, inspect the legs, ash tray, charcoal grate, cooking grate, lid, and vents. Make sure every component sits securely and allows unrestricted airflow.
Keep These Items Nearby
- Charcoal briquettes or suitable lump charcoal
- Charcoal chimney starter
- Natural fire starter or newspaper
- Long handled grilling tongs
- Heat resistant grill gloves
- Grill brush
- Instant read food thermometer
- Heat safe container for fully cooled ash
Light the Charcoal Correctly
A chimney starter gives you better control than repeatedly adding lighter fluid. Cuisinart’s charcoal instructions recommend using a chimney starter for consistent lighting.
Start by filling the chimney with the amount of charcoal needed for your meal. Use roughly half a chimney for moderate cooking and more charcoal when you need higher heat.
Place a safe fire starter beneath the chimney and ignite it from several points. Then allow the charcoal to heat until the briquettes develop a gray ash coating.
Once the charcoal reaches that stage, carefully pour it onto the charcoal grate. Spread the coals according to the cooking method you plan to use.
Why Charcoal Amount Matters
Too little charcoal can make temperature control difficult during longer cooking sessions. Conversely, excessive charcoal can create unnecessary heat and increase fire risk.
The official instructions specifically warn against overfilling the charcoal tray. Therefore, start with a moderate amount and add fuel only when necessary.
Set Up Direct and Indirect Heat
Direct heat works best when food needs strong heat directly beneath the cooking area. Burgers, hot dogs, steaks, chicken pieces, and vegetables often suit this approach.
For direct grilling, spread the hot charcoal across the cooking zone. Then place the cooking grate above the coals and allow it to heat before adding food.
Indirect cooking keeps food away from the strongest charcoal heat. This method works better for thicker foods that need longer cooking without excessive surface browning.
For indirect cooking, push the charcoal toward one side. Place food on the opposite side and close the lid to circulate heat around the food.
Preheat the Cooking Grate
Preheating improves browning and reduces sticking during cooking. After the charcoal becomes ready, install the cooking grate and close the lid.
Allow the grill to heat before placing food on the grate. Meanwhile, adjust the vents gradually instead of making large changes repeatedly.
A hot grate also helps create clearer grill marks on suitable foods. However, extremely high heat can burn delicate vegetables, sugary sauces, and thin proteins.
Control Temperature With Airflow
Temperature control becomes easier when you treat the vents as airflow controls. Start with both vents substantially open while the charcoal establishes itself.
Once the grill reaches your desired heat, reduce airflow gradually. Small adjustments usually provide better control than fully opening or closing either vent.
Never close both vents completely while cooking. The manufacturer’s instructions warn that fully closing the vents can extinguish the fire.
Use Heat Changes Gradually
If the grill runs too hot, reduce the vent openings slightly. Then wait several minutes before making another adjustment.
If the temperature falls too low, open the vents to increase oxygen flow. Give the charcoal time to respond before adding more fuel.
This gradual approach prevents the common mistake of constantly chasing temperature changes. With practice, you can learn how the grill responds to different charcoal amounts and vent positions.
Cook Food With Better Heat Management
Place food over direct heat when you want fast browning and strong searing. Keep thicker foods near indirect heat when they need more cooking time.
Use tongs instead of piercing food repeatedly with a fork. This approach helps retain juices while giving you better control during flipping.
Keep the lid closed whenever you need stable heat or indirect cooking. Opening the lid frequently allows heat to escape and can extend cooking time.
Use a Food Thermometer
Visual appearance alone cannot reliably confirm whether meat has reached a safe internal temperature. Use an instant read thermometer and follow current food safety guidance.
Insert the thermometer into the thickest portion without touching bone. Check different pieces when cooking several portions together.
Also, avoid placing cooked food on plates that previously held raw meat. Clean utensils and surfaces before serving finished food.
Manage Smoke Without Losing Heat
Smoke adds flavor, but heavy smoke does not automatically mean better grilling. Excessive smoke can create bitter flavors and obscure the food’s natural taste.
Start with clean, properly burning charcoal rather than damp or contaminated fuel. Then use small amounts of suitable smoking wood when your recipe calls for extra smoke.
Keep the lid closed after adding smoking wood. This allows smoke to remain around the food while airflow continues through the grill.
Handle Common Cooking Problems
| Problem | Likely Cause | Practical Fix |
|---|---|---|
| Grill stays too cool | Restricted airflow or insufficient charcoal | Open vents and check charcoal distribution |
| Grill becomes excessively hot | Too much airflow or charcoal | Reduce vent openings gradually |
| Food burns outside | Direct heat stays too intense | Move food toward indirect heat |
| Food cooks unevenly | Uneven charcoal placement | Redistribute charcoal into a planned heat zone |
| Food sticks to grate | Cold or dirty cooking surface | Preheat and clean the grate properly |
| Smoke tastes harsh | Excessive smoke or poor fuel | Reduce smoking wood and improve airflow |
Clean the Grill After Cooking
Cleaning becomes easier when you handle residue before it accumulates. Let the grill cool completely before removing ash or cleaning components.
Brush the cooking grate after each session when the surface remains safe to handle. Remove grease and food residue before the next cook.
The Cuisinart design includes an ash collection area that helps simplify cleanup. The enamel coated firebox also supports easier maintenance when you remove residue regularly.
Remove Ash Safely
Never remove ash while hot coals remain active. The manufacturer specifically warns against removing ashes until charcoal has completely burned out or extinguished.
Never pour water directly onto active charcoal to extinguish it. Instead, allow the charcoal to burn out safely while keeping the grill monitored.
Once everything becomes completely cold, remove the ash carefully. Dispose of it according to local waste rules and keep it away from combustible materials.
Store the Grill Properly
Clean and dry the grill before storing it for an extended period. Moisture trapped against metal surfaces can encourage corrosion and unpleasant residue.
Secure the lid before moving the grill. The current Cuisinart design includes three lid locks intended to keep the grill closed during transport.
Store charcoal separately in a dry location. Keep fuel, lighter products, and the grill away from children and ignition sources.
A Simple Cooking Routine for Beginners
A repeatable routine makes charcoal grilling much easier. Follow the same sequence until you understand how your grill responds to fuel and airflow.
- Place the grill outdoors on a level, safe surface.
- Inspect the vents, grates, legs, and ash collection area.
- Light an appropriate amount of charcoal using a chimney starter.
- Wait until the charcoal develops a gray ash coating.
- Arrange charcoal for direct or indirect cooking.
- Install the cooking grate and preheat the grill.
- Adjust both vents gradually to control heat.
- Place prepared food on the appropriate cooking zone.
- Close the lid when the recipe requires stable heat.
- Check food temperature before serving.
- Let charcoal become completely extinguished before cleanup.
- Brush the grate and remove cooled ash.
Common Mistakes to Avoid
Many beginners focus on charcoal ignition but overlook airflow management. However, oxygen control largely determines whether your fire stays stable during cooking.
Another mistake involves adding charcoal too quickly. Give existing coals time to respond before deciding that the grill needs additional fuel.
Never add lighter fluid to hot or warm charcoal. The Cuisinart instructions specifically prohibit adding lighter fluid or fluid treated charcoal to hot coals.
Finally, avoid using the grill under combustible overhead structures. Charcoal produces intense heat and carbon monoxide, so outdoor placement remains essential.
How to Get More Consistent Results
Keep notes about charcoal amounts, vent positions, weather conditions, and cooking times. After several sessions, those observations become your personal temperature control reference.
Start with familiar foods such as burgers, sausages, chicken pieces, and vegetables. Then move toward thicker steaks, ribs, and longer indirect cooks.
Also, keep one cooking zone hotter than another whenever space allows. This setup gives you a place to move food when the surface becomes too hot.
Why This Grill Works Well for Small Outdoor Cooking
The compact format makes this grill practical when portability matters more than maximum cooking capacity. Cuisinart lists camping, tailgating, and small outdoor cooking among its intended uses.
Its dual vent system also gives a small grill meaningful temperature control. Therefore, you can use it for both quick high heat cooking and slower covered cooking.
However, the smaller cooking surface rewards organized preparation. Keep ingredients ready before lighting charcoal so you can spend more time cooking.
Frequently Asked Questions
How much charcoal should I use in a Cuisinart 14 inch grill?
Start with a moderate amount of charcoal and adjust based on cooking temperature, food quantity, and cooking method.
How do I control the temperature on this charcoal grill?
Adjust the bottom intake and top exhaust vents gradually to control oxygen flow and cooking temperature.
Can I use this Cuisinart grill indoors?
No, use it only outdoors because burning charcoal produces carbon monoxide and creates a serious fire hazard.
Should I close the vents completely after cooking?
Do not rely on fully closed vents during active cooking, and allow the charcoal to extinguish safely before cleanup.
How do I clean the Cuisinart 14 inch charcoal grill?
After complete cooling, brush the cooking grate, remove ash, and wipe suitable surfaces according to the care instructions.
Final Thoughts
Learning how to use this grill mainly requires mastering charcoal placement, airflow, heat zones, and safe cleanup. Once those habits become routine, the compact design becomes much easier to manage.
Start with simple meals, make small vent adjustments, and record what works. Then use that experience to handle more demanding recipes with greater confidence.
Before your next cook, inspect the grill, prepare your fuel, and plan your heat zones. A few minutes of preparation can make the entire grilling session smoother.