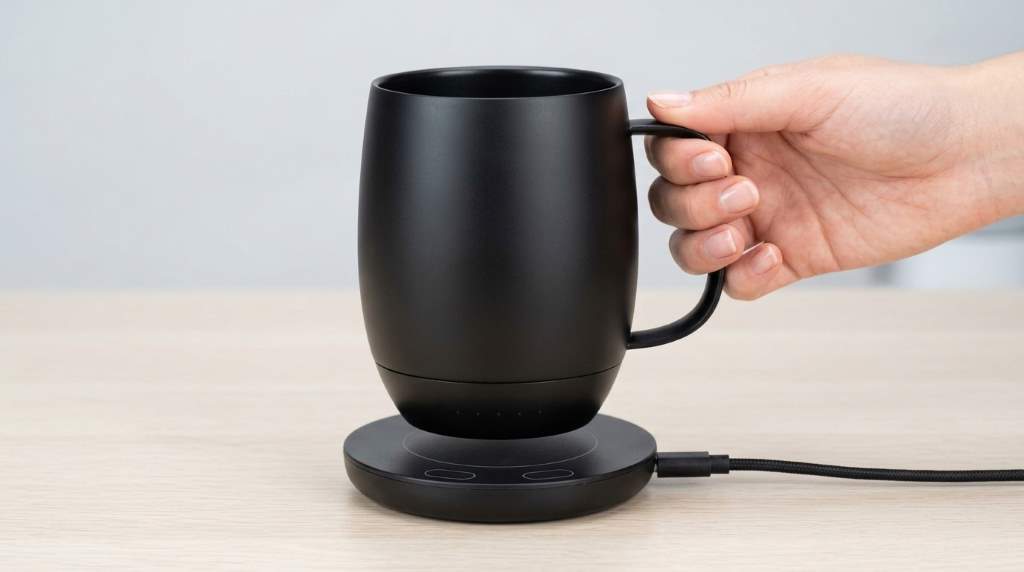
How to Use Housegem Coffee Cup Warmer

How to Organize With Homehacks Laundry Hampers
September 20, 2026
How to Clean House Gem Coffee Mug Warmer
September 20, 2026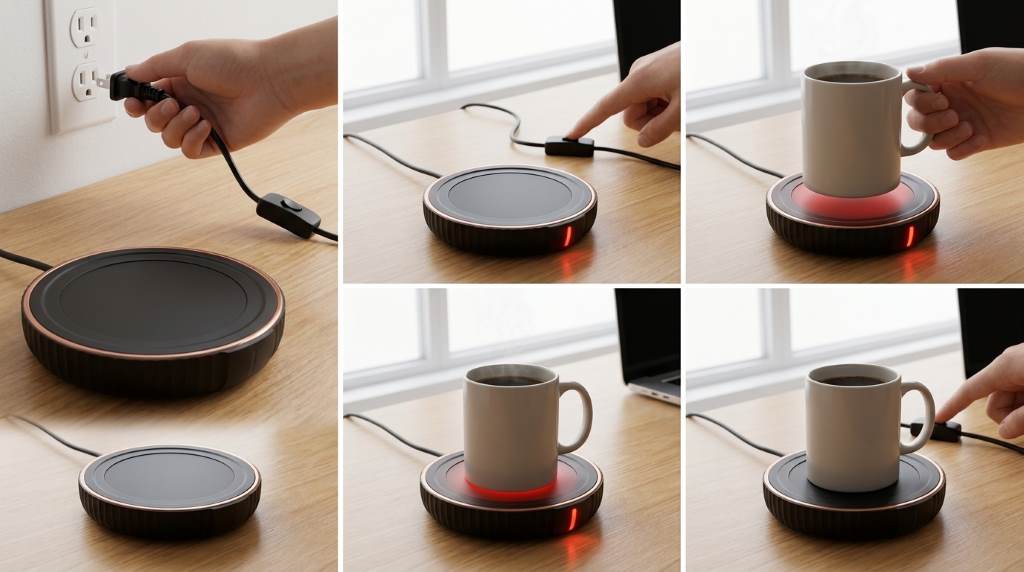
Using the Housegem Coffee Cup Warmer takes only a few simple steps. Place your mug on the heating plate, connect the warmer, select a suitable temperature, and let it maintain your drink. The Housegem Coffee Cup Warmer offers three temperature settings and a timer that can run from 2 to 12 hours. Its 36 watt design provides steady heat for coffee, tea, and similar drinks. However, your mug shape and material can affect warming performance. A flat bottom usually provides better contact with the heating surface.
Key Takeaways
- Place the warmer on a stable, dry, heat resistant surface before connecting power.
- Use a flat bottom ceramic or glass mug for more consistent heat transfer.
- Select the temperature that matches your preferred drinking warmth.
- Keep the mug centered so the heating plate contacts its base properly.
- Use the timer to reduce unnecessary operating time during long work sessions.
- Unplug the warmer before cleaning or moving it for storage.
What the Housegem Warmer Actually Does
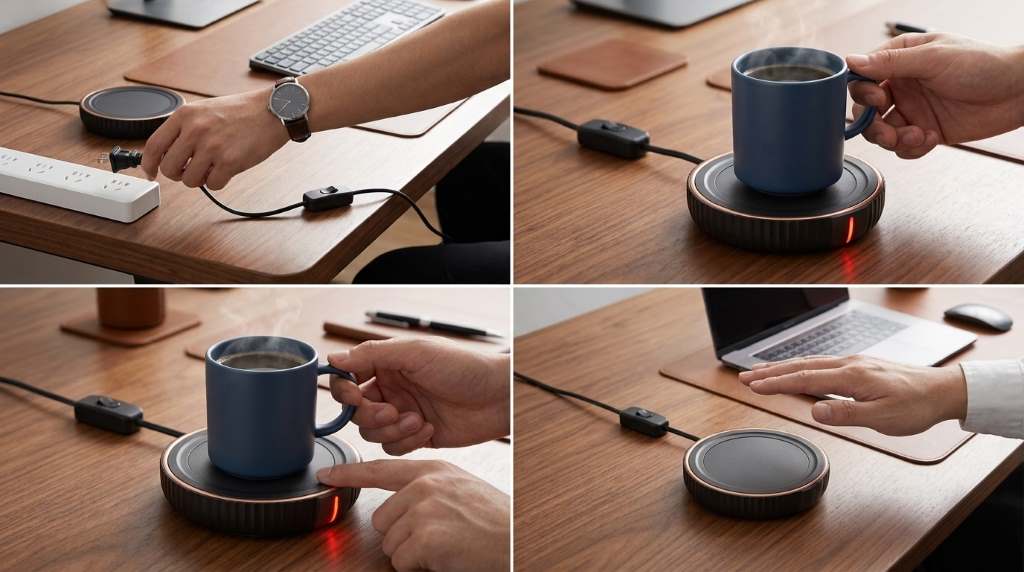
A coffee warmer does not work like an electric kettle. Instead, it slows the cooling process by transferring gentle heat through the mug base.
Therefore, the warmer works best when you start with coffee or tea that already feels hot. It maintains warmth rather than rapidly heating a cold beverage.
Understanding the Heating Plate
The heating plate transfers heat directly into the bottom of your cup. Better contact generally allows the beverage to retain warmth more consistently.
For that reason, flat bottom mugs usually outperform heavily curved or recessed designs. Thick insulated mugs can also reduce the amount of heat reaching your drink.
How to Set Up the Housegem Coffee Cup Warmer
First, place the warmer on a flat, stable, heat resistant surface. Keep the unit away from loose papers, cloth, water, and other items that could create problems around heat.
Next, inspect the heating surface and remove dust or residue. Then connect the power cord according to the instructions supplied with your specific unit.
Choose the Right Location
Your desk or kitchen counter can work well if it provides enough room around the warmer. Keep the appliance away from the edge so an accidental bump cannot move your mug.
Also, keep the cord positioned where your hands, chair, or other objects cannot catch it. A tidy setup makes everyday use easier and safer.
How to Use It Step by Step
Step 1: Prepare Your Drink
Pour your freshly prepared coffee, tea, hot chocolate, or another suitable beverage into your mug. Start with a comfortably hot drink instead of expecting the warmer to heat a cold beverage quickly.
Leave enough room below the rim to reduce the chance of spills. A lid can also help retain warmth by reducing heat loss from the drink surface.
Step 2: Place the Mug Correctly
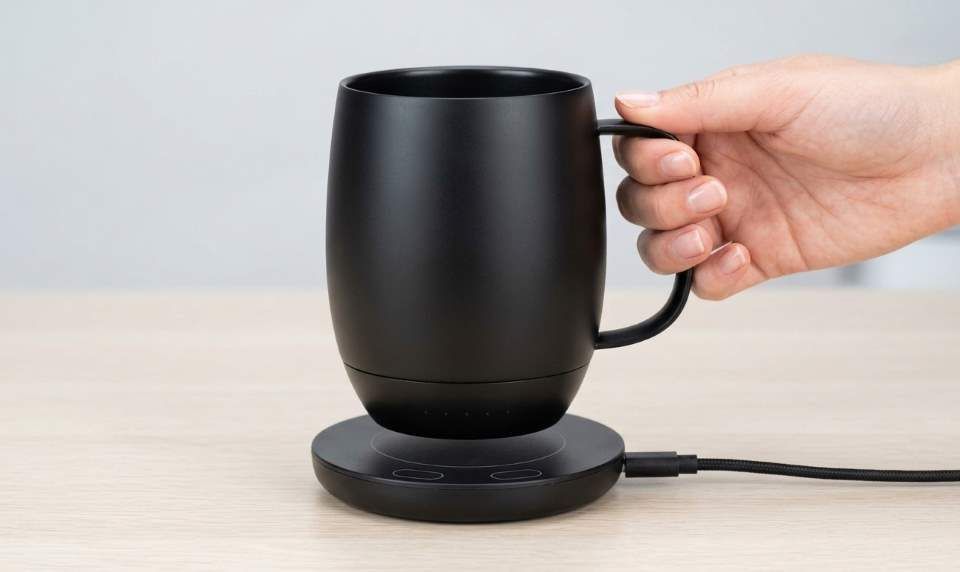
Set the mug directly in the center of the heating plate. Make sure the bottom sits flat and maintains good contact with the warming surface.
Avoid placing the mug partly over the edge. Centering the cup helps distribute heat more evenly and keeps the setup stable.
Step 3: Turn the Warmer On
Activate the warmer using its control button. Watch the indicator lights or display to confirm that the unit has entered an active heating mode.
Afterward, allow the warmer time to reach its selected operating temperature. The exact warming response depends on the drink volume, mug material, and starting temperature.
Step 4: Select a Temperature
Housegem provides three temperature settings, allowing you to adjust the warmth according to your drink and preference.
For regular coffee, begin with the middle setting and adjust from there. If you prefer a hotter drink, use a higher setting while monitoring the beverage.
Step 5: Set the Timer
The adjustable timer can provide up to 12 hours of operating time. Use a shorter duration when you expect to finish your drink soon.
For longer desk sessions, a longer timer can reduce repeated adjustments. Still, turn the appliance off when you no longer need it.
How to Select the Best Temperature
The right temperature depends more on your drinking habits than on a single universal setting. Coffee often benefits from moderate warmth because excessive heat can make each sip uncomfortable.
Start lower when you drink slowly or use a thin ceramic mug. Conversely, a thicker mug may require a higher setting because its material reduces heat transfer.
| Use Case | Suggested Approach | Why It Helps |
|---|---|---|
| Morning coffee | Medium setting | Maintains comfortable drinking warmth |
| Tea during work | Low or medium setting | Reduces excessive heating during slow sipping |
| Long desk sessions | Medium setting with timer | Maintains warmth without constant adjustment |
| Cold beverage | Warm it separately first | The warmer mainly maintains existing heat |
Which Mugs Work Best?
Flat bottom ceramic mugs usually provide the most practical combination of stability and heat transfer. Glass mugs can also work well when their base sits evenly against the plate.
However, thick double wall mugs may limit warming because their construction separates the beverage from the heat source. Similarly, deeply recessed mug bases may create uneven contact.
Mugs to Avoid
- Plastic containers that can react poorly to sustained heat.
- Paper cups that lack a stable, heat resistant base.
- Foam cups that can deform when exposed to heat.
- Very thick insulated mugs that block effective heat transfer.
- Mugs with highly uneven or deeply recessed bottoms.
When testing a new mug, check whether it sits level before leaving it unattended. A stable base improves both warming performance and spill resistance.
How to Keep Coffee Warm Longer
Start with a freshly prepared hot beverage instead of a drink that has already cooled substantially. Then place the mug on the center of the warmer as soon as practical.
Additionally, use a suitable lid when possible. A lid reduces heat escaping from the beverage surface, while the warmer replaces some heat lost through the mug base.
Your mug material also matters. A thinner ceramic or glass base generally transfers heat more readily than a heavily insulated container.
How to Use the Timer More Effectively
The timer becomes especially useful during focused work periods. Set a duration that matches your expected drinking session instead of automatically selecting the longest available period.
For example, a short coffee break may need only a few hours. A longer writing or office session may justify a longer setting, provided you remain attentive to the appliance.
Why the Timer Matters
A timer reduces the chance of leaving a heating appliance active longer than necessary. It also makes the warmer easier to fit into a predictable daily routine.
Even with a timer, avoid treating automatic shutoff as permission to ignore the appliance. Good placement and regular attention remain important.
How to Clean the Housegem Warmer
Always switch off and unplug the warmer before cleaning it. Allow the heating surface to cool completely before touching or wiping it.
Use a soft, slightly damp cloth to remove coffee splashes and surface residue. Avoid soaking the appliance or allowing water to enter electrical components.
For stubborn marks, use a mild cleaner that will not damage the surface. After cleaning, wipe away remaining moisture and let the unit dry before reconnecting power.
Common Mistakes That Reduce Performance
Using the Wrong Mug
A poorly matched mug can make a capable warmer seem ineffective. Thick insulation and uneven bases can prevent sufficient heat from reaching the beverage.
Therefore, test the warmer with a flat bottom mug before judging its performance. The difference can become noticeable during longer drinking sessions.
Starting With Cold Coffee
A mug warmer primarily maintains warmth rather than replacing a microwave or kettle. Starting with very cold coffee can produce disappointing results.
Instead, prepare the drink at your preferred temperature and use the warmer to slow its cooling. This approach matches the appliance’s intended purpose.
Ignoring the Timer
Long operating periods may waste energy when you have already finished your drink. Set the timer around your actual usage rather than leaving the maximum duration active.
Likewise, switch the unit off when you finish early. Simple habits can make the appliance more convenient during daily use.
Safety Practices for Daily Use
Keep the warmer on a stable surface and maintain clear space around it. Never cover the appliance with fabric, paper, or another material while it operates.
Handle the heating surface carefully because it can remain warm after operation stops. Keep children and pets away from the appliance during and immediately after use.
Never immerse the warmer in water. Also, inspect the cord regularly and stop using the appliance if you notice visible damage.
How to Get Better Results During Long Work Sessions
For long writing, studying, or office sessions, prepare your drink before starting work. Place the mug centrally and select a moderate temperature that matches your drinking pace.
Then use the timer to cover your expected session. If your coffee becomes too warm, lower the setting rather than repeatedly removing and replacing the mug.
Moreover, a covered mug can help preserve warmth between sips. This simple combination can reduce the need for reheating throughout the day.
Housegem Warmer Troubleshooting
| Problem | Likely Cause | Practical Fix |
|---|---|---|
| Drink stays cool | Poor mug contact | Use a flat bottom mug |
| Heat feels excessive | High temperature setting | Reduce the temperature |
| Warmer seems inactive | Power or control issue | Check the connection and controls |
| Uneven warming | Uneven mug base | Center a suitable mug on the plate |
| Surface looks dirty | Drink residue | Clean after unplugging and cooling |
When a Housegem Coffee Cup Warmer Makes Sense
This warmer can suit people who regularly leave coffee or tea untouched while working. It can also help anyone who dislikes repeatedly reheating a drink throughout the morning.
However, it cannot replace fast heating equipment when you need to heat a cold beverage quickly. Its main value comes from maintaining warmth during gradual drinking.
Frequently Asked Questions
How do I turn on the Housegem Coffee Cup Warmer?
Connect the warmer to power, activate its control, and place your mug centrally on the heating plate.
What mug works best with the Housegem warmer?
A flat bottom ceramic or glass mug generally provides effective contact with the heating surface.
Can the Housegem warmer heat cold coffee?
It can provide warming, but it works best when you begin with a hot beverage and maintain its temperature.
How long can the Housegem warmer run?
Its adjustable timer can provide operating periods from 2 to 12 hours depending on the selected setting.
How should I clean the Housegem warmer?
Unplug and cool the unit, then wipe its surface with a soft damp cloth without immersing the appliance.
Final Thoughts
Using the Housegem Coffee Cup Warmer becomes simple once you match the mug, temperature, and timer to your routine. Start with a hot drink, center a suitable mug, select moderate heat, and let the warmer maintain the temperature.
For better results, keep the heating surface clean and avoid mugs that block heat transfer. Try the recommended setup during your next coffee break, then adjust the temperature based on how quickly you drink.