How to Replace Frigidaire WF3CB Refrigerator Filter?

How to Replace Everydrop EDR3RXD1 Filter
September 20, 2026
How to Organize With Homehacks Laundry Hampers
September 20, 2026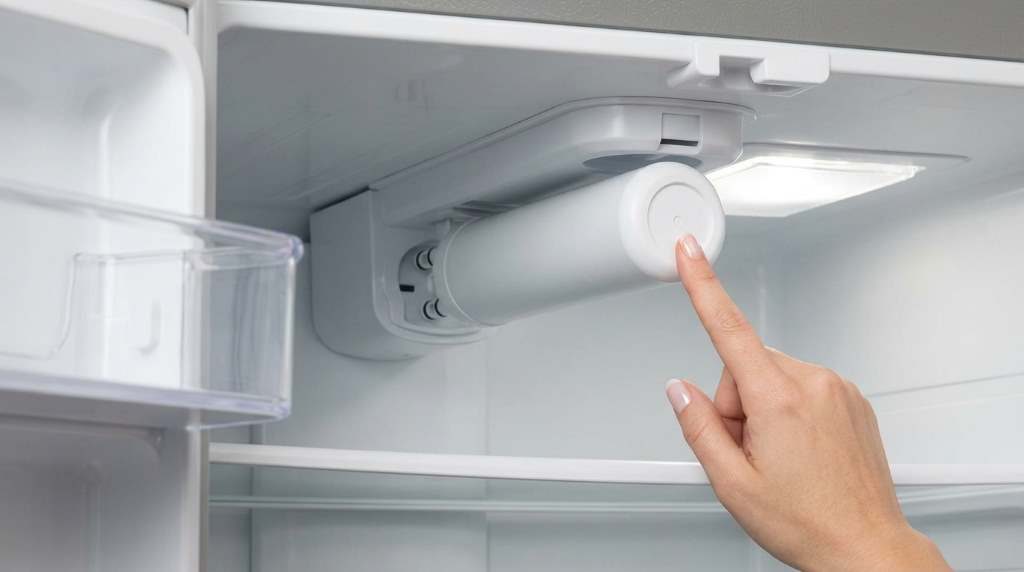
To replace a Frigidaire WF3CB filter, press the old cartridge inward, release it, and pull it straight out. Then align the new cartridge, push firmly until it clicks, flush the dispenser, and reset the filter indicator.
The Frigidaire WF3CB Refrigerator Filter uses a carbon block to filter refrigerator drinking water. Its rated service capacity reaches 200 gallons, while its rated service flow reaches 0.5 gallons per minute. However, correct installation matters because poor seating can reduce water flow or cause leakage. This guide explains replacement, flushing, resetting, and common troubleshooting steps.
Key Takeaways
- Confirm WF3CB compatibility with your refrigerator model before opening the replacement cartridge.
- Push the old filter inward first, then release and pull it straight outward.
- Remove every protective cap from the new cartridge before installation.
- Align the new filter carefully and push until the locking mechanism clicks.
- Flush the system thoroughly after installation to remove trapped air and carbon particles.
- Check the filter housing for leaks before returning the refrigerator to normal use.
- Reset the water filter indicator after completing installation and flushing.
Understand the WF3CB Filter Before Starting
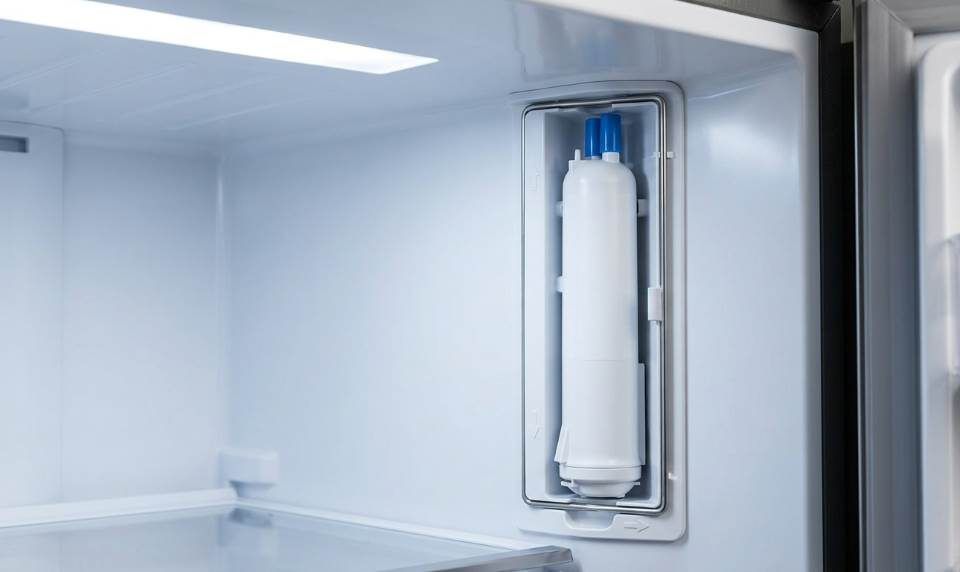
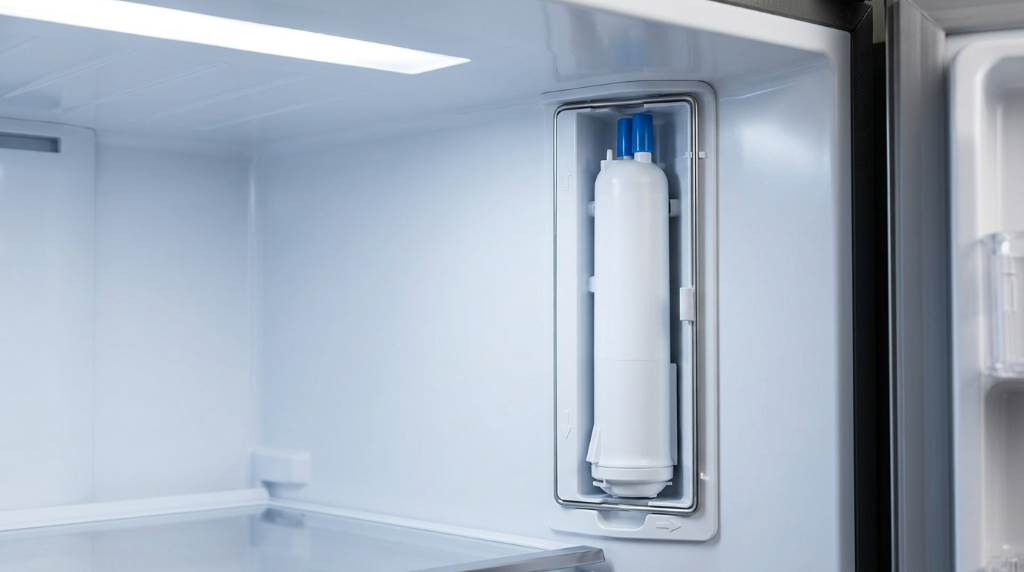
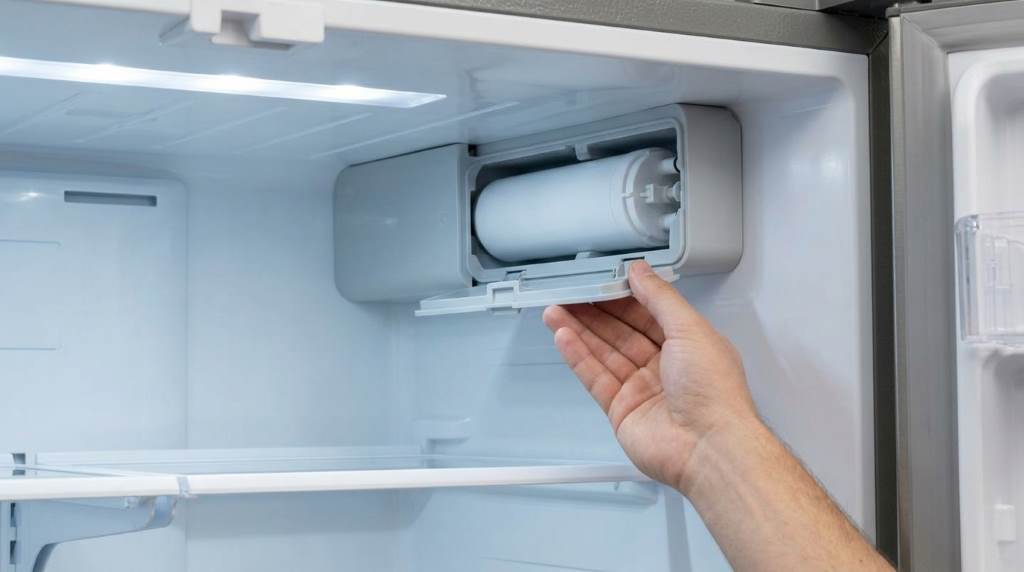
The WF3CB belongs to Frigidaire’s PureSource 3 water filtration system. You will commonly find its housing inside compatible side by side refrigerators.
The housing usually sits near the upper right rear section of the fresh food compartment. However, refrigerator designs vary, so verify your specific model before starting.
Confirm That WF3CB Fits Your Refrigerator
Never assume two similar looking cartridges use the same connection. Small differences around the connector can prevent proper installation or sealing.
First, inspect the existing cartridge for its part number. Also compare your refrigerator model against the compatibility information supplied with the replacement filter.
You can usually find the refrigerator model number inside the fresh food compartment. Check the upper interior walls when the refrigerator door remains open.
Know When Replacement Becomes Necessary
Frigidaire generally recommends replacing refrigerator water filters every six months. However, actual performance can decline sooner under demanding household conditions.
Reduced dispenser flow often provides an early warning of a restricted filter. Changes in water taste can also suggest replacement deserves attention.
Likewise, replace the cartridge when your refrigerator displays its filter replacement warning. Heavy water consumption may justify earlier replacement within the rated capacity.
What You Need for the Replacement
This job normally requires no specialized tools. Therefore, most homeowners can complete the replacement without disassembling refrigerator components.
Prepare everything beforehand so you can inspect the housing immediately. A towel also helps catch the small amount of water released during removal.
- A compatible WF3CB replacement filter
- A clean towel or absorbent cloth
- A large drinking glass or container
- Your refrigerator manual when model specific instructions differ
Keep the replacement cartridge sealed until you confirm compatibility. This precaution makes correcting an ordering mistake much easier.
How to Remove the Existing WF3CB Filter
Start by opening the refrigerator and locating the water filter housing. Move nearby food containers if they restrict comfortable access.
Next, turn the ice maker off before removing the cartridge. This step prevents the ice system from requesting water during replacement.
Release the Old Cartridge
Place a towel underneath the filter housing before releasing anything. A small amount of residual water may escape from the connection.
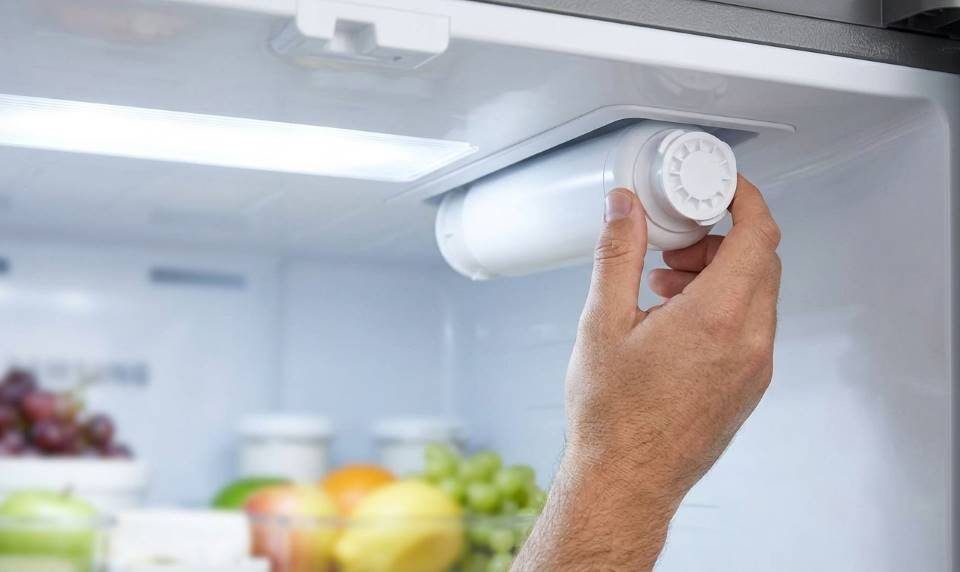
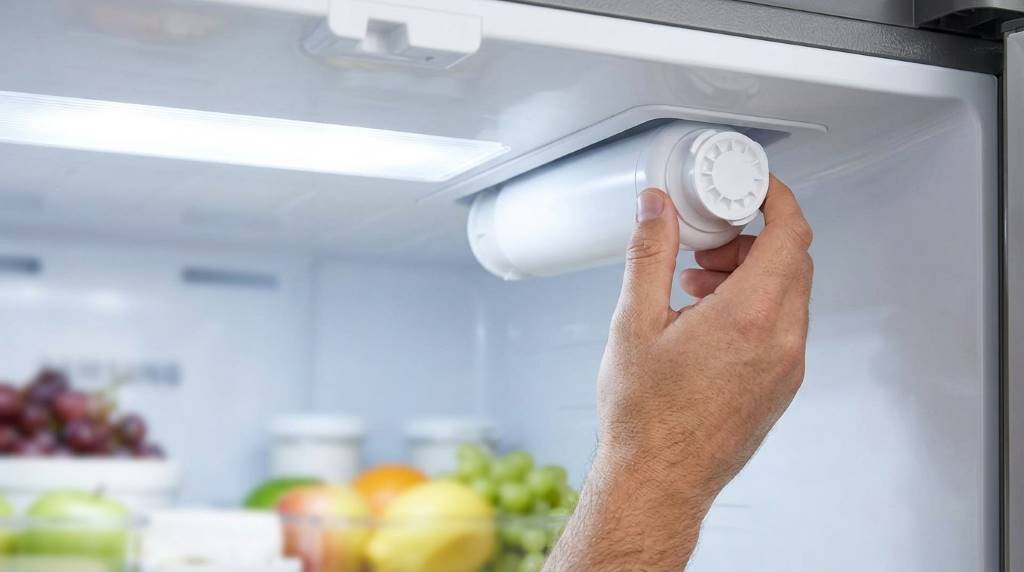
Press the exposed end of the old filter firmly inward. The locking mechanism should release and move the cartridge slightly toward you.
Then pull the cartridge straight outward without twisting or bending it. Excessive sideways pressure could stress the filter housing or internal connector.
What If the Old Filter Will Not Release?
A stubborn filter often needs another firm inward push before its latch releases. Therefore, press evenly against the cartridge face and release again.
Avoid aggressively twisting the filter or prying against its housing. Instead, confirm the cartridge moves along its intended straight removal path.
Stop if the cartridge appears broken or remains firmly jammed. Forcing damaged components can turn a simple filter change into a housing repair.
Install the New WF3CB Cartridge Correctly
Unpack the replacement only after removing the old cartridge successfully. Inspect the new filter for shipping damage, cracks, or damaged connection points.
Next, remove the protective caps covering its inlet and outlet connections. Leaving these caps installed prevents the cartridge from connecting correctly.
Align the Cartridge With the Housing
Use the cartridge guides and housing slots to establish the correct orientation. Then slide the filter straight inward without forcing its connection.
Continue until the cartridge reaches the connector at the rear. Finally, press firmly until you hear or feel the filter click.
The installed cartridge should feel secure rather than loose. Never accept a partially seated filter simply because it remains inside the housing.
Check the Installation Before Dispensing Water
Look closely around the filter connection after installation. The cartridge should sit straight and securely inside its housing.
If it looks crooked, remove it and repeat the alignment process. Correct seating protects water flow and helps prevent leaks.
Flush the New Filter Before Drinking the Water
Installing the cartridge completes only part of the job. You must also purge trapped air and loose carbon particles from the filtration system.
Place a large container beneath the dispenser and begin dispensing water. Initial sputtering can occur while trapped air leaves the water lines.
How Long Should You Flush a WF3CB Filter?
Run water through the newly installed filter for several minutes. Frigidaire installation guidance commonly calls for approximately four minutes of flushing.
You may notice temporary cloudiness or irregular flow during this process. However, these effects should improve as trapped air leaves the system.
Continue checking the filter housing while dispensing water. Stop immediately if continuous dripping or a visible leak develops around the cartridge.
Why Flushing Matters
A new carbon filter can contain harmless loose carbon particles from manufacturing and transportation. Flushing carries these particles through the dispenser before normal use.
The process also removes trapped air from the refrigerator’s water pathway. Consequently, dispenser flow should become smoother as purging continues.
Reset the Water Filter Indicator
The refrigerator does not necessarily recognize cartridge replacement automatically. Therefore, reset the filter status after installation and flushing.
Many compatible Frigidaire models use a Water Filter control on the dispenser panel. Press and hold that control for approximately three seconds.
The indicator may change from red to green after a successful reset. However, control sequences can differ between refrigerator models.
Check your model’s control instructions when the standard method does not work. Avoid repeatedly pressing unrelated controls while troubleshooting the indicator.
Test the Refrigerator After Replacement
A successful installation involves more than hearing the cartridge click. Test water flow, inspect for leaks, and confirm normal dispenser operation afterward.
Finally, turn the ice maker back on after completing those checks. Allow the system time to resume its normal ice production cycle.
| Check | Normal Result | Possible Problem |
|---|---|---|
| Filter position | Secure and straight | Incorrect alignment |
| Water flow | Steady after flushing | Trapped air or restricted flow |
| Filter housing | Dry around connection | Improper seating or damaged cartridge |
| Indicator | Reset status displayed | Incorrect reset procedure |
| Ice maker | Normal operation resumes | Water supply or filter problem |
Fix Common Problems After Installing the Filter
Most replacements work immediately after flushing. Still, several small installation issues can cause low flow, leakage, noise, or dispenser problems.
Troubleshoot the installation systematically rather than immediately replacing refrigerator components. Often, reseating the cartridge solves the problem quickly.
Water Does Not Dispense
First, confirm the filter sits completely inside its housing. Remove and reinstall it when you suspect incomplete engagement.
Next, verify the refrigerator receives water from the household supply. Also check whether the dispenser control became locked accidentally.
Finally, confirm you removed every protective cap before installation. A forgotten cap can prevent the water system from operating correctly.
Water Flow Seems Weak
Weak flow immediately after replacement can result from trapped air. Continue purging the system and watch whether flow becomes steadier.
If poor flow continues, inspect the filter position again. A cartridge that has not fully engaged may restrict normal water movement.
Also inspect the refrigerator’s water supply line for visible kinks. Restricted household supply pressure can produce similar dispenser symptoms.
The New Filter Leaks
Stop dispensing water if moisture continually appears around the filter housing. Remove the cartridge and inspect its body and connection points.
Then reinstall the filter carefully while keeping it straight. Listen for the locking click and confirm the cartridge remains firmly seated.
Replace a cracked or visibly damaged cartridge instead of reinstalling it. Persistent housing leaks may require professional appliance service.
The Filter Will Not Click Into Place
Never force a cartridge that refuses to engage. First, confirm its part number and compare its connector with the removed filter.
Then inspect the housing for packaging pieces, broken filter fragments, or other obstructions. Remove only loose material you can safely reach.
Try inserting the cartridge again with its guides correctly aligned. Stop when excessive force becomes necessary because the fit may be wrong.
The Filter Light Remains On
The indicator functions as a maintenance reminder rather than an installation detector on many refrigerators. Consequently, replacement alone may not clear it.
Hold the appropriate Water Filter control according to your refrigerator instructions. Confirm the display changes before considering the reset complete.
Mistakes That Make Filter Replacement Harder
The WF3CB replacement process looks simple, yet small mistakes often create unnecessary troubleshooting. Avoiding them protects the housing and saves considerable time.
- Buying a filter before confirming the refrigerator model and required cartridge.
- Twisting the old filter instead of using its push release mechanism.
- Forgetting to remove protective caps from the new filter connections.
- Installing the cartridge at an angle instead of following the housing guides.
- Stopping before the new cartridge clicks securely into its connector.
- Drinking immediately without flushing the new carbon filter first.
- Forgetting to reset the refrigerator’s filter status indicator afterward.
Another mistake involves forcing a filter when something feels wrong. Instead, remove it and inspect both the cartridge and housing before continuing.
How to Keep the Water System Working Well
Record the installation date immediately after replacing the filter. A phone reminder can help you track the next expected replacement interval.
However, do not rely solely on the calendar. Changes in flow, taste, or refrigerator alerts can indicate earlier replacement needs.
Watch Water Flow Between Replacements
A gradual flow reduction can indicate increasing restriction inside the cartridge. Therefore, compare dispenser performance with its behavior after a fresh installation.
Sudden flow loss deserves broader troubleshooting because the filter may not cause it. Check the supply line, dispenser lock, and cartridge position too.
Use the Correct Cartridge Every Time
Part numbers matter because refrigerator filtration systems use specific connectors and performance designs. Similar dimensions do not automatically establish correct compatibility.
Keep the previous filter’s part number available when ordering replacements. Also verify compatibility whenever you switch brands or cartridge types.
When Professional Service Makes Sense
A routine filter replacement should not require refrigerator disassembly. Therefore, persistent leaks or damaged housing components deserve closer professional inspection.
Service may also help when multiple compatible filters refuse to lock. In that situation, the receiver or internal housing mechanism may have failed.
Likewise, investigate persistent dispenser failure after confirming proper installation and water supply. The problem may involve another refrigerator water system component.
Frequently Asked Questions
How Often Should I Replace a Frigidaire WF3CB Filter?
Replace the WF3CB about every six months, or sooner when water flow noticeably declines.
Do I Need to Turn Off the Refrigerator Water Supply?
No, normal WF3CB cartridge replacement generally does not require shutting off the household water supply.
Why Does Water Sputter After Installing a New Filter?
Trapped air causes temporary sputtering, which normally disappears as you flush the new filter.
How Do I Know the WF3CB Filter Is Installed Correctly?
The cartridge should click securely into place, remain straight, and show no continuous leakage.
Why Is My Filter Light Still Red After Replacement?
You usually need to reset the filter indicator manually using your refrigerator’s designated control.
Final Thoughts
Replacing a WF3CB filter requires careful alignment, secure seating, thorough flushing, and an indicator reset. These simple steps help maintain reliable dispenser and ice maker performance.
Before starting, confirm cartridge compatibility and inspect the replacement for damage. Then follow each step carefully rather than forcing the filter into position.
After installation, test water flow and inspect the housing for leaks. Set your next replacement reminder once everything operates normally.