How to Replace Everydrop EDR3RXD1 Filter

How to Use Ember Temperature Control Smart Mug
September 20, 2026
How to Replace Frigidaire WF3CB Refrigerator Filter?
September 20, 2026
Replacing the Everydrop EDR3RXD1 Filter takes only a few minutes when installed correctly. Whirlpool recommends replacing refrigerator filters every six months, while the replacement itself can take under five minutes.
However, a proper replacement involves more than removing the old cartridge. You also need correct cap placement, filter orientation, water flushing, and indicator resetting.
Key Takeaways
- Confirm that EDR3RXD1 matches your refrigerator before installation.
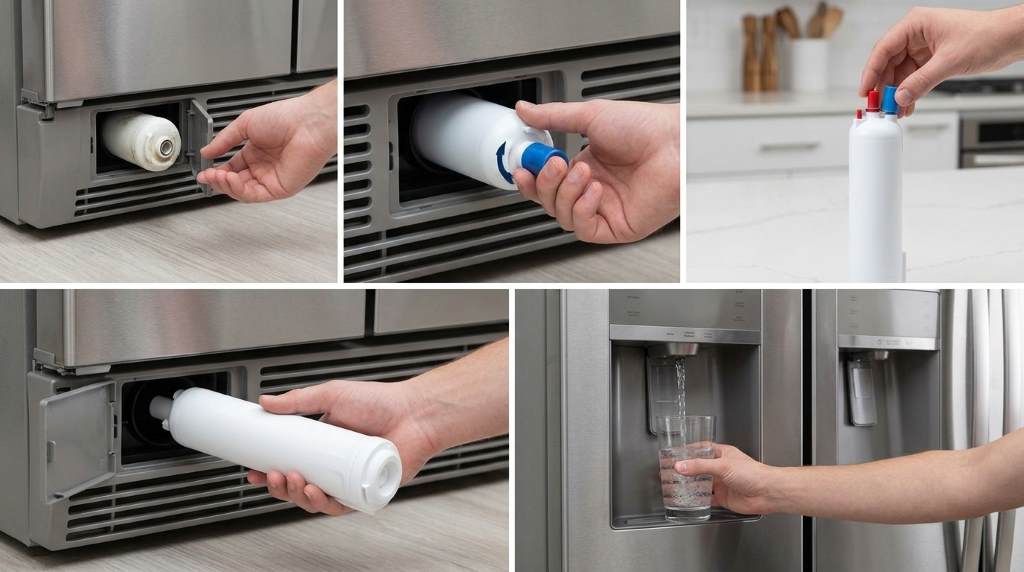
- Locate the filter housing inside the refrigerator base grille.
- Press the eject button before pulling out the old cartridge.
- Transfer the bottom cap carefully onto the replacement filter.
- Align the replacement cartridge correctly before pushing it inside.
- Flush the water system thoroughly before drinking the water.
- Reset the filter indicator after confirming proper water flow.
Before You Start the Replacement
First, confirm that your refrigerator uses Everydrop Filter 3, identified by EDR3RXD1. You can find the filter number printed on the existing cartridge or listed inside your manual.
Compatibility matters because refrigerator filters can look remarkably similar. Therefore, never force a cartridge simply because its shape appears close enough.
Everydrop Filter 3 commonly serves compatible Whirlpool, Maytag, KitchenAid, Amana, and JennAir refrigerators. Still, your refrigerator model remains the final compatibility check.
What You Need
You do not need special tools for this replacement. Prepare the new filter, a clean towel, and a container for flushing water.
- One compatible EDR3RXD1 replacement filter
- Clean towel for accidental water drops
- Large container for flushing the dispenser
- Refrigerator manual if your controls differ
Keep the new filter nearby before removing the old cartridge. This approach reduces the time your refrigerator remains without its normal filter.
Locate the Existing Filter
For Filter 3 systems, the filter housing sits on the left side of the refrigerator base grille. Look near the lower front section of the appliance.
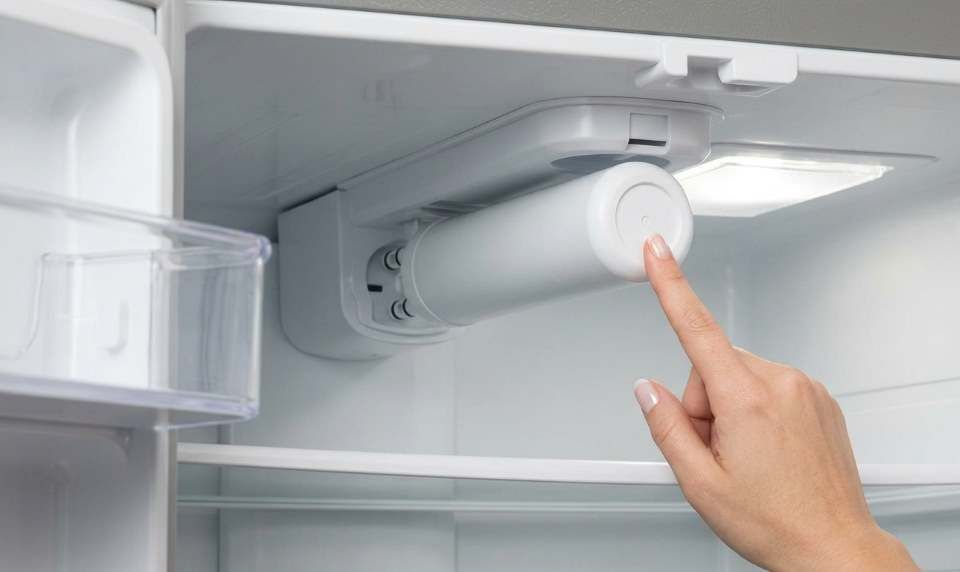
Once you locate the housing, identify the eject button beside the cartridge. The button releases the existing filter without requiring tools or excessive force.
Check the Filter Housing First
Before pressing anything, inspect the housing for visible damage or unusual moisture. A damaged housing can cause leaks even when you install the cartridge correctly.
Also check the area around the filter for dirt or residue. Wipe the surrounding surface with a clean, damp cloth when necessary.
Remove the Old EDR3RXD1 Filter
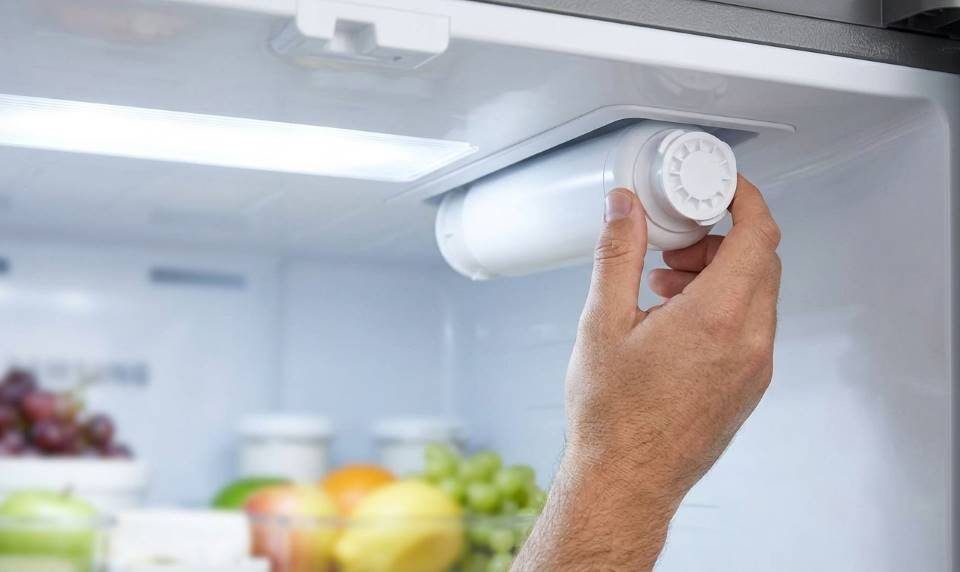
Press the eject button firmly to release the old filter from its locked position. Then pull the cartridge straight outward from the housing.
Do not twist the cartridge aggressively while removing it. Excessive force can damage the housing or make the cartridge harder to remove.
Keep a towel underneath the filter area during removal. A small amount of water can escape from the connection point.
Inspect the Removed Cartridge
Look at the old cartridge after removal, especially if water flow became slow. Heavy discoloration or sediment can indicate that replacement was overdue.
However, appearance alone cannot determine filter performance. Follow the recommended replacement interval rather than waiting for visible buildup.
Prepare the New Filter
Remove the replacement filter from its packaging carefully. Then remove the protective plastic covering from the filter tip.
Do not remove sealing components that belong to the cartridge itself. Check the filter carefully before installation to ensure nothing remains incorrectly attached.
Filter 3 installation also requires the cap from the old cartridge. Therefore, keep the old filter nearby until you transfer that cap.
Transfer the Filter Cap
Take the bottom cap from the old cartridge and examine its ridges. Align those ridges with the matching grooves on the new filter.
Place the cap onto the new cartridge and turn it clockwise until it locks securely. Avoid forcing the cap when the ridges do not align.
A poorly positioned cap can prevent proper installation. It can also make the cartridge appear secure when the filter remains incorrectly seated.
Install the New Filter Correctly
Hold the prepared EDR3RXD1 cartridge with its orientation arrow pointing toward the correct direction. For Filter 3, the arrow should point to the left during insertion.
Next, slide the cartridge into the filter opening. Push it inward until the eject button pops back into its normal position.
That click provides an important installation signal. Still, gently tug the cartridge afterward to confirm that it remains securely seated.
Never Force the Cartridge
A filter should enter the housing smoothly when the cap and orientation match correctly. If resistance appears immediately, stop and check the alignment.
Remove the cartridge and inspect the cap position again. Also check whether packaging material remains around the connection area.
Forcing the filter can damage the housing or create an imperfect seal. Consequently, careful alignment saves time and prevents avoidable leaks.
Flush the Water System
Flushing the new cartridge removes trapped air and helps clear initial carbon particles. This step also helps stabilize water flow after installation.
Place a large container beneath the dispenser before starting. Then dispense water in repeated short cycles rather than holding the dispenser continuously.
Everydrop recommends pressing the dispenser for about five seconds, then releasing it. Repeat that cycle until water flows normally, then continue flushing for about two minutes.
Whirlpool also provides guidance calling for four gallons through the line for refrigerator filter flushing. Follow your refrigerator instructions when they specify a particular flushing amount.
Why Flushing Matters
New carbon based filters can release harmless initial particles during first use. Flushing removes those particles before normal drinking and ice production resumes.
Flushing also helps remove air trapped inside the filter. That trapped air can cause sputtering, temporary dripping, or uneven dispenser flow.
If water initially looks cloudy, continue flushing the system. Clear water and stable flow should return as the air leaves the line.
Reset the Filter Indicator
After installing and flushing the cartridge, reset your refrigerator’s filter indicator. The exact button combination varies between refrigerator models.
Many Whirlpool refrigerators use a dedicated filter reset control. Some models instead require holding a refrigerator control button for about three seconds.
Check your refrigerator controls if the indicator does not reset immediately. A successful reset normally turns off the replacement warning.
Remember What the Reset Does
Resetting the indicator does not clean or restore the filter. It simply tells the refrigerator that you installed a fresh cartridge.
Therefore, never reset the indicator without replacing the filter. Otherwise, the refrigerator can display a fresh status while the old cartridge remains installed.
Check for Leaks and Flow Problems
After installation, inspect the filter area carefully for several minutes. Look for dripping water around the cartridge, cap, and housing connection.
Then test the dispenser for steady water flow. A weak stream can indicate an incorrectly installed or clogged filter.
Small ice cubes or reduced ice production can also indicate restricted water flow. Check the cartridge position before investigating other refrigerator components.
What to Check After Installation
| Check | What You Want | Possible Problem |
|---|---|---|
| Filter position | Cartridge sits securely | Incorrect alignment |
| Eject button | Button returns outward | Filter not fully seated |
| Water flow | Steady dispenser stream | Air or restricted flow |
| Filter housing | No visible dripping | Loose cap or seal |
| Indicator | Fresh filter status | Reset procedure needed |
Common EDR3RXD1 Replacement Mistakes
Many installation problems come from rushing the small steps. Fortunately, most issues have simple causes and straightforward solutions.
Installing Without Checking Compatibility
Buying a filter based only on appearance creates unnecessary installation problems. Always match EDR3RXD1 against your refrigerator model or existing filter number.
Also remember that similar Everydrop cartridges use different numbers. Filter 3 and Filter 4, for example, are not interchangeable simply because both fit certain refrigerators.
Forgetting the Old Cap
Filter 3 requires the bottom cap from the old cartridge during this replacement process. Keep the old filter until the cap transfers successfully.
If the cap does not align, do not force it. Recheck the ridges and grooves before continuing.
Skipping the Flush
Some users install the cartridge and immediately drink the first glass. That shortcut can leave trapped air and initial filter particles inside the water line.
Instead, flush the system thoroughly before normal drinking. This small step improves the transition to the new cartridge.
Ignoring a Slow Water Stream
A slow stream after replacement deserves attention. First, confirm that the filter sits fully inside the housing.
Next, flush additional water through the dispenser. If flow remains weak, consult your refrigerator troubleshooting instructions for possible supply issues.
When Should You Replace the Filter Again?
Everydrop generally recommends replacing the filter every six months. However, actual replacement timing can depend on water quality and household usage.
Replace the cartridge sooner when the refrigerator indicates replacement. You should also investigate earlier replacement when water flow noticeably decreases.
Heavy dispenser use can increase the amount of water passing through the cartridge. Therefore, the six month interval should serve as a practical baseline rather than permission to ignore warning signs.
Useful Replacement Reminders
- Record the installation date inside your maintenance notes.
- Set a calendar reminder for the next replacement.
- Watch for changes in taste, odor, or water flow.
- Check the filter indicator regularly.
- Keep one compatible replacement available before the next interval.
How to Keep the Replacement Process Simple
A repeatable routine makes future filter changes faster and safer. Start by confirming the filter number before ordering or opening the package.
Next, prepare the towel and flushing container before removing the old cartridge. This preparation prevents unnecessary interruptions during installation.
Finally, complete the entire process in sequence: remove, prepare, install, flush, reset, and inspect. Following the same order reduces missed steps and makes troubleshooting easier.
What If the New Filter Will Not Lock?
First, remove the cartridge and inspect the bottom cap. An incorrectly positioned cap can prevent the filter from reaching its locking position.
Next, verify the filter orientation and alignment with the housing. Then reinstall it gently until the eject mechanism returns to position.
If the cartridge still will not lock, stop applying force. Check the refrigerator manual for model specific installation requirements.
What If Water Tastes Different After Replacement?
A temporary taste difference can occur after installing a new carbon based filter. Continue flushing the system according to the recommended procedure.
If the taste remains unusual after proper flushing, inspect the installation again. Also consider the refrigerator water supply and other possible causes.
Do not assume that resetting the indicator resolves taste problems. The reset changes the refrigerator status display, not the physical filter condition.
A Simple Replacement Checklist
Before considering the job complete, review each step below. This final check takes less than a minute and can prevent recurring problems.
- Confirm EDR3RXD1 compatibility.
- Locate the base grille filter housing.
- Press the eject button.
- Remove and discard the old cartridge.
- Remove protective material from the new filter.
- Transfer and lock the bottom cap.
- Align the filter correctly.
- Push the cartridge fully into the housing.
- Flush the water system thoroughly.
- Reset the filter indicator.
- Check water flow and inspect for leaks.
Final Thoughts
Replacing an EDR3RXD1 filter becomes straightforward when you follow the correct sequence. The most important details involve cap transfer, left facing orientation, secure insertion, flushing, and indicator resetting.
Do not rush the installation simply because the cartridge appears easy to replace. Follow the checklist above, verify proper water flow, and schedule your next replacement before the current filter becomes overdue.
Keep this guide available for your next replacement and use the same inspection routine each time. A few careful minutes can help maintain reliable filtered water and smooth refrigerator operation.
Frequently Asked Questions
How often should I replace the EDR3RXD1 filter?
Replace the EDR3RXD1 about every six months, or sooner when usage and water conditions require it.
Where does the EDR3RXD1 filter go?
The EDR3RXD1 typically installs inside the filter housing located at the refrigerator’s base grille.
Do I need to transfer the old filter cap?
Yes, Filter 3 installation requires transferring the bottom cap from the old cartridge onto the replacement.
How much water should I flush after installation?
Flush according to your refrigerator instructions, with Whirlpool commonly recommending four gallons through the line.
Why is my water flow slow after replacement?
Check filter alignment and seating first, then flush additional water before investigating other supply problems.