
Help! My Bread Machine Loaf Sank in the Middle

Baking bread in a bread machine should make consistent, delicious loaves a breeze. But sometimes frustration kicks in when your bread rises beautifully and then collapses in the middle, leaving a sunken, crater-like appearance. If you’re muttering “Why did my bread sink?” let’s delve into the most likely culprits and troubleshoot your way to baking success.
Cloudy Tea From Your Coffee Maker? Here’s Why and How to Fix It

Tea enthusiasts know the joy of a perfectly clear, aromatic brew. But if you’ve ever used your coffee maker to make tea and ended up with a cloudy result, you’re not alone! This common issue can be frustrating, but luckily, it’s usually simple to understand and fix. Let’s dive into the reasons behind cloudy tea and how you can regain your crystal-clear cup.
Why macrame is great for 70s style

When you think of macrame, 70s flower pots hanging from the ceiling may first spring to mind. Today, macrame has made quite the comeback amongst bohemian enthusiasts. Let’s take a look at why macrame became popular in the 70s, and why it’s still great for 70s style.
Safe and Effective Tips for Painting Around Carpeted Stairs

Painting your stairwell is a fantastic way to refresh the look and feel of your home. However, if you have carpeted stairs, the project requires a bit more finesse to ensure crisp lines and to protect your carpet from paint splatter. Whether you’re a DIY enthusiast or a seasoned painter, understanding the correct techniques for painting around carpeted areas is crucial.
Five reasons to refurbish your kitchen

Thinking of upgrading your kitchen? We tend to assume that this means installing a brand-new replacement kitchen, but often the smarter choice is simply to refurbish it. Let’s look at some of the main reasons to invest in a kitchen refurb rather than replace your kitchen.
Five Common Thermal Spray Coating Processes

Thermal spray coating processes encompass a range of techniques used to apply protective coatings. Below are 5 methods which offer unique advantages and applications, making them vital in modern engineering and manufacturing.
What are the Importance of Home Appliance: Essential benefits for modern living

Home appliances are essential for daily tasks, making life easier and saving time significantly. With appliances, household chores become manageable and stress is minimized.
In today’s fast-paced world, the significance of home appliances cannot be overstated. From cooking to cleaning and storage, these devices streamline daily activities, offering convenience and efficiency. Modern appliances are designed to be energy-efficient, durable, and time-saving, contributing to reduced energy costs.
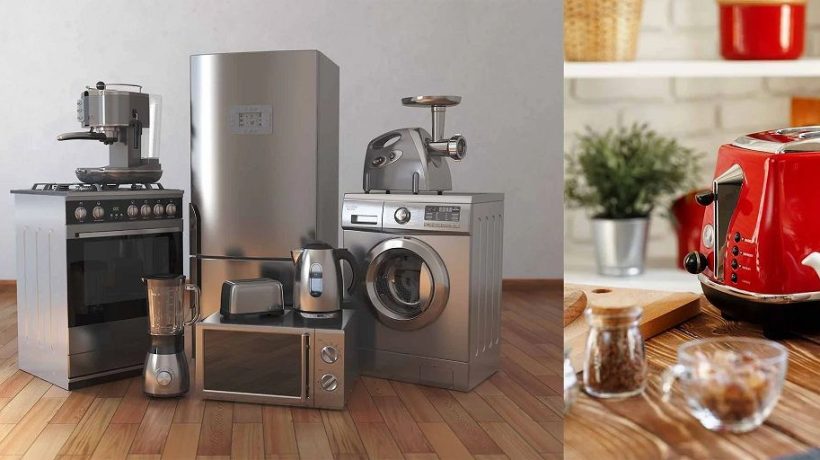
What are Essential Home Appliances: Must-Have Picks

Essential home appliances include a refrigerator, coffee maker, toaster, dishwasher, blender, electric kettle, and more. These appliances are crucial for everyday tasks and convenience in a household.
From preparing meals to keeping food fresh, they play a vital role in modern living. In today’s fast-paced world, having the right home appliances can make a significant difference in efficiency and comfort. The refrigerator ensures your food stays fresh, the coffee maker kickstarts your day, the dishwasher saves time on cleaning, and the blender helps in preparing quick and healthy meals.
Demystifying Household vs Home Appliances: Know the Difference!
Household appliances are designed for everyday use in homes, while home appliances are for occasional use. Home appliances, such as dishwashers and microwaves, assist in daily household functions like cooking and cleaning.
Understanding the differences between these two types of appliances can help you choose the right options for your specific needs. From refrigerators to washing machines, these products play a crucial role in modern living by making chores more manageable and enhancing convenience.
Home Appliances Which Can Run on Solar Energy: A Guide to Solar-Powered Household Devices
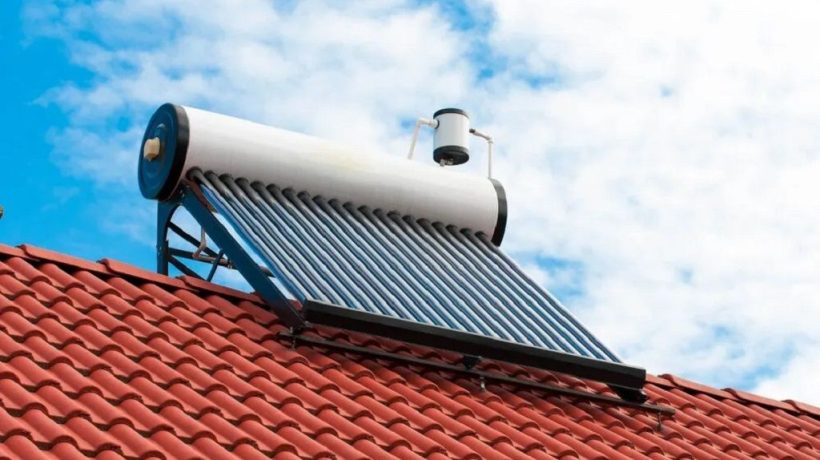
Home appliances that can run on solar energy include refrigerators, air conditioners, and water heaters. By utilizing solar power, you can reduce electricity costs while being environmentally friendly.
Transitioning to solar energy for your home appliances can lead to long-term savings and reduced carbon footprint. With advancements in solar technology, more appliances are becoming compatible with solar power systems. Investing in solar-powered appliances not only benefits you financially but also contributes positively to the planet.