How to Install Cabinet Lighting for a Brighter and More Modern Kitchen

How to Transform Your Kitchen with Robotic Cookers for Smart Cooking
April 15, 2026
How to Use a Food Vacuum Sealer Machine to Keep Food Fresh Longer
April 15, 2026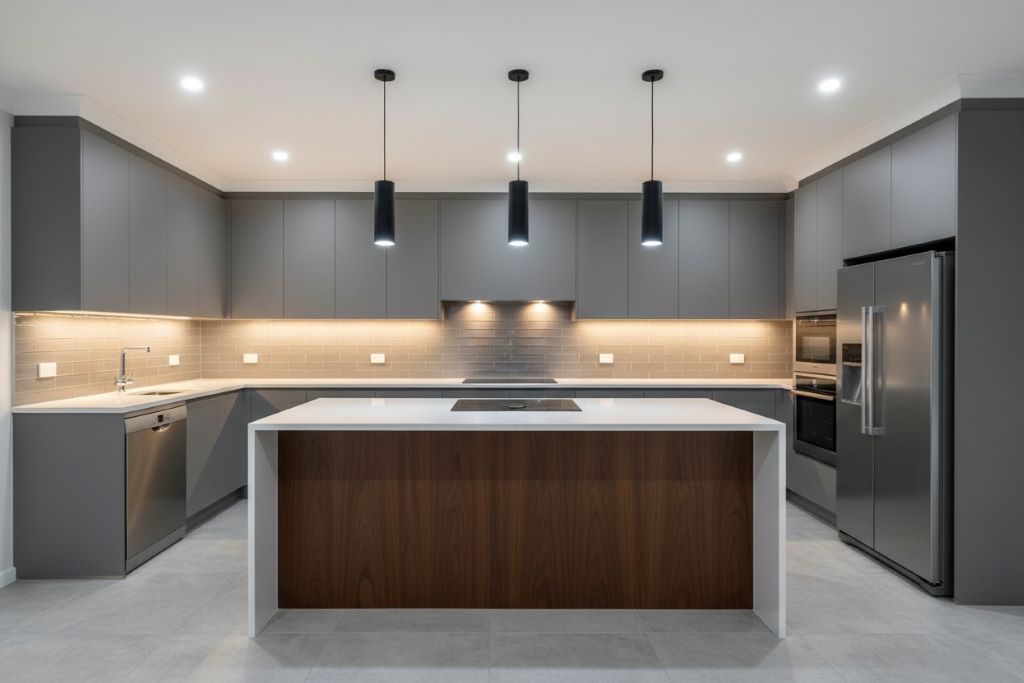
A well-lit kitchen is the heart of a modern home. It’s where meals are prepared, memories are made, and conversations flow. However, many kitchens suffer from poor lighting, especially in areas under cabinets where shadows can make cooking and food prep a challenge. Installing cabinet lighting is a simple yet transformative upgrade that can brighten your workspace, enhance your kitchen’s aesthetics, and even increase your home’s value.
I remember the first time I installed under-cabinet lights in my own kitchen. The difference was night and day—literally. Suddenly, chopping vegetables, reading recipes, and even cleaning up became easier and more enjoyable. If you’re ready to bring this change to your kitchen, this guide will walk you through everything you need to know.
Why Cabinet Lighting is a Game-Changer
Cabinet lighting is more than just a trend; it’s a practical solution for modern kitchens. According to recent studies, under-cabinet lighting is one of the most sought-after kitchen upgrades, with search interest peaking in 2025 as homeowners seek both functionality and style. These lights not only illuminate your countertops but also create a warm, inviting ambiance.
One of the biggest benefits is improved visibility. No more squinting to see if your knife is sharp enough or struggling to read a recipe. Cabinet lighting also adds depth to your kitchen, highlighting your backsplash and countertops. Plus, it’s energy-efficient, especially if you choose LED options, which can last up to 50,000 hours—far longer than traditional bulbs.
For those who love to entertain, cabinet lighting sets the perfect mood. Imagine hosting a dinner party with soft, warm lights casting a gentle glow over your appetizers and drinks. It’s these small details that make a space feel special.
Choosing the Right Type of Cabinet Lighting
Before you start, it’s important to pick the right type of lighting for your needs. Here are the most popular options:
- LED Strip Lights: These are flexible, easy to install, and provide even illumination. They’re perfect for long stretches of cabinetry and can be cut to fit your space.
- Puck Lights: Small, round, and versatile, puck lights are great for spot lighting. They can be battery-operated or hardwired.
- Linear Lights: These offer a sleek, modern look and are ideal for larger kitchens or islands.
- Wireless Lights: If you’re renting or want a hassle-free installation, wireless options with rechargeable batteries or motion sensors are a fantastic choice.
I opted for LED strip lights in my kitchen because I wanted a seamless look. They were easy to install, and the ability to adjust the color temperature was a bonus. If you’re unsure, consider visiting a local showroom or checking out online reviews to see what others recommend.
Tools and Materials You’ll Need
Gathering the right tools before you start will make the process smoother. Here’s what you’ll likely need:
- Cabinet lighting kit (LED strips, puck lights, or linear lights)
- Measuring tape
- Pencil
- Scissors (for cutting LED strips)
- Double-sided tape or mounting clips (depending on the type of lights)
- Screwdriver (if hardwiring)
- Wire connectors (if hardwiring)
- Power drill (if mounting clips are required)
- Transformer or power supply (for LED strips)
If you’re going wireless, you might also need batteries or a charging cable. Always double-check the instructions that come with your lighting kit to ensure you have everything you need.

Step-by-Step Guide to Installing Cabinet Lighting
Step 1: Plan Your Layout
Start by deciding where you want your lights. Measure the length of your cabinets and mark the spots where the lights will go. If you’re using LED strips, measure the exact length you need and cut them accordingly. For puck lights, space them evenly—usually every 12 to 18 inches.
Pro tip: If your kitchen has an outlet inside a cabinet, plan to place your transformer there for a cleaner look.
Step 2: Clean the Surface
Before attaching anything, clean the underside of your cabinets. Dust and grease can prevent adhesive tapes from sticking properly. A quick wipe with rubbing alcohol will do the trick.
Step 3: Attach the Lights
For LED strips, peel off the backing of the adhesive tape and press the strip firmly against the cabinet. If you’re using mounting clips, screw them into place first, then snap the lights into the clips.
For puck lights, stick them directly to the cabinet or screw them in, depending on the model. Make sure they’re aligned and evenly spaced.
Step 4: Connect the Power
If your lights are hardwired, you’ll need to connect them to your home’s electrical system. This step is best left to a professional if you’re not experienced with electrical work. For plug-in or battery-operated lights, simply connect them to the power source or insert the batteries.
Step 5: Test Your Lights
Before finalizing the installation, turn on the lights to make sure everything works. Check for any flickering or dim spots. If you’re using dimmable lights, test the dimmer function as well.
Tips for a Professional Finish
- Hide the Wires: Use cable clips or channels to keep wires neat and out of sight.
- Use a Dimmer: Installing a dimmer switch lets you adjust the brightness to suit different tasks and moods.
- Match the Color Temperature: Choose a color temperature that complements your kitchen. Warm white (2700K-3000K) creates a cozy atmosphere, while cool white (4000K-5000K) is better for task lighting.
- Consider Motion Sensors: Wireless lights with motion sensors are convenient and energy-efficient, turning on automatically when you enter the kitchen.
Common Mistakes to Avoid
- Skipping the Planning Stage: Rushing into installation without measuring or planning can lead to uneven lighting or wasted materials.
- Ignoring Electrical Safety: If you’re not confident with wiring, hire a professional. Electrical mistakes can be dangerous.
- Choosing the Wrong Brightness: Too bright, and your kitchen will feel harsh; too dim, and you won’t see well. Aim for a balance.
- Forgetting to Clean the Surface: Dirty cabinets can cause lights to fall or adhesive to fail.
Maintenance and Care
Once your cabinet lighting is installed, keeping it in top shape is easy. Dust the lights regularly with a soft cloth to maintain brightness. For LED strips, check the adhesive periodically and reapply if needed. If you notice any flickering or dimming, it might be time to replace the bulbs or check the connections.
FAQs
How long do LED cabinet lights last?
LED cabinet lights typically last between 30,000 to 50,000 hours, which is about 10 to 15 years with regular use. This makes them a cost-effective and low-maintenance option for your kitchen.
Can I install cabinet lighting myself?
Yes! Most cabinet lighting kits are designed for DIY installation, especially wireless or plug-in options. However, if your project involves hardwiring, it’s best to consult a professional electrician.
What’s the best color temperature for kitchen lighting?
For a warm, inviting glow, choose a color temperature between 2700K and 3000K. For brighter task lighting, opt for 4000K to 5000K.
Are battery-operated cabinet lights worth it?
Battery-operated lights are a great option if you want flexibility and easy installation. They’re ideal for renters or anyone who wants to avoid wiring. Just remember to check the battery life and opt for rechargeable models if possible.
How much does it cost to install cabinet lighting?
The cost varies depending on the type of lights and whether you DIY or hire a professional. Basic LED strip kits start at around $20, while professional installation can range from $100 to $300.
Conclusion
Installing cabinet lighting is a simple yet impactful way to modernize your kitchen. It enhances visibility, adds style, and creates a warm, welcoming atmosphere. Whether you’re a seasoned DIYer or a first-timer, the right tools and a little planning will help you achieve professional results.
I still remember how much I loved the transformation in my own kitchen. The soft glow under the cabinets made everything feel more inviting, and cooking became a joy rather than a chore. If you’re ready to take the plunge, start by choosing the right lights for your space and following the steps above. Your brighter, more modern kitchen is just a few steps away!
What’s your experience with cabinet lighting? Have you installed it in your kitchen, or are you planning to? Share your thoughts and tips in the comments below!
