How to Use Weber Jumbo Joe Premium Grill

How to Replace Waterdrop ADQ747935 Water Filter
September 21, 2026
How to Use Weber Original Kettle Grill
September 21, 2026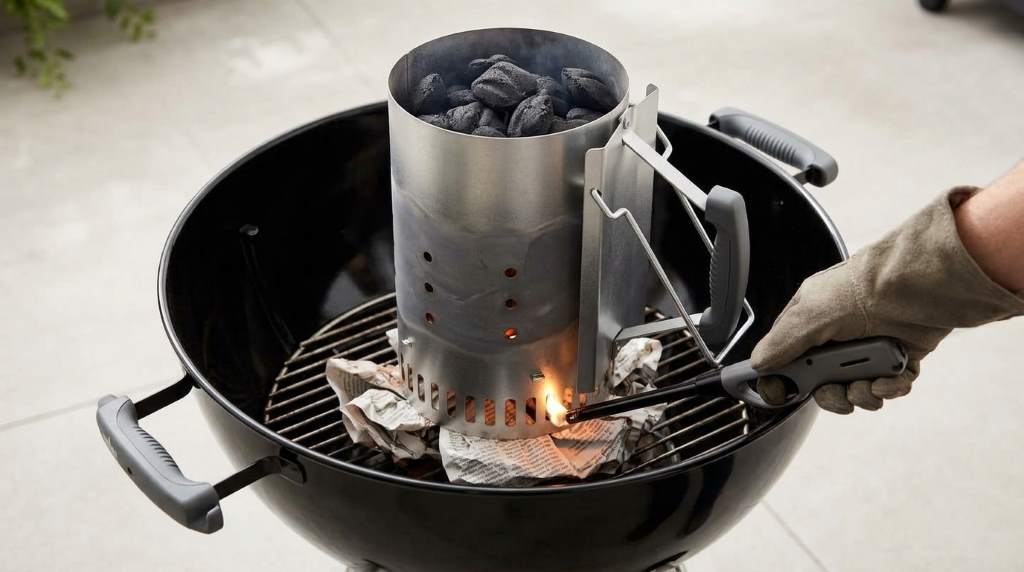
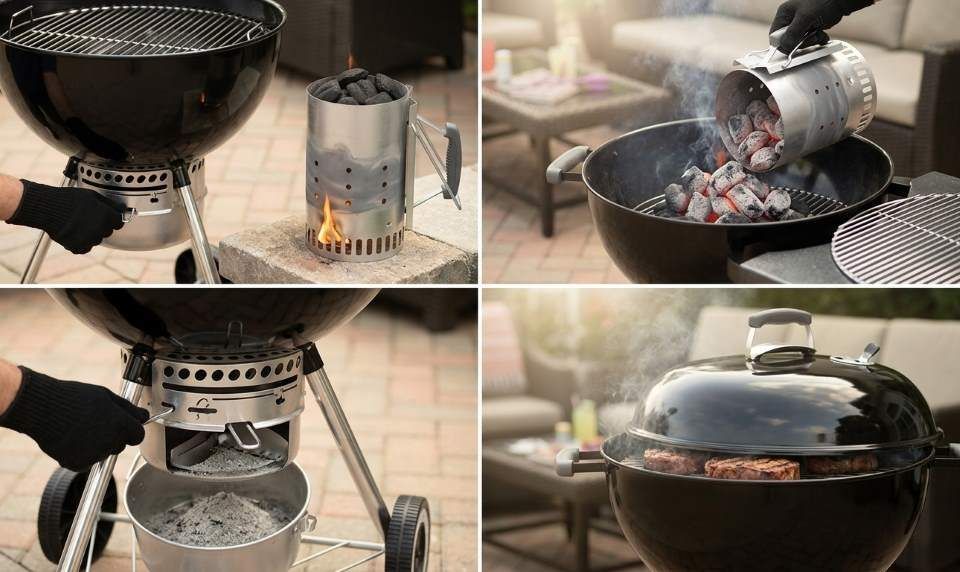
You use the grill by igniting charcoal in a chimney starter until hot coals show grey ash. Next, arrange coals on the lower grate for direct grilling or two-zone indirect roasting. Finally, adjust the top and bottom dampers to dial in your target cooking temperature.
Consumer outdoor cooking surveys show that 71 percent of outdoor cooks prefer portable charcoal flavor. Furthermore, market analytics indicate that portable kettle grills boast a 24 percent satisfaction advantage over gas alternatives. Learning to master the Weber Jumbo Joe Premium Grill elevates your tailgating and beach cookouts effortlessly. This versatile eighteen-inch charcoal cooker delivers authentic smoky flavor wherever your adventures take you.
This comprehensive guide details ignition methods, damper adjustments, and heat zone configurations for perfect results. In addition, you will learn essential safety practices and cleaning routines for travel. Follow our tested barbecue steps to prepare succulent meats with total confidence.
Key Takeaways
- Ignite briquettes in a compact chimney starter to eliminate chemical lighter fluid odors.
- Engage the Tuck-N-Carry handle system to lock the porcelain lid during transit.
- Establish two-zone heat setups to sear steaks and roast chicken without burning.
- Regulate internal kettle temperatures by opening or closing aluminum airflow dampers.
- Empty the rust-resistant aluminum ash catcher after every single outdoor cookout.
- Brush cooking grates thoroughly while warm to preserve clean food contact surfaces.
Anatomy of the Jumbo Joe Premium Portable Grill
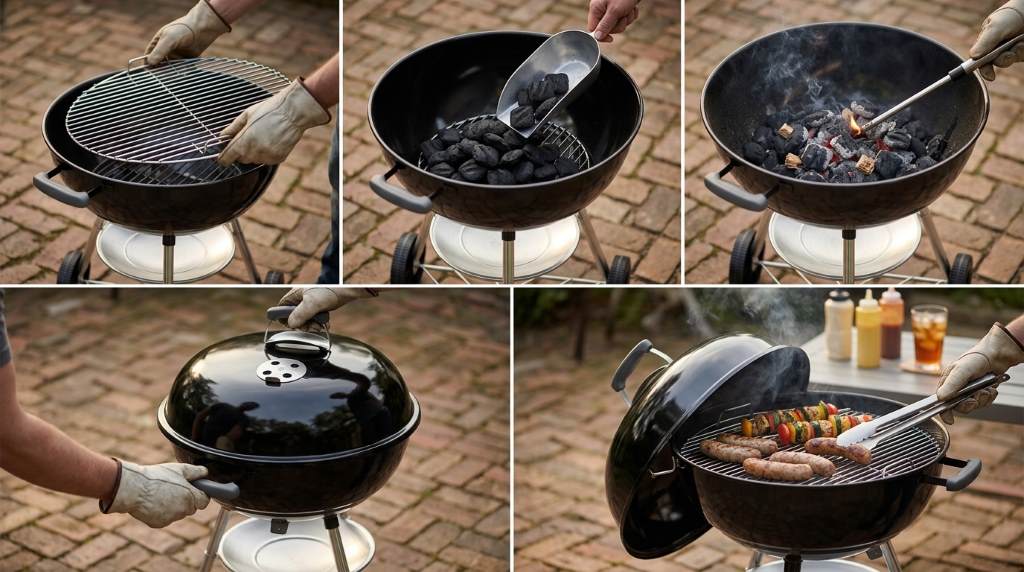
The eighteen-inch kettle body offers substantial cooking capacity for camping families and tailgating crowds. Specifically, the heavy-gauge porcelain-enameled bowl and lid retain radiant heat evenly throughout long cooking sessions. Furthermore, this durable finish resists rust, peeling, and blistering under intense charcoal heat.
A plated steel cooking grate spans two hundred forty square inches of surface area. Consequently, you can grill eight large burgers or two whole spatchcocked chickens simultaneously. In addition, heavy wire spacing supports hefty roasts without bowing under heavy weight loads.
The distinctive Tuck-N-Carry wire handle locks the lid tightly for easy one-handed carrying. Furthermore, the bar swings downward during grilling to serve as a convenient lid holder. Consequently, this clever design keeps the hot lid off dirty ground and blocks brisk winds.
Selecting the Ideal Charcoal Fuel and Supplies
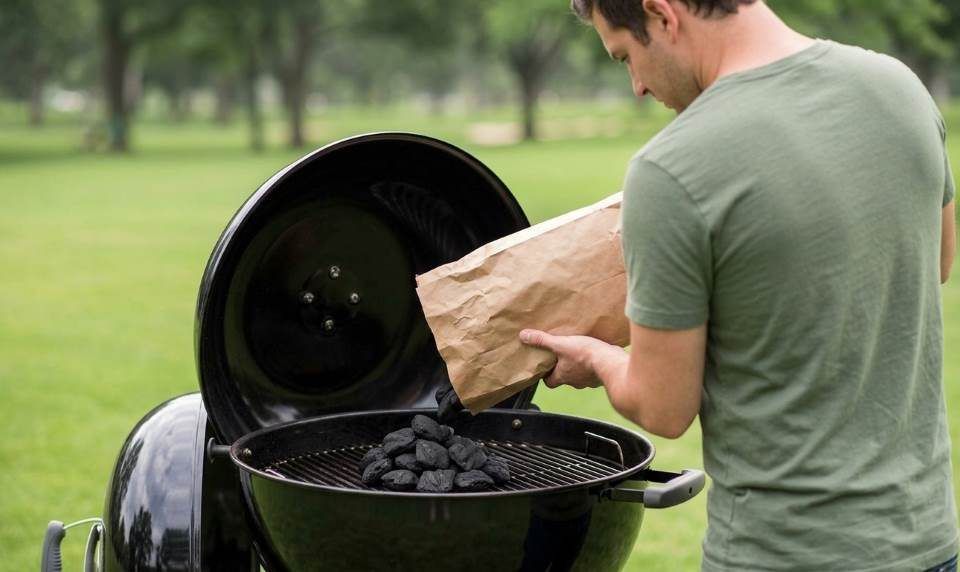
Choosing proper fuel directly impacts your cooking temperature stability and meat flavor profiles. First, decide between uniform hardwood charcoal briquettes and natural lump charcoal varieties. For example, briquettes burn slowly and deliver steady temperatures for thick cuts and roasting.
Conversely, all-natural hardwood lump charcoal burns hotter and ignites much faster than compressed briquettes. In fact, lump charcoal leaves less residual ash, which keeps bottom air vents clear. Moreover, many experienced pitmasters blend both fuel types to achieve intense heat and long duration.
Always avoid instant-light briquettes saturated with toxic chemical petroleum solvents. Specifically, these volatile accelerants impart bitter chemical fumes into delicate meats and vegetables. Instead, use natural paraffin starter cubes under your chimney to light clean coals safely.
Step-by-Step Grill Setup and Ignition Process
Proper lighting techniques ensure rapid ignition and stable coal bed temperatures for grilling. First, take time to prepare your equipment on a stable, fireproof outdoor surface. Follow these systematic steps for quick, reliable startup every time you cook.
Step 1: Positioning the Grill on Stable Ground
Place your portable kettle grill on level grass, gravel, or heat-resistant campsite tables. Specifically, maintain at least five feet of clearance from combustible wooden walls, dry brush, and tent fabrics. Furthermore, never operate charcoal grills inside enclosed tents, RV trailers, or covered vehicle beds.
Next, unlock the Tuck-N-Carry handle bar and swing it down into resting position. Then, remove the kettle lid and place it securely into the rear wire holder hook. Finally, remove the upper steel cooking grate to access the lower charcoal grate underneath.
Open the aluminum bottom bowl damper fully to provide maximum airflow to starting embers. Fresh oxygen draft accelerates chimney ignition and prevents smoldering coals. In addition, verify that the bottom vent louvers slide smoothly without catching on grit.
Step 2: Lighting Coals with a Chimney Starter
Place two wax lighting cubes directly onto the center of the lower charcoal grate. Next, set a compact charcoal chimney starter upright over the paraffin starter cubes. Fill the upper chimney canister with approximately forty to fifty uniform charcoal briquettes.
Light the starter cubes beneath the chimney using a long-stem safety lighter. The flames will ignite the bottom briquettes and spread upward through convection draft. Furthermore, hot smoke will pour from the chimney top within five to eight minutes.
Allow the coals to burn undisturbed for approximately fifteen to twenty minutes. Pour the coals out once glowing red embers show through gray ash blankets. Always wear heat-resistant leather barbecue gloves when handling hot chimney starter handles.
Step 3: Arranging the Charcoal Heat Bed
Pour glowing coals carefully across the lower steel charcoal support grate. For high-heat searing, spread coals evenly across the grate surface in a single layer. This direct heat setup works brilliantly for searing thin burgers, hot dogs, and kebabs.
Alternatively, bank all hot coals onto one side of the kettle bowl. This arrangement creates an effective two-zone fire for versatile indirect roasting and baking. The empty bowl side provides a gentle convective heat zone for delicate foods.
Place the clean plated steel cooking grate back into the kettle bowl. Cover the grill with the porcelain lid and open the top damper completely. Let the cooking grate preheat under cover for ten minutes before placing food.
Mastering Damper Adjustments and Heat Management
Kettle temperature control relies completely on managing oxygen intake through top and bottom dampers. Opening dampers introduces fresh air to burning coals, which increases combustion heat significantly. Conversely, closing dampers restricts oxygen, cooling the fire bed smoothly.
Use the bottom bowl damper as your primary coarse temperature adjustment throttle. For high searing temperatures above four hundred fifty degrees, leave bottom vents wide open. For slow roasting around three hundred degrees, slide the damper half closed.
The top lid damper functions as your fine exhaust control and smoke draw regulator. Position the top lid vent directly above your meat during indirect cooking setups. As a result, convective heat and fragrant wood smoke sweep across the food evenly.
Popular Charcoal Cooking Times and Temperatures
Understanding ideal cooking zones and target internal temperatures prevents undercooking or scorching food. Refer to the reference table below for tested times on the eighteen-inch portable kettle.
| Meat Cut | Heat Technique | Grill Temp Range | Internal Target Temp |
|---|---|---|---|
| Quarter-Pound Burgers | Direct High Heat | 450F to 500F | 160F Well Done |
| Bone-In Chicken Thighs | Indirect Medium Heat | 350F to 400F | 175F Tender |
| Ribeye Steaks (1-Inch) | Sear Then Indirect | 450F to 525F | 135F Medium Rare |
| Pork Bratwursts | Two-Zone Gentle Heat | 325F to 375F | 165F Juicy |
| Corn on the Cob | Direct Medium Heat | 350F to 400F | Charred Tender |
Utilizing the Tuck-N-Carry System for Safe Transport
The patented Tuck-N-Carry locking bar is the standout feature of this portable cooker. When packing up camp, rotate the heavy-gauge wire bar upward over the lid handle. The bar latches securely into the opposing bowl notch to clamp down the lid.
This locked position holds the lid, grates, and residual cooled ashes securely inside. Consequently, you can lift the entire twenty-pound barbecue assembly by the top handle. Transporting your cooker to campsite picnic tables requires minimal effort and zero spills.
Never lock the Tuck-N-Carry bar over hot coals to move a burning cooker. High radiant heat warms metal wire bars rapidly and creates severe burn hazards. Always allow coals to extinguish completely before securing the lid for highway travel.
Cleaning, Ash Removal, and Field Maintenance
Keeping your portable kettle clean ensures smooth damper operation and prevents corrosive deterioration. In addition, routine grate cleaning eliminates rancid grease buildup that causes acrid smoke flavors. Therefore, perform simple maintenance after every cookout to keep your grill in showroom condition.
Scrape food residue off the steel cooking grate while bars remain pleasantly warm. For example, use a bristle-free stainless steel scraper or crumpled aluminum foil ball in tongs. Consequently, cleaning warm grates removes stubborn char quickly without scratching protective metal coatings.
Next, sweep cooled gray ashes through the bottom bowl slots using the damper blades. The removable aluminum ash catcher bowl sits underneath to collect all falling debris. Finally, dump cooled ash into a metal bucket or designated campfire disposal receptacle.
Occasionally, wash the porcelain exterior shell with warm water and mild dish soap. Never use abrasive scouring pads or corrosive oven cleaners on glossy porcelain enamel. Instead, a soft microfiber rag restores the deep black luster without dulling the finish.
Troubleshooting Common Charcoal Grilling Challenges
Even seasoned barbecue enthusiasts encounter unexpected heat spikes or stubborn embers outdoors. Fortunately, quick diagnostic checks resolve airflow and temperature irregularities quickly. Therefore, learn these field solutions to master portable charcoal grilling anywhere.
Combating Sudden Grease Flare-Ups
Fat drippings from fatty burgers or sausages can trigger aggressive flame bursts unexpectedly. In particular, do not pour water onto burning coals to extinguish sudden meat flare-ups. Water creates explosive steam clouds and blows fine ash onto fresh food surfaces.
Instead, move threatened meats to the indirect side of the grate immediately. Next, close the top lid damper halfway to deprive aggressive flames of oxygen. Consequently, the flame burst will subside quickly, allowing you to resume safe cooking.
Overcoming Weak Fire and Dropping Heat
If grill temperatures drop prematurely, check the lower bowl vents for ash blockages. Deep accumulations of powdery ash choke airflow and suffocate burning coals quickly. Therefore, tap the bottom damper lever to clear loose ash into the catcher.
In addition, check whether damp ambient humidity softened your leftover briquettes in transit. In fact, damp briquettes struggle to maintain vigorous combustion heat inside compact bowls. Fortunately, adding ten fresh, dry briquettes restores vibrant heat levels within minutes.
Conclusion
The eighteen-inch portable kettle grill delivers legendary outdoor flavor in a remarkably mobile package. By mastering chimney ignition, damper ventilation, and two-zone cooking, you produce competition-worthy barbecue anywhere. In addition, thoughtful cleaning habits ensure decades of faithful camping and tailgating service.
Pack your portable cooker and fire up delicious memories on your next adventure. Elevate your outdoor cooking skills with this premier portable barbecue powerhouse today.
Frequently Asked Questions
How many charcoal briquettes should I use in the Jumbo Joe?
You should use approximately forty to fifty charcoal briquettes for standard grilling temperatures.
Can I use wood chunks for smoking on this portable grill?
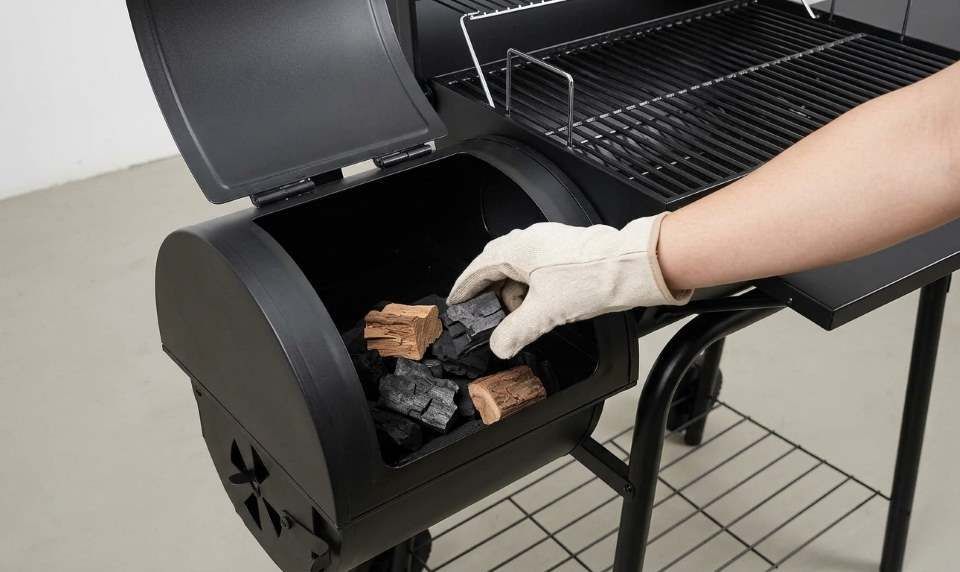
Yes, you can place dry hardwood chunks onto coals during two-zone indirect cooking.
How do I extinguish burning coals after finishing my meal?
Close the top and bottom dampers completely to starve the fire of oxygen.
Does the Tuck-N-Carry handle stay cool during grilling?
The wire handle absorbs radiant heat, so you should handle it using barbecue gloves.
What is the cooking surface diameter of the Jumbo Joe grill?
The cooking grate features an eighteen-inch diameter providing two hundred forty square inches.