How to Fix a Noisy Firegas 30-Inch Under Cabinet Range Hood

Why Is Flow Slow After Changing Everydrop EDR4RXD1 Filter?
August 12, 2026
How to Light a GasOne 30qt Turkey Fryer Set Safely
August 12, 2026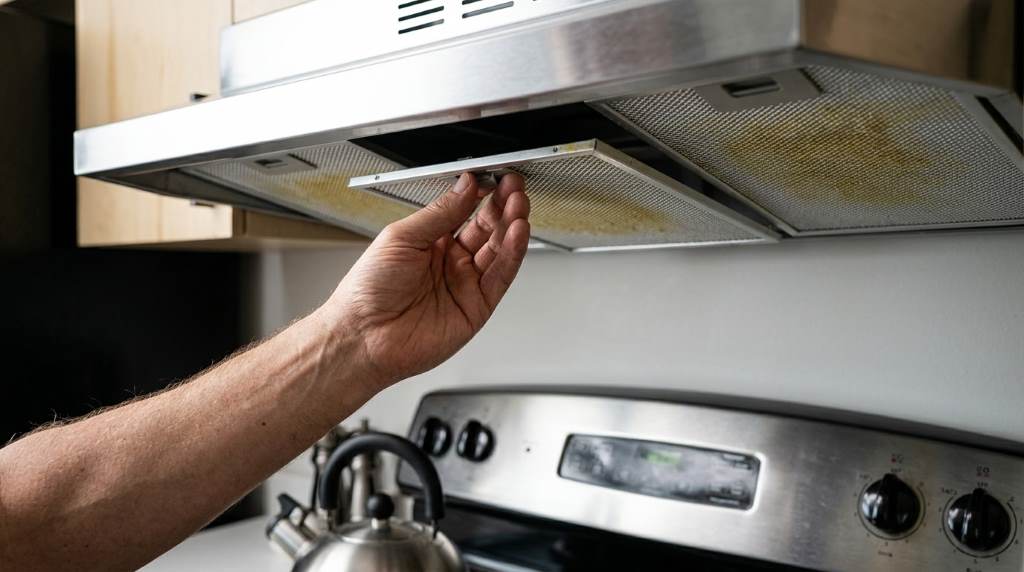
A noisy range hood usually points to loose mounting, dirty filters, airflow resistance, or a fan problem. Start by switching off power, then inspect the filter, fan area, duct path, and mounting screws carefully. The Firegas 30-inch under cabinet range hood can produce less than 57 dB at high speed. Its listed airflow reaches 300 CFM, so unusual rattling deserves attention.
Fortunately, many range hood noises come from simple problems rather than major component failures. Therefore, you can often identify the cause through a careful inspection and a few basic adjustments. This guide explains what to check, what each sound usually means, and when professional service makes sense.
Start by Identifying the Type of Noise
Before touching the hood, listen closely while the fan runs at each available speed. Different sounds often point toward different mechanical or airflow problems.
A steady rushing sound usually comes from normal air movement through the fan and ductwork. However, rattling, scraping, buzzing, clicking, or vibrating sounds deserve further inspection.
- Rattling: Often indicates a loose filter, screw, damper, or mounting component.
- Scraping: Usually suggests fan blade contact or a damaged internal component.
- Buzzing: May indicate electrical vibration, motor problems, or loose wiring components.
- Clicking: Can come from a damper, loose fan component, or foreign object.
- Strong vibration: Often points toward loose mounting or an unbalanced fan.
- Air roar: Can indicate restricted ductwork or excessive airflow resistance.
Next, run the hood briefly on low speed and then high speed. If the noise changes sharply between speeds, focus attention on the fan, airflow, and mounting system.
Safety First Before Troubleshooting
Always disconnect electrical power before cleaning, inspecting, or servicing the range hood. The manufacturer instructions also call for power disconnection before maintenance work.
If your unit uses hard wiring, switch off the appropriate circuit breaker before opening electrical areas. Never work around exposed wiring while the appliance remains energized.
Also, avoid reaching into the fan housing while the blades can move. Allow the fan to stop completely before removing filters or inspecting internal parts.
Clean the Grease Filters Thoroughly
Grease buildup can restrict airflow and create additional turbulence around the fan. Over time, that restriction can make normal operation sound noticeably louder.
First, remove the aluminum filter according to the appliance instructions. Then wash away accumulated grease using warm water and a suitable degreasing cleaner.
Rinse the filter thoroughly and let it dry completely before reinstalling it. Never reinstall a wet filter because moisture can affect nearby electrical components.
Check the Filter Fit
A clean filter can still create noise if it sits incorrectly inside the hood. Therefore, inspect its edges and confirm that every retaining point sits securely.
Move the installed filter gently with your hand while the power remains off. If it shifts easily, reinstall it until it sits firmly without excessive movement.
Tighten the Range Hood Mounting Screws
Loose mounting hardware ranks among the simplest causes of range hood vibration. A small amount of movement can become much louder when the fan reaches higher speed.
Inspect the screws connecting the hood to the cabinet or mounting surface. Tighten loose hardware carefully, but avoid overtightening and damaging the cabinet material.
After tightening everything, test the hood again at both speeds. If the vibration disappears, the mounting connection likely caused the original noise.
Inspect the Cabinet Around the Hood
Sometimes the hood works correctly, but the cabinet amplifies its vibration. Thin panels can behave like soundboards and make ordinary fan movement seem much louder.
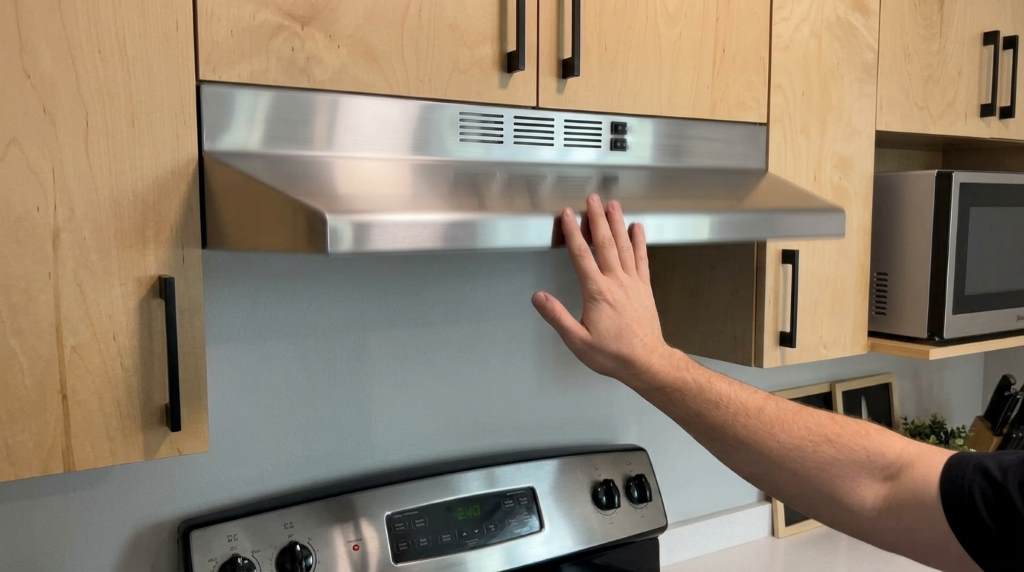
Place your hand lightly against nearby cabinet surfaces while the fan operates. If the vibration changes when you touch a panel, inspect that panel and its connections.
Secure loose cabinet hardware where appropriate. Avoid adding materials inside the hood unless the manufacturer specifically approves them.
Inspect the Fan for Obstructions
A foreign object inside the fan area can produce clicking, scraping, or intermittent rattling. Grease residue can also collect around moving components and affect smooth operation.
Disconnect power before inspecting the fan area. Look for loose debris, damaged pieces, or anything that could contact the fan during operation.
Do not force the fan or bend its blades during inspection. A distorted blade can create imbalance and produce stronger vibration when the motor runs.
Look for Fan Blade Contact
Fan blades should rotate without rubbing against nearby housing components. Any contact can create a sharp scraping sound that changes with fan speed.
If you notice visible damage or blade contact, stop using the hood until the problem receives proper attention. Continuing operation can worsen motor or fan damage.
Check the Damper and Vent Outlet
A ducted range hood relies on a clear exhaust path for efficient airflow. The FIREGAS design supports ducted or ductless configurations on several 30 inch models.
For ducted installations, inspect the accessible damper and exhaust connection for movement or obstruction. A loose damper can rattle whenever air passes through the outlet.
Also check whether the exterior vent flap moves freely. Debris, grease, nesting material, or other restrictions can increase airflow noise.
Why Duct Restrictions Create More Noise
Air needs a reasonably clear path when the fan operates. Sharp restrictions can increase turbulence, pressure, and audible airflow noise.
Inspect accessible duct sections for crushed areas or obvious blockages. However, avoid dismantling hidden ductwork unless you have the required skills and equipment.
Professional inspection makes more sense when the duct runs through walls, ceilings, or difficult cabinet spaces. This approach reduces the chance of damaging concealed structures.
Check Whether the Hood Uses Ducted or Ductless Venting
Your troubleshooting approach depends partly on the ventilation configuration. Ducted systems move air outdoors, while ductless systems return filtered air into the kitchen.
Ductless operation requires the appropriate charcoal filtration system for compatible models. A saturated filter can restrict airflow and increase operating noise.
If the hood suddenly became louder after months of use, inspect the filtration system first. Replacing an exhausted charcoal filter may restore smoother airflow.
Inspect the Motor and Fan Assembly
If cleaning and tightening do not solve the noise, the motor deserves closer attention. Motor wear can produce humming, grinding, squealing, or increasingly loud operation.
Listen for sounds that remain present even after the filters and mounting hardware receive attention. A persistent mechanical sound can indicate bearing wear or another motor related problem.
Do not attempt internal motor repairs unless you have suitable electrical and appliance repair experience. A qualified technician can inspect the assembly without creating additional safety risks.
Signs That Point Toward Motor Trouble
- The hood becomes louder gradually over several weeks.
- The fan produces grinding or squealing sounds.
- The motor struggles to start or changes speed unexpectedly.
- The noise continues after cleaning and tightening.
- The hood produces unusual electrical smells or excessive heat.
When these symptoms appear together, continued operation may not make sense. Switch off the appliance and arrange professional inspection.
Check for Electrical Buzzing
A buzzing sound requires more caution because electrical components may cause it. Loose electrical connections can also create heat and increase fire risk.
Turn off the circuit breaker before inspecting any accessible electrical connections. Never tighten or modify energized wiring inside the hood.
If you see damaged insulation, scorched components, loose wiring, or unusual heat, stop troubleshooting immediately. A licensed electrician or qualified appliance technician should handle the repair.
Use a Simple Noise Troubleshooting Sequence
A structured process helps you avoid replacing parts unnecessarily. Follow the checks from the easiest external causes toward more complex internal faults.
- Turn off electrical power and let the fan stop completely.
- Remove and clean the grease filter thoroughly.
- Check the filter for damage and confirm proper seating.
- Inspect accessible mounting screws and cabinet connections.
- Look for visible debris around the fan area.
- Inspect accessible duct connections and the exterior damper.
- Restore power and test the hood on low speed.
- Test high speed and compare the sound with the earlier result.
- Stop operation if scraping, burning smells, or electrical symptoms appear.
This sequence works because it starts with common, low risk causes. It also helps you identify whether cleaning or mechanical tightening actually changed the noise.
Common Noise Problems and Practical Fixes
| Noise | Likely Cause | First Action |
|---|---|---|
| Rattle | Loose filter or mounting hardware | Secure the filter and screws |
| Vibration | Loose mounting or unbalanced fan | Check mounting stability |
| Scraping | Fan blade contact | Stop and inspect the fan |
| Buzzing | Electrical or motor issue | Disconnect power and inspect safely |
| Air roar | Duct restriction | Inspect accessible ventilation paths |
| Clicking | Damper or loose component | Inspect the damper and housing |
What Not to Do When Fixing the Noise
Do not spray lubricant into the motor or fan assembly without manufacturer approval. The wrong lubricant can damage components or create a fire hazard around cooking grease.
Likewise, never block ventilation openings to reduce noise. That approach can restrict airflow and force the fan to work against greater resistance.
Avoid adding foam, cloth, tape, or other soundproofing materials inside the hood. These materials can interfere with ventilation and create serious heat or fire concerns.
When You Should Stop Troubleshooting
Some problems require professional service rather than another round of household adjustments. Stop troubleshooting when the noise comes with electrical, mechanical, or heat related warning signs.
- Burning smells come from the hood.
- The circuit breaker trips repeatedly.
- The motor becomes unusually hot.
- The fan produces severe grinding or scraping.
- Electrical wires appear damaged.
- The fan blade appears cracked or badly distorted.
- The hood vibrates excessively after mounting checks.
These symptoms can indicate a deeper fault that basic cleaning cannot resolve. Professional service also protects the appliance from damage caused by incorrect disassembly.
How to Prevent Future Range Hood Noise
Regular cleaning provides the simplest long term defense against many airflow problems. Clean grease filters before heavy buildup changes the fan sound or reduces extraction performance.
Also, inspect the hood mounting points whenever you notice new vibration. Catching loose hardware early can prevent repeated movement and cabinet damage.
For ducted installations, keep the exhaust path as clear and direct as practical. Proper ventilation reduces unnecessary turbulence and helps the fan operate more efficiently.
A Simple Maintenance Routine
- Check the filter regularly for visible grease accumulation.
- Clean aluminum filters according to the appliance instructions.
- Inspect visible screws and mounting points periodically.
- Listen for changes in fan sound during normal use.
- Check accessible vent components for obstruction.
- Replace compatible charcoal filters when they become exhausted.
Small maintenance tasks can prevent minor noises from becoming larger mechanical problems. More importantly, they help preserve safe and consistent ventilation performance.
Should You Repair or Replace the Hood?
A repair usually makes sense when cleaning, mounting adjustments, or minor component replacement solves the problem. Replacement becomes more reasonable when major components repeatedly fail.
Consider the hood’s age, condition, performance, and repair requirements before making that decision. A noisy but otherwise functional appliance may need only a simple mechanical correction.
However, persistent motor problems deserve a careful cost comparison. Professional diagnosis can help determine whether repair offers better value than replacing the entire unit.
Final Thoughts
Fixing a noisy Firegas 30 inch under cabinet range hood usually starts with cleaning, tightening, and checking airflow. Those steps address several common causes without unnecessary part replacement.
Start with the filter and mounting hardware, then inspect the fan and accessible ventilation path. If scraping, electrical buzzing, burning smells, or severe vibration continues, stop using the hood.
Take action before a small noise becomes a larger mechanical or electrical problem. If basic troubleshooting does not restore quiet operation, arrange a qualified inspection for a safe, lasting repair.
FAQs
Why is my Firegas range hood rattling?
A loose filter, mounting screw, damper, or internal component commonly causes rattling during fan operation.
Why does my range hood sound louder on high speed?
Higher fan speed increases airflow and vibration, which can expose loose parts or restricted ductwork.
Can a dirty filter make a range hood noisy?
Yes, heavy grease buildup can restrict airflow and increase turbulence around the fan.
Should I lubricate a noisy Firegas range hood motor?
No, avoid motor lubrication unless the manufacturer specifically approves the procedure for your model.
When should I call a professional for range hood noise?
Call a professional when noise continues after basic checks or appears with heat, burning smells, or electrical symptoms.