
How to clean a cuisinart coffee maker?

You’ve probably had the experience of trying to clean your Cuisinart coffee maker, only to realize that the instructions that came with it are confusing or outdated. You may have also found yourself wondering if there’s a better way to clean this type of coffeemaker. The good news is, yes! There is an excellent way to clean your Cuisinart coffee maker and we’re going to tell you exactly how in this guide.
The Dangers Of The Pop Up Bread Toaster
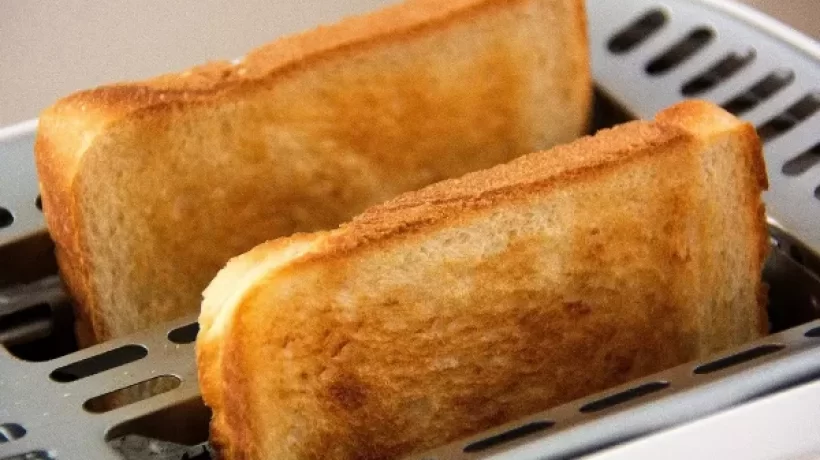
Bread toasters have many uses – they can help you to toast your bread faster, it is easier to handle the different types of bread that pop up than by using a pan and oven, and it also helps to keep your food warm. If you’re considering buying a new pop-up toaster, take this blog article as a warning before you do.
What Are Some Stock Issues For Businesses?
There are several different types of storage solutions available to businesses, so it’s important to understand which are best for your company. You’ll need to determine what stock your company generates and where it needs to be accessed. Then you can start looking for storage solutions. Once you’ve determined the best storage option, you can create a plan for implementing that solution.
How to Toast buttered bread in a toaster

Imagine toasting your bread only to have it come out soggy and melted. Or worse yet, to start a fire because of melted butter! Wouldn’t it be great if you could toaster bread without any of these problems? You can, using your oven or even an oven broiler! Just make sure to follow these simple steps to toast buttered bread in toaster:
Three Ways to Reduce your Carbon Footprint
More and more we are hearing about climate change and addressing the very real threat of this is not something that is just down to large organisations, it is something that everyone can address. There are lots of things that we can do to change the future for the better – here are a few of them…
What to Look for When Investing in Quality Cookware
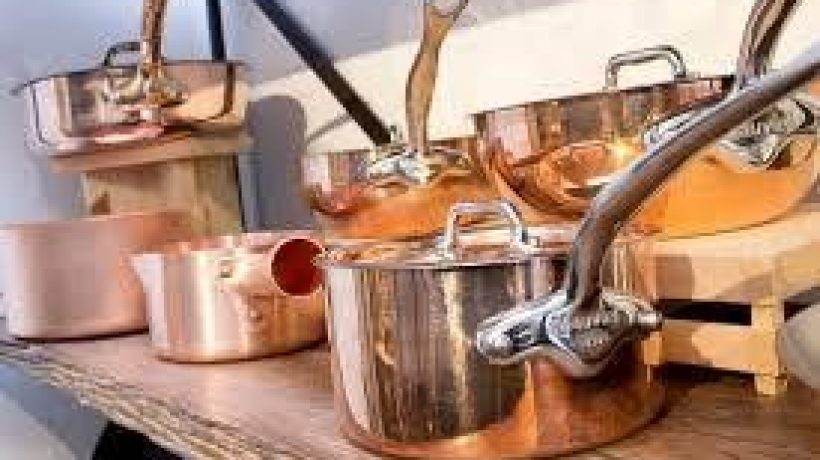
One of the most important things to have in the kitchen is a good quality set of pans. High quality cookware is of course more expensive, but you will also have cookware that lasts you many years, if not a lifetime, so it really is a good investment. As well as this, you tend to have a much better cooking experience when you use good quality cookware, and you will ultimately get a better meal when you are using good tools to cook with.
How To Clean Your Cooktop On The Trail (Without All The Mess)
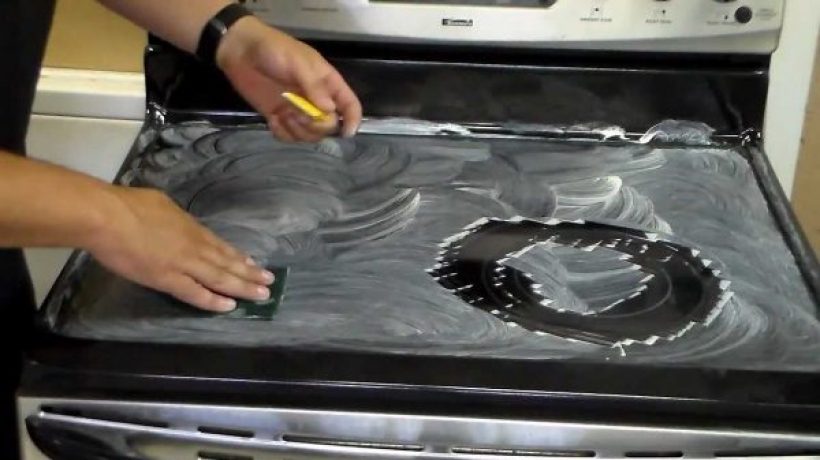
Cleaning your cooktop is no easy task, but luckily there are a few simple tricks you can use. This article provides some helpful hints for how to clean your cooktop on the trail. Whether you’re cooking for yourself or cooking for others, this article will provide some helpful information on how to stay safe and clean while out on the trail!
Why To Clean Your Cooktop On The Trail
There are a few reasons why you might need to clean your cooktop on the trail.
First, dirt and food can build up on the surface of the cooktop over time, making it difficult to cook food evenly and causing the lid to stick when opening and closing the oven door.
Second, cooking smells can permeate through cookware and food if the cooktop is not cleaned regularly.
Third, a dirty cooktop can be hazardous if it comes in contact with open flames or sparks. Cooking on a dirty stove could result in an electrical fire.
Fourth, a dirty cooktop can also be difficult to clean. Scrubbing with a scrub brush will only uncover so much dirt; using a cleaner that is specifically designed for cooktops will be necessary to remove all of the built-up gunk. You can learn to remove yellow condensation stains on ceiling.
How To Clean Cooktops On The Trail
If you’re like most hikers, you love cooking your meals while on the trail. But sometimes the cooktop can get a little messy. Here are three easy tips to keep your cooktop clean while hiking!
1. Make sure your cookware is properly seasoned. Non-stick surfaces work best when seasoning them before each use. This will help prevent sticking and make cleanup much easier.
2. Clean with a soft cloth or sponge and warm water. Wipe down the entire surface, using a circular motion, then rinse with cool water. Be sure to use a mild soap if needed; dishwashing detergent can damage your cooktop’s finish.
3. Let dry completely before using again.
Safety Precautions
One of the most common complaints heard on backpacking trails is dirty cooktops.
If you’re planning on cooking your meals on a backcountry stove, it’s important to know how to clean your cooktop without all the mess.
Here are a few safety precautions to keep in mind before getting started:
1. Use caution when using boiling water or other hot liquids. Boiling water can reach temperatures of 212 degrees Fahrenheit, which can cause serious injury if spilled.
2. Never use harsh chemicals or abrasives to clean your cooktop. These substances can damage the surface of your cooktop and create hazardous fumes when combined with heat.
3. Store all cooking utensils and materials in a safe place before starting your hike. Firewood may be the obvious choice, but other items like sharp knives or pots can also pose a danger if left out in the open.
4. Always wear eye protection when cleaning your cooktop, and stay away from flames while cleaning. If you do accidentally start a fire, use caution while putting it out and evacuate the area as quickly as possible. Let’s learn how to wash clothes in bathtub.
Final Thoughts
If you’re anything like me, your stovetop is a dirty, greasy mess. But don’t worry – it doesn’t have to stay that way on the trail! Here are five tips for cleaning your cooktop without all the mess:
1. Invest in a good stovetop cleaner. There are a lot of different brands and types of cleaners available, so find one that fits your needs. I like spray cleaners because they’re easy to use and fast.
2. Wipe down the surface of the cooktop with a clean cloth or paper towel. Make sure to get into all of the nooks and crannies.
3. Apply the cleaner as directed on the bottle or can. Be sure to work around the edges of the cooktop as well.
4. Let the cleaner work its magic for a few minutes, then wipe off any excess with a clean cloth or paper towel.
5. Rinse off the surface with warm water and dry it off completely before using it again.
How To Make Your Grill Look Built In
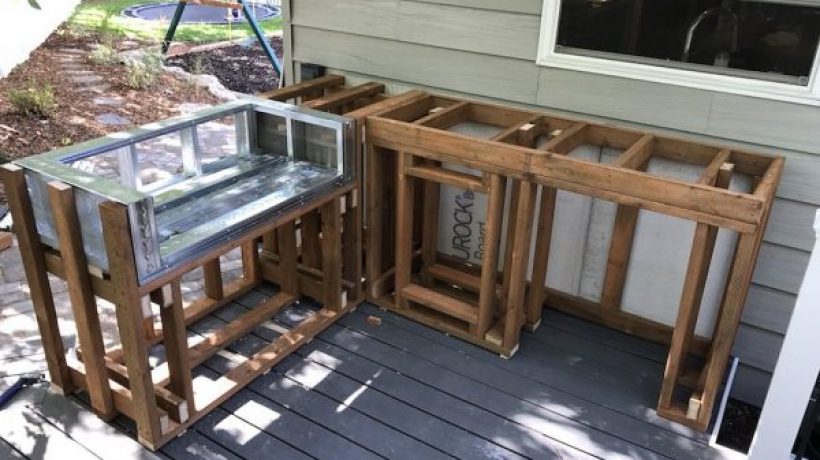
The grill is one of the most prominent features you’ll find in your backyard. It’s where you cook up all your favorite meals, but it can be difficult to make sure that your grill looks like it was built in from the start. In this blog article, we’ll walk you through how to make your grill look like it’s already been there for years!
How To Make Your Grill Look Built In?
If you’re looking for an easy way to transform your grill into a built-in look, there are a few things you can do. By following these simple tips, you can create a grill that looks like it was part of the original construction.
1. Choose the right materials. If you’re using an existing grill, don’t bother trying to cover it in faux brick or other random materials; just use a good quality paint or sealant to give it that built-in look. If you’re starting from scratch, consider using materials like stone, brick, or slate tiles to create a more authentic appearance.
2. Add some trim. If your grill doesn’t have any pre-existing trim, you can easily add some with some wood or metal corners and screws. This will give the appearance of a well-crafted piece of hardware that’s been integrated seamlessly into your home’s architecture.
3. Match the style of your home. If your home is contemporary or sleek, go for a modern grill design that echoes the lines of the structure. If your home is more traditional or rustic, go for something that looks like it’s been around for generations – like a old-fashioned barbeque. Discover does polyester stretch?
4. Remember the environment your grill is in. If you’re in a home that’s constantly being used, and you don’t want to see food stains on the sides of your grill, consider a stainless steel or anodized aluminum model, as these materials are easy to clean. You can also find models that incorporate biodegradable materials like bamboo and corn husks.
5. Consider the size of your family and who will be using it most often. If this is going to be a get-together day or weekend feature for everyone in the family to use, go for a larger grill with more cooking space – but keep in mind that it’ll take longer to heat up and cool down with larger grills than smaller ones.
Why You Want to Install a Built In Grill
If you’re thinking about adding a built in grill to your backyard BBQ pit, there are a few reasons why you should consider it. Not only does installing a grill mean that you can cook your food right at your table, but it can also give your outdoor space a bit of a style overhaul. Here are 4 reasons why installing a grill is a great idea:
1) It Adds Functionality – A well-built in grill can do everything from cooking burgers to smoking meat. This means that you don’t have to go searching for various appliances when you want to cook something on the grill.
2) It Looks Great – Building in a grill not only saves you space, but it also gives your backyard an updated look. Whether you want to add some rustic charm or simply want to be able to cook foods that wouldn’t otherwise be possible outside, installing a grill is a great way to achieve both goals.
3) It’s Portable – If you’re ever planning on hosting a party or just want to cook some food for yourself and friends, having a built in grill will make things much easier. You can simply move the grill wherever you need it without having to worry about dealing with heavy appliances or transporting pieces of equipment.
4) It’s Easy to Set Up – Not only is it easy to move around, but it’s also fairly easy to set up too! You won’t have to worry about a whole bunch of heavy-duty equipment and awkward pieces that can get in the way, so you can focus on the party or cooking to your heart’s content.
5) It’s Affordable – If you’ve ever had to buy a grill from a big box store before, then you know that they’re often pretty expensive. A good quality backyard grill will easily last for years and years (instead of just a few), which makes investing in one much more reasonable than buying a new one all of the time. Do you know how much does a cast iron tub weigh?
Finishing Touches
Here are four ideas for finishing touches:
1. Install a hood. A hood can add elegance and function to your grill by shielding the food from direct sunlight and wind. You can find hoods for both charcoal and gas grills at most hardware stores.
2. Add an external thermometer. This is a must for any serious barbecue fan. Not only will it help you ensure that the food is cooked to your liking, but it also adds an element of sophistication to your grill.
3. Install an automatic igniter. These devices start the fire automatically when you place the food on the grill, eliminating the need for matches or lighter fluid. They’re available in both charcoal and gas models, and they range in price from $10 to $50.
4. Add decorative metalwork or stones to the front of the grill rack. This can add interest and pizzazz to the grill without taking up much space.
How To Remove Rust From Oven Doors
Sometimes the hardest parts of cooking are the parts that you can’t see, like cleaning up spilled flour or scrubbing off burned-on grease. One thing that’s easy to overlook is removing rust from your oven door and other metal surfaces, but this can be a difficult task without special cleaners. Find out what you need in order to get that very important sparkling clean oven door back in your home!
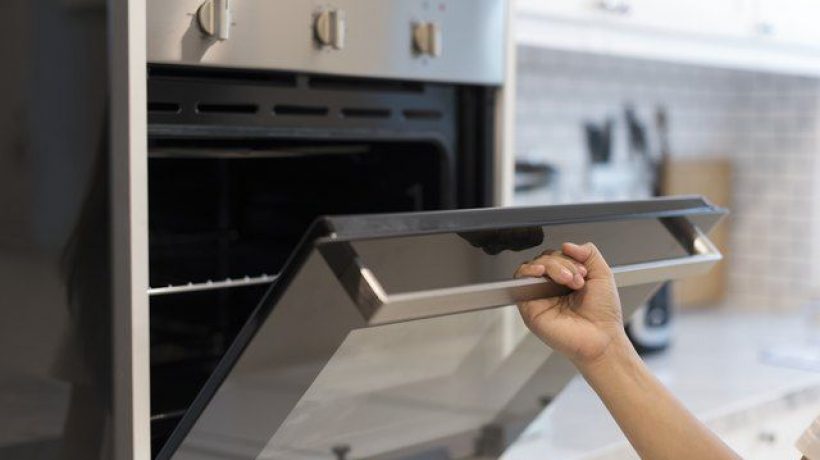
What is the purpose of oven doors?
Oven doors are used primarily to protect the oven from heat and smoke. They also help ventilate the oven, allowing air to circulate freely. Oven doors can become rusty over time due to the accumulation of rust and metal particles. This can cause the door to stick and refuse to open or close properly.
There are a few ways to remove rust from oven doors. You can use a wire brush to remove the rust particles, an abrasive cleaner, or a metal stripper. If the door is badly rusted, you may need to replace it. Have a look at the fruit decoration ideas.
Signs of Rust on a Door and How to Remove it
If you have rust on your oven door, it’s time to take action. Here are four signs that your oven door is in need of a good cleaning:
1. rusty spots or patches on the surface of the door.
2. rusty hinges or hardware.
3. rusty areas near the handle or other openings.
4. rust flakes coming off the door.
To clean your oven door, start by removing any loose debris with a vacuum cleaner. If the rust is stubborn, use a wire brush and a bucket of water to loosen the dirt and grime. Once everything is cleaned, apply a coat of sealant to the door and hinges to prevent future rusting.
What are the Types of Oven Doors?
There are two main types of oven doors: hinged and sliding. Hinged oven doors open like a door and can swing out of the way for easy access to the oven interior. Sliding oven doors open by pushing a button on the side and then sliding along a track. There are also hybrid doors that have both hinged and sliding sections.
If your oven doesn’t have either type of door, you can still remove rust from it using a hairdryer, an old sock, and some sandpaper. Start by cleaning the area where the rust is located with soap and water. Once the area is clean, use the hairdryer to heat up the metal until it becomes hot enough to remove the rust. Be careful not to burn yourself! Once the rust is removed, use sandpaper to finish off the job.
How to Clean the Inside and Outside of a Door
If you have rust on your oven door, it’s time to clean it. There are a few ways to clean the inside and outside of a door, but the most effective is to use a pressure washer. Use the following steps to remove rust from a oven door:
1) Remove any objects that may be blocking the spray nozzle.
2) Place the oven door on a sturdy surface so that it’s stable.
3) Turn on the water and wait until it reaches full pressure.
4) Spray the door with water from several angles until it’s completely wet.
5) Allow the door to dry completely before replacing anything.
Removing the rust from oven door using vinegar
There is a quick and easy way to remove it using vinegar. All you need is some vinegar, a scrub brush, and a bucket. Remove any dirt or dust from the area that you want to clean. Spray the vinegar onto the scrub brush and start scrubbing the rust off of the door. Be sure to use plenty of pressure so that the rust comes off in pieces. Once the area is clean, rinse it off with water and dry it off. Then, apply a coat of paint or sealant to protect the surface from further rusting. You can cut grass with scissors.
Step 1: Pour a cup of white vinegar into a bowl.
Step 2: Wet the oven door with water and wring out the excess.
Step 3: Apply a liberal amount of the vinegar to the area where rust is forming. Rub it in with your fingertips until it starts to turn black.
Step 4: Let the mixture sit for five minutes, then rinse it off with cold water.
Step 5: Dry the area with a clean cloth and allow the oven door to cool before replacing it on its hinges.
Conclusion
You can use an oven cleaner, a metal polish, or a vinegar and water solution. Just be sure to test the cleaning agent on a small area first to make sure it doesn’t damage the door. After cleaning the area, apply a coat of sealer or paint to protect the door from future rusting.
How to Fix a Microwave That Won’t Heat
Microwaves are convenient appliances, but they can be a little temperamental. If your microwave isn’t heating up or heating up very slowly, you might have a problem with the power cord. This article will help you troubleshoot and fix the issue so that you can get back to enjoying your meal in no time!
What to Do if the Microwave Won’t Heat
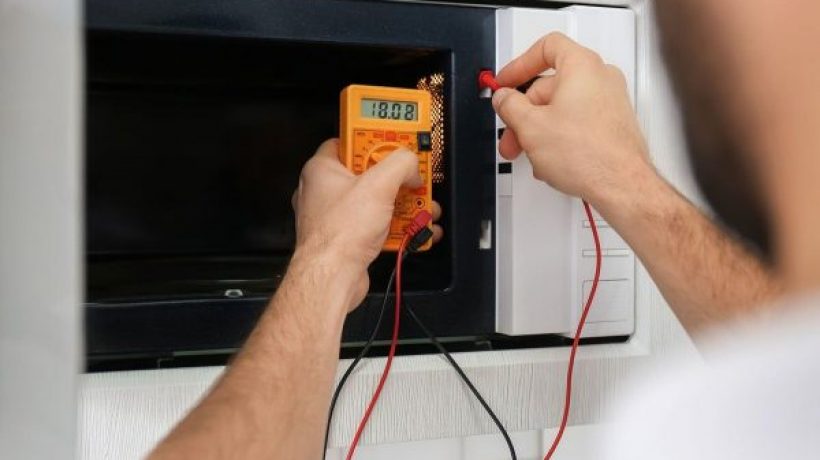
There are a few things you can do if your microwave starts to not heat properly.
First, make sure that the power is turned on and plugged into an outlet.
Next, check to see if the magnetron is working by pressing the power button and watching as the microwave light comes on. If the magnetron isn’t working, you may need to replace it.
Finally, if all of these steps fail to fix the issue, there may be something wrong with the circuit board inside of the microwave. In this case, you would need to take it in for repair.
What can You do about it?
If your microwave oven won’t heat up, there are a few things you can try. First, check to see if any of the power cords are plugged in correctly. If the power cord isn’t the issue, then check to see if anything is blocking the microwaves from getting to the heating element. Sometimes something metal, like a metal bracket, can block the microwaves’ access to the heating element. Another possible issue is that there’s something blocking the microwaves’ view of the heating element. This could be something like an object inside of the microwave oven or a piece of paper between the microwaves and the heating element. If none of these solutions work, then you may need to replace your microwave oven. Let’s learn how to remove shower handle.
The Difference between Defrosting and Cooking Options
One of the most common problems with microwaves is that they won’t heat up. The problem can be solved by defrosting the microwave oven or by using a different cooking option.
The easiest way to defrost a microwave is to pour a cold water into the microwave and turn it on for 10 minutes. This should defrost the microwave and allow it to work properly.
If the microwave doesn’t seem to be heating up, you can try using a cooking option that is specifically designed for microwaves. These options include setting the power to low, putting a cup of water in the microwave, or cooking food in a mug instead of in a dish.
The Power Settings on a Microwave Oven
If your microwave oven won’t heat up, there are a few things you can do to fix it. First, check the power settings. Make sure that the oven is set to the proper power level. If the power level is too low, the oven may not be able to reach the required temperature. Second, try cleaning the heating element. It may be dirty and need to be replaced. Finally, if all else fails, you may need to take the microwave apart and have it repaired.
Cleaning Your Microwave Oven
The microwave oven is a handy appliance, but it can also be a dirty one. Cleaning the oven can help make it work better and last longer. Here are four tips for cleaning your microwave oven:
1. Use vinegar or baking soda to clean the exterior of the oven. Vinegar is effective at removing grease and fingerprints, while baking soda is good at scrubbing away dirt and grime. Just mix a teaspoon of each into a cup of water and use a spray bottle to mist the inside of the oven.
2. Remove the racks and wipe them down with a damp cloth. Wipe down the door seal, too, if it’s dirty.
3. Clean the interior of the oven with a damp cloth. Use a mild dishwashing detergent and water — just enough to moisten the cloth but not so much that it leaks onto other parts of the oven. Don’t use abrasive cleaners or scouring pads; they can damage the oven’s finish. Instead, use a soft cloth or sponge.
4. Dry all surfaces carefully before putting everything back together. Discover the hot ground reverse.
Conclusion
The most common reason for a non-heating microwave is that the power cord has been damaged or the plug has been pulled out of the wall. If this is the case, you will need to take apart the microwave and replace either the power cord or plug. Another potential issue is that there may be something blocking the microwaves from hitting the food, such as grease build-up on one of the heating coils. To clear this obstacle, you will need to remove all of the debris using a vacuum cleaner before reattaching everything back together. In very rare cases, however, a microwave might just not work due to a defective part.