
Liftmaster Troubleshooting: Fix Your Garage Door Issues Today!
If your Liftmaster garage door is not fully opening or the lights on the opener are flashing, you may be dealing with a few common issues. First, check if the safety reversing sensors are blocked or misaligned.
Next, look for obstructions that may be preventing the sensors from working properly. You should also test the Safety Reversal System to ensure it is functioning correctly. If your garage door won’t close, you may need to adjust the force control or reset the memory of your garage door opener.
If these troubleshooting steps don’t solve the problem, it’s recommended to contact a professional for repair and maintenance.
Credit: www.doorpros.com
Common Liftmaster Garage Door Issues
Experiencing issues with your Liftmaster garage door? Common problems include misaligned safety sensors, a door that won’t fully open, and a blinking LED light. Troubleshoot these problems with easy-to-follow steps.
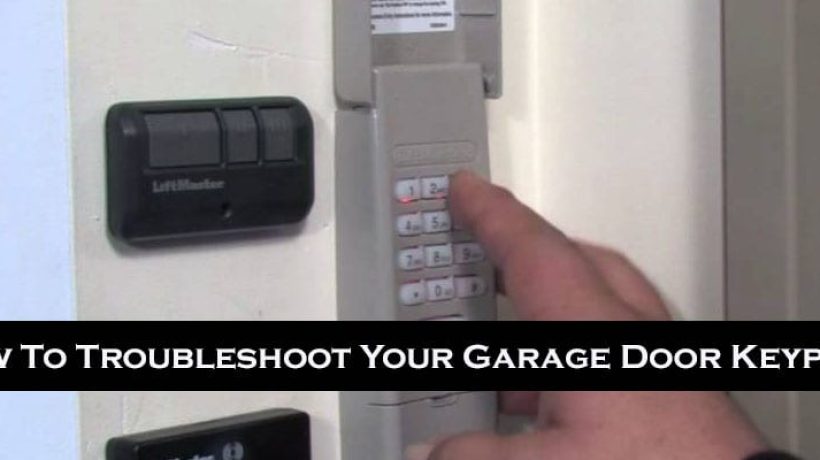
Lights Flashing
If you’ve noticed the lights on your Liftmaster garage door opener flashing, there could be a few potential issues causing this. One common cause is the safety reversing sensors being blocked or misaligned. Check for any obstructions that may be blocking the sensors and make sure they are properly aligned.
Here’s a step-by-step troubleshooting guide:
1. Test the Safety Reversal System: Place an object in the path of the door and try to close it. If the door stops and does not reverse, the safety reversal system may need adjustment or repair.
2. Check for Obstructions: Examine the area around the safety sensors and remove any objects that might be blocking them. Sometimes, dirt and debris can also obstruct the sensors, so clean them carefully.
3. Verify Sensor Alignment: Ensure that the safety sensors are properly aligned. They should be facing each other and have a solid connection.
4. Inspect Sensor Wiring: Check the wiring between the sensors and the garage door opener. Look for any loose or damaged wires that need to be repaired or replaced.
If you’ve tried these troubleshooting steps and the lights on your Liftmaster garage door opener are still flashing, it’s recommended to contact a professional technician for further assistance.
Door Won’t Fully Open
If your Liftmaster garage door won’t fully open, there are a few potential issues that you can troubleshoot. One common cause is the door being disconnected from the opener.
Here’s a step-by-step troubleshooting guide:
1. Disconnect the Garage Door: Pull the emergency release cord to disconnect the garage door from the opener. Try to manually open the door to check if it moves smoothly without any resistance. If it doesn’t, there might be an issue with the door itself, such as worn-out rollers or tracks that need lubrication.
2. Check the Opener: Inspect the garage door opener for any visible signs of damage or malfunction. Look for loose wires, worn-out gears, or worn-out drive belts. If you notice any issues, it’s best to contact a professional technician for repair or replacement.
3. Reconnect the Garage Door to the Opener: Once you’ve inspected the opener, reconnect the garage door to the opener by pulling the emergency release cord back into place. Make sure it snaps into the proper alignment.
4. Adjust Force and Travel Limits: In some cases, the garage door opener’s force and travel limits might need adjustment. Consult the manufacturer’s manual for instructions on how to adjust these settings properly.
5. Test the Safety Reversal System: After performing the necessary adjustments, test the safety reversal system. Place an object in the path of the closing door and try to close it. The door should reverse immediately upon contact with the object. If it doesn’t, the safety reversal system may need adjustment or repair.
If you’ve followed these troubleshooting steps and your Liftmaster garage door still won’t fully open, it’s recommended to seek professional assistance to avoid further damage or potential safety hazards.
Opener Not Closing
If your Liftmaster garage door opener is not closing properly, there are a few potential causes that you can investigate. One common issue is an incorrect force control setting.
Here’s a step-by-step troubleshooting guide:
1. Check Force Control: Locate the force control adjustment on your garage door opener. Adjust it to a higher setting if the door is not closing completely. However, be cautious not to set it too high, as it can pose a safety risk.
2. Inspect Safety Sensors: Ensure that the safety sensors are properly aligned and have a clear line of sight. Make sure they are clean and free from any dirt or debris that could interfere with their operation.
3. Test the Safety Reversal System: Place an object in the path of the closing door and try to close it. The door should reverse immediately upon contact with the object. If it doesn’t, the safety reversal system may need adjustment or repair.
4. Check for Obstructions: Inspect the area around the garage door and track for any obstructions, such as debris or objects that could be preventing the door from closing properly. Remove any obstacles that you find.
5. Consult the Manual: If the issue persists, consult your Liftmaster garage door opener’s manual for specific troubleshooting instructions or contact a professional technician for further assistance.
Remember, if you are unsure about performing any of these troubleshooting steps or if the issue persists, it is always best to contact a professional technician. They have the expertise and knowledge to diagnose and resolve the problem efficiently and safely.
Troubleshooting Steps
When it comes to troubleshooting your Liftmaster garage door opener, there are a few key areas to focus on. By checking the safety reversing sensors, the garage door opener itself, the force control settings, and the reset button, you can quickly identify and resolve many common issues.
Safety Reversing Sensors
If your garage door won’t close properly or keeps reversing, the safety reversing sensors may be the culprit. These sensors are located near the bottom of the garage door tracks and are responsible for detecting any obstructions in the door’s path. Here’s how you can troubleshoot them:
- Check for any obstructions that may be blocking the sensors, such as dirt or debris.
- Ensure that the sensors are properly aligned and facing each other.
- Clean the lenses of the sensors using a soft cloth.
- If the sensors are still not functioning properly, consult the Liftmaster manual or contact professional help for further assistance.
Garage Door Opener
If your Liftmaster garage door opener is not functioning correctly, there are a few steps you can take to troubleshoot the issue:
- First, make sure that the batteries in the remote control are not depleted and replace them if needed.
- Check if the door needs lubrication by applying a silicone-based lubricant to the hinges, springs, and rollers.
- Inspect the garage door opener for any visible signs of damage or wear, such as frayed wires or loose connections.
- If necessary, consult the Liftmaster manual or contact professional help for further diagnosis and repair.
Force Control
If your garage door opener is not closing or opening with the proper force, the force control settings may need adjustment. Here’s how you can troubleshoot this issue:
- Locate the force control adjustment screws on the side of the garage door opener unit.
- Using a flathead screwdriver, turn the screws clockwise to increase the force and counterclockwise to decrease it.
- Test the garage door’s operation after each adjustment until the desired force is achieved.
- Be cautious not to set the force too high, as it can cause damage to the door or opener.
Reset Button
If all else fails, you can try resetting your Liftmaster garage door opener to its factory settings. Most Liftmaster models have a reset button located on the opener unit. Here’s how you can reset it:
- Locate the reset button on the opener unit.
- Press and hold the button for about 10 seconds until the indicator lights on the unit start flashing.
- Once the lights stop flashing, release the reset button.
- Test the garage door opener to see if the issue has been resolved.
By following these troubleshooting steps for your Liftmaster garage door opener, you can quickly identify and resolve many common issues. However, if the problem persists or you are unsure of how to proceed, it is always best to seek professional assistance to ensure the safety and functionality of your garage door system.
Additional Tips And Information
When troubleshooting your Liftmaster garage door opener, it’s important to consider a few additional tips and information that can help you identify and fix common issues. By following these tips, you can ensure that your garage door operates smoothly and efficiently.
Batteries Replacement
One of the most common reasons why a Liftmaster garage door opener may not be working properly is due to low or dead batteries in the remote control. It’s important to replace the batteries regularly to ensure that the remote control functions correctly. To do this:
- Find the battery compartment on the back of the remote control.
- Open the compartment and remove the old batteries.
- Insert new batteries, making sure to follow the correct polarity.
- Close the compartment and test the remote control to see if the issue is resolved.
Lubrication
To keep your Liftmaster garage door opener running smoothly, it’s important to regularly lubricate the moving parts. This helps to reduce friction and wear, ensuring that the door operates quietly and efficiently. Here’s how to lubricate your garage door:
- Use a silicone-based lubricant specifically designed for garage doors.
- Apply the lubricant to the rollers, tracks, and hinges.
- Make sure to wipe off any excess lubricant to prevent dripping.
- Test the garage door to see if it moves more smoothly.
Alignment Of Safety Sensors
If your Liftmaster garage door opener is not closing properly, it could be due to misaligned safety sensors. These sensors are located on either side of the garage door and ensure that the door stops and reverses if there is an obstacle in its path. Follow these steps to align the sensors:
- Check if the sensors are aligned by looking for a solid indicator light on both sensors.
- If the lights are not solid, adjust the sensors until they are aligned.
- Clean the sensors to remove any dirt or debris that may be obstructing the beam.
- Test the garage door to see if it closes properly after aligning the sensors.
Track Alignment
An improperly aligned track can cause issues with the operation of your Liftmaster garage door opener. If you notice any misalignment, you can realign the track using the following steps:
- Use a level to check if the track is straight and level.
- If the track is misaligned, loosen the screws that hold it in place.
- Gently tap the track with a hammer to adjust its position.
- Tighten the screws once the track is properly aligned.
- Test the garage door to ensure it moves smoothly along the track.
By following these additional tips and information, you can troubleshoot common issues with your Liftmaster garage door opener and keep it operating smoothly. Remember to always prioritize safety and consult a professional if you are unsure or unable to fix the problem yourself.

Credit: patch.com
Credit: www.easyopendoor.com
Frequently Asked Questions For Liftmaster Troubleshooting
Is There A Reset Button On Liftmaster?
Yes, there is a reset button on Liftmaster.
What Is Wrong With My Liftmaster Garage Door Opener?
Common issues with a LiftMaster garage door opener include: – Needing to replace the batteries in the remote control – Lack of lubrication on the door mechanism – Misalignment of the safety sensors – Problems with the track alignment or broken springs.
Contact a LiftMaster dealer for assistance.
What Does 5 Blinks On A Liftmaster Mean?
5 blinks on a LiftMaster mean that there is an issue with the motor. It could be a motor overload or a problem with the motor circuit. It’s recommended to consult a professional technician for a proper diagnosis and repair.
Why Is My Garage Door Opener Blinking And Not Opening?
If your garage door opener is blinking and not opening, there could be several reasons. First, check if the safety sensors are blocked. Then, make sure there aren’t any obstructions. Test the safety reversal system and adjust the open force and travel limits.
If the issue persists, consult a LiftMaster dealer for further assistance.
Conclusion
If you’re experiencing issues with your Liftmaster garage door opener, don’t worry. There are simple troubleshooting steps you can take to address common problems. Start by checking if the safety reversing sensors are blocked or misaligned, and clear any obstructions.
Test the Safety Reversal System and make adjustments to the open force and travel limits if necessary. Remember, if your garage door won’t fully open or close, there could be various reasons, and it’s essential to diagnose the problem before seeking professional help.
With these troubleshooting tips, you’ll have your Liftmaster garage door opener working smoothly in no time.
Keurig Coffee Maker Troubleshooting: Easy Fixes for Common Issues
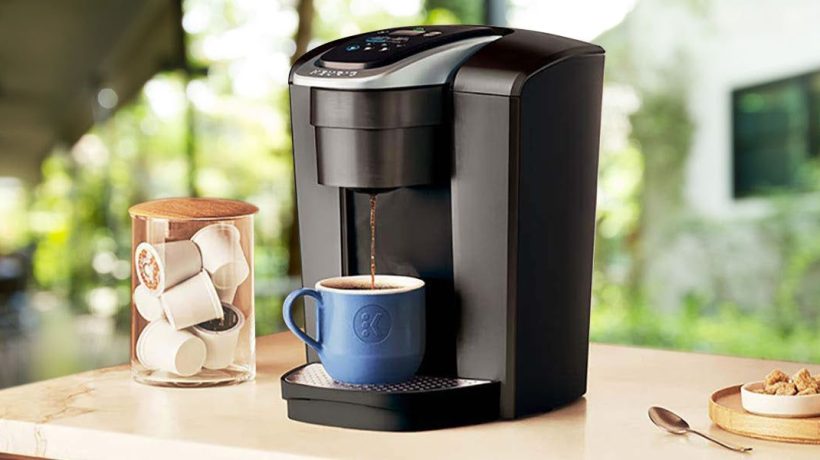
If your Keurig coffee maker is not starting or the lights are on but no water is coming out, try resetting the machine and make sure the water reservoir is properly attached. If your Keurig is not brewing, it could be due to water scaling or debris buildup in the water pump, so try cleaning the reservoir and refilling it partially.
Additionally, it is recommended to descale your Keurig regularly to eliminate mineral buildup and keep it in optimal condition. Having issues with your Keurig coffee maker and looking for troubleshooting solutions? You’re in the right place! Keurig coffee makers are convenient and easy to use, but occasionally, they may encounter problems.
In this guide, we will provide you with simple and effective troubleshooting tips to help you resolve common issues with your Keurig coffee maker. So, if your Keurig is not starting, no water is coming out, or the lights are on but it’s not brewing, keep reading to find out how to fix these problems and enjoy your favorite cup of coffee again.
Credit: lifeboostcoffee.com
Common Issues With Keurig Coffee Makers
Common issues with Keurig Coffee Makers, such as the machine not starting, no water coming out, or all lights on, can be solved through troubleshooting methods. Watch Keurig troubleshooting videos or follow step-by-step instructions to fix these problems and ensure your coffee maker is working properly.
Not Starting
If your Keurig coffee maker is not starting, there are a few possible causes:
- Make sure the machine is plugged into a working outlet.
- Check if the power switch is turned on.
- Ensure that the water reservoir is properly attached.
If the above steps do not resolve the issue, try resetting your Keurig coffee maker. Here’s how:
- Turn off the machine.
- Unplug it from the power source.
- Wait for a few minutes.
- Plug it back in and turn it on.
No Water Coming Out
If you are experiencing no water coming out of your Keurig coffee maker, follow these troubleshooting steps:
- Check if the water reservoir is filled with water.
- Verify that the reservoir is properly attached to the machine.
- Inspect the water lines and make sure there are no blockages.
- Run a cleansing brew cycle to flush any debris.
If the issue persists, descaling your Keurig can solve the problem. Follow the manufacturer’s instructions on how to descale your machine.
All Lights On
If all the lights on your Keurig coffee maker are on, try the following troubleshooting steps:
- Turn off the machine and unplug it.
- Remove the water reservoir and clean it.
- Inspect the needles inside the K-Cup compartment and clean them if necessary.
- Check if the drip tray is full and needs to be emptied.
- Reassemble the machine and plug it back in.
If the problem persists, contact Keurig customer service for further assistance.

Credit: lifeboostcoffee.com
Troubleshooting Steps
To ensure your Keurig coffee maker is working properly, it is important to troubleshoot any issues that may arise. Below, we will outline the steps you can take to troubleshoot common problems with your Keurig coffee maker, including resetting the Keurig, cleaning the water reservoir, and properly seating the coffee maker.
Resetting The Keurig
If your Keurig coffee maker is not working as expected, one of the first troubleshooting steps you can take is to reset the machine. Follow these steps to reset your Keurig:
- Turn off and unplug your Keurig coffee maker.
- Wait for a few minutes.
- Plug the machine back in and turn it on.
- Allow the Keurig to go through its startup process.
- Once the machine is ready, try brewing a cup of coffee to see if the issue is resolved.
Cleaning The Water Reservoir
If you are experiencing issues with your Keurig coffee maker, such as no water coming out, it is possible that the water reservoir may be clogged or dirty. Follow these steps to clean the water reservoir:
- Remove the water reservoir from the Keurig coffee maker.
- Empty any remaining water from the reservoir.
- Rinse the reservoir with warm water.
- Use a mild dish soap and a soft brush to clean the inside of the reservoir.
- Rinse the reservoir thoroughly to remove any soap residue.
- Reattach the water reservoir to the Keurig coffee maker.
Properly Seating The Coffee Maker
If your Keurig coffee maker is not functioning properly, it is important to ensure that the coffee maker is properly seated. Follow these steps to properly seat the coffee maker:
- Make sure the coffee maker is turned off and unplugged.
- Check that the coffee maker is placed on a flat, stable surface.
- Ensure that the coffee maker is aligned correctly with the water reservoir and other components.
- Once the coffee maker is properly seated, plug it back in and turn it on.
By following these troubleshooting steps, you can resolve common issues with your Keurig coffee maker and enjoy your favorite cup of coffee hassle-free.
Preventing Future Issues
Preventing future issues with your Keurig coffee maker is essential to ensure a smooth and uninterrupted brewing experience. By following these simple steps, you can avoid common problems and keep your coffee maker running at its best.
Regular Descaling
To prevent mineral buildup and improve the lifespan of your Keurig coffee maker, regular descaling is crucial. Over time, the mineral deposits from water can clog the internal tubes and affect the overall performance of your machine.
Descale your Keurig, follow these simple steps:
- Fill the water reservoir with a mixture of descaling solution and water, as recommended by the manufacturer.
- Place an empty mug on the drip tray and start the brewing process without inserting a coffee pod.
- Continue the brew cycle until the water reservoir is empty and the descaling solution has been completely brewed into the mug.
- Discard the liquid in the mug and repeat the process with plain water to rinse any remaining descaling solution.
- Remember to descale your Keurig every 3-6 months, or as directed by the manufacturer, to maintain optimal performance.
Using Clean Water
The quality of water you use plays a significant role in the performance of your Keurig coffee maker. Using clean, filtered water can prevent mineral buildup and improve the taste of your brewed coffee.
Here are a few tips for using clean water:
- Consider using a water filter or purchasing pre-filtered water to remove impurities.
- Avoid using distilled or softened water, as they may negatively impact the taste and performance of your coffee.
- Regularly clean and refill the water reservoir with fresh, clean water to ensure the best brewing results.
Cleaning Overflow Tube
The overflow tube of your Keurig coffee maker can become clogged with coffee grounds or debris over time, leading to water overflow and potential brewing issues.
To clean the overflow tube, follow these steps:
- Turn off and unplug your Keurig coffee maker.
- Remove the water reservoir and locate the overflow tube, usually positioned near the center of the machine.
- Carefully detach the tube and clean it using a pipe cleaner or a small brush.
- Ensure the tube is free from any obstruction before reattaching it securely.
- Regularly inspect and clean the overflow tube to prevent any future issues with your Keurig coffee maker.
By following these preventive measures, you can ensure the longevity and optimal performance of your Keurig coffee maker. Incorporating regular descaling, using clean water, and cleaning the overflow tube will help you enjoy a delicious cup of coffee every time.

Credit: lifeboostcoffee.com
Frequently Asked Questions Of Keurig Coffee Maker Troubleshooting
Where Is The Reset Button On My Keurig?
The reset button on a Keurig is usually located on the side or the back of the machine. To reset your Keurig, simply press and hold the reset button for a few seconds. Make sure the machine is unplugged before doing this.
Why Is My Keurig Suddenly Not Working?
If your Keurig suddenly stops working, it may need to be reset or the water reservoir could be connected incorrectly. You may also need to descale your Keurig to remove mineral buildup. Check for water scaling that could be blocking the water pump.
Make sure the brewer is properly plugged into the outlet and other appliances work in the same outlet.
Why Is There No Water Coming Out Of My Keurig?
If there is no water coming out of your Keurig, the most likely reason is water scaling or debris interfering with the water pump. To resolve this issue, empty and refill the water reservoir about one-third of the way.
Why Isn’t My Keurig Working When I Press The Button?
If your Keurig is not working when you press the button, it could be due to a reset or incorrect connection of the water reservoir. To fix this, try resetting your Keurig and ensuring the water reservoir is properly attached.
You may also need to descale your Keurig to remove mineral buildup.
Conclusion
Troubleshooting your Keurig coffee maker doesn’t have to be a daunting task. By following the steps outlined in this blog post, you can easily address common issues such as the machine not starting, no water coming out, or all lights on.
Remember to also perform regular descaling to maintain the optimal condition of your Keurig. With these troubleshooting tips, you’ll be able to enjoy your favorite cup of coffee hassle-free. Happy brewing!
Whirlpool Washer Troubleshooting: How to Fix Common Problems

Whirlpool washer troubleshooting involves addressing issues such as leaks, odors, loud noises, and problems with draining or spinning. On front-load washers, a dirty drain pump filter is often the cause of these problems.
To fix a Whirlpool washer, start by checking the drive belt to see if it is broken or has fallen off the pulley system. If the belt is intact, other potential solutions include resetting the washer and checking for any stored error codes.
Whirlpool provides helpful videos and manuals online to guide users through the troubleshooting process.
Credit: danmarcappliance.com
Whirlpool Washer Troubleshooting
When it comes to Whirlpool washer troubleshooting, common problems like leaks, odors, and loud noises can be easily fixed. If your washer isn’t spinning but making noise, it may be due to a broken or loose drive belt. You can check the belt by unplugging the machine and removing the back panel.
If the belt is off the pulley system, it will need to be repaired.
Whirlpool washers are known for their reliability and efficiency, but like any appliance, they can experience problems from time to time. If you’re facing issues with your Whirlpool washer, don’t panic. In this article, we’ll guide you through some common problems, possible causes, and troubleshooting steps to help you get your washer back up and running smoothly. Let’s dive in!
Common Problems
Whirlpool washers may encounter a variety of common problems that can hinder their performance. Some of these issues include:
- Leaks
- Odors
- Loud noises
- Trouble with draining or spinning
If you’re experiencing any of these problems, don’t worry. We’ll explore the possible causes next.
Possible Causes
Identifying the cause of the problem is essential in troubleshooting your Whirlpool washer. Here are some possible causes for the common problems mentioned above:
- A dirty drain pump filter
- Improperly balanced load
- Blocked or kinked drain hose
- Worn-out belts or motor
Now that we have an idea of what could be causing the issues, let’s move on to the troubleshooting steps to resolve them.
Troubleshooting Steps
To help you fix the problems with your Whirlpool washer, follow these simple troubleshooting steps:
- Clean the drain pump filter to ensure proper drainage
- Check if the load is properly balanced inside the washer
- Inspect the drain hose for any obstructions or kinks
- Examine belts and motor for any signs of wear and tear
By following these troubleshooting steps, you can address the common problems and ensure your Whirlpool washer is running smoothly once again.
Remember, if you’re unsure about any of these steps or if the problem persists despite your troubleshooting efforts, it’s always best to consult a professional technician or contact Whirlpool’s customer support for further assistance.
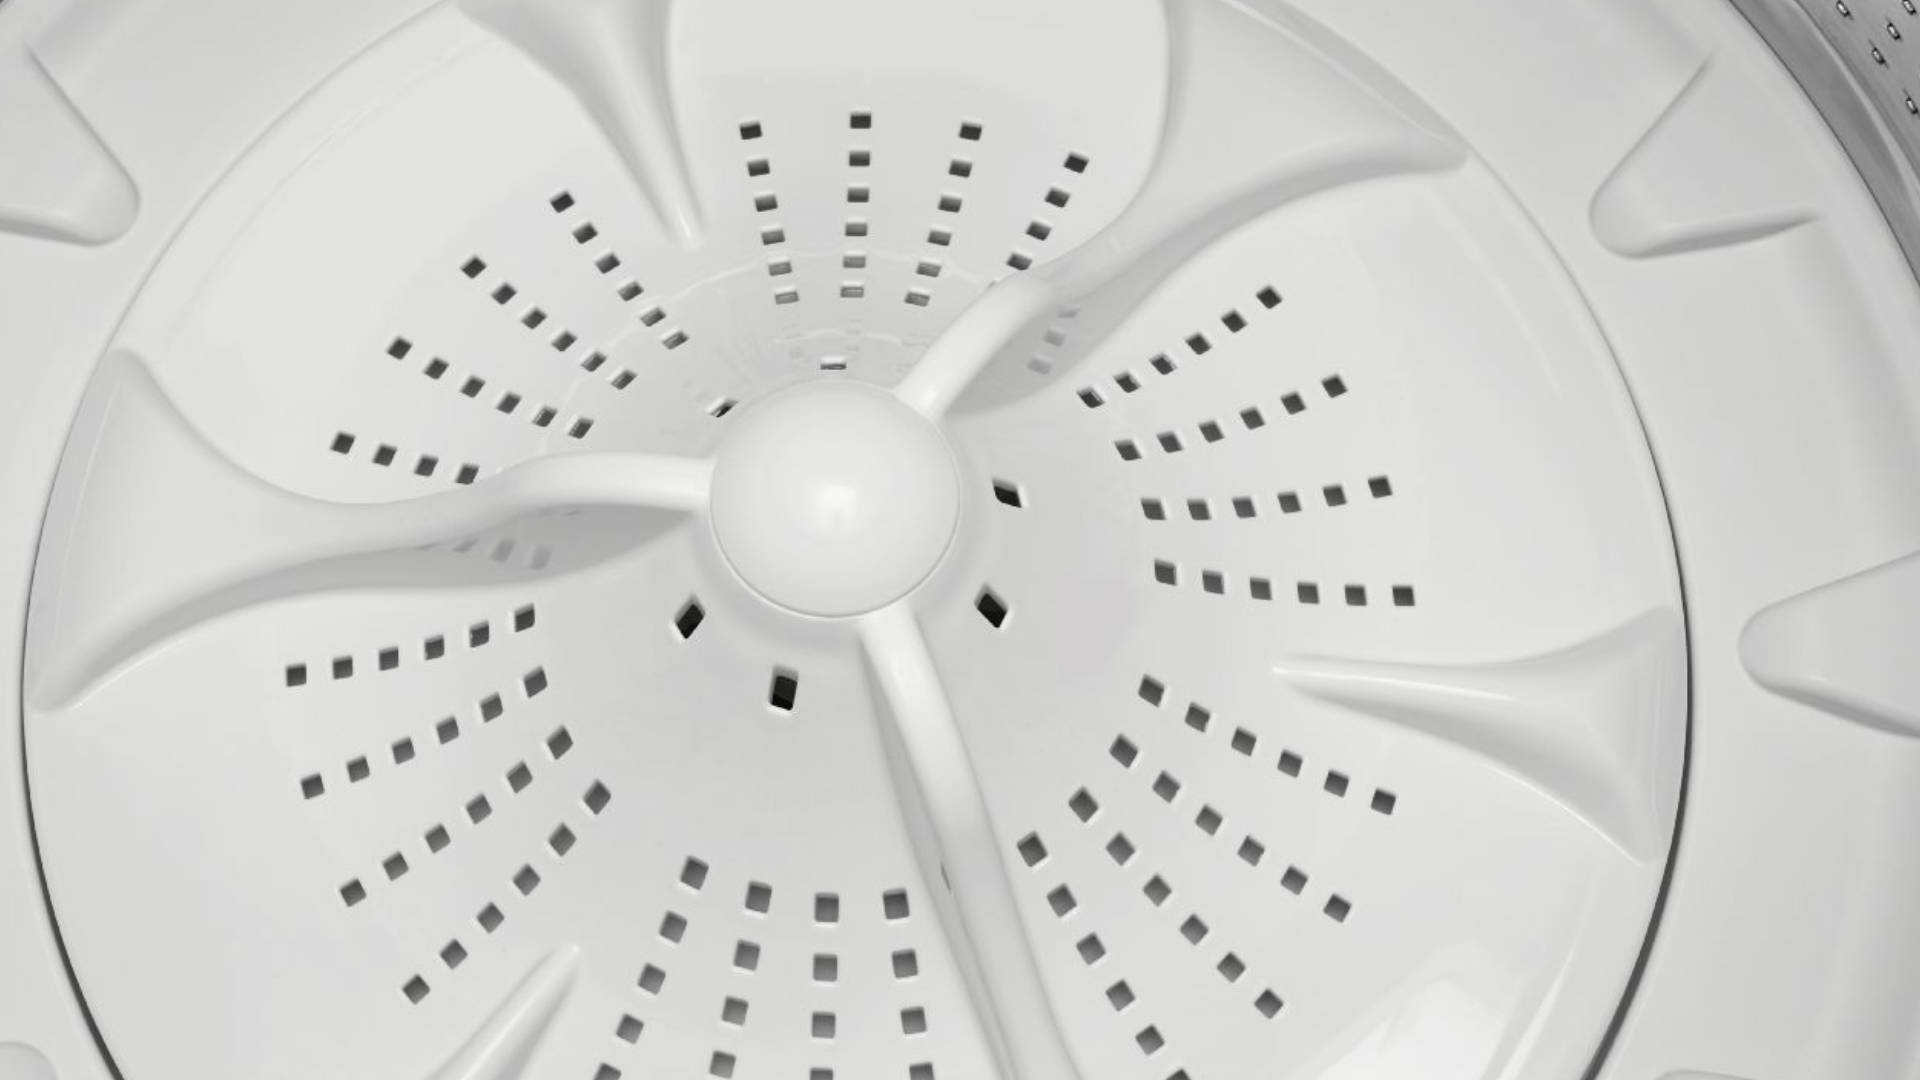
:max_bytes(150000):strip_icc()/CabrioWasherBIG-5a5505a1da27150037fd805d.jpg)
Credit: www.thespruce.com
How To Fix Common Whirlpool Washer Problems
If you’re experiencing common problems with your Whirlpool washer, such as leaks, odors, loud noises, or trouble with draining or spinning, there are simple fixes you can try. One possible issue could be a dirty drain pump filter, especially for front load washers.
Consult the Whirlpool washer manual or watch online tutorials for step-by-step instructions on how to fix these problems.
If you own a Whirlpool washer, you may encounter some common problems along the way. Luckily, many of these issues can be easily fixed without the need for a repair technician. In this section, we will discuss how to troubleshoot and resolve some of the most common problems that Whirlpool washer owners face. Whether your washer won’t start, won’t spin, leaks, or makes loud noises, we’ve got you covered.
Won’t Start
If your Whirlpool washer won’t start, it can be frustrating and inconvenient. However, there are a few troubleshooting steps you can take to fix this problem:
- Check for power: Ensure that the washer is properly plugged into a power source and that the power outlet is working.
- Circuit breaker: Check the circuit breaker and make sure it is not tripped.
- Door lock: If the washer door is not properly closed or the door lock is malfunctioning, the washer may not start. Make sure the door is closed tightly and that there are no obstructions preventing it from closing.
- Control panel: Check the control panel for any error codes or issues. Follow the instructions in the user manual to troubleshoot any error codes.
Won’t Spin
If your Whirlpool washer is not spinning, follow the steps below to resolve the issue:
- Overloading: Overloading the washer can cause it to become unbalanced and prevent it from spinning. Remove some items from the washer and redistribute the load evenly.
- Drainage issues: Check for any clogs in the drain hose or pump. Clear any obstructions that may be preventing proper drainage.
- Lid switch: The lid switch is a safety feature that prevents the washer from spinning when the lid is open. Ensure that the lid is fully closed and the switch is functioning properly.
- Motor coupling: The motor coupling connects the motor to the transmission. If it is broken or worn out, the washer may not spin. Inspect the motor coupling and replace if necessary.
Leaks Or Drainage Issues
If your Whirlpool washer is leaking or experiencing drainage problems, try the following troubleshooting steps:
| Possible Causes | Solutions |
|---|---|
| Clogged drain hose | Clear any debris or obstructions from the drain hose. |
| Loose or damaged hose connections | Tighten or replace any loose or damaged hose connections. |
| Worn out pump or pump seal | Inspect the pump and pump seal for any signs of wear or damage. Replace if necessary. |
| Overloading | Ensure that you are not overloading the washer, as this can cause leaks or drainage issues. |
Loud Noises
If your Whirlpool washer is making loud noises, follow these steps to address the problem:
- Uneven load: Make sure the load is evenly distributed in the washer to prevent excessive vibrations and noise.
- Leveling: Check that the washer is properly leveled. Adjust the leveling feet if necessary to ensure stability.
- Motor coupling: If the motor coupling is worn or broken, it can cause loud noises during operation. Inspect and replace as needed.
- Worn drum bearings: Inspect the drum bearings for any signs of wear or damage. If they are worn out, they may need to be replaced.
By following these troubleshooting steps, you can easily fix common problems with your Whirlpool washer and avoid the need for expensive repairs. However, if the issue persists or you are unsure about performing any repairs yourself, it is always recommended to seek professional assistance.

Credit: voltappliancerepair.com
Frequently Asked Questions On Whirlpool Washer Troubleshooting
What Is Common Problem For Whirlpool Washer?
Common problems for Whirlpool washers include leaks, odors, loud noises, and trouble with draining or spinning. If you have a front load washer, a dirty drain pump filter can be a common cause. To fix these issues, you can clean the drain pump filter.
How Do I Reset My Whirlpool Whirlpool Washer?
To reset your Whirlpool washer, follow these simple steps. First, unplug the washer from the power source for one minute. Then, plug it back in and open and close the door six times within twelve seconds. Finally, select a new cycle and press the “Start” button.
Why Won’t My Washer Start When I Press Start?
If your washer won’t start when you press start, it could be due to a few reasons. First, check if the washer is properly plugged in and if the power supply is functioning. Also, make sure that the door or lid is securely closed.
If these basic checks don’t solve the issue, it may require professional assistance.
Why Is My Whirlpool Washing Machine Not Spinning But Making Noise?
If your Whirlpool washing machine is not spinning but making noise, it could be due to a broken or detached drive belt. To check, unplug the machine and remove the back panel to inspect the belt. If necessary, replace the belt to restore proper spinning function.
Conclusion
If your Whirlpool washer is giving you trouble, don’t panic. Common issues like leaks, odors, loud noises, and problems with draining or spinning can be resolved with some simple troubleshooting. Check the drain pump filter on front load washers and inspect the drive belt on top load washers.
Remember to unplug your machine before any repairs. For more in-depth guidance, you can refer to Whirlpool tech manuals, error codes, and reset/recalibration techniques available online. With these troubleshooting tips, you’ll have your washer back to its efficient and reliable self in no time.
Bosch Dishwasher Troubleshooting: Fix It with Ease
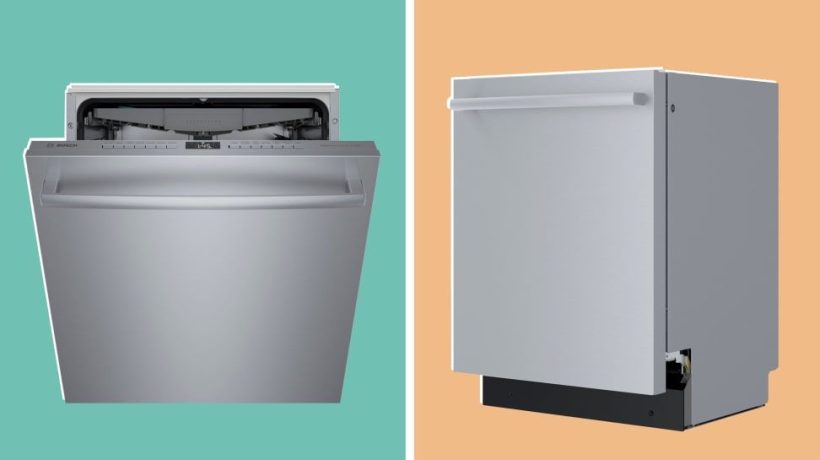
If you are experiencing issues with your Bosch dishwasher, such as poor cleaning performance or it not starting, there are several common troubleshooting steps you can take. These include checking for debris in the dishwasher door’s seal, inspecting the drain pump, looking for error codes, cleaning the soap dispenser, verifying the dishwasher’s installation, checking the water supply valve, and running a diagnostic test, among others.
By following these steps, you can quickly identify and resolve many common problems with your Bosch dishwasher.
Credit: www.smartappliance.co.za
Introduction To Bosch Dishwasher Troubleshooting
Introducing Bosch Dishwasher Troubleshooting – a comprehensive guide to solving common issues with Bosch dishwashers. Learn how to fix problems such as poor cleaning performance or a dishwasher that won’t start with easy-to-follow steps and tips.
Overview Of Common Issues
If you’re facing issues with your Bosch dishwasher, you’re not alone. These efficient machines can sometimes experience problems that hinder their performance. Understanding the common issues that can occur with Bosch dishwashers is the first step in troubleshooting and resolving the problem.
Some of the most common problems include poor cleaning performance, dishes coming out dirty or with residue, and even food particles remaining on plates. These issues can be frustrating, especially when you rely on your dishwasher to provide spotless results. However, with proper troubleshooting techniques, you can quickly identify and resolve these problems.
Importance Of Troubleshooting
Troubleshooting your Bosch dishwasher is essential to ensure its optimal performance and longevity. Ignoring or neglecting the issues can lead to further damage and costly repairs down the line. By identifying and addressing the problem promptly, you can avoid more significant issues and extend the lifespan of your dishwasher.
Furthermore, troubleshooting allows you to save time and money. Instead of immediately calling a technician, you can attempt to fix the problem yourself. This can be particularly beneficial if the issue is minor or easily fixable. By troubleshooting and resolving the problem independently, you can get your dishwasher back up and running without incurring unnecessary expenses.
Benefits Of Diy Troubleshooting
When it comes to Bosch dishwasher troubleshooting, the do-it-yourself (DIY) approach can have several advantages. By taking matters into your own hands, you can:
- Gain knowledge and understanding of your dishwasher: By troubleshooting, you become more familiar with your dishwasher’s components, functioning, and potential issues. This knowledge can empower you to quickly identify and tackle future problems.
- Save time and money: By avoiding the need to call a technician for every minor issue, you can save both time and money. DIY troubleshooting allows you to tackle common problems independently, reducing both downtime and expenses.
- Increase convenience: When you can troubleshoot and fix your dishwasher issues on your own, you don’t have to wait for a professional to arrive. This means you can get your dishwasher back to working order sooner, ensuring convenience in your daily routine.
- Enhance your problem-solving skills: Troubleshooting your dishwasher helps develop your problem-solving abilities. As you learn to diagnose and resolve various issues, you become more adept at identifying and solving problems in other areas of your life as well.
In conclusion, troubleshooting your Bosch dishwasher is crucial for maintaining its performance and avoiding unnecessary expenses. With a DIY approach, you can gain knowledge, save time and money, increase convenience, and enhance your problem-solving skills. In the following sections, we will explore common issues, their causes, and troubleshooting techniques to help you get the most out of your Bosch dishwasher.
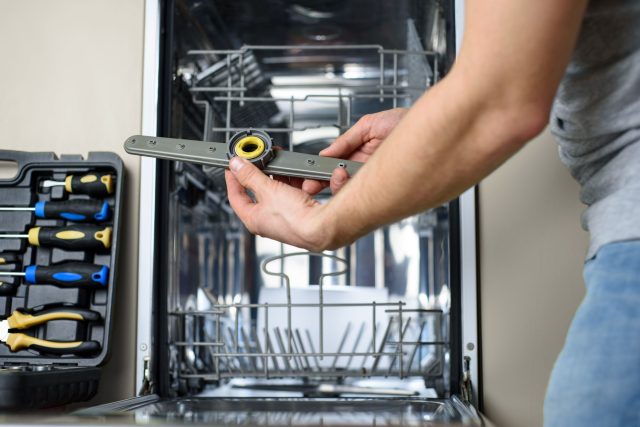
Troubleshooting Bosch Dishwasher Not Starting
If your Bosch dishwasher is not starting, there are several potential causes that you can troubleshoot to get it up and running again. Below, we’ve listed some common issues and steps you can take to resolve them:
Check For Debris In The Door Seal
Make sure to inspect the door seal for any debris that might be preventing it from closing properly. Remove any dirt or residue by gently wiping it with a damp cloth. A clean and tight door seal is crucial for the dishwasher to start.
Inspect The Drain Pump
The drain pump plays a vital role in removing water from the dishwasher. If it gets clogged or damaged, the dishwasher may not start. Check the drain pump for any obstructions or signs of damage. Remove any debris and ensure that the pump is working properly.
Look For Error Codes
Bosch dishwashers often display error codes to indicate specific issues. Check the control panel for any error codes being displayed. Refer to the dishwasher’s manual or Bosch’s official website to understand what each code means and take the necessary steps to resolve the problem.
Clean Out The Soap Dispenser
A clogged or dirty soap dispenser can prevent the dishwasher from starting. Remove any remnants of detergent or blockages from the dispenser. Ensure that it opens and closes smoothly for proper soap distribution during the wash cycle.
Verify Dishwasher Installation
Check if the dishwasher is properly installed and connected to the power source. Make sure that the power cord is securely plugged into an outlet and the dishwasher is receiving power. Additionally, ensure that the water supply line is connected correctly and turned on.
Check the Water Supply Valve
Inspect the water supply valve to ensure it is fully open. Sometimes, the dishwasher may not start if there is insufficient water supply. Turn the valve clockwise to open it fully and allow proper water flow to the dishwasher.
Inspect the Water Inlet Valve
The water inlet valve controls the flow of water into the dishwasher. If this valve is faulty or clogged, it can prevent the dishwasher from starting. Examine the valve for any blockages or signs of damage. Clean or replace the valve if necessary.
Reset The Bosch Dishwasher
If none of the above steps resolve the issue, try resetting the dishwasher. Locate the power button or circuit breaker and turn it off for a few minutes. Then, turn it back on and try starting the dishwasher again. Resetting can often fix minor glitches and get the dishwasher working again.
Troubleshooting Poor Cleaning Performance In Bosch Dishwasher
If you’re experiencing poor cleaning performance from your Bosch dishwasher, there may be a few simple troubleshooting steps you can take to resolve the issue. This article will guide you through the possible causes of poor cleaning and provide step-by-step instructions to help you get your dishwasher back to its optimal performance.
Possible Causes Of Poor Cleaning
To troubleshoot poor cleaning performance in your Bosch dishwasher, it is important to consider a few possible causes:
- Check for Clogged Spray Arms
- Clean the Filter and Impeller
- Inspect and Clean the Air Gap
- Check Detergent Dispenser
- Ensure Proper Loading of Dishes
- Inspect Water Temperature
Check For Clogged Spray Arms
One common cause of poor cleaning in Bosch dishwashers is clogged spray arms. Over time, food particles and debris can accumulate and block the spray arms, preventing them from distributing water effectively. To check for clogs:
- Remove the spray arms by twisting them counterclockwise.
- Rinse the spray arms under warm water to remove any debris.
- Inspect the spray arm nozzles for clogs and clean them with a small brush if necessary.
- Reinstall the spray arms by twisting them back into place.
Clean The Filter And Impeller
The filter and impeller in your Bosch dishwasher play a crucial role in removing food particles and debris from the water. If these components become clogged or dirty, it can impact the cleaning performance. To clean the filter and impeller:
- Locate the filter at the bottom of the dishwasher and remove it.
- Rinse the filter under warm water to remove any trapped debris.
- Inspect the impeller for any clogs or blockages and remove them if necessary.
- Reinstall the filter and ensure it is securely in place.
Inspect And Clean The Air Gap
The air gap is a device installed on your sink that prevents dirty water from flowing back into the dishwasher. If the air gap becomes clogged, it can affect the dishwasher’s cleaning performance. To inspect and clean the air gap:
- Locate the air gap on your sink or countertop and remove the cover.
- Inspect the air gap for any debris or obstructions.
- Use a small brush or toothbrush to clean the air gap thoroughly.
- Reinstall the cover and ensure it is securely in place.
Check Detergent Dispenser
The detergent dispenser plays a crucial role in the cleaning process, and if it is not functioning properly, it can lead to poor cleaning performance. To check the detergent dispenser:
- Open the dishwasher door and locate the detergent dispenser.
- Ensure that the dispenser is clean and free from any blockages or residue.
- Check that the dispenser latch or mechanism is operating correctly.
- If necessary, consult the dishwasher manual for specific instructions on replacing the detergent dispenser.
Ensure Proper Loading Of Dishes
The way you load your dishes can also affect the cleaning performance of your Bosch dishwasher. Improper loading can result in blocked spray arms, inadequate water circulation, and food particles remaining on the dishes. To ensure proper loading:
- Avoid overcrowding the dishwasher, allowing the water to reach all surfaces of the dishes.
- Place dishes and utensils in a way that allows for proper water flow and spray arm rotation.
- Make sure that larger items do not block the spray arms or impede the movement of the water.
- Refer to the dishwasher manual for specific loading instructions and recommendations.
Inspect Water Temperature
The water temperature in your Bosch dishwasher plays a crucial role in effectively removing food particles and cleaning your dishes. If the water is not hot enough, it can result in poor cleaning performance. To ensure proper water temperature:
- Check the water heater temperature settings and adjust if necessary.
- Run hot water at the nearest sink tap before starting the dishwasher to ensure hot water supply.
- If necessary, consult a professional to check the dishwasher’s heating element or thermostat.
By following these troubleshooting steps, you can address poor cleaning performance in your Bosch dishwasher and ensure that your dishes come out sparkling clean every time. Remember to consult the dishwasher manual for specific instructions and recommendations.

Credit: www.youtube.com

Credit: www.youtube.com
Frequently Asked Questions Of Bosch Dishwasher Troubleshooting
What Is The Most Common Problem With A Bosch Dishwasher?
A common problem with Bosch dishwashers is poor cleaning performance, resulting in dirty dishes, residue on glassware, or food particles remaining on plates.
How Do I Reset A Bosch Dishwasher?
To reset a Bosch dishwasher, follow these steps:
1. Turn off the dishwasher and unplug it from the power source.
2. Wait for a few minutes.
3. Plug the dishwasher back in and turn it on.
4. Press and hold the “Start” or “Reset” button until the display resets or shows a new cycle.
5. Start a new cycle to test if the reset was successful. Remember, always refer to your Bosch dishwasher manual for specific instructions.
How Do I Fix My Bosch Dishwasher Not Starting?
To fix a Bosch dishwasher not starting, follow these steps:
1. Check the door’s seal for any debris.
2. Inspect the drain pump for any issues.
3. Look for error codes and address them accordingly.
4. Clean out the soap dispenser.
5. Verify the dishwasher is properly installed.
6. Check the water supply and inlet valves.
7. Reset your Bosch dishwasher if needed.
How Do I Run Diagnostics On My Bosch Dishwasher?
To run diagnostics on your Bosch dishwasher, press and hold the POWER SCRUB PLUS and REGULAR WASH buttons simultaneously. If a fault is detected, specific indicator lights will be lit.
Conclusion
If you’re experiencing issues with your Bosch dishwasher, you’re not alone. One common problem is poor cleaning performance, resulting in dirty dishes or residue on glassware. But don’t worry, there are steps you can take to troubleshoot and fix these issues.
From checking for debris in the dishwasher door seal to cleaning out the soap dispenser, these simple solutions can help restore your dishwasher’s functionality. Remember, if you’re still having trouble, don’t hesitate to reach out to a professional repair service like Bosch Home Appliance Repair Services for expert assistance.
Keurig Troubleshooting: The Ultimate Guide to Fixing Common Issues
If your Keurig is not turning on or not brewing, it may need to be reset or the water reservoir could be incorrectly connected. To fix this issue, perform a basic reset by turning the machine off and unplugging it for a few minutes before plugging it back in and turning it on again.
Additionally, make sure that the water reservoir is properly attached to the machine. If the problem persists, try cleaning the machine by removing and cleaning the overflow tube, descaling the machine to remove any mineral buildup, and ensuring that all removable parts are washed thoroughly.
Tackling these troubleshooting steps should help resolve issues and get your Keurig working again.

Credit: www.calameo.com
Common Keurig Troubleshooting Issues
If you’re experiencing problems with your Keurig coffee maker, don’t worry! Many Keurig users encounter similar issues, and most of them can be easily resolved. In this section, we’ll go over some common troubleshooting issues you may encounter with your Keurig machine and provide simple solutions to help you get back to enjoying your favorite brews in no time.
Keurig Not Turning On
If your Keurig machine isn’t turning on, it can be frustrating. However, there are a few steps you can take to troubleshoot this issue. First, make sure that the power cord is securely plugged into a functioning power outlet. Try plugging another device into the same outlet to verify if it’s working correctly.
If the power outlet is working, check the power button on your Keurig machine. Ensure that it’s fully pressed and not stuck. Sometimes, debris or residue can accumulate around the button, causing it to malfunction. Clean the area around the power button with a cloth or a cotton swab to remove any dirt or build-up.
If neither of these solutions works, you can try performing a system reset on your Keurig machine. To do this, unplug the power cord from the outlet, wait for a few seconds, and then plug it back in. This simple reset can often resolve minor glitches and get your Keurig working again.
Blinking Lights
If you notice blinking lights on your Keurig machine, it usually indicates an error or issue that needs attention. One common reason for blinking lights is a problem with the water reservoir. Check to ensure that the water reservoir is properly attached to the machine. Sometimes, a loose or improperly inserted reservoir can cause the machine to display blinking lights.
Another common cause of blinking lights is a clogged or blocked needle that punctures the K-Cup. Over time, coffee grounds and debris can accumulate in this area, preventing proper brewing. To fix this issue, carefully remove the K-Cup holder and clean the needle with a paperclip or a needle. Be gentle and thorough to remove any blockages and allow for smooth operation.
Keurig Not Brewing
If your Keurig machine is not brewing properly or not brewing at all, there are a few troubleshooting steps you can take. First, check the water reservoir to ensure that it has enough water. If the water level is low, the machine might not be able to brew a full cup of coffee. Refill the reservoir and try brewing again.
Another possible reason for your Keurig not brewing is a clogged or blocked water line. Over time, mineral deposits from water can build up and obstruct the flow of water. To fix this, you can run a descaling process using Keurig-approved descaling solution or a mixture of vinegar and water. This will help remove any mineral build-up and restore the proper flow of water.
In summary, common Keurig troubleshooting issues include the machine not turning on, blinking lights, and the machine not brewing. By following the troubleshooting steps mentioned above, you can resolve these issues and continue enjoying your favorite coffee effortlessly. Remember to check the power source, clean and reset the machine if necessary, and ensure proper water reservoir attachment for smoother operation. Cheers to many more delicious cups of coffee with your perfectly functioning Keurig!
Credit: medium.com
Troubleshooting Steps To Fix Keurig Issues
Resetting The Keurig
If your Keurig machine suddenly stops working or none of the buttons are responding, performing a reset can often resolve the issue. To reset your Keurig, follow these steps:
- Unplug the machine from the power source.
- Wait for a few minutes to allow the machine to fully power down.
- Plug the Keurig back into the power source.
- Power on the machine and check if the issue persists.
Performing a reset can help in cases where the Keurig is experiencing a temporary glitch or has frozen.
Cleaning And Reattaching Water Reservoir
If your Keurig is not working properly, it is possible that the water reservoir is not attached correctly. Follow these steps to clean and reattach the water reservoir:
- Take the water reservoir off of your Keurig.
- Clean the water reservoir thoroughly with warm water and mild dish soap.
- Rinse the reservoir to remove any soap residue.
- Reattach the water reservoir to your Keurig machine, ensuring it is properly seated.
Properly attaching the water reservoir ensures a secure connection, allowing the Keurig to function correctly.
Cleaning Overflow Tube
If your Keurig machine is experiencing issues such as not brewing full cups of coffee, there may be a clog in the overflow tube. Here’s how you can clean it:
- Remove and clean the overflow tube. This can be done by detaching the tube from the Keurig and rinsing it with warm water.
- Use a paperclip or a plastic straw to gently dislodge any coffee grounds or debris that may be blocking the tube.
- Reattach the cleaned overflow tube to your Keurig machine.
Cleaning the overflow tube ensures a smooth flow of water and prevents any potential clogs that could affect the brewing process.
Properly Seating The Coffee Maker
If your Keurig machine is not brewing properly, it may be due to improper seating. Follow these steps to properly seat the coffee maker:
- Ensure that the Keurig machine is placed on a stable and level surface.
- Align the coffee maker properly with the base to ensure a secure fit.
- Check that all components, such as the drip tray and K-cup compartment, are properly aligned and in place.
Properly seating the coffee maker helps to maintain the correct flow of water and ensures that all components are functioning correctly.
Specific Keurig Models And Troubleshooting Tips
When it comes to troubleshooting your Keurig coffee maker, specific models may have unique issues that require specific solutions. In this section, we will cover troubleshooting tips for the smallest Keurig models, Keurig drip coffee models, and how to find replacement parts and accessories for your Keurig machine. In case your Keurig suddenly stops working or encounters any issues, these troubleshooting tips will help you resolve them quickly and get back to enjoying your favorite cup of coffee.
Smallest Keurig Models
If you own one of the smallest Keurig models, such as the Keurig K-Mini, K-Express Single Serve, or K-Slim, you may encounter specific issues. Here are a few troubleshooting tips for these compact machines:
- Ensure that the power cord is securely plugged into an outlet. Sometimes a loose connection can prevent the Keurig from turning on.
- Check if the water reservoir is properly attached to the machine. If it is not secured correctly, the Keurig may not function properly.
- If the brewer is not brewing or the coffee tastes weak, try descaling the machine to remove any mineral buildup that could be affecting the brew quality.
Keurig Drip Coffee Models
If you own a Keurig drip coffee model like the K-Duo Essentials, K-Elite, K-Duo Single Serve Carafe, or K-Supreme, here are some troubleshooting tips:
- If your buttons are not working on the K-Express brewer, you can try resetting the machine to see if that resolves the issue.
- If your Keurig is suddenly not working at all, check if the brewer powers on by ensuring it is plugged into a working power outlet.
- If your Keurig is clogged and not brewing full cups of coffee, try cleaning all the removable parts, such as the filter basket and water reservoir, with dish soap and hot water. For stubborn clogs, gently use a paperclip or plastic straw to clear the blockage.
Replacement Parts And Accessories
If you need to find replacement parts or accessories for your Keurig machine, you can visit the official Keurig website. They offer various parts like water reservoirs, lids, filter baskets, and more. Here are a few examples:
| Keurig Water Reservoir And Lid For… |
| Replacement Water Reservoir for… |
| Keurig Filter Basket For K-Duo… |
With these troubleshooting tips and the availability of replacement parts and accessories, you can easily resolve any issues you may encounter with your Keurig coffee maker. Keeping your machine in good working condition ensures that you can continue enjoying a fresh cup of coffee every day. Happy brewing!

Credit: lifeboostcoffee.com
Faqs And Further Resources
If your Keurig is experiencing issues, check out our FAQs and further resources for troubleshooting tips and solutions. From resetting your Keurig to cleaning the machine and checking for clogs, we’ve got you covered to get your brewer back to optimal functioning.
How To Reset A Keurig?
If your Keurig isn’t working properly, a simple reset might do the trick. To reset your Keurig, follow these steps:- Turn off your Keurig and unplug it from the power source.
- Remove the water reservoir from the machine.
- Wait for a few minutes to ensure that the machine is completely cooled down.
- Reattach the water reservoir to the machine.
- Plug in your Keurig and turn it on.
- Wait for the machine to power up and go through its startup sequence.
- Your Keurig is now reset and ready to use!
Reasons For Keurig Suddenly Not Working
There could be several reasons why your Keurig is not working suddenly. Here are some common issues:- The water reservoir might not be properly connected.
- There could be mineral buildup in the tank or internal tubes.
- The machine might need to be descaled.
How To Tell If Your Keurig Is Clogged
If your Keurig is not brewing full cups of coffee or water is not flowing properly, it might be clogged. To check for clogs and fix them, try the following steps:- Wash all removable parts of the Keurig with dish soap and hot water.
- Use a paperclip and a plastic straw to break up any coffee grounds clogs.
- Run a few cycles of water through the machine without a pod to flush out any remaining debris.
Additional Troubleshooting Resources From Keurig
If you need further assistance with troubleshooting your Keurig, you can visit the official Keurig website for more resources. They provide comprehensive guides and videos to help users resolve various issues. Visit their website at www.keurig.com/support for more information. Remember to utilize their resources to ensure that your Keurig is always running smoothly and you can enjoy your favorite beverages hassle-free.Frequently Asked Questions For Keurig Troubleshooting
How To Reset Keurig?
To reset your Keurig and fix any issues, make sure the water reservoir is correctly connected. Descaling the machine can also help remove mineral buildup. Clean removable parts with dish soap and hot water to clear any clogs caused by coffee grounds.
If the machine still isn’t working, try resetting it by turning it off and then on again.
Why Is My Keurig Suddenly Not Working?
If your Keurig suddenly stops working, it may need to be reset or the water reservoir could be connected incorrectly. To fix this, try resetting the machine and properly attaching the reservoir. You may also need to descale the Keurig to remove mineral buildup.
Why Did My Keurig Machine Suddenly Stop Working?
If your Keurig machine suddenly stopped working, it could be due to a need for a reset or incorrect connection of the water reservoir. Descaling might also be necessary to remove mineral buildup. Try these steps and ensure proper cleaning to fix common issues.
How Do You Tell If Your Keurig Is Clogged?
If your Keurig suddenly stops brewing full cups of coffee, it may be clogged. Wash all removable parts with dish soap and hot water. Coffee grounds clogs can be easily broken up with a paperclip and plastic straw.
Conclusion
If your Keurig is suddenly not working, there could be a few simple solutions. First, try resetting the machine and ensuring the water reservoir is properly connected. Additionally, a descaling process may be necessary to remove any mineral buildup. If you suspect a clog, try cleaning all removable parts with dish soap and hot water.
By following these troubleshooting tips, you can get your Keurig back to brewing delicious coffee in no time.
Furnace Troubleshooting 101: Fix It Yourself and Save Time
If your furnace is not kicking on, there are several possible causes, including thermostat configuration, a dirty air filter, a clogged condensate line, ignition problems, or a blocked burner. To troubleshoot your furnace, start by checking the thermostat, furnace filter, and electrical panel.
Ensure that the pilot light is lit and the gas valve is open. If these steps don’t solve the issue, you may need to reset the furnace by turning off the power supply and pressing the reset button. If the problem persists, it is recommended to contact a professional HVAC technician for further assistance.
Introduction To Furnace Troubleshooting
Discover the ins and outs of furnace troubleshooting with this comprehensive introduction. Learn how to identify common issues such as thermostat malfunctions and dirty air filters to get your furnace running efficiently again.
What Is Furnace Troubleshooting?
Furnace troubleshooting refers to the process of identifying and resolving issues or problems with a furnace. It involves diagnosing the problem, identifying the underlying cause, and implementing the necessary repairs or adjustments to restore proper functioning. Furnace troubleshooting can include tasks such as checking the thermostat, inspecting the electrical panel, examining the flame, and ensuring the pilot light and gas valve are functioning correctly. By performing these troubleshooting steps, homeowners can often save time and money by avoiding unnecessary service calls and resolving minor issues themselves.
Importance Of Diy Furnace Troubleshooting
DIY furnace troubleshooting is essential for homeowners who want to maintain their heating systems and ensure they are operating efficiently. By taking the time to troubleshoot and resolve minor issues, homeowners can save money on costly repairs and extend the lifespan of their furnaces. DIY troubleshooting also allows homeowners to gain a better understanding of their heating systems, empowering them to make informed decisions when it comes to repairs or upgrades. Additionally, being able to identify and fix minor issues promptly can help prevent major breakdowns in the future, ensuring a comfortable living environment throughout the winter months.
Benefits Of Saving Time With Diy Troubleshooting
One of the significant benefits of DIY furnace troubleshooting is the ability to save time. Instead of waiting for a technician to arrive and diagnose the issue, homeowners can take immediate action to resolve minor problems themselves. This can be especially beneficial during the colder months when a malfunctioning furnace can result in discomfort and inconvenience. By troubleshooting the furnace themselves, homeowners can identify and fix simple problems quickly, ensuring their heating system is up and running in no time. Saving time with DIY troubleshooting also allows homeowners to get back to their daily routines without lengthy disruptions or waiting times for professional help.

Credit: www.globalheatingairconditioning.com
Common Furnace Problems And Troubleshooting Steps
If your furnace is experiencing issues, try these troubleshooting steps. Check the thermostat, furnace filter, switch, and electrical panel. Ensure the flame is ignited and the pilot light is functioning. Make sure all components are properly secure.
Every homeowner dreads the moment when their furnace starts acting up, especially during the cold winter months. Fortunately, many common furnace problems can be easily troubleshooted without having to call in a professional. In this section, we will explore some of the most common furnace problems and provide you with step-by-step troubleshooting solutions to get your furnace up and running efficiently.
Malfunctioning Thermostat
A malfunctioning thermostat is one of the most common furnace problems that homeowners encounter. If your thermostat is not working properly, you may notice that your fan is constantly running or that your furnace is working inefficiently. To troubleshoot a malfunctioning thermostat, follow these steps:
1. Check the thermostat settings: Make sure that the thermostat is set to the desired temperature and that it is set to “heat” mode.
2. Replace the batteries: If your thermostat is battery-powered, replace the batteries to ensure proper functioning.
3. Clean the thermostat: Dust and debris can accumulate on the thermostat, affecting its performance. Gently clean the thermostat using a soft cloth or brush.
4. Check the wiring: Inspect the wiring connections of the thermostat to make sure they are secure. If any wires are loose or disconnected, reattach them properly.
No Heat or Hot Air
Another common furnace problem is when no heat or hot air is coming from the vents. This can be particularly frustrating during chilly weather. To troubleshoot this issue, follow these steps:
1. Check the thermostat: Ensure that the thermostat is set to a temperature higher than the current room temperature. If it is already set correctly, turn the thermostat off and then back on to reset it.
2. Inspect the furnace filter: A clogged or dirty furnace filter can restrict airflow and prevent hot air from circulating properly. Check the filter and replace it if necessary.
3. Check the gas supply: If you have a gas furnace, ensure that the gas supply valve is open. If it is closed, turn it on and wait for a few minutes to see if the furnace ignites.
4. Examine the pilot light: If your furnace has a pilot light, check to see if it is lit. If it is not lit, follow the manufacturer’s instructions to relight it. If you are unsure how to do this, it is best to consult a professional.
The furnace Not Turning On
If your furnace is not turning on at all, there are a few troubleshooting steps you can take before calling a technician. Follow these steps to troubleshoot a furnace that is not turning on:
1. Check the power supply: Ensure that the furnace is receiving power. Check the circuit breaker or fuse box to make sure the breaker or fuse controlling the furnace is not tripped or blown.
2. Inspect the thermostat: Verify that the thermostat is set to “heat” and is set to a temperature higher than the current room temperature. If it is set correctly, try resetting the thermostat by turning it off and then back on.
3. Inspect the furnace switch: Locate the furnace switch, usually located near the furnace itself, and make sure it is turned on.
4. Check for blocked vents or ducts: Blocked vents or ducts can prevent air from circulating, causing the furnace to shut off. Ensure that all vents and ducts are clear and unobstructed.
Resetting a Furnace
Sometimes, resetting your furnace can resolve common issues and get it back up and running. Each furnace model may have a slightly different reset process, so consult your furnace’s user manual for specific instructions. However, here is a general guide to resetting a furnace:
1. Locate the reset button: Look for a small red or yellow button on or near the furnace. This button may be labeled as “reset” or “reboot.”
2. Turn off the furnace: Switch off the power to the furnace by turning off the main switch or shutting off the circuit breaker that controls the furnace.
3. Wait for a few minutes: Allow the furnace to sit without power for at least five minutes. This will reset the internal components.
4. Turn on the furnace: After the waiting period, turn the furnace back on by flipping the main switch or restoring power via the circuit breaker.
By following these troubleshooting steps, you can often resolve common furnace problems without having to call in a professional. However, if you are unable to fix the issue or if you are unsure about performing any of these steps, it is always best to consult a certified HVAC technician to ensure the problem is properly diagnosed and resolved.
Step-by-step Guide For Diy Furnace Troubleshooting
When your furnace isn’t working properly, it can be frustrating and inconvenient. Before calling in a professional, there are several troubleshooting steps you can take to identify and potentially resolve the issue. In this step-by-step guide, we’ll walk you through the process of DIY furnace troubleshooting, starting with checking the furnace filter.
Checking The Furnace Filter
One of the first things to do when troubleshooting your furnace is to check the furnace filter. A dirty or clogged filter can cause the furnace to work inefficiently or even shut down completely. Here’s how you can check and clean or replace the furnace filter:
- Locate the furnace filter, usually found near the air handler or in the return air duct.
- Carefully remove the filter and inspect it for dirt, dust, or debris.
- If the filter appears dirty or clogged, clean it by gently tapping it or using a vacuum cleaner to remove loose debris.
- If the filter is beyond cleaning, replace it with a new one. Make sure to use the correct size and type of filter for your furnace.
- After cleaning or replacing the filter, reinsert it into the furnace securely.
Inspecting The Thermostat
The thermostat is another component to inspect when troubleshooting your furnace. A malfunctioning thermostat can cause issues with temperature control and overall furnace performance. Here’s how you can inspect the thermostat:
- Check the thermostat settings to ensure it is set to the desired temperature and mode (heating or cooling).
- If the thermostat is battery-operated, make sure the batteries are properly inserted and not depleted.
- Clean any dust or debris on the thermostat using a soft cloth or brush.
- For programmable thermostats, verify that the programmed schedule is correct and that any overrides or hold settings are not causing the issue.
- If the thermostat appears to be functioning properly but the furnace still isn’t working, consider replacing the thermostat as a possible solution.
Examining The Furnace Flame
The flame in your furnace can indicate if there are any ignition problems or issues with the gas valve and flame sensor. Here’s how you can examine the furnace flame:
- Turn off the furnace and wait for it to cool down completely.
- Remove the furnace cover or access panel to expose the burner assembly.
- Turn the furnace back on and observe the burner flames.
- The flame should be steady, blue, and evenly distributed across the burners.
- If the flame is yellow, flickering, or uneven, it may indicate a problem with the gas valve or flame sensor. Contact a professional for further assistance.
Troubleshooting Ignition Problems
If your furnace is having trouble igniting, it may be due to a faulty igniter or pilot light. Here are some steps to troubleshoot ignition problems:
- Check if the pilot light is lit. If not, follow the manufacturer’s instructions to relight it.
- If the pilot light is lit but the burners still won’t ignite, the igniter may be dirty or worn out. Clean or replace the igniter according to the manufacturer’s recommendations.
- Ensure that the gas supply to the furnace is turned on.
- If the ignition problems persist, it’s best to consult a professional HVAC technician for further diagnosis and repair.
Identifying Gas Valve And Flame Sensor Issues
The gas valve and flame sensor are crucial components for proper furnace operation. If they are malfunctioning, it can lead to issues like frequent cycling or the furnace not turning on. Here’s how you can identify gas valve and flame sensor issues:
- Inspect the gas valve for any visible damage or loose connections. Tighten any loose connections or replace the gas valve if necessary.
- Check the flame sensor for dirt or corrosion. Clean the flame sensor using fine sandpaper or a wire brush.
- If cleaning the flame sensor doesn’t resolve the issue, it may be faulty and need to be replaced. Contact a professional for assistance.
By following this step-by-step guide for DIY furnace troubleshooting, you can potentially identify and resolve common furnace issues. However, if the problem persists or you’re unsure of what to do, it’s always best to seek professional help. Maintaining a properly functioning furnace is essential for the comfort and safety of your home during the colder months.

Credit: www.youtube.com

Credit: www.houselogic.com
Frequently Asked Questions On Furnace Troubleshooting
What Is A Common Failure For A Furnace?
A common failure for a furnace is a malfunctioning thermostat. If your fan is constantly running, it may be a sign that the thermostat isn’t working properly. This can cause the furnace to work inefficiently and drain the thermostat battery.
How Do I Find Out What’s Wrong With My Furnace?
To find out what’s wrong with your furnace, follow these troubleshooting tips:
1. Check the furnace filter, thermostat, switch, and electrical panel.
2. Verify the pilot light and gas valve are functioning correctly.
3. Ensure the front panel is properly secured.
If these steps don’t solve the issue, contact a professional. Resetting the furnace may also help. Turn off the power supply, locate the reset button, press it, and then turn the power back on.
What Would Cause A Furnace Not To Kick On?
Possible causes for a furnace not kicking on include thermostat configuration, dirty air filter, high limit switch, clogged condensate line, insufficient fuel, leaky ducts, ignition problems, blocked burner, flame sensor issues, gas valve malfunctions, cracked heat exchanger, or clogged coil.
Resetting the furnace by turning off the power supply and pressing the reset button may also help.
How Do You Reset A Furnace?
To reset a furnace, follow these steps: turn off the circuit breaker for the furnace, locate the reset button on the furnace, and press it, if the button pops up, press it down. Finally, return the cover to the blower compartment and turn the power back on.
Conclusion
Furnace troubleshooting can be a challenging task, but with the right knowledge and guidance, you can save both time and money by fixing the issue yourself. From checking the thermostat and furnace filter to inspecting the flame sensor and heat exchanger, there are several common problems that you can easily identify and address.
Remember to always prioritize safety and consult a professional if needed. By following these troubleshooting tips, you can ensure that your furnace operates efficiently and keeps your home warm during the colder months.
What is causing TV interference?
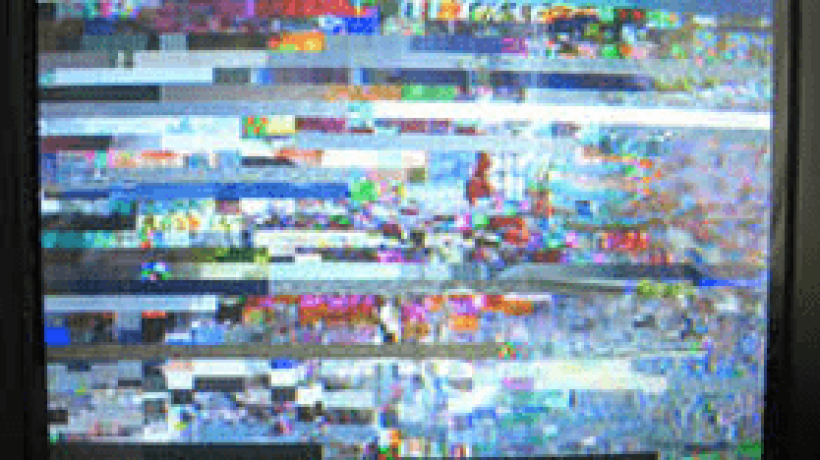
It’s not always your mobile phone to blame if your TV suffers from constant interference. In fact, there are many factors that can interfere with your TV signal. Here are a few common suspects.
Causes that can be found in your own home
Other mains powered devices can cause interference from within your home. Freeview devices can be affected by variations in electrical current. To identify the cause, you’ll have to turn off all appliances and devices.
Trends in the Automobile Industry

Like any other industry, the automobile industry is constantly changing and developing in terms of fashion and trends. Technology is evolving at a rapid pace. This makes the future exciting for both the industry and the consumer. Here are some top trends.
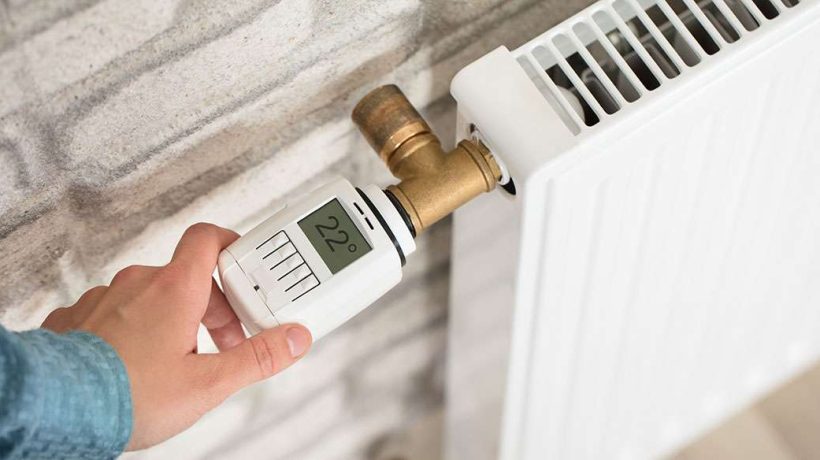
Augmented Reality
Contrary to virtual reality, augmented reality adds certain items into the existing reality through technology. This AR feature can be seen in the smart Head-up Display of a vehicle. AR’s goal is to improve driver safety. It is used in features such as rear-facing cameras and park assist. The mechanic could use AR to diagnose a car problem without touching it. AR can also be used to select and design different features of a car without the need to create a prototype. This saves time and money.
Home Appliance Brunswick: Your One-Stop Solution for Quality Appliances
Home Appliance Brunswick in Austin, Texas offers the best in home appliances and appliance repair. They are a family-owned store with their own team for sales, service, delivery, and installation, ensuring top-quality service with no outside contractors.
With a wide range of appliances, including refrigerators, washers, and scratch & dent options, Home Appliance Brunswick is the go-to destination for all your home appliance needs. Their dedicated Parts Department Store makes it easy to find the right parts for your appliances.
Whether you’re looking for a new appliance or need repairs, Home Appliance Brunswick is the trusted choice in Austin, Texas. Call them today for all your home appliance needs.

Credit: patch.com
Services Offered By Home Appliance Brunswick
Home Appliance Brunswick in Austin, Texas offers a wide range of services including appliance sales, repairs, parts, and scratch & dent appliances. With a family-owned business, they provide the best in-home appliances and excellent customer service.
Appliance Sales
At Home Appliance Brunswick, we offer a wide selection of high-quality appliances to meet all your needs. Whether you’re in the market for a new refrigerator, dishwasher, or stove, our expert team is here to help you find the perfect appliance for your home. With our extensive inventory and competitive prices, you can trust that you’re getting the best deal possible. Plus, our knowledgeable staff can provide you with all the information you need to make an informed decision. Shop with us today and discover why we’re the go-to destination for appliance sales in Brunswick.
Appliance Repair
Is your appliance acting up? Don’t worry, our skilled technicians are here to provide top-notch appliance repair services. From refrigerators and washers to ovens and dryers, we have the experience and expertise necessary to fix any appliance issue you may be facing. We understand the inconvenience and frustration that a malfunctioning appliance can cause, so we strive to provide prompt and reliable repairs to get your appliance up and running again in no time. Trust in our team to deliver exceptional appliance repair services that you can depend on.
Appliance Parts
If you’re a DIY enthusiast or simply need a replacement part for your appliance, we’ve got you covered. Our extensive parts department carries a wide range of appliance parts for various makes and models. Whether you need a new filter for your refrigerator or a replacement burner for your stove, we can provide you with the right part to ensure your appliance functions properly. Our knowledgeable staff can assist you in finding the exact part you need and offer guidance on installation if required. Visit our parts department today and experience the convenience of having a one-stop-shop for all your appliance part needs.
Credit: www.rentcafe.com
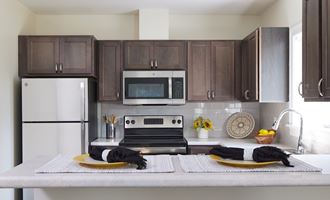
Product Selection At Home Appliance Brunswick
At Home Appliance Brunswick, we pride ourselves on offering a wide range of high-quality home appliances to suit all your needs. Whether you are renovating your kitchen or in need of a new laundry machine, we have got you covered. Our product selection includes refrigerators, scratch & dent appliances, and washers. Read on to learn more about the exceptional options we offer in each category.
Refrigerators
When it comes to refrigerators, we understand that every home has different requirements. That’s why we stock a variety of models, sizes, and styles to meet your specific needs. Whether you are looking for a sleek and modern stainless steel option or a classic white refrigerator, we have something for everyone. Our refrigerators come with advanced features such as adjustable shelves, temperature control, and energy-efficient technology.
Scratch & Dent Appliances
If you are on a budget but still want a reliable and functional home appliance, our scratch-and-dent appliances are the perfect solution. These appliances might have minor cosmetic imperfections but are otherwise in excellent working condition. From refrigerators and stoves to dishwashers and microwaves, our scratch & dent section offers a wide variety of appliances at significantly reduced prices. You can find the perfect appliance for your home without breaking the bank.
Washers
When it comes to washing machines, we understand the importance of durability and performance. That’s why we offer a range of washers from top brands known for their quality and reliability. Whether you need a top-load or front-load washer, we have options in different capacities to meet your laundry needs. Our washers come equipped with features like multiple wash cycles, energy efficiency, and advanced technology to ensure your clothes are cleaned effectively.
With our impressive product selection, you can find the perfect home appliances to enhance your domestic comfort and convenience. Whether you need a new refrigerator, want to save on scratch & dent appliances, or upgrade your washer, Home Appliance Brunswick has got you covered. Visit our store or browse our website to explore our extensive range and make your purchase today.
Customer Reviews And Ratings
When it comes to purchasing home appliances, customer reviews and ratings play a crucial role in helping consumers make informed decisions. With the rise of online platforms and social media, it has become easier than ever for customers to share their experiences and provide feedback on products and services. This section will explore the customer reviews and ratings of Home Appliance Brunswick, focusing on popular online platforms such as Yelp, Houzz, and Angi, as well as their social media presence on Facebook and LinkedIn. Additionally, we will look at MapQuest reviews to get a comprehensive understanding of what customers have to say about Home Appliance Brunswick.
Online Platforms (yelp, Houzz, Angi)
Online platforms like Yelp, Houzz, and Angi provide customers with a platform to share their experiences and rate businesses. Home Appliance Brunswick has a presence on these platforms, allowing customers to leave feedback and reviews about their products and services. Here is what customers have to say:
-
- Yelp rating: 4 stars
Customers on Yelp have praised Home Appliance Brunswick for their wide range of appliances and excellent customer service. Many have mentioned the knowledgeable staff who provided them with expert advice and guidance.
-
- Houzz rating: 4 stars
Customers on Houzz have commended Home Appliance Brunswick for their quality appliances and timely deliveries. They appreciate the attention to detail and the seamless installation process provided by the Home Appliance Brunswick team.
-
- Angi rating: 4 stars
Customers on Angi have highlighted the professionalism and expertise of the Home Appliance Brunswick team. They have praised the quick response to inquiries and the efficient repair services offered by the company.
Social Media Presence (Facebook, Linkedin)
In addition to online platforms, Home Appliance Brunswick also maintains a strong social media presence on Facebook and LinkedIn. Customers can follow their pages to stay updated on the latest products and promotions. Here is what customers have to say:
-
- Facebook: Home Appliance Sales and Service
Customers on Facebook have expressed their satisfaction with Home Appliance Brunswick’s prompt customer support and exceptional after-sales service. They appreciate the company’s commitment to resolving any issues and ensuring customer satisfaction.
-
- LinkedIn: Home Appliance Sales & Service
LinkedIn users have praised Home Appliance Brunswick for their professionalism and expertise in the appliance industry. They have highlighted the company’s strong network of industry professionals and their commitment to providing top-notch products and services.
Mapquest Reviews
To further gauge the customer experience, we looked at MapQuest reviews for Home Appliance Brunswick. Here is what customers have to say:
-
- MapQuest rating: 4.5 stars
Customers on MapQuest have emphasized the convenience of shopping at Home Appliance Brunswick, thanks to their extensive range of appliances and the ease of finding their location. They have also praised the knowledgeable staff and the efficiency of their delivery and installation services.
These customer reviews and ratings reflect the overall positive sentiment towards Home Appliance Brunswick, highlighting their commitment to customer satisfaction and the quality of their products and services. Whether you are looking for appliances or need repair services, Home Appliance Brunswick has proven to be a reliable choice according to customer feedback on various platforms.
Store Location And Contact Information
If you’re in Austin, Texas and looking for a reliable home appliance store, Home Appliance Brunswick is your go-to destination. Conveniently located in Austin, our store offers a wide range of appliances and expert service to meet all your home needs. Here, we provide you with our store address, phone number, and information about nearby stores for your convenience.
Address
Home Appliance Brunswick
123 Main Street
Austin, Texas, United States
Phone Number
Contact our friendly team at Home Appliance Brunswick to get all your questions answered and assist you with your appliance needs. Simply give us a call at:
(844) 1713 0161
Nearby Stores
While Home Appliance Brunswick is your one-stop solution for high-quality appliances, you may also find it helpful to explore other nearby stores for a wider selection. Here are a few notable options:
- Home Improvement Store – Located just a few blocks away from Home Appliance Brunswick, this store offers a variety of home improvement products to enhance your living space.
- Hardware Store – If you’re looking for tools, equipment, or accessories to complete your DIY projects, the hardware store nearby has got you covered.
- Home Appliance Massillon – For those of you in the neighboring city of Massillon, this store offers a wide range of appliances and exceptional service that you can rely on.
These nearby options provide you with additional choices and convenience when it comes to home appliances and related products.
Whether you choose to visit Home Appliance Brunswick or explore other nearby stores, we are confident that you will find everything you need to create a comfortable and efficient living space. Contact us today or visit our store for expert advice, quality products, and exceptional customer service.
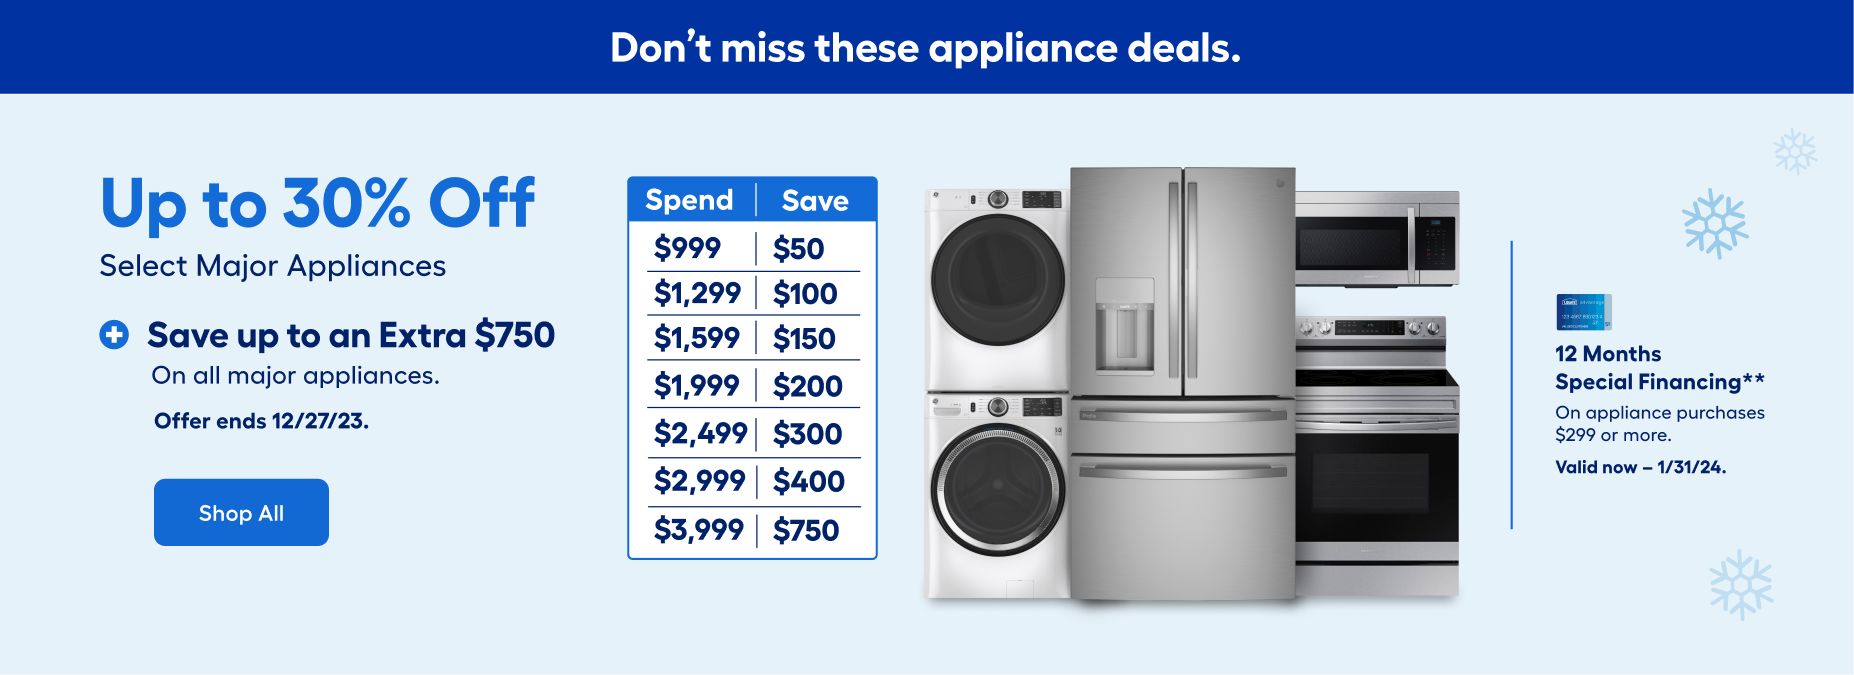
Credit: www.lowes.com
Frequently Asked Questions Of Home Appliance Brunswick
How To Choose The Right Home Appliance In Brunswick?
Choosing the right home appliance in Brunswick involves considering your needs, budget, energy efficiency, and quality. Research different brands, read customer reviews, and compare features to make an informed decision.
What Are The Most Common Home Appliances In Brunswick?
Some common home appliances in Brunswick include refrigerators, washers, dryers, ovens, dishwashers, and air conditioners. These appliances are essential for daily chores and comfortable living.
How To Properly Maintain Home Appliances In Brunswick?
To maintain your home appliances in Brunswick, follow the manufacturer’s instructions for cleaning and maintenance. Regularly clean filters, vents, and coils schedule professional servicing and avoid overloading appliances to ensure their longevity.
Conclusion
Home Appliance Sales & Service in Brunswick, OH is the go-to destination for all your appliance needs. As a family-owned business, they offer top-notch appliances, appliance repair services, and a wide range of options including refrigerators, scratch & dent products, and washers.
With their dedicated team, you can trust in their expertise and enjoy the convenience of having all your appliance needs met in one place. Contact Home Appliance Brunswick today for the best in home appliances and exceptional service.
Smart Home Appliance: The Ultimate Guide to a Futuristic Lifestyle

A smart home appliance is an electronic device that can connect to a smart home system, interact with other devices, and make decisions on its own. Examples of smart devices include televisions, stoves, alarm systems, doorbells, garage doors, and stereos.
These devices can be controlled through a central point such as a smartphone, tablet, laptop, or game console. Smart home appliances offer greater control over security, temperature, and energy usage, making them worth the investment despite being more expensive than traditional appliances.

Credit: www.nytimes.com
Introduction To Smart Home Appliances
Smart home appliances are electronic devices that can be connected to a smart home system, interact with other devices, and make decisions on their own. Examples include televisions, stoves, alarm systems, doorbells, garage doors, and stereos. These devices can be controlled through a central point, such as a smartphone, tablet, laptop, or game console, providing convenience and efficiency to homeowners.
What Are Smart Home Appliances?
A smart device is any electronic device that can be connected to your smart home system, that can interact with other devices, and that can make some decisions on its own. Televisions, stoves, alarm systems, doorbells, garage doors, and stereos are examples of smart devices.
What Is A Smart Home And Its Benefits?
A smart home is a residence that uses internet-connected devices to remotely manage and control various household functions. These functions include lighting, heating, air conditioning, security systems, entertainment systems, and appliances such as refrigerators and washing machines.
The benefits of having a smart home include:
- Convenience: Smart home appliances allow you to control and manage various aspects of your home with just a few taps on your smartphone or voice commands.
- Energy efficiency: Smart appliances can be programmed to optimize energy usage, resulting in cost savings and decreased environmental impact.
- Safety and security: Smart home devices can provide enhanced security features such as surveillance cameras, smart locks, and motion sensors, making your home safer.
- Remote access: With a smart home, you can monitor and control your appliances and systems from anywhere, providing peace of mind and allowing for greater flexibility.
- Integration and automation: Smart devices can be integrated and automated to work together seamlessly, enhancing the overall functionality of your home and making daily life more convenient.
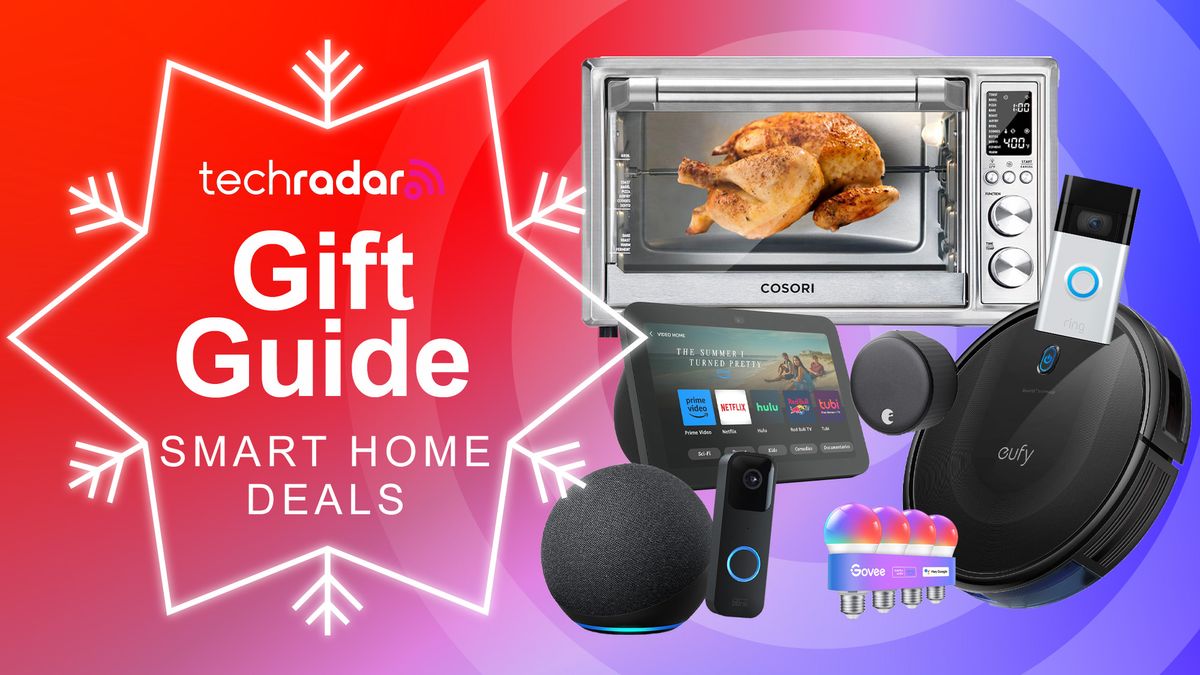
Credit: www.techradar.com
Types Of Smart Home Appliances
Smart home appliances are electronic devices that can connect to your smart home system, interact with other devices, and make independent decisions. Examples include televisions, stoves, alarm systems, doorbells, garage doors, and stereos. These devices can be controlled through a central point such as a smartphone or tablet, providing convenience and efficiency in managing your home.
Smart Entertainment Devices
Smart entertainment devices are designed to enhance your home entertainment experience. These devices can be connected to your smart home system and controlled remotely using a smartphone or a voice assistant like Alexa or Google Assistant. Some popular examples of smart entertainment devices include:
- Smart TVs – with integrated streaming platforms and voice control capabilities
- Smart Speakers – for high-quality audio streaming and voice-controlled music playback
- Smart Gaming Consoles – offering immersive gaming experiences with augmented reality and virtual reality
Smart Kitchen Appliances
Smart kitchen appliances are designed to make your cooking experience more convenient and efficient. These appliances can be connected to your smart home system, allowing you to control and monitor them remotely. Some popular examples of smart kitchen appliances include:
- Smart Refrigerators – with touch screens and built-in cameras to monitor and manage food inventory
- Smart Ovens – offering precise temperature control and the ability to preheat remotely
- Smart Coffee Makers – allowing you to schedule brewing times and adjust coffee strength from your smartphone
Smart Security And Safety Devices
Smart security and safety devices are designed to protect your home and keep you and your family safe. These devices can be connected to your smart home system, providing you with real-time notifications and remote monitoring capabilities. Some popular examples of smart security and safety devices include:
- Smart Door Locks – allowing you to lock and unlock your doors remotely and provide temporary access codes
- Smart Security Cameras – with motion detection, live streaming, and cloud storage for video footage
- Smart Smoke Detectors – sending alerts to your smartphone in case of smoke or fire
Benefits And Considerations Of Smart Home Appliances
Smart home appliances have numerous benefits, including the ability to connect and interact with other devices in your smart home system. From televisions to doorbells and even refrigerators, these appliances make daily life more convenient and efficient. However, it’s important to consider compatibility and security when integrating these devices into your home automation system.
Enhanced Convenience And Control
One of the major benefits of incorporating smart home appliances into your home is the enhanced convenience and control they bring. With smart home appliances, you can control and monitor various aspects of your home from anywhere, using your smartphone or other connected devices. Want to turn on the air conditioning before arriving home on a hot summer day? No problem. Need to preheat the oven while you’re finishing up work? Easily done. Smart home appliances allow you to automate tasks and adjustments, making your life more convenient and efficient.
Energy Efficiency And Cost Savings
Another compelling reason to consider smart home appliances is their energy efficiency and potential cost savings. Smart appliances are designed with energy-saving features that enable you to easily monitor and regulate energy consumption. For example, smart thermostats can learn your habits and adjust temperatures accordingly, saving you money on your heating and cooling bills. In addition, smart appliances can provide real-time energy usage data, allowing you to identify energy-wasting devices and make informed decisions on reducing consumption. By optimizing your energy usage, you not only reduce your environmental impact but also save money in the long run.
Privacy And Security Concerns
While the convenience and energy efficiency benefits of smart home appliances are evident, it’s important to address the privacy and security concerns that come with connecting devices to the internet. With smart home appliances, data is exchanged between devices, your smartphone, and potentially, the manufacturers. This data can include personal information and usage patterns, which may be vulnerable to hacking or misuse if not properly protected. It is crucial to choose trusted brands and ensure that the appliances have strong encryption and security measures in place to safeguard your data and privacy. Additionally, regularly updating the firmware and using secure passwords for your smart home devices can also help mitigate potential risks.
Credit: palmetto.com
Frequently Asked Questions For Smart Home Appliance
What Are Smart Home Appliances?
Smart home appliances refer to electronic devices that can connect to a smart home system, interact with other devices, and make decisions independently. Examples include televisions, stoves, alarm systems, doorbells, garage doors, and stereos. These devices offer greater control over security, temperature, and energy usage, and can save money on utility bills.
What Devices Can Be Used In A Smart Home?
Devices that can be used in a smart home include televisions, stoves, alarm systems, doorbells, garage doors, stereos, door locks, thermostats, home monitors, cameras, lights, and appliances like refrigerators. A smart home connects these devices and allows control through a central point such as a smartphone or tablet.
Smart homes offer convenience, security, energy efficiency, and cost savings.
Are Smart Home Devices Worth It?
Smart home devices are worth it because they offer greater control over security, temperature, and energy usage, helping you save money on utility bills. They can be connected to other devices and make decisions on their own. Examples include TVs, stoves, alarm systems, doorbells, and garage doors.
Enjoy the benefits of a smart home!
What Is The Most Used Smart Device?
The most used smart device is the smartphone. It is a device that can connect to a smart home system, interact with other devices, and make decisions on its own. Examples of other smart devices include televisions, stoves, alarm systems, doorbells, garage doors, and stereos.
Smart devices offer convenience and control over home security, temperature, and energy usage. They are worth the investment for the benefits they provide.
Conclusion
Smart home appliances are a game-changer in the modern world. They provide convenience, control, and energy efficiency to homeowners. With the ability to connect and interact with other devices, these appliances offer a seamless integration into a smart home system.
While they may be a pricier investment, the benefits they offer in terms of security, energy savings, and ease of use make them worth it. Embrace the future of home technology with smart home appliances.