Beat the Heat: Your Ultimate Guide on How to Make Shaved Ice with a Blender (Easy & Refreshing!)

Why Your Freezer Evaporator Fan Is the Unsung Hero of Your Kitchen
June 10, 2025
Ultimate Guide: How to Clean a Commercial Ice Machine Safely
June 15, 2025
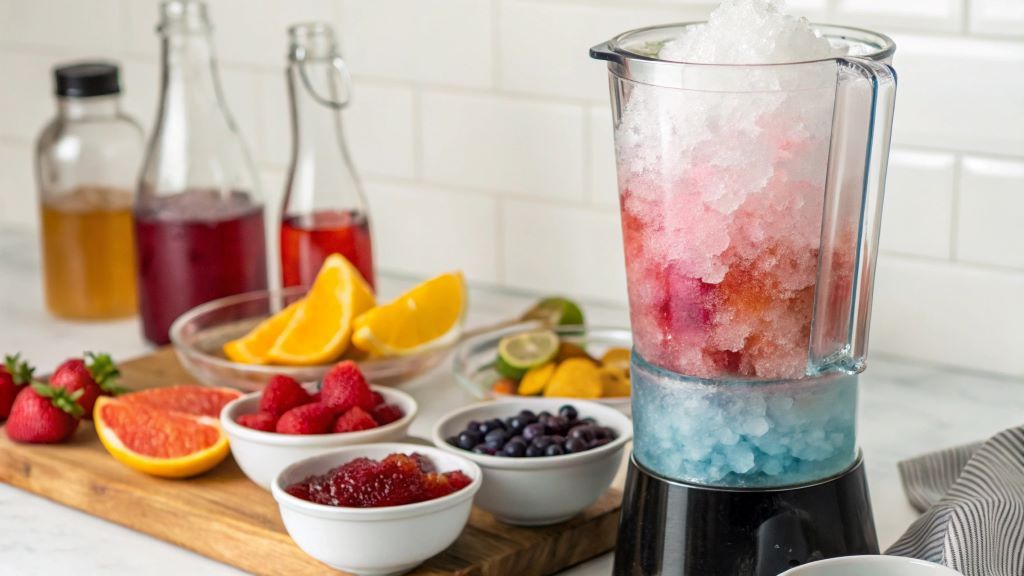
The sun is beaming, the temperature is climbing, and all you can think about is something icy, sweet, and utterly refreshing. Enter shaved ice: that delightful cloud of snow-like ice, drenched in vibrant syrups, promising instant relief and a burst of flavor. While dedicated machines craft those ethereally fluffy mounds you find at specialty shops or Hawaiian beaches, did you know your trusty kitchen blender can step in as a surprisingly capable understudy?
Making shaved ice at home using a blender is your ticket to cooling down without needing fancy equipment. It’s accessible, quick, and opens up a world of customizable frozen treats. While the texture might lean more towards a fine snow cone than true gossamer shaved ice, the result is still incredibly satisfying on a sweltering day. Ready to transform simple ice cubes into a delightful dessert? Let’s dive into how you can whip up this cool treat right in your own kitchen.
Blender Shaved Ice vs. The Real Deal: Setting Expectations
Before we hit blend, let’s chat texture. True shaved ice, like the Japanese Kakigori or Hawaiian style, is made by shaving incredibly thin layers off a large block of solid ice using a specialized machine with a sharp blade. This process creates a delicate, snow-like texture that absorbs syrup beautifully without instantly turning into a puddle.
A blender, on the other hand, works by using its blades to chop, crush, and pulverize ice cubes. Even the most powerful blenders will create something closer to finely crushed ice or the texture found in a snow cone – still delicious, but typically a bit crunchier and denser than machine-shaved ice.
Think of it this way: a dedicated shaver peels the ice, while a blender shatters it. Understanding this difference helps set realistic expectations. While your blender version might not replicate that melt-in-your-mouth fluffiness perfectly, it absolutely delivers a fantastic, icy, syrup-holding base that hits the spot. The convenience factor is undeniable – you likely already have a blender, making this method incredibly accessible!
Gearing Up: Choosing Your Blender and Ice
Not all blenders are created equal when it comes to tackling solid ice. Success hinges significantly on having the right tool for the job.
Blender Power is Paramount:
Forget trying this with a basic, low-wattage blender or an immersion (stick) blender – you’ll likely end up with a stalled motor, damaged blades, or just lukewarm, chunky water. You need a robust, high-powered blender designed to handle tough ingredients.
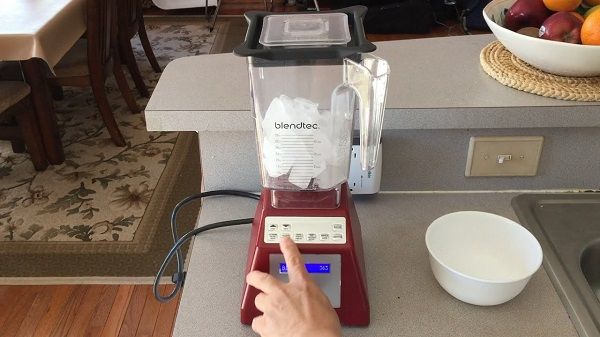
- High-Performance Heroes: Brands like Vitamix, Blendtec, and higher-end Ninja models are often cited as being capable of pulverizing ice effectively. Look for blenders with strong motors (ideally 1000 watts or more) and sturdy blade assemblies.
- Ice Crush Setting: Many powerful blenders have a dedicated “Ice Crush” or “Pulse” function. These pre-programmed cycles or manual options are specifically designed for breaking down ice efficiently without overheating the motor.
Ice is Key:
The type and state of your ice also play a crucial role.
- Cube Life: Standard ice cubes from trays or your refrigerator’s dispenser are generally the go-to for blenders. Some sources suggest that crescent-shaped ice (often found in certain dispensers) might blend slightly better, possibly due to having more edges for the blades to catch.
- Size Matters (Sometimes): If your blender struggles, try using slightly smaller cubes or even giving larger cubes a quick whack inside a sturdy bag with a rolling pin before blending. This pre-crushing gives the blender a head start.
- Hard and Cold: Use ice that is frozen solid and very cold. Ice that’s starting to melt (“wet” ice) will result in a slushier, less snowy texture. Some enthusiasts even pre-chill their blender jar and blade in the freezer for 20-30 minutes before blending to keep everything as cold as possible. Using filtered or bottled water for your ice can result in clearer ice with a slightly better texture, as impurities can affect freezing.
The Blender Method: Step-by-Step to Icy Goodness
Alright, you’ve got your powerful blender and your frosty ice cubes. Let’s make some magic happen!
Gather Your Tools:
You’ll need your high-powered blender, ice cubes, an ice scoop or sturdy spoon, and your serving bowls or cups ready to go. Speed is important once the ice is blended!
Prepare the Ice:
Ensure your ice is fully frozen. If using very large cubes and you’re unsure about your blender’s power, consider that pre-crushing step mentioned earlier.
Load the Blender (Don’t Overdo It!):
This is crucial. Don’t fill the blender jar to the brim with ice. Work in smaller batches – maybe 2-4 cups of ice at a time, depending on your blender’s size and power. Overloading prevents the blades from moving freely and crushing the ice evenly.
The Blending Dance (Pulse is Your Friend):
Secure the lid tightly. Instead of just hitting “high” and walking away, use the “Pulse” function or manually pulse the blender in short bursts (1-2 seconds each). This gives the ice time to settle back down onto the blades between pulses, leading to more even crushing and preventing the bottom from turning to slush while the top remains chunky.
Consider Speed Progression:
Alternatively, start the blender on its lowest speed, then quickly increase to the highest speed. Blend for about 30 seconds to a minute. High speed can help incorporate a bit of air, potentially making the texture slightly lighter.
Optional: A Tiny Splash of Liquid:
Some find that adding a very small amount of cold water (think 1-2 tablespoons per batch) helps lubricate the blades and allows the ice to move more freely, resulting in a smoother blend. It can also make the final “snow” slightly stickier, helping it hold its shape when scooped. Be cautious – too much liquid turns it into a slushy fast.
Check and Adjust:
After about 30-60 seconds of pulsing or blending, stop and check the texture. Use a spatula (with the blender OFF!) to move things around if needed. Is it snowy? Still too chunky? Blend or pulse a bit more. If it looks too thin or watery, you may have blended too long or added too much liquid; try adding a few more ice cubes.
Scoop and Serve Immediately:
Once you achieve a fine, snow-like consistency, turn off the blender and work quickly! Shaved ice melts fast. Scoop the icy goodness into your prepared bowls or cups.
Chasing the Fluff: Tips for Better Blender Shaved Ice Texture
While replicating machine-level fluffiness is tough, these tips can help you get the best possible texture from your blender:
- Power Up: Use the most powerful blender you have access to.
- Pulse Power: Master the pulsing technique for even crushing.
- Go High (Briefly): A short burst on high speed at the end might incorporate air.
- Minimal Liquid: Only add water if necessary, and keep it to a tiny amount (1-2 tbsp).
- Small Batches: Don’t overcrowd the blender jar.
- Super Cold: Use very hard, frozen ice and consider pre-chilling your blender components.
- Pure Ice: Filtered water can make a subtle difference.
- Acceptance: Embrace the slightly crunchier, snow-cone-like texture your blender produces – it’s still delicious!
Beyond the Ice: Flavoring Your Creation
Now for the really fun part – adding flavor! Plain shaved ice is just waiting to be dressed up.
Syrups Galore:
- Store-Bought Ease: The quickest option is to buy pre-made shaved ice or snow cone syrups, available online and in some stores in countless flavors.
- DIY Simple Syrup Base: Make your own versatile base! Gently boil equal parts water and white sugar (e.g., 1 cup water, 1 cup sugar) in a saucepan, stirring until the sugar completely dissolves. Let it simmer for about a minute, then remove from heat and let it cool completely. This is your unflavored simple syrup.
- Quick Flavor Hacks: Stir an unsweetened powdered drink mix packet (like Kool-Aid) into your cooled simple syrup for instant flavor. For a 1:1 sugar/water ratio syrup (yielding about 1.5 cups), one packet usually works well, but you can add two for a bolder taste.
- Fruity Goodness (Cooked): For more natural flavors, simmer fruit (like berries, peaches, mangoes) with water until they break down (10-15 mins). Strain the mixture through a fine-mesh sieve, pressing the solids to extract all the liquid. Return the fruit juice to the pot, add sugar (to taste, maybe start with half the volume of the juice) and perhaps a squeeze of lemon juice, then simmer until it thickens into a syrup. Cool completely. Examples: Raspberry, Blackberry, Peach, Orange (using fresh juice).
- Other Ideas: Fruit juices, coffee concentrates, or even some liqueurs (for adult versions) can be used.
Toppings & Twists:
- Classic Snow Cap: A drizzle of sweetened condensed milk adds creamy sweetness.
- Fresh Fruit: Top with diced mango, strawberries, kiwi, or berries.
- Global Inspiration: Think red bean paste (Patbingsu), mochi, or matcha syrup (Kakigori).
- Fun Extras: Sprinkles, gummy candies, or even a scoop of vanilla ice cream at the bottom add extra delight.
- Layering Technique: For even flavor distribution, add some ice, then some syrup, then more ice, then more syrup. This prevents all the flavor from pooling at the bottom.
Troubleshooting: When Blending Goes Wrong
Hit a snag? Here are common issues and fixes:
- Ice Won’t Crush/Blender Stalling:
- Cause: Blender not powerful enough, too much ice at once, ice cubes too large.
- Fix: Ensure you’re using a high-powered blender. Work in smaller batches. Try pulsing instead of continuous blending. Add 1-2 tablespoons of cold water. Pre-crush large cubes slightly.
- Too Watery/Melty:
- Cause: Over-blending, too much liquid added, ice wasn’t cold/hard enough, working too slowly.
- Fix: Blend for less time, focus on pulsing. Be very sparing with added liquid (or omit it). Use fresh, hard ice straight from the freezer. Have serving cups ready and scoop immediately after blending.
- Chunky Bits Remain:
- Cause: Uneven blending, not pulsing enough, blender overloaded.
- Fix: Stop and stir/redistribute ice (blender OFF!). Pulse more. Ensure blades are making good contact. Use smaller batches. Use the tamper if your blender has one.
People Also Ask: Your Blender Shaved Ice FAQs
Q1: Can you make shaved ice with a regular, non-high-powered blender?
- It’s generally not recommended. Regular blenders may struggle significantly, potentially damaging the motor or blades. They are unlikely to achieve a fine, snowy texture and might just chip the ice or melt it. Stick to high-powered models designed for crushing ice.
Q2: What’s the main difference between blender shaved ice and machine shaved ice?
- Texture is the key difference. Machines shave thin, fluffy layers from an ice block, creating a light, snow-like consistency. Blenders crush or pulverize ice cubes, resulting in a finer version of crushed ice, similar to a snow cone – still great, but typically denser and crunchier.
Q3: How do I make my blender ice fluffier?
- While true fluffiness is hard with a blender, you can get closer by: using a very powerful blender, pulsing effectively, working in small batches, ensuring ice is extremely cold, potentially adding a tiny splash of water, and maybe running on high speed briefly at the end to incorporate air.
Q4: What kind of ice is best for making shaved ice in a blender?
- Standard ice cubes work well. Ensure they are fully frozen and hard. Some suggest crescent-shaped cubes or slightly smaller cubes might be marginally easier for the blender to process. Avoid ice that’s already starting to melt.
Q5: Can I make shaved ice syrup without cooking?
- You can mix sugar directly into cold water or fruit juice, but it dissolves much slower and less effectively than when heated. Boiling sugar and water creates a true simple syrup where the sugar is fully dissolved, resulting in a smoother, non-gritty texture. Mixing unsweetened drink powders into store-bought simple syrup or even just water can work in a pinch, though the flavor might be less integrated.
Conclusion: Your Refreshing Reward Awaits!
Making shaved ice with a blender is a wonderfully simple and satisfying way to create a cooling treat right at home. While it may not perfectly replicate the delicate texture of machine-shaved ice, it offers incredible convenience and delivers a refreshingly icy base perfect for soaking up your favorite flavors.
You’ve learned the importance of using a powerful blender, the right techniques for crushing ice effectively, and a multitude of ways to customize your creation with syrups and toppings. It’s a fun activity for kids and adults alike, perfect for backyard barbecues, poolside lounging, or simply surviving a hot afternoon.
So grab your blender, raid the freezer for ice, and get creative with your syrups. Your homemade, blender-style shaved ice adventure is just a few pulses away. Go chill out and enjoy your delicious, icy creation!
Read More:

